

coltonbaxter31
New member

Mods:
Exterior
38 inch LED light bar
Retrofitted halo head lights
4x innovation steel front bumper
4x innovation rear bumper
Interior
Pioneer AVH-270BT head unit
12" Alpine subwoofer with homemade sub box(x's 2)
Kicker front door speakers
Red led cluster gauge
Red led key ring
Red led ashtray light
Red led climate control
Mossy Oak seat covers
Mossy Oak Floor Mats
Tires and wheels
315/75/16 Mastercraft courser MXTs
Pro comp 8069's
Gorilla lug nuts
Performance
Custom catback exhaust
Spectre cold air intake system
Suspension
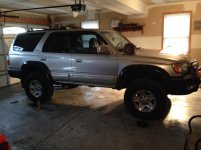
3 inch suspension lift
2 inch toytec body lift
1 inch dif drop
Exterior
38 inch LED light bar
Retrofitted halo head lights
4x innovation steel front bumper
4x innovation rear bumper
Interior
Pioneer AVH-270BT head unit
12" Alpine subwoofer with homemade sub box(x's 2)
Kicker front door speakers
Red led cluster gauge
Red led key ring
Red led ashtray light
Red led climate control
Mossy Oak seat covers
Mossy Oak Floor Mats
Tires and wheels
315/75/16 Mastercraft courser MXTs
Pro comp 8069's
Gorilla lug nuts
Performance
Custom catback exhaust
Spectre cold air intake system
Suspension
3 inch suspension lift
2 inch toytec body lift
1 inch dif drop
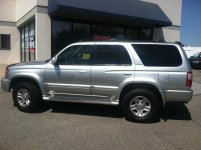
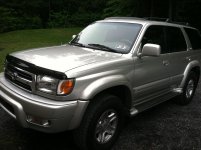
This is when i first got her in May of 2012, 100k miles. Cost me 9,000 dollars which isnt bad for the shape that its in. The only thing that i could complain about is that the driver seat was a little ripped but i got mossy oak seat covers to fix that problem.

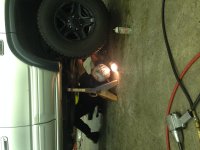
She wasnt stock for long .. first thing i did was put a glass pack on it and it sounded great. I don't have any pics of the process
Got new firestone destination A/T tires. 265/75/16. This is what i have for now i had to get rid of those dinky ones that were on when i got it. I didnt have the money at the time to get much more then the destinations because i have to save some money for college, but as soon as i get some spare change im getting 305's i think..

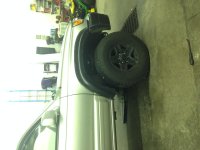
I decided to take the running boards off

I hated the stock wheels and painted them with plasti-dip which held up really well for my first time dipping. This was just temporary until i got new wheels.

I installed 4 kc headlights. (2 floods, and 2 spot lights) I just installed them right to the stock bumper.. Yeah not my best idea, but an armor bumper is definitely something that im trying to save up for so its alright.


I didnt do any mods to my 4runner for a while because i was in the middle of football season but now that i have more time ive been working on it more and i ordered a 3 inch suspension lift and installed it right after it came because i couldnt resist the urge. I also painted the front and back bumper and the fender flares black. I think it looks pretty good
 imp:
imp:

I decided to take all the plasti dip off my wheels and paint it with rustoleum wheel paint to make it look more glossy instead of the matte black for a change.

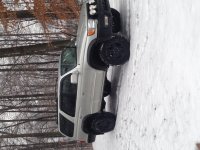
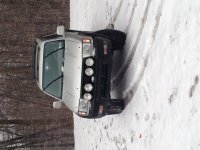
I took these photos today because i needed some update pictures of the 4runner and there was snow on the ground so i guessed it would make for some good picture taking:rockon:


I just ordered some leds for my interior and im going to be changing all of the green leds that are stock to red. Im going to start taking a lot more pictures.. I just found this site recently and im going to be doing a lot of moding and updates to my 4runner so ill take more pictures for my thread. Next on my list are new wheels and tires. I need some beefier tires and new wheels to make it look like its not stock. I was thinking of getting some pro comp wheels and goodyear duratracs.
I just got my leds in the mail today and installed them. I love the new leds in my gauge cluster they really stand out. They were really easy to install but at the same time they were kind of annoying as well... To install them i took off some trimming and paneling around the steering column and around the gauges to where i could get to the gauges easily. once you have the paneling off you unscrew the 4 screws that are holding the gauge cluster into the dash. At this point, lower your steering wheel as low as it will go to give you some more room to work with. You will obviously have to disconnect all the electrical harnesses that are hooked to the gauge cluster, just press on the tab and they will come out with a little pull. When you have all the harnesses disconnected wiggle the cluster out so you can get to the back where all the lights are. (removing all the harnesses will reset your mileage for this take of gas)
This is what it looks like with the cluster out of the 4runner

Once you have it out you will turn it over to the back where all the leds show. I removed the hard plastic that covers the circuit board(this is optional but it makes changing some of the lights so much easier). Depending on what year of 4runner you have you will need certain bulbs for your year. For my 99 i needed 7 #74 bulbs and 3 #24 bulbs. The 24's are for the the speedometer and for the rpms and the 74's are for all the other little lights and accessories on the cluster.(24's are the larger ones. To take the lights out you need to twist the wedge bases left and they will become loose. When you take them out just remember where you took if from and take some needle nose pliers and pull out the original bulb. Then take the correct bulb size and push it back in(you will hear a click). The bulbs do have a polarity to them so there is a certain way to push them in but nothing i could see that stood out. So if you know how to tell the difference in led polarity please leave a comment. This is why i said it was kind of annoying because some of my lights didnt work at first because i didnt have the right polarity. After the new led is pushed in put the wedge base back in. After youre done put the cover back over the circuit board and plug all the harnesses back into your cluster. This is how you can see if you have the wrong polarity in some of your leds. If only half of your lights work identify which ones arent working and flip the led around. After you fixed it make sure all of your trimming is back on properly and enjoy your new look


My wrong polarity.

Polarity corrections

I also did my key ring.

Attachments
-
 securedownload.jpg129.1 KB · Views: 2,978
 -
 securedownload (1).jpg123.6 KB · Views: 2,930
 -
 securedownload (2).jpg125.7 KB · Views: 3,055
 -
 securedownload (10).jpg137.3 KB · Views: 2,912
 -
 securedownload (11).jpg135.3 KB · Views: 2,920
 -
 securedownload (12).jpg133.8 KB · Views: 2,987
 -
 securedownload (14).jpg130.5 KB · Views: 2,894
 -
 securedownload (13).jpg135.5 KB · Views: 2,922
Last edited:


