Cup Holder Mod - Center Console Upgrade

Asmara

New member
I just did the Cup Holder Modification - Center Console Upgrade on my '98 Limited with rear heat and thought I'd throw some thoughts out for everybody else.

Here's a thread that has a lot of great details on the modification. I was actually going to post something in that thread since it was recent and well laid out. That was until it took me forever to find it using the search option because JohnsD90 misspelled cup holder as "cupholder." [note I can't spell for anything so this is no criticism, just a statement.] I figured having a separate post might help others find instructions/tips. Here's another good thread I used as research and finally, the original cup holder mod instructions were here but some of the links no longer work.

One thing that was notably different from my experience than other installs was I didn't drill or tap anything.

I purchased the e-brake lever and center console from a salvage company. I think it is worth every penny to get the ebrake lever as well as the console. With the 99+ e-brake lever there is no drilling. Just unbolt the old e-brake and stick in the new one. Takes all of 5 minutes.

The console is next and but not tricky at all. Cut off all the extra plastic pieces as instructed. I just used tin snips and a utility knife to clean everything up.

Next was the part where I was worried about having to drill. There is a metal bracket that the cup holder mounts to. Unfortunately the holes are in a different space on the 99+ console. On mine, the rear heat further adds a little wrinkle (JohnD90's thread shows everything in great detail. This is step 10).
What I did instead of drilling tapping etc was measure the height of the bracket and where the holes needed to be. Then I got out the vice grips and bent the bracket down. Then I used a hammer to turn the S shape of the bracket into more a Z shape. You only have to move it about 1/2 in back. A couple of bends and a couple of taps and it was done. Holes lined up perfectly.

At this point you are done except for moving the switches. This was the only real pain about the whole project. If I would have been a little more aware of what a pain this was (not hard, just a pain), I probably would have considered switching the center panel to a 99+. Not sure if it is possible because of the the vents but seems like it would. It's worth looking into.

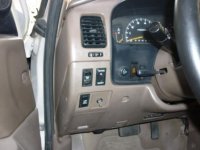
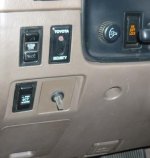
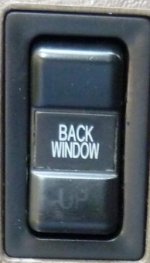
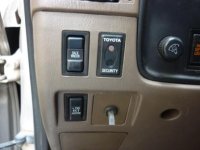
In my case, I just cut all the wires and spliced in about a 12 inches of extra wire and moved the ECT button, Rear Window and Toyota Security to the empty slots to the left of the steering wheel. The only odd thing is that because of how the rear window switch was originally mounted it is setup so pushing up is down and down is up. I just mounted the switch upside down for now. Eventually I'll figure out the wiring and just reverse it and polish off the Up and Down markings on the switch.

This was an easy upgrade. Highly recommend. Thanks to JohnD90 and all who came before me for making it even easier.
 
Register to hide this ad
I'm not going to say :worthless but write ups are always better with pics. I don't think John's is in the General section DIY Write Up sticky so one of you guys should make a nice one and link it up there.
 
I'm about to do this mod also. Pics are good for sure but any info is good info. I didnt buy the newer e-brake lever when I bought the console but I may go back and get it if they will come off of it cheap.
 
No Pics

I'm not going to say :worthless but write ups are always better with pics. I don't think John's is in the General section DIY Write Up sticky so one of you guys should make a nice one and link it up there.

:peace:I'll put some pics up tomorrow. I only didn't because there are so many others out there and they are all basically identical but if it will help, it's easy to get back in there. Only 2 bolts and two screws and the whole thing comes apart.
I also didn't want to take away from the great effort by JohnD90.
 
JohnsD90 misspelled cup holder as "cupholder."

lol, but that is an awesome idea about the rear bracket to hold the console, i didn't even think of that. I only made the writeup because i felt it was nessecery too, And for anyone doing this mod i would reccomend to hammer that bracket to make i work. Personally, the e brake bracket is a waste of money if you have a drill and drill bits, it was very easy to do, and the wiring took a while but i did it a few days before to the console swap, it is not hard to do the wiring its just tedious and you just need to take your time. You also didnt need to drill because you bought the E brake bracket, and actually thought before attempting the console bracket, i would like to see some pics too. I edited your step 10 into my writeup, i credited it to you, if you would like more credit i will put more in.
 
Last edited:
Photos

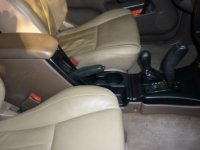
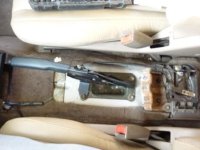
Here's the what's underneath and the completed install. The armrest is going to be recovered in leather that matches the seats. You might note that the seats are not the original color. These were recently recovered in a lighter color leather that matches the center panel inserts on the doors using the factory stitching pattern (this was a mistake on my part in choosing the color. Bad lighting. I'm getting the center seats recovered in the same leather. )
 

Attachments

  • Entire view.JPG
    Entire view.JPG
    30.7 KB · Views: 45,583
  • Installed.JPG
    Installed.JPG
    25.8 KB · Views: 46,919
more pictures

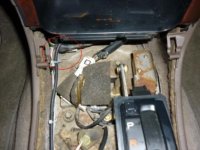
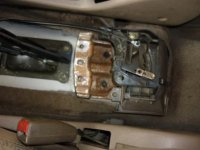
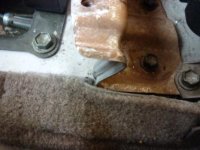
This shows how far back you need to trim the wires for the switch rerouting. Also the bracket from a couple of different angles. It's pretty easy to see how it's been modified with the hammer and vice grip method. The angles are normally about 90 degrees. The thick wire you see heading towards the console is the cable for an aftermarket iPod connector.
 

Attachments

  • Wire Trim.JPG
    Wire Trim.JPG
    34.2 KB · Views: 42,087
  • Bracket 1.JPG
    Bracket 1.JPG
    29.2 KB · Views: 41,359
  • Bracket 3.JPG
    Bracket 3.JPG
    32.9 KB · Views: 41,116
Last edited:
Switch mounting

Here's what the switches look like mounted - note the upside down rear window switch. The other aftermarket switch converts the horns from loud to loud hi-low alternating sound. It's the same sound used by big trucks here in India and helps move slower traffic out of the way when driving.
 

Attachments

  • Switch Original.JPG
    Switch Original.JPG
    29.9 KB · Views: 41,513
  • Switch Original close.JPG
    Switch Original close.JPG
    24.4 KB · Views: 42,025
Last edited:
Final Wiring Fix

Since I had to go back out there today anyway I figured I would fix the switch so I could mount it right side up where up was up and down was down.

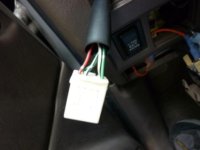
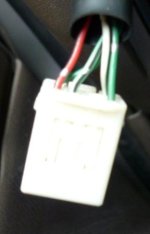
Here's the wiring. Note I never really paid attention to which color was up and which was down. Sorry. I was just trying to find the two to swap.

Grey/green positive interior lighting
White/green negative interior lighting

Red black gray - up (or down) window
light green black gray up (or down) window

Green Black gray window power

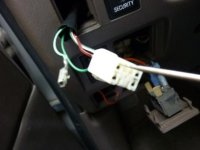
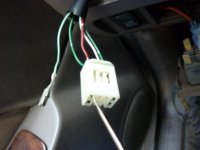
Here's some pictures the up down window wires on on the left side of the plug.
 

Attachments

  • Original Wiring.JPG
    Original Wiring.JPG
    23.3 KB · Views: 41,576
  • Original Wiring cropped.JPG
    Original Wiring cropped.JPG
    20.7 KB · Views: 41,267
Switch cleaning

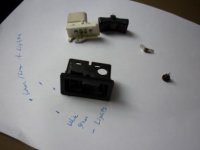
First I took the switch apart to clean it and see if I could remove the up/down markings. When I was using my meter to map the switch I noted that there was a lot of resistance when I pushed the down button. Once I got the switch apart I saw the corrosion. I little scraping/cleaning later and internals were good as new. The switch is easily taken apart. There are just plastic tabs holding it together. I washed the plastic parts in the sink and use a magic eraser to get off the up and down. As you can see, the down came out a little better. I'll have to work on the up a bit more.
 

Attachments

  • Switch Apart.JPG
    Switch Apart.JPG
    19.8 KB · Views: 41,026
  • Switch Installed Close up.JPG
    Switch Installed Close up.JPG
    24.5 KB · Views: 41,101
Nice write-up and pics! Once I get around to finding a good 99-02 console I will go ahead and do this mod (With the help of your and JohnsD90's write-ups). :D
 
Finally Rewiring

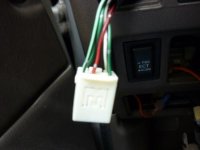
I took apart the connector. There is a plastic plug that comes out on one side. You can see it removed in the second pic and reinstalled in the third pic. I just gently pried it up with a jewelers flathead screwdriver. Once your remove this, use a very fine flathead jewelers screwdriver to lift the plastic latch that holds the pin in place while pulling on the wire. You can see it if you look inside the plug. The wire and connector will just slide right out. Do this for both wires and swap them. Put it all back together and everything works as expected ie pushing up on the switch (formerly labeled down) moves the window up and pushing down on the switch (still labeled faintly 'up' :) ) moves the window down.
 

Attachments

  • Pin removal.JPG
    Pin removal.JPG
    24.9 KB · Views: 41,095
  • pin removal 2.JPG
    pin removal 2.JPG
    24.6 KB · Views: 41,102
  • Fixed Wiring.JPG
    Fixed Wiring.JPG
    22.1 KB · Views: 40,908
  • Switch Installed.JPG
    Switch Installed.JPG
    28.3 KB · Views: 63,299
Last edited:
Completing the mod

Nice write-up and pics! Once I get around to finding a good 99-02 console I will go ahead and do this mod (With the help of your and JohnsD90's write-ups). :D

I encourage you to do it. Frankly I spent more time cleaning crude out of corners and edges since I had it apart than I did on the entire modification.

I've noticed on the internet that there is a salvage yard in CA getting 4Runners in all the time. I tried to email the yard I linked to but they never answered. CA is about a 12 hour time difference from here so I couldn't really call. I ended up having a family member pick up the parts from a yard in AZ for me.
 
Credit and tedium

Personally, the e brake bracket is a waste of money if you have a drill and drill bits, it was very easy to do, and the wiring took a while but i did it a few days before to the console swap, it is not hard to do the wiring its just tedious and you just need to take your time.I edited your step 10 into my writeup, i credited it to you, if you would like more credit i will put more in.

On the e-brake, I think I've just gotten too old. I'm happy to pay for convenience these days. With my luck I would drill into a transmission line or something.

The wiring was tedious but not hard as you mentioned. I even soldered each connection and used heat shrink tubing. 9 wires to lengthen if you skip the security ones which just fit.

No need for any credit. Like you I just like getting the info out there for all to read. This site has saved me time, money and frustration more than once keeping the 4Runner going because everybody shares.
 
I know this thread has pretty much died off but I wanted to say that I have done this mod, most of it anyway, and it is well worth it. Thanks for all the detailed instructions and pictures from everyone! I havent re-routed the wires for my switches yet because I don't have enough open places for them without cutting my dash. With that being said has anyone replaced the center dash trim around the radio and a/c controls with one from a newer 3rd gen.? I have that piece plus the air duct that seperates the vents plus I have the wires for all the switches in the newer trim panel. I tried plugging the hazard & defrost plug from my old one into the new trim piece with no luck, meaning they didn't work but i'm not sure that the wiring is the same. If anyone has done/tried this I would appreciate any info they have and if not I will try to post some when I get time and figure it out.
 
excellent write up and pics.

I completed the center console mod and like you I got the ebrake from the 99 I also snagged the part the center console attaches to and it took 10 minutes total to remove and reinstall the new cup holder. Just an FYI to anyone else wanting to do this mod.
 
Hey there, I hope hope hope someone replies to me. I have a friend who has only the black part of the console, the actual cupholder part, where the e-brake and things go. He doesn't have the whole armrest and console part. Will just the black piece fit onto the old 98' and older console? Anyone know if they could be a direct bolt??
 
It looks like there might be just enough room at the top of the new panel on the center counsole where it meets with the cover / lid that lifts up to install the switches there but it might be crowded. Has anyone tried this?
 
Hey there, I hope hope hope someone replies to me. I have a friend who has only the black part of the console, the actual cupholder part, where the e-brake and things go. He doesn't have the whole armrest and console part. Will just the black piece fit onto the old 98' and older console? Anyone know if they could be a direct bolt??

Sorry for the delay. They finally got the email notification system working again.

Nope. There is no direct bolt in. You have to do the whole swap.
 
Help removing in-dash cup holder for 1998 4Runner

Hi all - I have a 1998 4Runner and I see from the thousands of posts on forums that I am not alone with the problem of having the cup holders break. Both the front and rear units have broken on my vehicle. I was able to find replacement parts but I can't figure out how the heck to get the broken in-dash cup holder out of my dashboard so I can install the new one. Please tell me I do not have to take the whole dashboard trim assembly off in order to replace this part. I love Toyotas but this was without a doubt the worst design idea I've ever seen on a vehicle. It's a great running vehicle but the interior trim, knobs and accessories are made like crap. Any help given would be greatly appreciated, thanks!
 

Members online

Forum statistics

Threads
278,309
Messages
3,554,075
Members
248,016
Latest member
Advally Service

Trending content

Back
Top