Custom Bumper/Receiver Hitch for my 1st Gen

illzoni

New member
I wanted a bumper and receiver hitch for my '87 for a few reasons:
1) need to pull a small trailer occasionally;
2) wanted a bumper on the truck, both aesthetically and functionally;
3) would like to explore adding accessories to said unit.

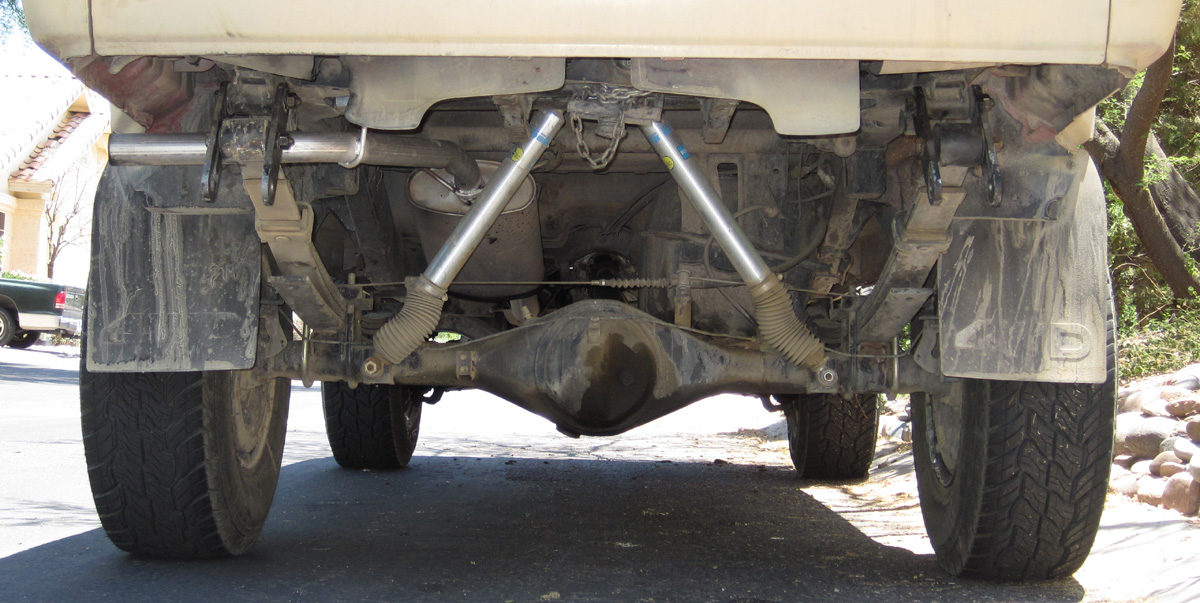
Here's what it looked like before I started the bumper:
100814_0746.1200.jpg


And underneath:
100531_0390.1200.jpg
 
Last edited:
Register to hide this ad
I was unable to get a standard receiver hitch installed, as the larger spring modification occupies the end of the frame rail. This photo shows the stock mount point (vacant) and the new custom one (from PO):
100814_0745.1200.jpg


Other design considerations include the spare tire carrier hardware and the custom shock mounting points (bar added):
100814_0751.1200.jpg


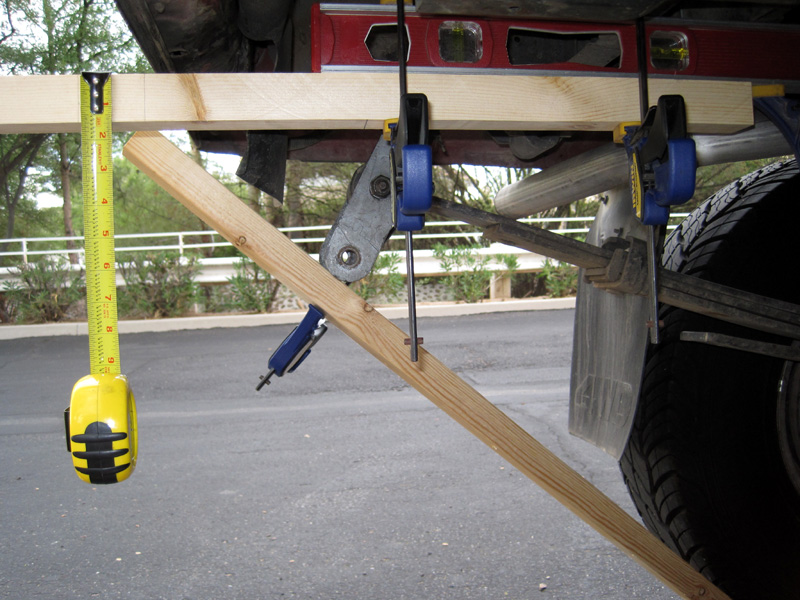
I also wanted to ensure I didn't reduce my departure angle (clearance) and rigged this up to illustrate:
100814_0765.0800.jpg

...with the upper surface of the angled board representing the departure angle, I can see the long shackle is the limiting factor in the rear. Also, any new bumper would be the new LIMFAC (limiting factor) represented by the tape measure.

That departure angle photo also helped me visualize the new design. Imagine the level being one arm of the mounting system and the horizontal board being another extension to get clearance under the tailgate. They're both clamped to the frame crossmember to which the spare tire carrier hardware is bolted.

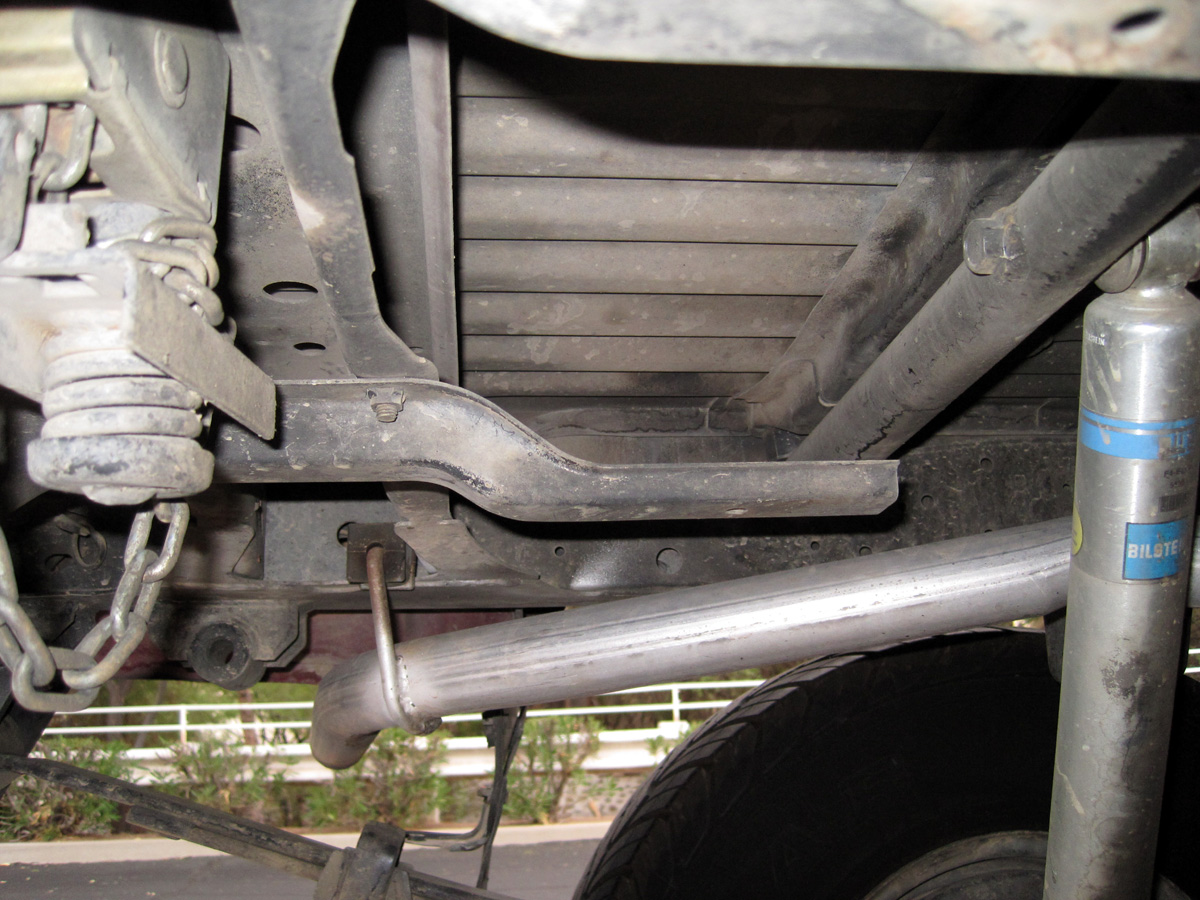
Here you can see that frame crossmember and the custom upper shock mount bar:
100814_0754.1200.jpg

...the shock mount bar is 15/16" higher than the bottom surface of the frame crossmember and that cause some issues later.

All this figurin' helped me to come up with a pretty simple solution/design.
 
Last edited:
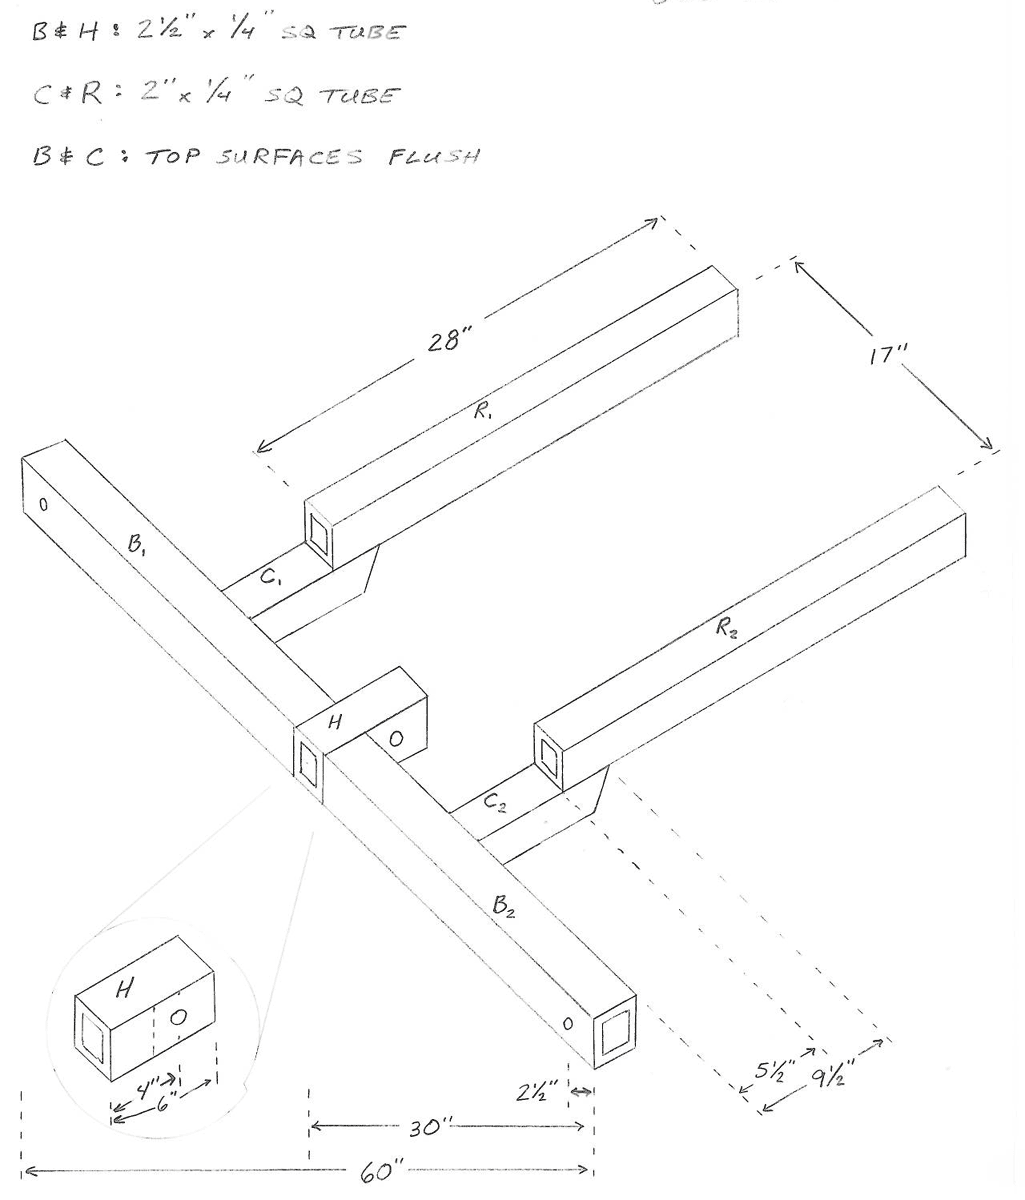
After several drafts, consultation with an aircraft engineer and the fabricator, I came up with:
hitch.final.1200.gif

(The small drawing of the receiver (H) in the lower left is a detail of it...the lines I drew to help indicate that didn't scan clearly.)

The main rails (R) are long enough to overlap the shock mount bar and the frame crossmember. The next pieces (c) connect the rails to the bumper and are just low enough to clear the underside of the tailgate.

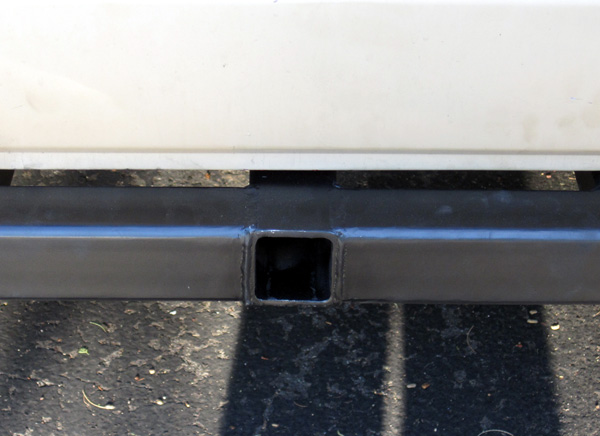
The bumper (B) is made of the same stuff receivers are made from. Notice I've spec'd hitch pin holes near each end (maybe for future gadgets :D). The receiver (H) is flush with the rear, upper, and lower surfaces of the bumper, giving a clean look. It would've been somewhat simpler to fabricate had it simply been welded below the bumper, but that would've affected clearance and not given me the same look. Also, the hitch pin hole is farther back/deeper than normal, so I had to drill a custom hole in my current drop bar.
 
Last edited:
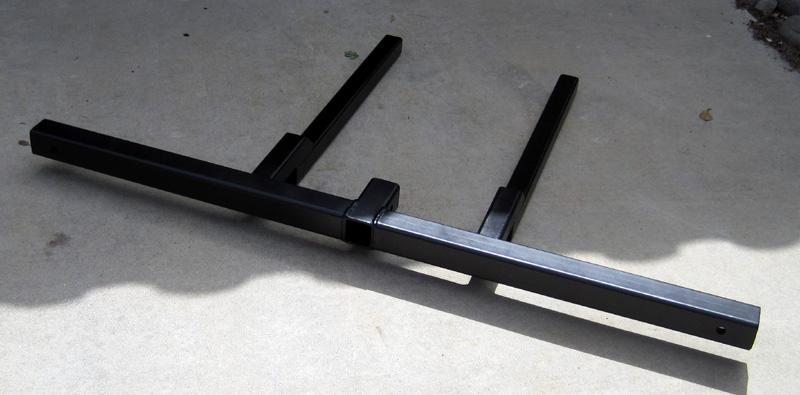
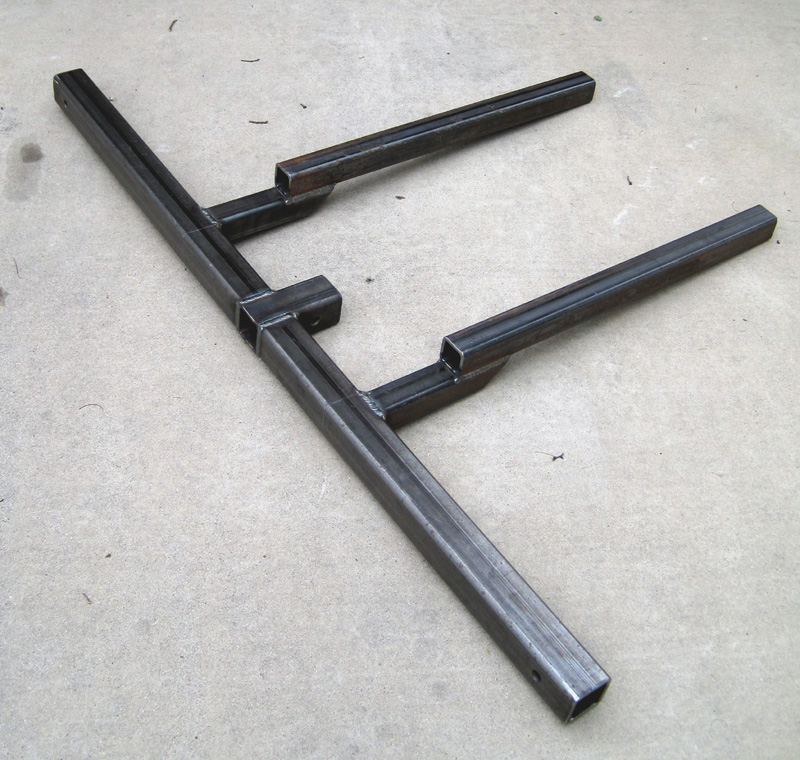
With that drawing and about $300, I got this:
100822_0778.0800.jpg

I was very pleased with the workmanship. It turned out exactly how I had pictured in my head. And I like to think the drawing had something to do with getting the result I wanted.
 
Last edited:
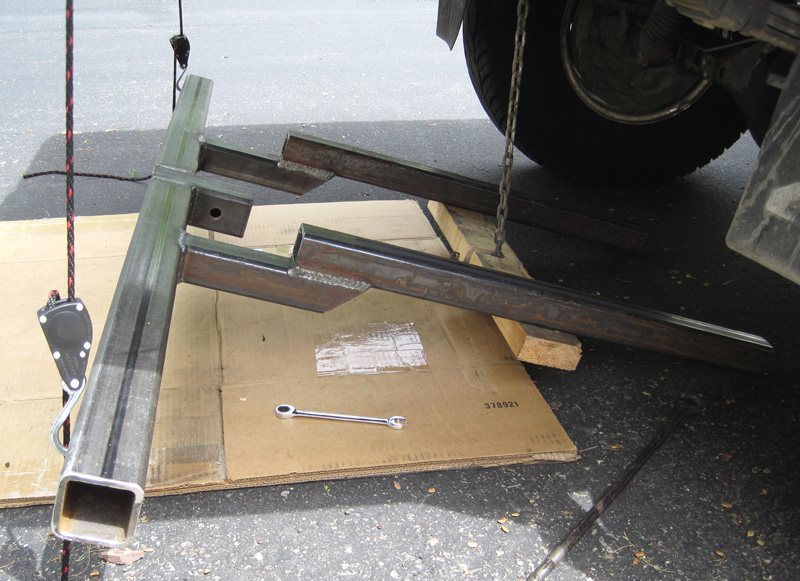
Before drilling holes, I dry fit it to the truck to mark my spots.

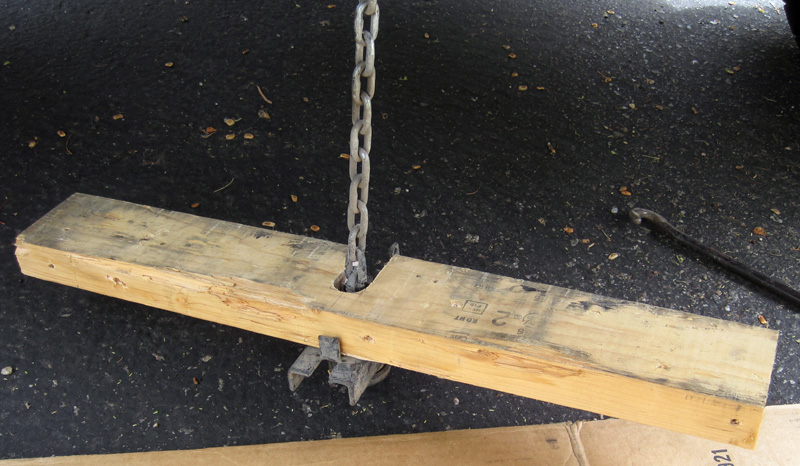
The spare tire hoist proved useful. I notched a 2x4 and used it to help lift the hitch:
100822_0786.0800.jpg


The same ratcheting ropes I use to hoist my top to the garage ceiling also proved handy:
100822_0788.0800.jpg


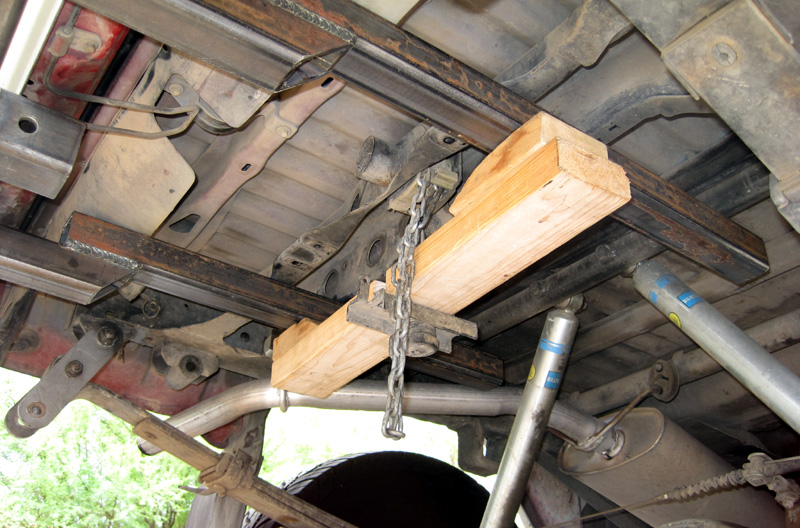
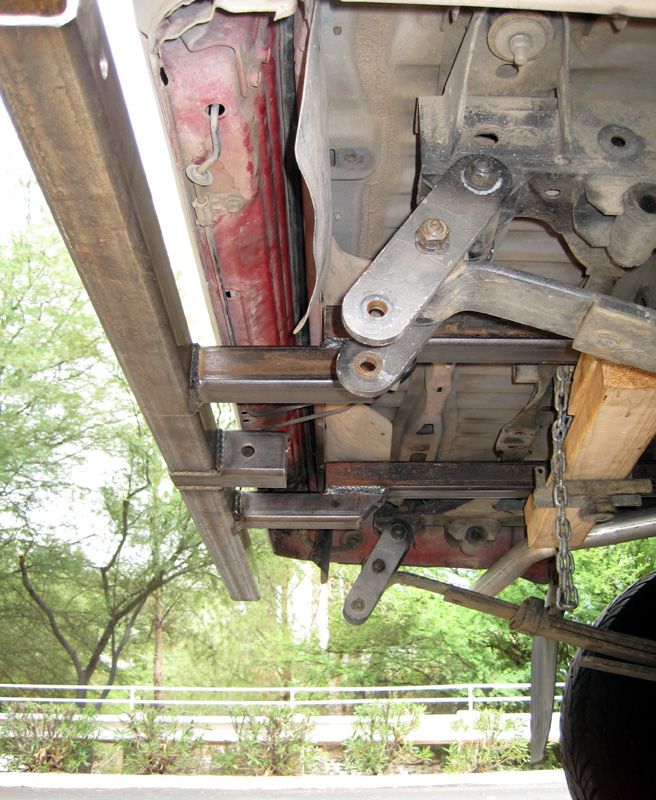
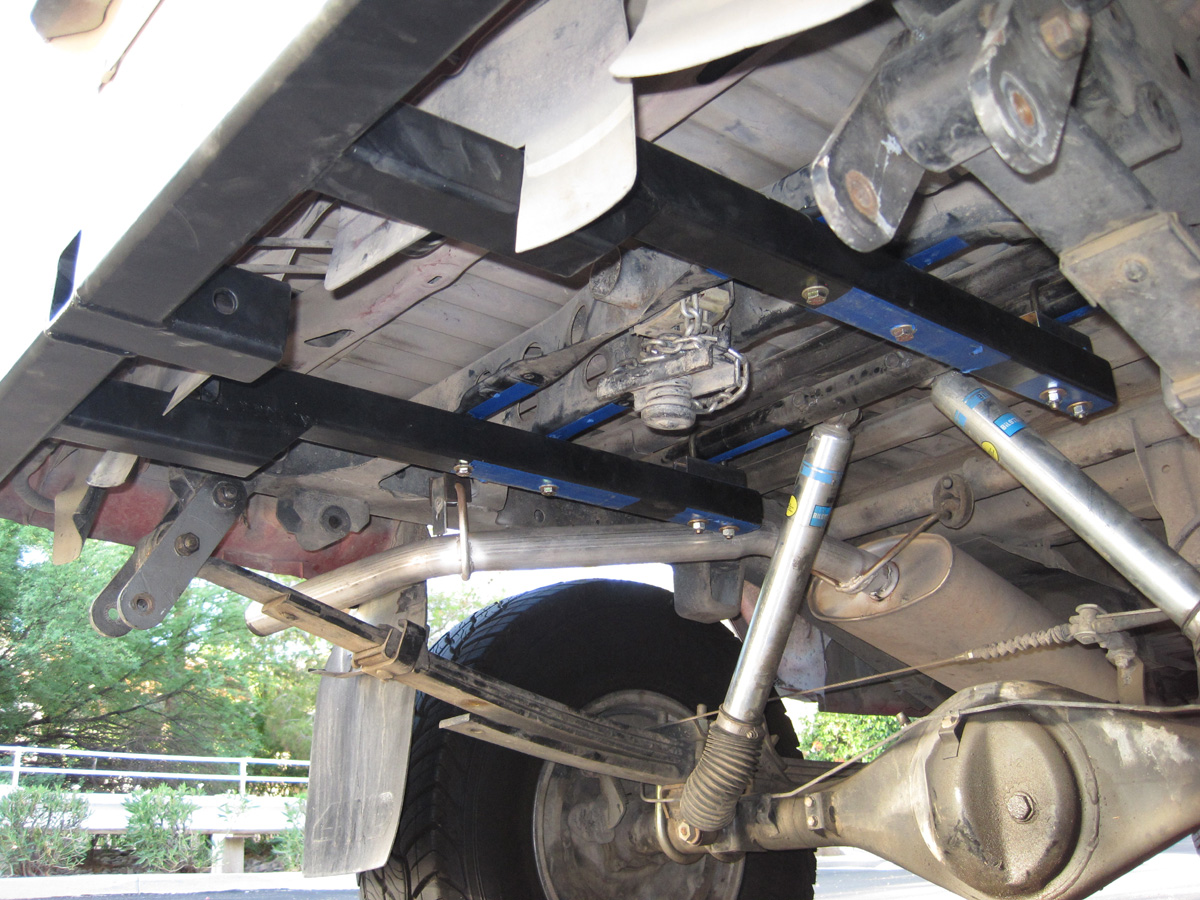
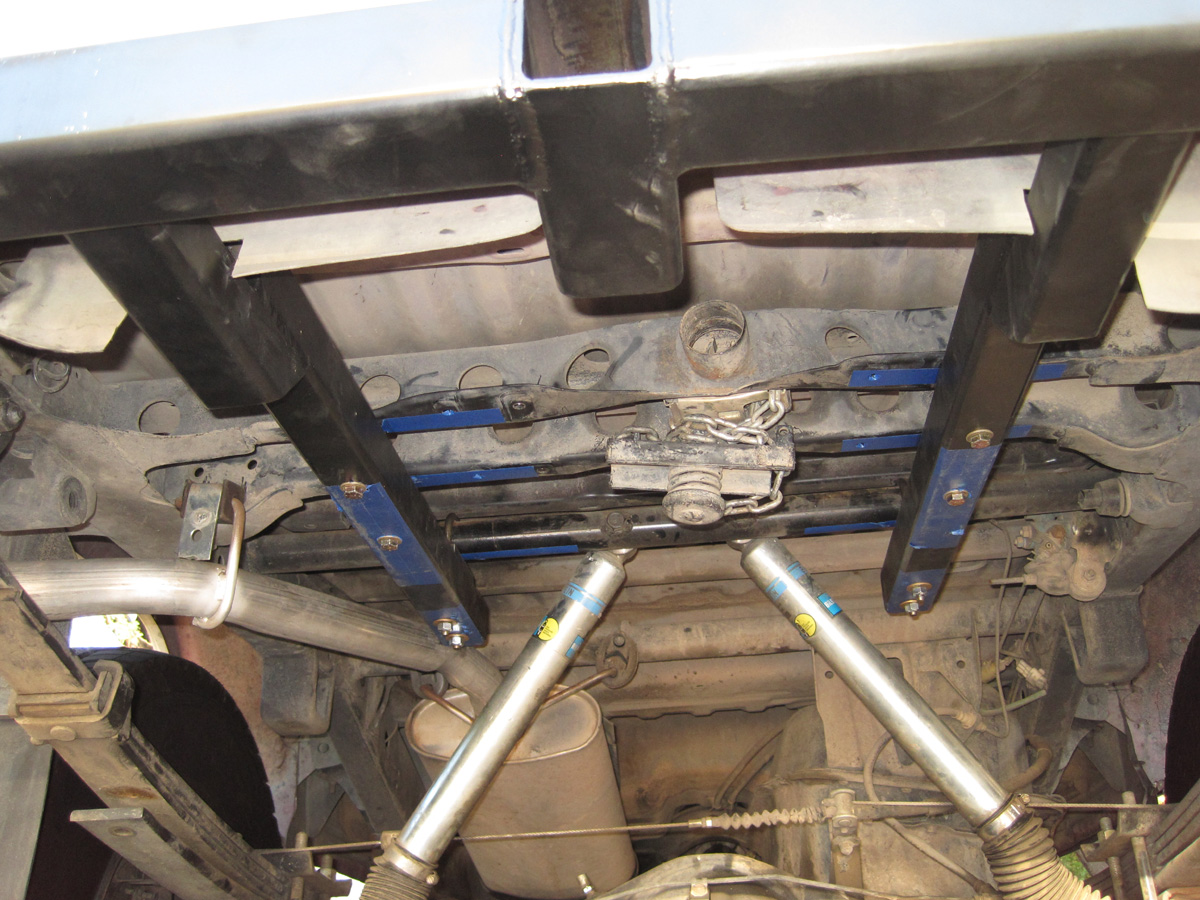
Everything underneath fit well:
100822_0800.0800.jpg


I cleared the rear end as designed:
100822_0799.0800.jpg


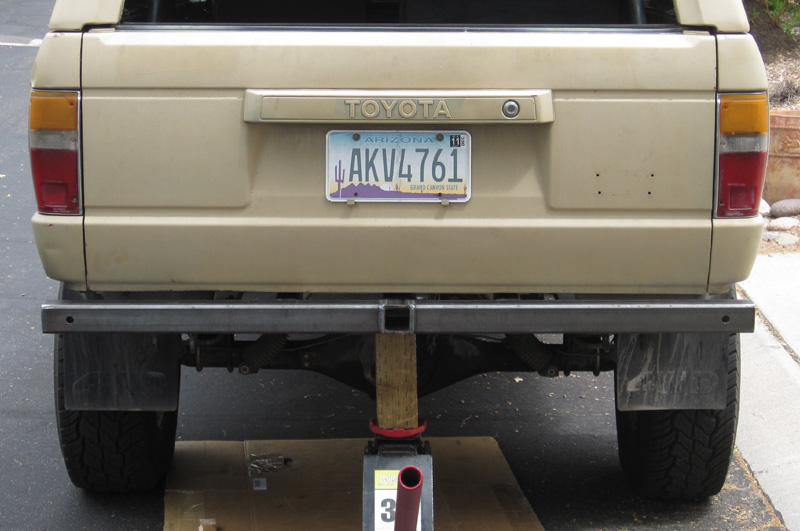
And looked pretty good in place:
100822_0808.0800.jpg

100822_0810.0800.jpg
< left - right >
100822_0809.0800.jpg
 
Last edited:
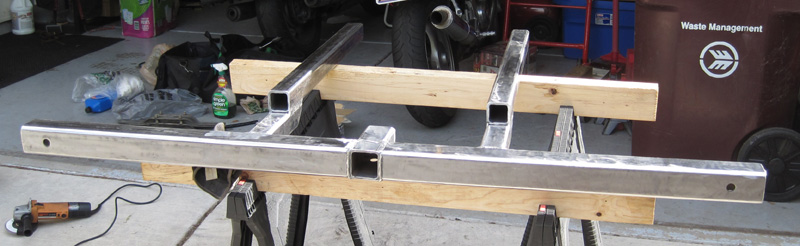
I suppose I could have just primered and painted it, but I took the angle grinder sanding attachment to it (and was tempted to clear coat it):
100822_0815.0800.jpg


And then painted it satin black with Krylon:
100831_0819.0800.jpg


Liberal use of painters tape helped me locate the holes:
100831_0830.1200.jpg


Here you can see I've removed the spare tire carrier braces and have plenty of clearance at the front mounting points with the shocks:
100831_0832.1200.jpg
 
Last edited:
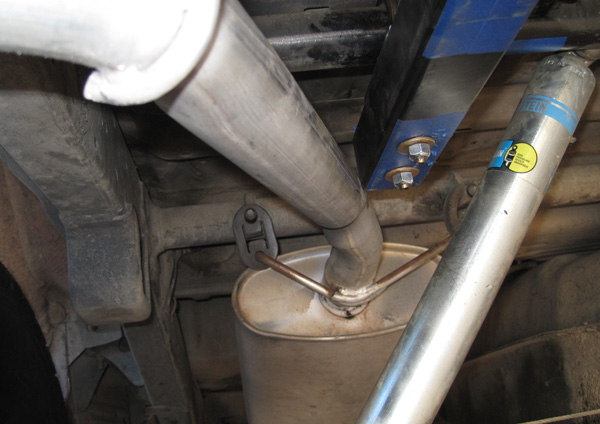
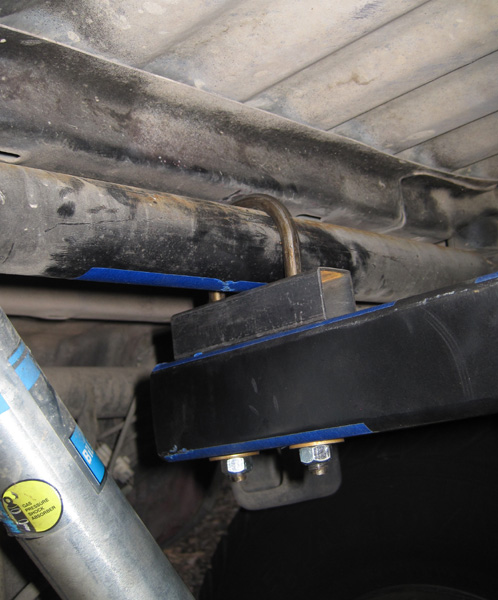
I did create a couple of problems I need to correct.

1) The tailpipe is contacting the left rail:
100831_0835.0600.jpg

Pretty sure I can relocate the hangars to fix this.

2) The right rail mounting point is directly contacting a body support and therefore 'booming' noise into the truck:
100831_0834.0600.jpg

I would appreciate suggestions on fixing this one.
 
Last edited:
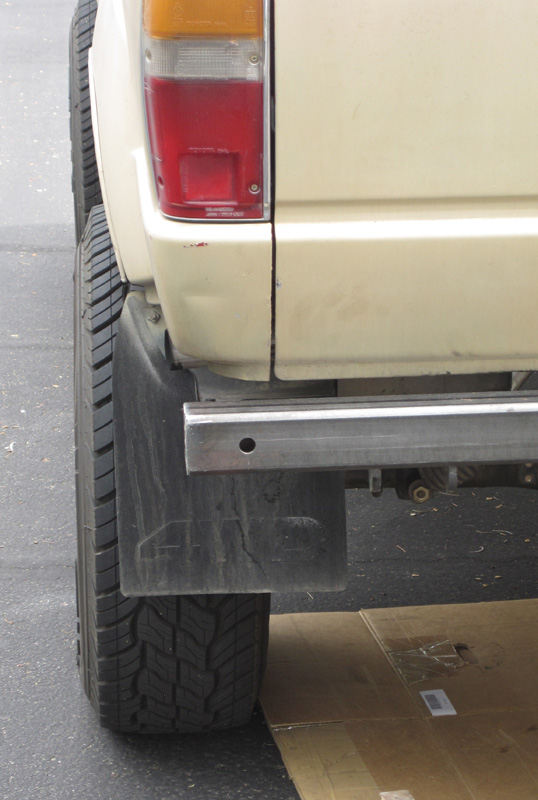
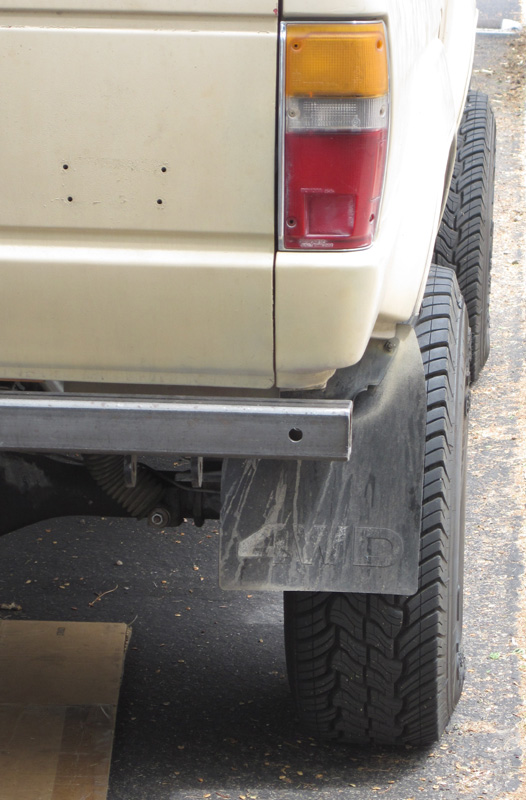
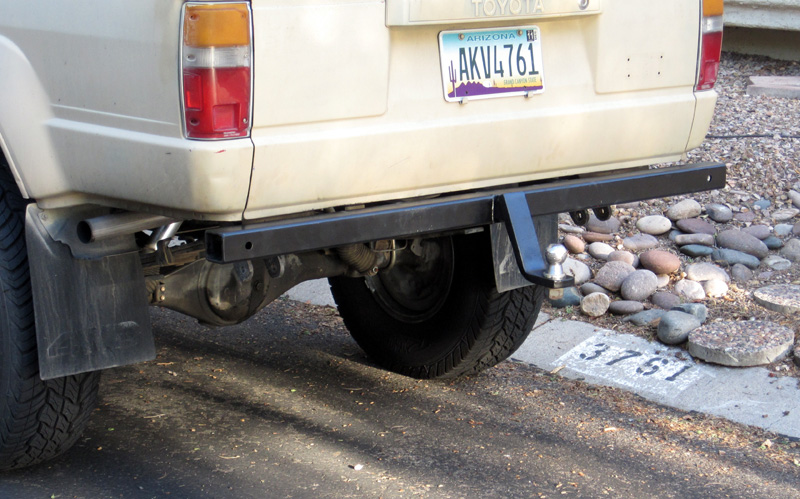
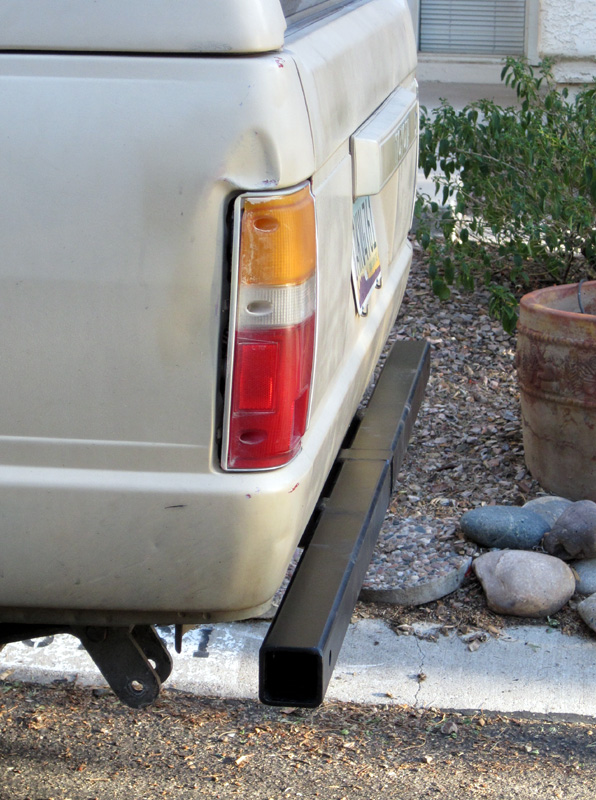
Here's the finished project...
100831_0821.0800.jpg


Notice the pin is behind the bumper, out of sight:
100831_0825.0600.jpg

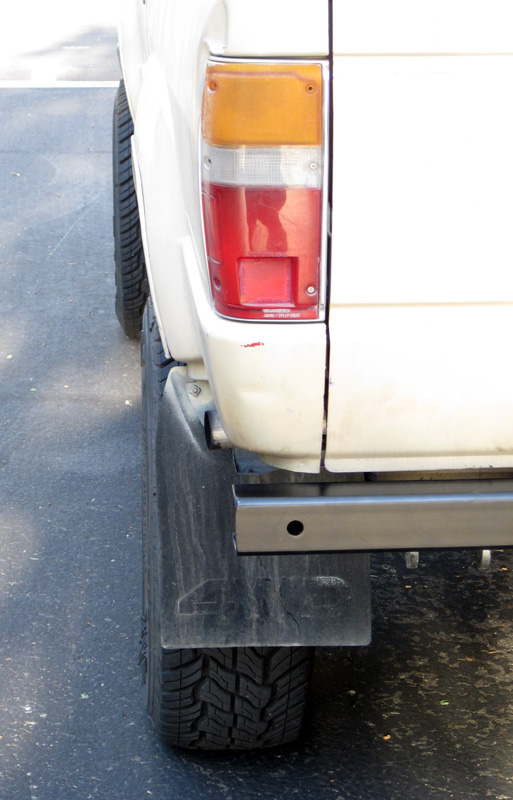
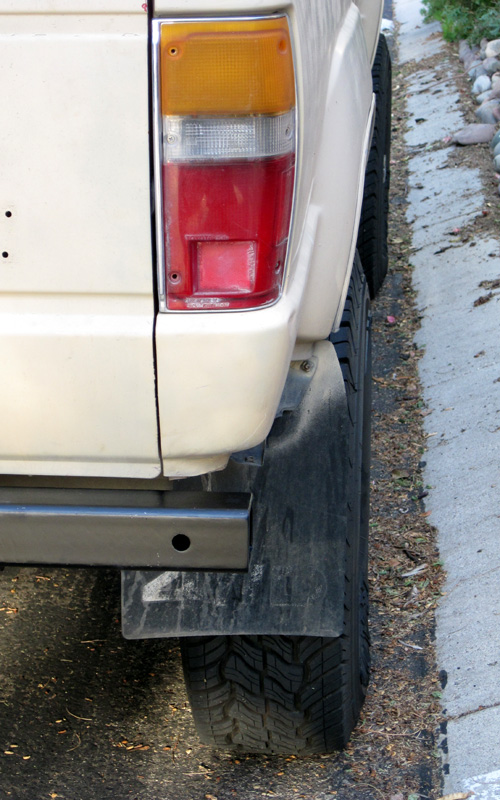
I did neglect to include attachments for safety chains....need to fix that. Ideas?

100831_0822.0800.jpg
100831_0820.0800.jpg


100831_0823.0800.jpg
100831_0824.0800.jpg

(Note: I did switch to wheels with greater backspacing, so this looks a bit different.)


It's tucked pretty tightly to the rear:
100831_0828.0800.jpg


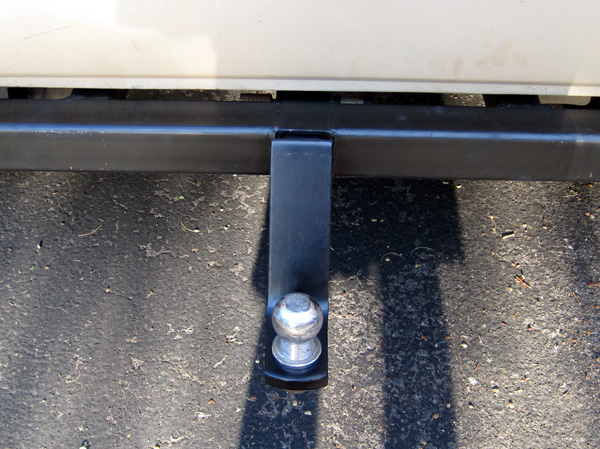
I'm happy with how the receiver part turned out:
100831_0827.0600.jpg


And that's it:
100831_0826.0800.jpg


So that's the last of my post. If you have any suggestions concerning:
a) the tailpipe;
b) the mount hitting the body underside;
c) safety chain attachment points...
...please chime in.
Heck, if you have any comments, please share.

Thx,
Jon
 
Last edited:
Folks,

If you checked out my thread already, the photos probably weren't working....they should be now.

Thx,
Jon
 
you can find the swivel hoops designed for farm equipment cheap at small hardware stores, etc. may help in the options for safety chains/tow hooks. Looks great though!
 
Good project! This is the bumper my ole' lady and I built for her JEEP. I got the hoops and the receiver from Attwoods. We have about $75.00 in the whole deal.
 

Attachments

  • IMG_20100926_143223.jpg
    IMG_20100926_143223.jpg
    20.6 KB · Views: 3,353
  • IMG_20100926_143237.jpg
    IMG_20100926_143237.jpg
    29.1 KB · Views: 3,971

Members online

No members online now.

Forum statistics

Threads
278,316
Messages
3,554,105
Members
248,016
Latest member
Advally Service

Trending content

Back
Top