matoolie
New member
I came across these lights when doing some searching for options on my 2014 4runner fog lights.
Morimoto XB LED Fog lights
They seemed to be a good replacement for the OEM fog lights. After some more research, I found that the 2014 uses same part number fog light as previous 5th gens. Based on this I purchased the lights. The website above now lists the lights fitting 2010-2015 4runners.
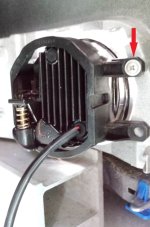
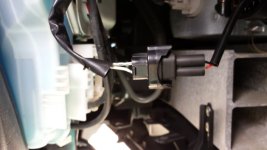
The lights come with H11 connectors which you have to place the male terminals of the lights into. Just do this after verifying the polarity of the factory connector on the vehicle side. On the back of each light is a screw used to adjust the aim of the light.
<a href="https://www.flickr.com/photos/125868611@N04/14586438523" title="image by Michael Allen, on Flickr"><img src="https://farm4.staticflickr.com/3855/14586438523_08880609b4_c.jpg" width="800" height="600" alt="image"></a>
<a href="https://www.flickr.com/photos/125868611@N04/14379688170" title="image by Michael Allen, on Flickr"><img src="https://farm4.staticflickr.com/3858/14379688170_bd6f39d46b_c.jpg" width="600" height="800" alt="image"></a>
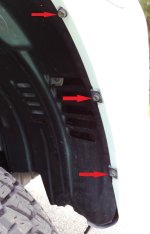
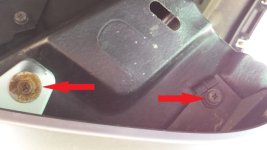
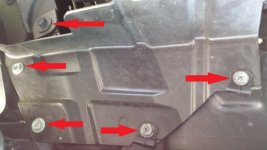
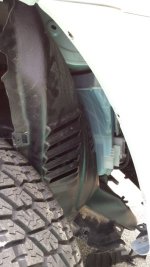
For the 2014, the entire front bumper has to removed. Basically removing some clips and several screws. Relatively easy.
<a href="https://www.flickr.com/photos/125868611@N04/14379778889" title="image by Michael Allen, on Flickr"><img src="https://farm3.staticflickr.com/2916/14379778889_97fbef0151_c.jpg" width="800" height="600" alt="image"></a>
The fog light assemblies are then removed from the bumper by removing 3 clips and 1 screw.
<a href="https://www.flickr.com/photos/125868611@N04/14543329636" title="7-3-2014 11-40-56 AM by Michael Allen, on Flickr"><img src="https://farm6.staticflickr.com/5532/14543329636_96d968c891_z.jpg" width="436" height="640" alt="7-3-2014 11-40-56 AM"></a>
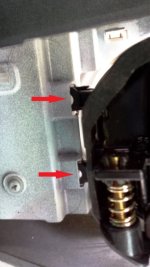
The fog lights are assembled to their brackets using 2 screws. The fog lights do have 4 screw bosses, but 2 are slipped into slots in the brackets and 2 have screws.
<a href="https://www.flickr.com/photos/125868611@N04/14565594012" title="7-3-2014 11-44-01 AM by Michael Allen, on Flickr"><img src="https://farm3.staticflickr.com/2915/14565594012_7fdfc722bc_z.jpg" width="640" height="518" alt="7-3-2014 11-44-01 AM"></a>
The spacing of the screw bosses on the LED are slightly wider than those on the factory light. As a result, for the 2 bosses that slide into the slots, plastic material had to be removed from the outside edges of the bosses with a dremel.
<a href="https://www.flickr.com/photos/125868611@N04/14379932727" title="image by Michael Allen, on Flickr"><img src="https://farm4.staticflickr.com/3878/14379932727_83a472d75d_z.jpg" width="640" height="480" alt="image"></a>
Other than the easy modification above, the rest of the install was simple and was done in about 1 hour. Here are the lights installed. I aimed the lights per the factory instructions and have a pretty good cutoff. Basically the top edge of the light on the wall should be same height of light itself with vehicle parked 3m from wall.
<a href="https://www.flickr.com/photos/125868611@N04/14566376315" title="image by Michael Allen, on Flickr"><img src="https://farm6.staticflickr.com/5523/14566376315_29d39e30e5_z.jpg" width="480" height="640" alt="image"></a>
<a href="https://www.flickr.com/photos/125868611@N04/14543282256" title="image by Michael Allen, on Flickr"><img src="https://farm4.staticflickr.com/3856/14543282256_97a6e70879_z.jpg" width="640" height="480" alt="image"></a>
Have yet to drive at night to see what lighting is like, but obviously the color is different from the factory halogens and match my HID's better.
<a href="https://www.flickr.com/photos/125868611@N04/14379826889" title="7-3-2014 11-49-16 AM by Michael Allen, on Flickr"><img src="https://farm4.staticflickr.com/3855/14379826889_d1e3b46829_z.jpg" width="640" height="458" alt="7-3-2014 11-49-16 AM"></a>
Morimoto XB LED Fog lights
They seemed to be a good replacement for the OEM fog lights. After some more research, I found that the 2014 uses same part number fog light as previous 5th gens. Based on this I purchased the lights. The website above now lists the lights fitting 2010-2015 4runners.
The lights come with H11 connectors which you have to place the male terminals of the lights into. Just do this after verifying the polarity of the factory connector on the vehicle side. On the back of each light is a screw used to adjust the aim of the light.
<a href="https://www.flickr.com/photos/125868611@N04/14586438523" title="image by Michael Allen, on Flickr"><img src="https://farm4.staticflickr.com/3855/14586438523_08880609b4_c.jpg" width="800" height="600" alt="image"></a>
<a href="https://www.flickr.com/photos/125868611@N04/14379688170" title="image by Michael Allen, on Flickr"><img src="https://farm4.staticflickr.com/3858/14379688170_bd6f39d46b_c.jpg" width="600" height="800" alt="image"></a>
For the 2014, the entire front bumper has to removed. Basically removing some clips and several screws. Relatively easy.
<a href="https://www.flickr.com/photos/125868611@N04/14379778889" title="image by Michael Allen, on Flickr"><img src="https://farm3.staticflickr.com/2916/14379778889_97fbef0151_c.jpg" width="800" height="600" alt="image"></a>
The fog light assemblies are then removed from the bumper by removing 3 clips and 1 screw.
<a href="https://www.flickr.com/photos/125868611@N04/14543329636" title="7-3-2014 11-40-56 AM by Michael Allen, on Flickr"><img src="https://farm6.staticflickr.com/5532/14543329636_96d968c891_z.jpg" width="436" height="640" alt="7-3-2014 11-40-56 AM"></a>
The fog lights are assembled to their brackets using 2 screws. The fog lights do have 4 screw bosses, but 2 are slipped into slots in the brackets and 2 have screws.
<a href="https://www.flickr.com/photos/125868611@N04/14565594012" title="7-3-2014 11-44-01 AM by Michael Allen, on Flickr"><img src="https://farm3.staticflickr.com/2915/14565594012_7fdfc722bc_z.jpg" width="640" height="518" alt="7-3-2014 11-44-01 AM"></a>
The spacing of the screw bosses on the LED are slightly wider than those on the factory light. As a result, for the 2 bosses that slide into the slots, plastic material had to be removed from the outside edges of the bosses with a dremel.
<a href="https://www.flickr.com/photos/125868611@N04/14379932727" title="image by Michael Allen, on Flickr"><img src="https://farm4.staticflickr.com/3878/14379932727_83a472d75d_z.jpg" width="640" height="480" alt="image"></a>
Other than the easy modification above, the rest of the install was simple and was done in about 1 hour. Here are the lights installed. I aimed the lights per the factory instructions and have a pretty good cutoff. Basically the top edge of the light on the wall should be same height of light itself with vehicle parked 3m from wall.
<a href="https://www.flickr.com/photos/125868611@N04/14566376315" title="image by Michael Allen, on Flickr"><img src="https://farm6.staticflickr.com/5523/14566376315_29d39e30e5_z.jpg" width="480" height="640" alt="image"></a>
<a href="https://www.flickr.com/photos/125868611@N04/14543282256" title="image by Michael Allen, on Flickr"><img src="https://farm4.staticflickr.com/3856/14543282256_97a6e70879_z.jpg" width="640" height="480" alt="image"></a>
Have yet to drive at night to see what lighting is like, but obviously the color is different from the factory halogens and match my HID's better.
<a href="https://www.flickr.com/photos/125868611@N04/14379826889" title="7-3-2014 11-49-16 AM by Michael Allen, on Flickr"><img src="https://farm4.staticflickr.com/3855/14379826889_d1e3b46829_z.jpg" width="640" height="458" alt="7-3-2014 11-49-16 AM"></a>