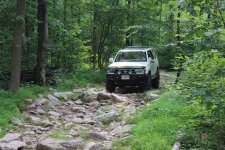
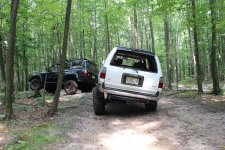
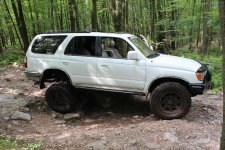
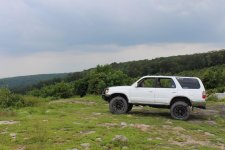
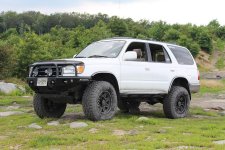
Dirtbike250x's Build Thread

Nice 3rd Gen! That's cool the 4Runner has been in your family since new! I hope that I will be able to pass my 5th Gen down to my 2 yr old daughter in 14 years...

So what is the deal with the Air Plane Hanger you do all of your work in? Seems like a good space to have!

Thanks Willy, it was a pretty special day when the truck was passed down to me. I certainly plan to keep it as long as the truck lives for.

And for the hanger, my father works as an aircraft technician, so in the off hours I am able to take up a corner and do some work on the truck. Certainly extremely fortunate to have access to such a place.
 
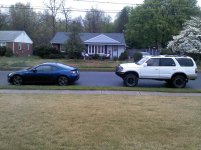
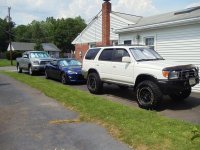
So the truck has not gotten much attention lately. Between nursing school and the getting a new friend for the 4Runner the truck has been sitting.

2013-04-29 11.56.35.jpg

With the 40 min commute I have everyday the truck just wasn't doing it for me anymore. So came the FR-S 6-speed. It is the most fun anyone can have in a car of that price tag. I still make time to get the truck out about once a week to keep the battery charged and all, plus I just love being in the it.

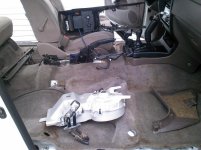
I needed a small project to do on the truck, it's not really a "mod" but my rear heater hasn't worked for some time now. So I thought why not yank it. Turned out to be a really easy project other than gaining access to the blower under the carpet.

2013-06-16 18.09.45.jpg

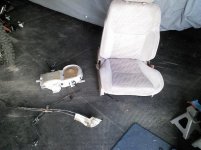
And everything I took out. Of course the seat is going back in.

2013-06-17 13.32.50.jpg

It has been to long since I've worked on the truck, so even though this was a simple project it was very enjoyable. :bluejump:
 

Attachments

  • 2013-04-29 11.56.35.jpg
    2013-04-29 11.56.35.jpg
    128.4 KB · Views: 1,676
  • 2013-06-16 18.09.45.jpg
    2013-06-16 18.09.45.jpg
    85.5 KB · Views: 1,558
  • 2013-06-17 13.32.50.jpg
    2013-06-17 13.32.50.jpg
    74.2 KB · Views: 1,578
Congrats on the new FR-S! Keep up the hard work in nursing school and you will be set for a career. Right now I am doing my prereqs before I apply for nursing school. Great build on the 4runner by the way!
 
Congrats on the new FR-S! Keep up the hard work in nursing school and you will be set for a career. Right now I am doing my prereqs before I apply for nursing school. Great build on the 4runner by the way!

Thank you! Yeah schooling is certainly keeping me busy, but having other nurses in the family I know it all be worth it in another year. Best of luck to you in you prereqs, and then into the nursing school. It has been a great time so far for me. :yo:
 
So I am finally off for a few weeks from my schooling, so that means more time with the truck. First on the list was to give it a nice wash and wax, and ended up doing 3 of my family 4 Toyotas.

DSC03547.jpg

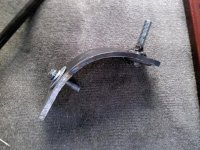
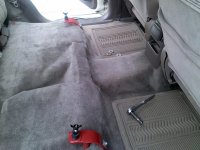
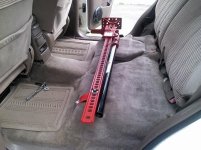
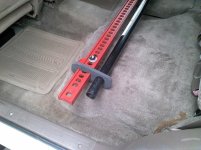
Next on my list was to make an easier and more convenient hi lift mount inside the truck. I don't exactly like Hi lifts mounted outside the truck, and previously have been using straps to hold mine down. So I got some scrap metal and my welder and made a little something.

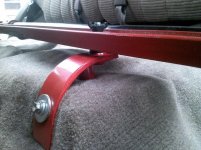
I had some 1/4 in. plate laying around and cut out 2 rectangles and bent them to an angle. Then welded a bolt through them to make a stud.

2013-07-06 17.26.50.jpg

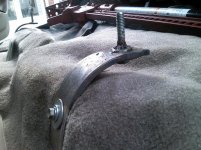
For my off-road trips I don't tend to need the backseats so I removed them just for trips for extra cargo area, and the threaded holes made for great initial mounting location

2013-07-06 17.23.39.jpg

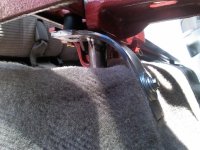
With the jack mounted it had a little bit of movement, because of the weight put on the single mounting location. So I welded in a vertical support. And made some bushings out of reinforced hose to prevent vibration.

2013-07-07 14.15.49.jpg

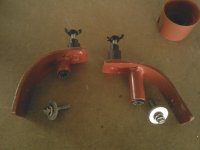
Added some more hose to the vertical support to prevent the metal cutting into the carpet and any more vibration. Then after the paint they were done.
2013-07-09 13.28.11.jpg
2013-07-09 16.07.14.jpg

Yes I turned a normal nut into a wing nut.

2013-07-09 16.13.14.jpg
2013-07-09 16.10.44.jpg

Overall I am happy with how it turned out. I'm yet to drive around with it to find any hidden rattles with it, but it feels pretty sturdy mounted. And with a total cost of $0.00 that is always a plus.
 

Attachments

  • DSC03547.jpg
    DSC03547.jpg
    138.1 KB · Views: 1,703
  • 2013-07-06 17.26.50.jpg
    2013-07-06 17.26.50.jpg
    83.6 KB · Views: 1,727
  • 2013-07-06 17.23.39.jpg
    2013-07-06 17.23.39.jpg
    85.6 KB · Views: 1,754
  • 2013-07-07 14.15.49.jpg
    2013-07-07 14.15.49.jpg
    80.4 KB · Views: 1,706
  • 2013-07-09 13.28.11.jpg
    2013-07-09 13.28.11.jpg
    91.2 KB · Views: 1,676
  • 2013-07-09 16.07.14.jpg
    2013-07-09 16.07.14.jpg
    56.9 KB · Views: 1,719
  • 2013-07-09 16.13.14.jpg
    2013-07-09 16.13.14.jpg
    77.9 KB · Views: 1,665
  • 2013-07-09 16.10.44.jpg
    2013-07-09 16.10.44.jpg
    79 KB · Views: 1,734
Last edited:
I had some 1/4 in. plate laying around and cut out 2 rectangles and bent them to an angle. Then welded a bolt through them to make a stud.

View attachment 92972

For my off-road trips I don't tend to need the backseats so I removed them just for trips for extra cargo area, and the threaded holes made for great initial mounting location

View attachment 92973

With the jack mounted it had a little bit of movement, because of the weight put on the single mounting location. So I welded in a vertical support. And made some bushings out of reinforced hose to prevent vibration.

View attachment 92974

Added some more hose to the vertical support to prevent the metal cutting into the carpet and any more vibration. Then after the paint they were done.
View attachment 92975
View attachment 92977

Yes I turned a normal nut into a wing nut.

View attachment 92979
View attachment 92980

Overall I am happy with how it turned out. I'm yet to drive around with it to find any hidden rattles with it, but it feels pretty sturdy mounted. And with a total cost of $0.00 that is always a plus.[/QUOTE]


That's bad ass! Let me know if it rattles or anything I might need to do that !
 
That's bad ass! Let me know if it rattles or anything I might need to do that !

Seems the only rattle is with the handle. Quick fix though, I'll go look around and see what I can make a handle keeper from. Overall though its pretty sturdy, grabbing on it shaking it the only movement is what the reinforced hose gives which isn't much. Let me know if you have any more questions.
 
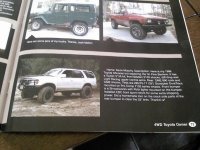
Also found out my truck was put in the most recent issue of 4WD Toyota Owner. I submitted a pic of my truck probably 2 years ago when I subscribed to the mag, and it finally found it's way into the mag. Thanks to LINY4Runner for spotting it (I'm not sure how to work the mention feature)

2013-07-10 10.59.23.jpg
 

Attachments

  • 2013-07-10 10.59.23.jpg
    2013-07-10 10.59.23.jpg
    61 KB · Views: 1,772
Great looking rig and congrats on getting in the Toyota Owner magazine. I've been wanting to submit some photos myself. Crazy it took 2 years to make it.
 
Today I finished up the hi-lift mount project with a handle holder. I had some difficulty finding some material laying around worthy of the project. My first attempt I tried using thick foam, but figured after some use it would eventually rip apart.

It took some time before I found a material, and it was right below my feet. My garage floor is covered in gym maps, a thick sturdy rubber material which are very heavy.

2013-07-10 12.27.50.jpg

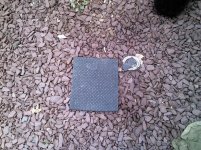
When we cut it to fit the garage we had some left overs.

2013-07-10 12.28.00.jpg

Which eventually became...

2013-07-10 12.28.18.jpg
 

Attachments

  • 2013-07-10 12.27.50.jpg
    2013-07-10 12.27.50.jpg
    61 KB · Views: 1,655
  • 2013-07-10 12.28.00.jpg
    2013-07-10 12.28.00.jpg
    94.1 KB · Views: 1,595
  • 2013-07-10 12.28.18.jpg
    2013-07-10 12.28.18.jpg
    61.2 KB · Views: 1,604
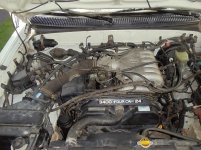
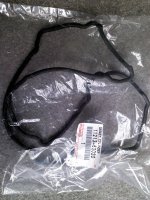
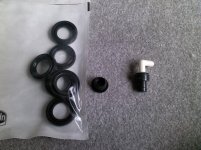
The past two days I spent doing something I've been wanting to do for some time now. I installed new valve cover gaskets, plenum gaskets, PCV valve and drive belts. They weren't leaking to bad, just minor weeping, but it was wet all the way around and I do not like anything leaking!

It was a pretty intimidating job, just because I've never dug into the motor that far before. However, it was a fairly straight forward job. As long as all connections that were disconnected are reconnected it works just as good. Total time was about 10 hrs over 2 days.

The tips I have for anyone going to do this job is to take your time and make all mating surfaces clean...very clean...brand new looking clean. About 75% of the first day of dis-assembly was cleaning all the important surfaces and just getting the grit out of spots were it shouldn't be. As you can see I didn't paint the plenum or valve covers because simply I don't like the look of the them black and wasn't going to put extensive hours into cleaning the aluminum.

Also take the time to put Dielectric grease around the edges of the electrical plugs if there is a threat of water to the engine.

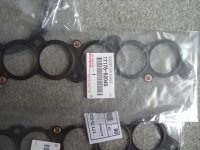
Now for a few pics of the process, and some part numbers for the valve cover gaskets and plenum gaskets if anyone needs them.
2013-07-03 14.59.42.jpg

2013-07-03 15.00.08.jpg

DSC03572.jpg

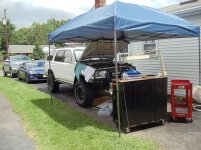
The portable garage canopy

DSC03598.jpg


DSC03628.jpg

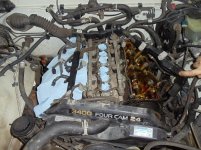
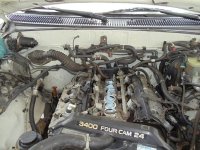
New gaskets installed along with the PCV valve, which I recommend replacing since the cover is off and much easier to get out if the old grommet is dry and hard like mine was.
DSC03637.jpg

It's getting closer

DSC03640.jpg

And one shot of the new belts. Another easy but much needed job for my Runner.
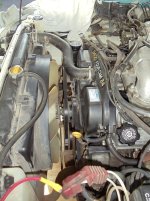
DSC03647.jpg
 

Attachments

  • 2013-07-03 14.59.42.jpg
    2013-07-03 14.59.42.jpg
    125.5 KB · Views: 1,557
  • 2013-07-03 15.00.08.jpg
    2013-07-03 15.00.08.jpg
    119.9 KB · Views: 1,613
  • DSC03572.jpg
    DSC03572.jpg
    46.4 KB · Views: 1,605
  • DSC03598.jpg
    DSC03598.jpg
    114.7 KB · Views: 1,711
  • DSC03628.jpg
    DSC03628.jpg
    119.9 KB · Views: 1,865
  • DSC03637.jpg
    DSC03637.jpg
    84.9 KB · Views: 1,644
  • DSC03640.jpg
    DSC03640.jpg
    87.1 KB · Views: 1,592
  • DSC03647.jpg
    DSC03647.jpg
    83.4 KB · Views: 1,626
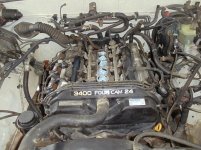
Also one picture of the final motor back together. There were some loose hoses which could have posed a problem to air/vacuum leaks. I took the time to fix those hoses and make sure all connections were tight and leak free.

After taking it up to temp on the test drive, there was no wow factor in difference in the way it ran. However, I do believe that all those little things add up to make the engine simply work better.

Also a large thanks to my helper and Dad for being a second and third eyes to the project and couple extra hands to get dirty.

Large projects like this remind me how important this truck is to my family and me. We got this truck when I was 3yrs. old and it has stuck around for us for me to be able to do all the work on the truck.

DSC03650.jpg
 

Attachments

  • DSC03650.jpg
    DSC03650.jpg
    89.4 KB · Views: 1,763
Last edited:
Today I started another DIY project for the truck

The idea for today's project was to make a slider adapter for my hi-lift jack. I spent just a little time looking at manufactured ones, and came up with an idea to make my own.

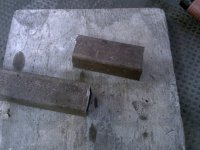
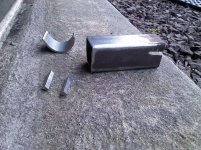
Started by cutting some square tubing to size, and notching it to fit the contours of the jack and hold itself in place.

2013-07-20 12.42.14.jpg

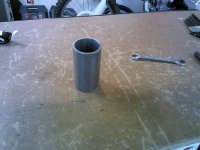
Next for the part that will cradle the slider tubing, I used what was left over from my sliders. When I got my sliders from 4xinnovations they send them with a third leg that is longer for other frames. So I cut the top quarter off and bent it open to fit around the diameter of the slider tubing.

2013-07-20 12.29.57.jpg

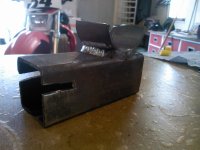
With the square tube notched and the round tube bent open and some square key stock ground down to a triangle for side support it was time to weld :frog:

2013-07-20 14.22.05.jpg

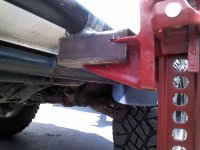
Welding complete and ready for a test lift...

2013-07-20 14.42.50.jpg
2013-07-20 14.46.38.jpg

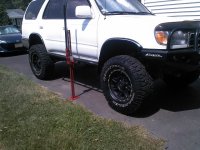
And it works just fine. Just a quick easy way to make lifting much safer task at a price I love. Still have to smooth out the rough edges, sandblast it and give it a nice shiny paint job. But I thought I'd share what I had so far...

2013-07-20 14.46.19.jpg
 

Attachments

  • 2013-07-20 12.42.14.jpg
    2013-07-20 12.42.14.jpg
    124.2 KB · Views: 1,568
  • 2013-07-20 12.29.57.jpg
    2013-07-20 12.29.57.jpg
    130.2 KB · Views: 1,615
  • 2013-07-20 14.22.05.jpg
    2013-07-20 14.22.05.jpg
    96.6 KB · Views: 1,570
  • 2013-07-20 14.42.50.jpg
    2013-07-20 14.42.50.jpg
    103.7 KB · Views: 1,549
  • 2013-07-20 14.46.38.jpg
    2013-07-20 14.46.38.jpg
    110.9 KB · Views: 1,561
  • 2013-07-20 14.46.19.jpg
    2013-07-20 14.46.19.jpg
    136.7 KB · Views: 1,602
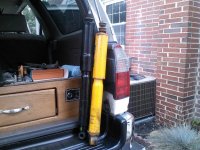
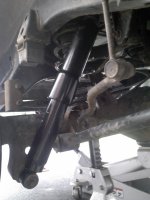
Another update on the truck. I've been doing a lot of research on shocks for the truck. The shocks that I originally had really limited the flex of the truck, they were just too short to pair with the coil. So thanks to [MENTION=44220]BigFishAllDay[/MENTION] for making the thread on the Black Tokico OEM Land Cruiser shocks, I decided they were my best option for price/function ratio.

I was a little worried about the ride because I've read that they are a much stiffer shock, and extra weight in the rear is required to run them. I have roughly 250lbs in the truck when going to the trail, and maybe I have a different feeling of a "rough ride" but I personally say they ride better than the OME shocks I had before.

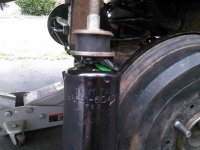
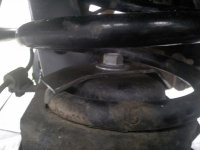
I am still running the OME 890 coil in the rear so I made a quick spring retainer (pictured below). I had a chance to flex the rear suspension at Rausch Creek off Road Park (pictures coming later) and the 890 certainly gets loose, but I don't think would fall out.

Comparison of the two shocks (the OME shocks will be up for sale soon with only 10k miles on them)

2013-07-25 15.53.16.jpg

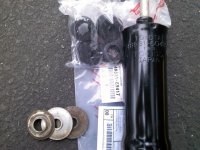
The part number pictured comes with the shock and 4 bushings, the washers are not, and will be needed for the install. Lucky for me a friend with a FZJ80 just replaced his front shocks for extended length TJMs and had plenty of washers to offer me. So that saved me greatly on buying those expensive washers.

2013-07-25 18.05.54.jpg
2013-07-25 15.23.12.jpg

Here's a shot of the spring retainer I made, just a simple bent piece of metal with a bolt holding it in place. The install of the shocks were done the evening before leaving for Rausch so will have to get a coat of paint on these, as well as extend the parking brake bracket.

2013-07-25 18.01.30.jpg

And the final product.

2013-07-25 18.01.14.jpg
 

Attachments

  • 2013-07-25 15.53.16.jpg
    2013-07-25 15.53.16.jpg
    107.7 KB · Views: 1,630
  • 2013-07-25 18.05.54.jpg
    2013-07-25 18.05.54.jpg
    69.9 KB · Views: 1,514
  • 2013-07-25 15.23.12.jpg
    2013-07-25 15.23.12.jpg
    56.8 KB · Views: 1,588
  • 2013-07-25 18.01.30.jpg
    2013-07-25 18.01.30.jpg
    101.9 KB · Views: 1,546
  • 2013-07-25 18.01.14.jpg
    2013-07-25 18.01.14.jpg
    56.6 KB · Views: 1,556
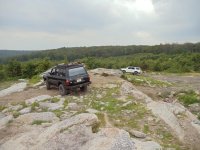
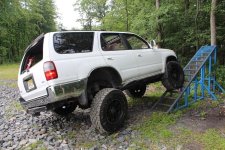
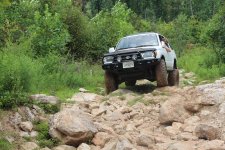
The day after installing the Tokico Shocks, a Land Cruiser friend and myself left for Rausch Creek Off Road Park. The shocks worked excellent, provided a great highway drive out there and flex perfectly on the trail. The trip worked out great there was a TTORA meet the same weekend so was able to see some other toyotas on the trail.

DSC03725.jpg

IMG_2472.jpg

IMG_2445.jpg

IMG_2428.jpg

On full extension on the drives side the drive shaft does come in contact with the stock gas tank skid. For now my fix is going to be drop the skid and pound in the area of contact. But that was the only problem I ran into running the new shocks on the trail.

IMG_2424.jpg

IMG_2412.jpg
IMG_2484.jpg

IMG_2488.jpg
 

Attachments

  • DSC03725.jpg
    DSC03725.jpg
    81 KB · Views: 1,384
  • IMG_2472.jpg
    IMG_2472.jpg
    136.3 KB · Views: 1,444
  • IMG_2445.jpg
    IMG_2445.jpg
    136.5 KB · Views: 1,458
  • IMG_2428.jpg
    IMG_2428.jpg
    128.2 KB · Views: 1,440
  • IMG_2424.jpg
    IMG_2424.jpg
    135.5 KB · Views: 1,399
  • IMG_2412.jpg
    IMG_2412.jpg
    136.9 KB · Views: 1,457
  • IMG_2484.jpg
    IMG_2484.jpg
    83.3 KB · Views: 1,428
  • IMG_2488.jpg
    IMG_2488.jpg
    119.8 KB · Views: 1,480
Just read through your build. Love it. I wish I could say that mine has been in the family for as long as yours has. But maybe my kids could say that if I have kids. Haha everything looks sharp on your Runner. It's good to see people doing their own projects. Keep up the good work! Looking forward to what you turn out next.
 
Just read through your build. Love it. I wish I could say that mine has been in the family for as long as yours has. But maybe my kids could say that if I have kids. Haha everything looks sharp on your Runner. It's good to see people doing their own projects. Keep up the good work! Looking forward to what you turn out next.

Thanks A Lot! The truck has a little extra special meaning for my family and me, in addition to being a awesome truck. It gives me something more to appreciate knowing I grew up in that backseat. If or when your kids come along they can possibly share that same thing with your truck.

The DIY projects are great and very satisfying, the little details are what I'm most proud of. Thanks again for the kind words. :cheers:
 
Thanks A Lot! The truck has a little extra special meaning for my family and me, in addition to being a awesome truck. It gives me something more to appreciate knowing I grew up in that backseat. If or when your kids come along they can possibly share that same thing with your truck.

The DIY projects are great and very satisfying, the little details are what I'm most proud of. Thanks again for the kind words. :cheers:

I agree totally with you. With what little I've done to mine so far I can only imagine what it was like for you. Speaking of, have you any updates?
 

Members online

Forum statistics

Threads
278,316
Messages
3,554,110
Members
248,016
Latest member
Advally Service

Trending content

Back
Top