Dirtbike250x's Build Thread

Ah sweet, that is pretty close. I roam that area every once in awhile. Post up a picture of your truck so I can look out for you.

C1D81EE0-8205-41B2-B728-264E5314CF5E-1062-000000FC1C2A3737_zps2922a489.jpg~original
 
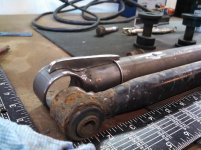
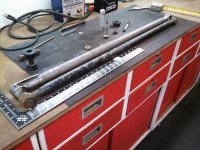
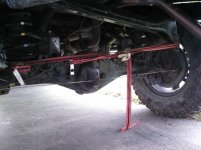
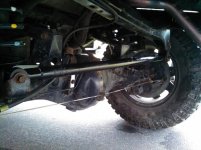
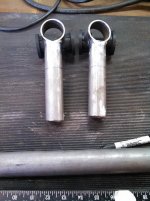
It's time to start another project on the truck. A little while back the panhard bar started making some noise from a little bit of play in the bushing. I attempted to tighten the bolt up and it was a temporary fix. Instead of spending the money to buy a fancy adjustable bar, I decided to get some building parts from ruffstuffspecialities and fab up my own bar.
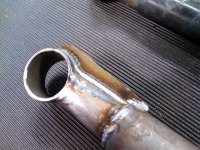
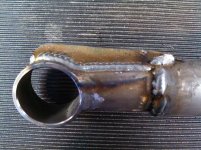
What I used was : 1.5x.120 DOM tubing for the main tube, 1.25x.120 DOM to sleeve inside the main bar on either end to better adapt to the custom width poly bushings on either end. And just some scrap 3/8" angle steel to make the gusset. Simple design and a practice run when it comes time to make stronger lower links.

Once it is all welded up painted and installed I'll post more pictures.
But for now here are a few...

IMG_20141005_154542_194.jpg

IMG_20141006_171344_290.jpg

IMG_20141006_191557_605.jpg
 

Attachments

  • IMG_20141005_154542_194.jpg
    IMG_20141005_154542_194.jpg
    84.7 KB · Views: 872
  • IMG_20141006_171344_290.jpg
    IMG_20141006_171344_290.jpg
    86 KB · Views: 873
  • IMG_20141006_191557_605.jpg
    IMG_20141006_191557_605.jpg
    67.4 KB · Views: 881
Some Updated Welded shots

IMG_20141007_170350_168.jpg

IMG_20141007_170429_699.jpg

My Temporary Panhard Bar

IMG_20141007_170556_053.jpg

And an Installed Pic.

IMG_20141011_170229_368.jpg


So far the bar works well, I was able to fully flex the truck and it runs through its full range of motion. Now I can move onto the lower links now that I have some experience on something to learn from.

In other news, a new member was added to the Toyota Family recently, probably the most special Toyota (at-least to me) Pictures to come...
 

Attachments

  • IMG_20141007_170350_168.jpg
    IMG_20141007_170350_168.jpg
    91.8 KB · Views: 836
  • IMG_20141007_170429_699.jpg
    IMG_20141007_170429_699.jpg
    98 KB · Views: 824
  • IMG_20141007_170556_053.jpg
    IMG_20141007_170556_053.jpg
    59.1 KB · Views: 845
  • IMG_20141011_170229_368.jpg
    IMG_20141011_170229_368.jpg
    61.6 KB · Views: 810
Pictures as promised....

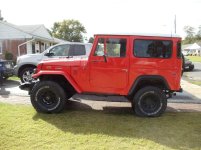
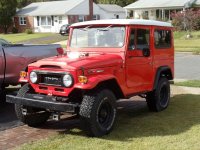
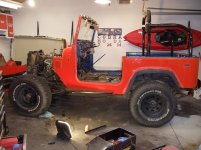
The new addition to the Toyota fleet is here! Picked up this 74 FJ40 in an estate sale. The previous owner was a Toyota enthusatist as well and kept good care of the mechanical functioning of the truck with a 2F engine swap with a 4 speed and Toyota mini truck power steering upgrade. Let the new project begin. :driving:

DSC03986.jpg


DSC03987.jpg
 

Attachments

  • DSC03986.jpg
    DSC03986.jpg
    86.4 KB · Views: 890
  • DSC03987.jpg
    DSC03987.jpg
    100.9 KB · Views: 906
Thanks guys. Who knows what it will turn into, from a restoration to a wheeler. I have no set plan, just happy to have my dream vehicle. :bravo:
 
The mods have been slow on the 4Runner for two reason; it's no fun working in the driveway when it is freezing outside and the newest project has gone under the knife taking up the garage space.

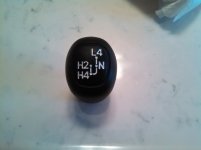
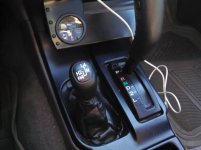
However, I noticed on another thread a forum member did a paint fill on the 4WD shift knob I thought it was a good idea and I gave it a try.

IMG_20150130_144114_307.jpg

It is just white nail polish. I'm sorry I do not remember who originally posted the idea to give credit to.

IMG_20150131_120304_710.jpg

And just for fun a photo of the other Toyota...I'll try not to turn this into a 40 build thread...

DSC04110.jpg
 

Attachments

  • IMG_20150130_144114_307.jpg
    IMG_20150130_144114_307.jpg
    67.5 KB · Views: 649
  • IMG_20150131_120304_710.jpg
    IMG_20150131_120304_710.jpg
    100.5 KB · Views: 659
  • DSC04110.jpg
    DSC04110.jpg
    61.9 KB · Views: 705
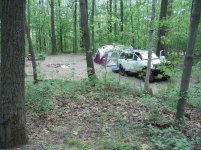
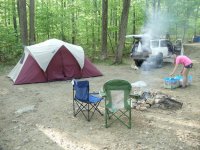
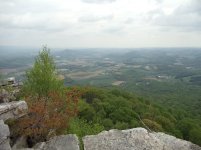
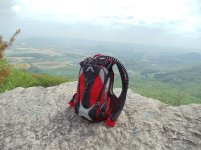
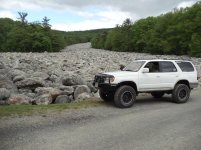
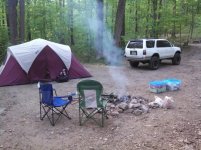
While the mods have slowed in the Runner due to "Project: Rotten Orange" (the fj40 build). That doesn't mean the truck isn't being used. Most recently it has been the "Expedition vehicle" being used to simply go explore the out doors.

With a little bit of Hiking and Biking and Camping have been the updates for this build thread.

DSC04453 edit.jpg


DSC04457.jpg


DSC04461.jpg


DSC04466.jpg


DSC04472.jpg


IMG_20150511_184611_346.jpg
 

Attachments

  • DSC04453 edit.jpg
    DSC04453 edit.jpg
    136.4 KB · Views: 574
  • DSC04457.jpg
    DSC04457.jpg
    138 KB · Views: 574
  • DSC04461.jpg
    DSC04461.jpg
    91.6 KB · Views: 582
  • DSC04466.jpg
    DSC04466.jpg
    108.5 KB · Views: 576
  • DSC04472.jpg
    DSC04472.jpg
    125.8 KB · Views: 575
  • IMG_20150511_184611_346.jpg
    IMG_20150511_184611_346.jpg
    74.6 KB · Views: 571
Last edited:
great thanks man. Gonna try this out this weekend. Gotta pull out the head unity anyway to replace the worn speakers.

Yes the thread posted above is the same write-up I used to do this mod. I wouldn't say it is an easy one but certainly not hard either. For me routing the antenna wire was the toughest part, using some thin wire works or a metal coat hanger is nice to fish the wire behind the dash.

One of the better mods I have done. When on the trail just unscrew the antenna and have no chance of it getting hung up!

Any other questions just let me know!
 
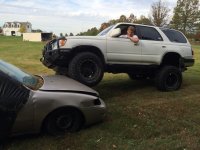
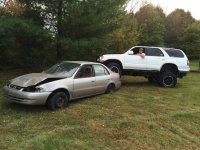
Did some back yard crawling in the Runner today. Corolla was a "totaled" right off after an accident. It was just a quick time to play on it after work, with some more time soon, we'll see what kind of corolla crawling the truck is capable of...

IMG952298.jpg


IMG952302.jpg
 

Attachments

  • IMG952298.jpg
    IMG952298.jpg
    114.8 KB · Views: 431
  • IMG952302.jpg
    IMG952302.jpg
    138.5 KB · Views: 433
I couldn't wait for the first snow fall after the new tires, I couldn't have been happier with the difference. But I didn't have much to compare to, since the first year had the very wore street tires with 90k on them.
41.gif
 

Members online

Forum statistics

Threads
278,316
Messages
3,554,112
Members
248,016
Latest member
Advally Service

Trending content

Back
Top