
Hey all,
quick run down on a fun little project i did over this past weekend.
Many of us have broken clocks, or clocks in our aftermarket stereos, so why let that space go to waste? For 15 bucks shipped to my door and about 3 hours of my time, i was able to get this result:
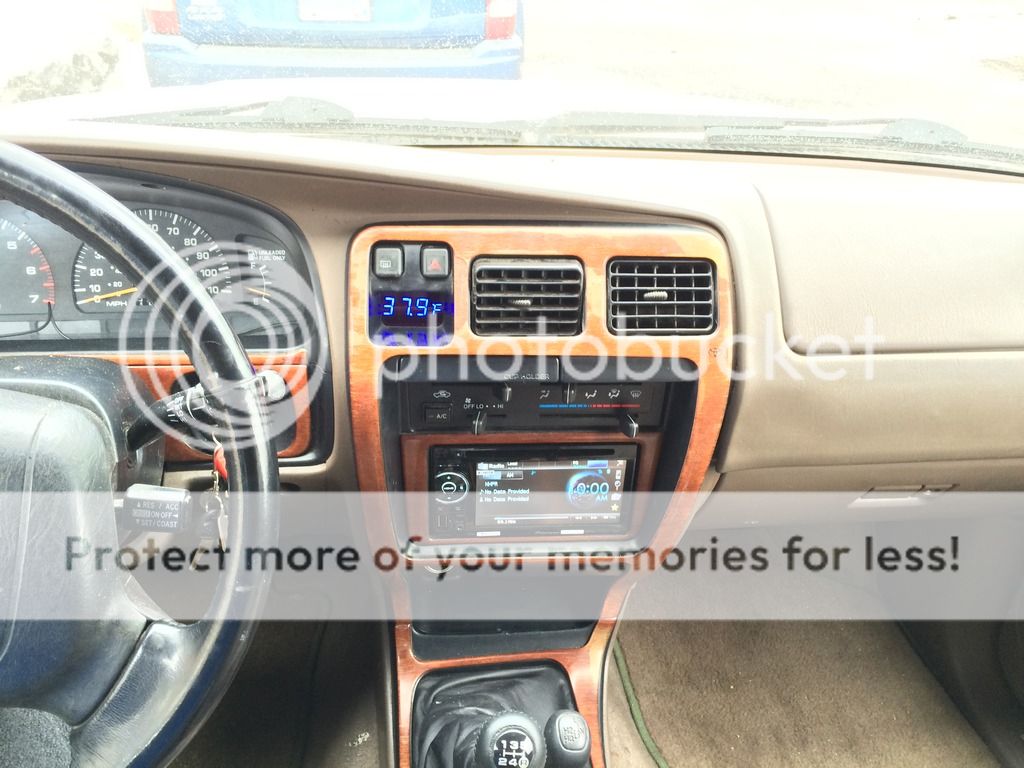
Step one, buy the digital gauge. found this gem:
Blue LED Temperature Display External Sensor
Part # 320-506 for partsexpress.com
Other models offer a red display as opposed to blue, or dual zone temp monitoring. Dimensions were very close to what i figured i could stuff in, and the price was so minimal, I took the plunge.
Step 2, trim to fit and mount-
Tools used:
1. cutting pliers (for cutting plastic)
2. soldering iron (for melting as well as "welding" plastic)
3. flat file (to file down any plastic not smooth after cutting)
3. glue gun (for final mounting and securing)
This is where some creativity was needed, as this unit is certainly larger than the clock and its plastic housing it replaces. I started by removing the plastic "snap mount points for the clock, and melting and filing down anything above the back (in dash) side of the original clock mount location, areas of this indicated by red lines. Next, i trimmed the upper right hand corner of the temp gauge housing, indicated by yellow line. With patience, this created a perfect, flush and aligned fit.
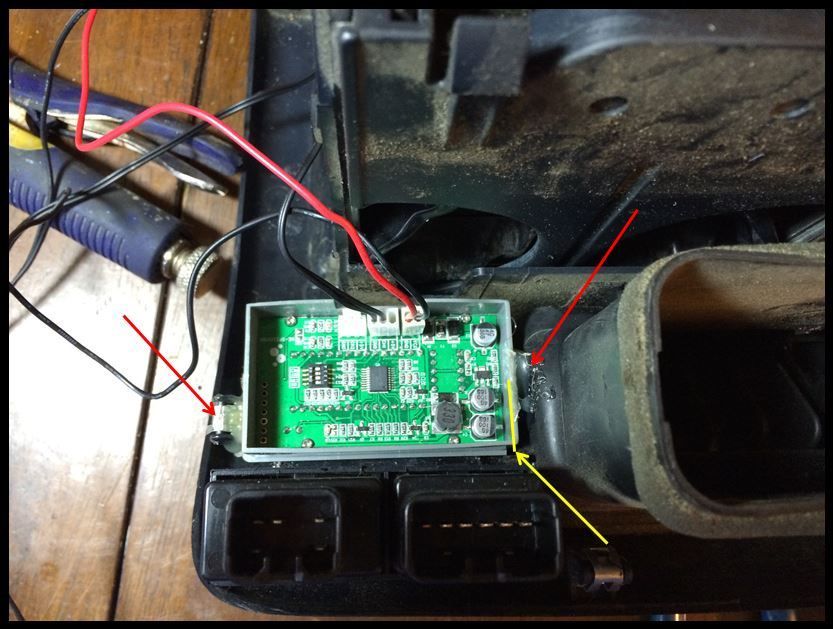
I would hate this if it were crooked, misaligned or otherwise looked improperly installed, but as mentioned, patience paid off here.
The only other dash modification was the removal of the in dash mount point that the now removed trim mount would snap into. Its the upper left most trim mount spot, cut it right out of the dash.
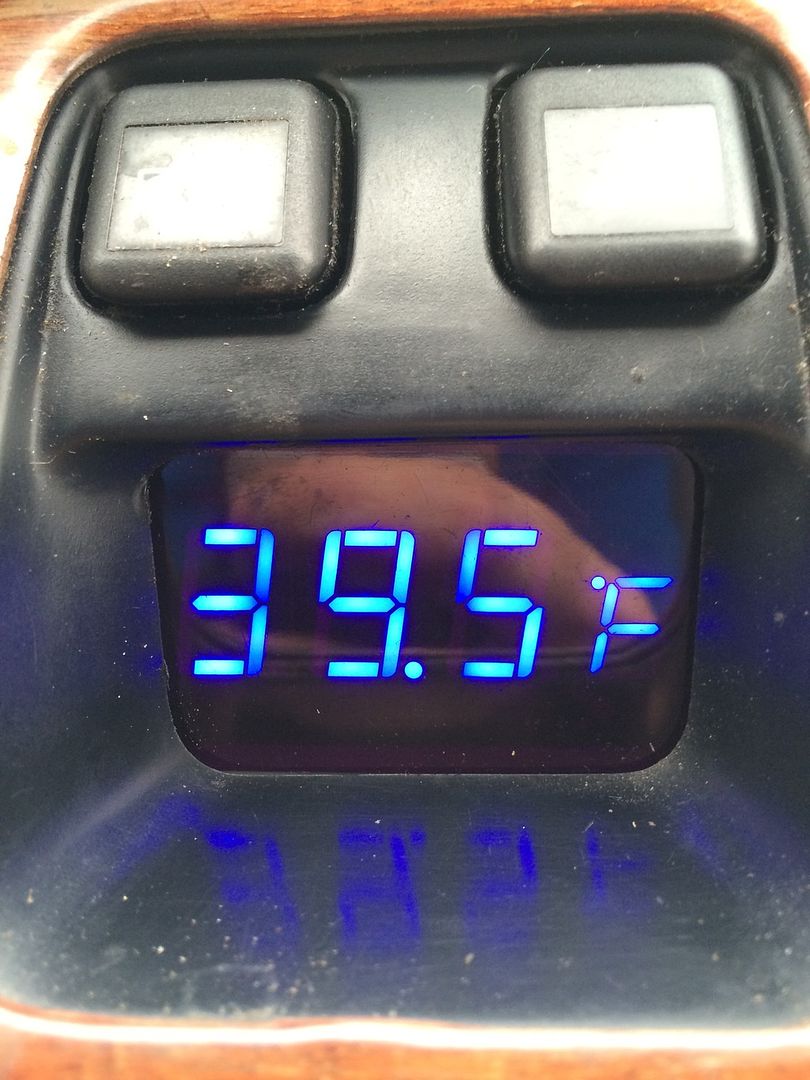
Step 3. Wire in
The temp guage came with a 38" long cable for the temperature probe itself, and of course, removing the clock frees up a switched 12V power source, so this is pretty straight forward. If memory serves correctly, grey with black stripe is positive and solid grey is negative, but always double check with a voltmeter. I was prepared to splice in a longer run, thinking 38" wasn't quite going to make the trip from the dash to the lower portion of the front bumper, but it somehow did (is it really only 38"? i never measured it). Ran it through the firewall on the drivers side footwell where the hood cable runs through. Note that for me, a previous alarm install left a small drilled hole through the rubber surrounding the hood latch cable, so I re-used this to get the probe through.
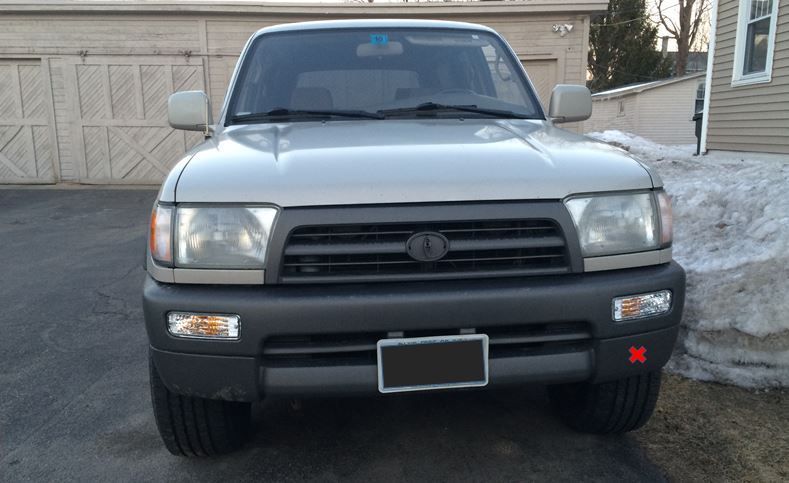
Final mount location is on the back side of where indicated by the red X, wire is secured with good old zip ties, with the probe essentially hanging in the air. According to the seller, its suitable for fish tanks, so getting this thing wet should not matter at all. A few messy rainy days in with no issues at all so far.
All in, i'm happy with the final fit and finish, the gauge seems to be quite accurate, (measured against my buddies 2014 Accord since we commute the same route, and his car and this were reporting the same through the short 15 mile run)
The blue color gauge is now my inspiration to replace all my dash lights with blue to get everything looking matched!
Any questions, please feel free to ask!
Thanks
quick run down on a fun little project i did over this past weekend.
Many of us have broken clocks, or clocks in our aftermarket stereos, so why let that space go to waste? For 15 bucks shipped to my door and about 3 hours of my time, i was able to get this result:
Step one, buy the digital gauge. found this gem:
Blue LED Temperature Display External Sensor
Part # 320-506 for partsexpress.com
Other models offer a red display as opposed to blue, or dual zone temp monitoring. Dimensions were very close to what i figured i could stuff in, and the price was so minimal, I took the plunge.
Step 2, trim to fit and mount-
Tools used:
1. cutting pliers (for cutting plastic)
2. soldering iron (for melting as well as "welding" plastic)
3. flat file (to file down any plastic not smooth after cutting)
3. glue gun (for final mounting and securing)
This is where some creativity was needed, as this unit is certainly larger than the clock and its plastic housing it replaces. I started by removing the plastic "snap mount points for the clock, and melting and filing down anything above the back (in dash) side of the original clock mount location, areas of this indicated by red lines. Next, i trimmed the upper right hand corner of the temp gauge housing, indicated by yellow line. With patience, this created a perfect, flush and aligned fit.
I would hate this if it were crooked, misaligned or otherwise looked improperly installed, but as mentioned, patience paid off here.
The only other dash modification was the removal of the in dash mount point that the now removed trim mount would snap into. Its the upper left most trim mount spot, cut it right out of the dash.
Step 3. Wire in
The temp guage came with a 38" long cable for the temperature probe itself, and of course, removing the clock frees up a switched 12V power source, so this is pretty straight forward. If memory serves correctly, grey with black stripe is positive and solid grey is negative, but always double check with a voltmeter. I was prepared to splice in a longer run, thinking 38" wasn't quite going to make the trip from the dash to the lower portion of the front bumper, but it somehow did (is it really only 38"? i never measured it). Ran it through the firewall on the drivers side footwell where the hood cable runs through. Note that for me, a previous alarm install left a small drilled hole through the rubber surrounding the hood latch cable, so I re-used this to get the probe through.
Final mount location is on the back side of where indicated by the red X, wire is secured with good old zip ties, with the probe essentially hanging in the air. According to the seller, its suitable for fish tanks, so getting this thing wet should not matter at all. A few messy rainy days in with no issues at all so far.
All in, i'm happy with the final fit and finish, the gauge seems to be quite accurate, (measured against my buddies 2014 Accord since we commute the same route, and his car and this were reporting the same through the short 15 mile run)
The blue color gauge is now my inspiration to replace all my dash lights with blue to get everything looking matched!
Any questions, please feel free to ask!
Thanks


