2TH4IST
Member
This thread is a work in progress! PLEASE CHECK THE FIRST POST FOR UPDATES
Edit 7-20-25 - the fan didn't end up working while driving. It was perfect idling. My guess is it stayed on while at speed and caused a sort of air lock. I'll dive into this a bit further, but for now I have the stock fan clutch and shroud back on.
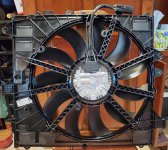
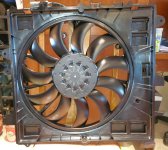
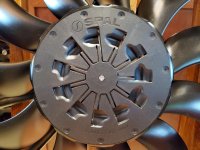
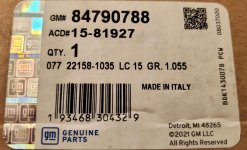
Ok fellas, here is the thread I promised regarding a e-fan swap. This is for a brushless fan set up. Specifically for a 2016+ camaro SS 19" brushless spal fan. Technically it's a 18" fan. I started doing research on pwm (pulse width modulation) brushless fans a few months ago.
I'll answer your question now, no, my 4runner isn't overheating, or having any kind of cooling issue right now. I am currently using the koyo aluminum radiator, and I like it.
I'm purely doing this mod for a few reasons:
1 - mechanical fans don't work great at low off road speeds.
2 - can turn it off for water crossings.
3 - I have a plate bumper, winch, big trans cooler, so 2/3rds of the rad is blocked from natural airflow.
Ok back to the e-fan. As I did my research I originally was looking into the 2 speed Ford taurus/lincoln mk8 fan. Well those cars are old now and finding them in a junk yard is very hard. Sure there are aftermarket (tyc, Dorman etc.) But they are proven to not perform like stock (amp draw and cfm). Also I'm not Ok with the amp draw on start up and running.
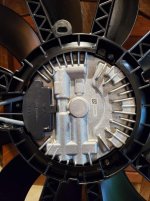
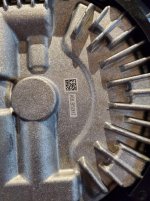
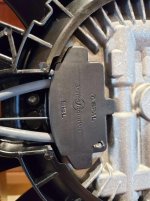
The spal camaro fan has "soft start" function which significantly reduces amp draw on start up. Yes this (spal camaro) fan draws around 77ish amps at full speed. But it should not have a need to run at full speed (unless your controller uses full speed for ac fan use). Also take a look at a SS camaro cooling stack, yikes! If this fan can keep that car cool, I have high hopes of it working well on the 4runner. Also to add, this fan might require a alternator upgrade.
Also lots of pics/info re: others using this fan for some crazy thick cooling stacks.
So onward I went with research. I found pwm brushless fans. Specifically Spal aftermarket. They are expensive and offered up to 16" easy to find and very hard to find 18" pwm brushless fans. So onward I read. I found this totally amazing 240 volvo website. It is a treasure trove of info! My God, basically everything I was looking for. Here is the site:
Brushless Cooling Fan Conversions
Read his site, then re-read it again. Only one thing I will completely disagree on is the delta pag fan being #1 on his list. I'll hold onto my opinions. Only thing I'll say is if it's to good to be true, it probably is. Do your own research on this brand.
So with that said more research I go. Radiator specs now. The oem 4runner (3rd gen v6) is as follows:
Oem core size - 22 5/8" by 25 1/4" with 1" thickness single pass
Koyo rad - 22 5/8" x 25 1/4" and 1.41" thick, "triple pass"**
CFS - 22 5/8 x 25 1/4" and 1.65" thick, single pass.
** triple pass and dual pass are descriptions from manufacture. Flow is down, up, down.
Coolant flow from the 5vz is out from the upper hose, through the radiator and out the bottom hose, through the thermostat and back into the engine. This is important for proper temp sensor location.
So I have found a seller on ebay that has the 18" spal brushless fans for sale.
SPAL 12v Brushless Axial Fan VA164-ABL806HT/R-116A | eBay
The fan is spal aftermarket line of fan. So per the 240 volvo site, spal changed the pwm signal to positive for aftermarket line of fans. Read his site again for further explanation. Spal offers their own sensor/fan controller for the AFTERMARKET fan line. These sensors WILL NOT WORK ON OEM SPAL FANS.
More digging for pwm control modules. Some are from 70$ up to and over 300$+. Lingenfelter's offering was looking really nice! Until I read with the ac activation, it sends the fan into full speed! Fire truck! But a jeep motor swap company had lingenfelter mod their software to turn fan on w/ac to 50% speed.
Lingenfelter Controller – Jeep Speed Shop
Delta pag also offers their controller, which I have confirmed via email with them, it is now user adjustable for fan speed with ac activation, sweet.
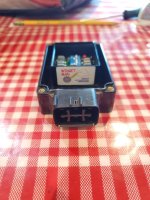
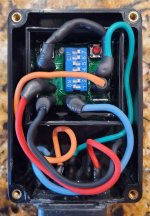
I found widgit man's pwm fan controller. 70$ or so, tiny and super easy to program. Runs fan at 50% plus current fan speed for ac. Can be programmed for an array of coolant temp sensors, including oem (not a fan of tapping into a ecm temp sensor). And can switch between positive and negative pwm modes (can use oem and aftermarket spal fans and any other pwm fan for that matter).This is the controller I went with.
VARIABLE PWM FAN CONTROL works with ANY sensor, compare to Lingenfelter VSFM-002 | eBay
It fits my needs to a T.
Ok with all this said, I bought the 16+ camaro fan, widget man controller, and some connectors for the hook up.
I'M NO LONGER GOING TO USE THE BELOW FAN SHROUD.
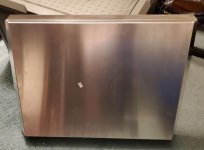
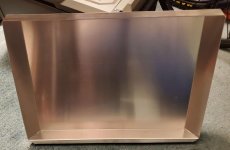
I also bought a dirt track fan shroud. It's not exactly the same size as the 4runners core size, but it is very close to the correct width. With some modding to make it the right height, it will fit. Here is the link:
Northern Z40023 High Performance Aluminum Engine Fan Shroud Kit for 31" Radiato | eBay
A northern radiator model # Z40023. I'll cover the mods when I get to that part. I'm also moving to a CSF radiator as well. It's thicker thus more heat rejection capability. So when I get that, I can start measuring for shroud mods. I'm also going to mod a aftermarket fan bracket to remove the pulleys to gain more clerance for fan.
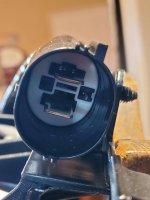
Also I'm running 8 awg wire to feed the fans with a midi blue sea fuse holder. 16awg wire for sensors and power & ground for the controller. The fan doesn't need a relay as well, since it has a soft start function its initial start up amp draw is low.
Wire was purchased from:
https://www.wireandsupply.com/
Connectors bought from both:
https://www.corsa-technic.com/item.php?item_id=1896&category_id=390
https://www.bmotorsports.com/shop/product_info.php/cPath/109_182/products_id/5780
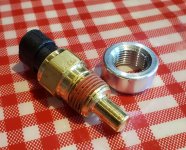
THIS ECT WONT FIT WHERE I WANT IT SO I WON'T BE USING IT, YOU CAN USE IT, JUST FIND A SUTABLE LOCATION.
Coolant temp sensor I'm planning on using:
https://www.bmotorsports.com/shop/product_info.php/cPath/129_142/products_id/398
https://www.bmotorsports.com/shop/product_info.php/products_id/849
UPDATE 7-4-25
I'm either going to use widget man's RTD sensor or tap into the oem toyota harness (make my own jumper for the 5vz). Down side is the wire is either 28awg or 30awg on the RTD, but I'll update which route I go.
Wigit man RTD
This is where I'm at thus far. I'll update and add pics as time comes/permits.
ADDED INFO:
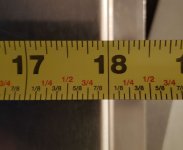
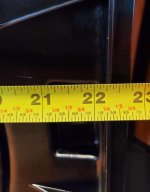
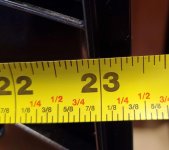
The shroud inner lip width: 22 5/16"
Shroud max outter: 23 3/8"
Shroud height: 22"
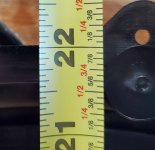
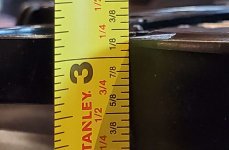
Shroud/fan thickness: 3 3/16"
Micked out the wire size was: 5.5mm or .218" (8 awg) od. But this could use a thicker insulation, so it could also be 10 awg. Spals aftermarket jumper harness is marked 10awg. Granted spal offers "aftermarket" brushless fans up to 16" that are easy to find. They do offer 18" fan, but are hard to find.
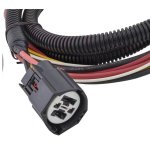
Spals "jumper harness"
Sensor hookup to fan harness:
Harness
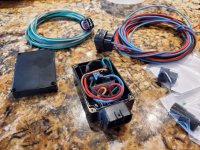
Or the whole wire kit with sensor:
Kit
Spals aftermarket temp sensors/control module:
185 on, 165 off
215 on, 190 off
https://www.speedwaymotors.com/SPAL...rature-Control-Sensor-175-195-Deg,497969.html
165 on, 140 off
Update:
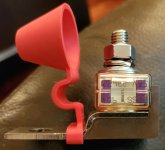
One step closer today, ordered the CSF radiator this AM through teq offroad. Also got the fuse for the fan as well. Circuit breakers don't work good under hoods. The heat from the engine can cause false trips. It's a blue sea fuse block with 90a terminal fuse. Went with 90a as the fan is close to 77a at full boar, add 10% above max load and it 88a. So 90a it is.
Fuse block
Terminal fuse
New info
**This is being mocked up on a CSF radiator, I'll check on the koyo, I don't have a stock rad **
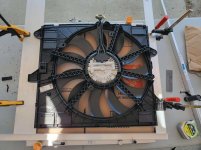
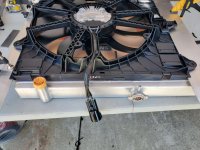
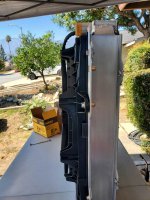
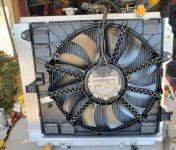
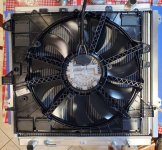
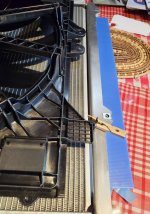
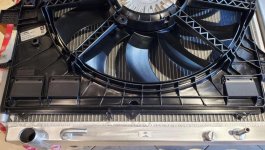
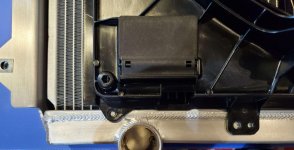
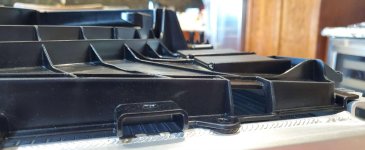
Got the CSF radiator in today and it's fancy. Really really wish they would have stuck with the oem style mounts though. Other then that it's good. So with that said, began fitting the fan. I measured the core clerance with the koyo core to crank pulley and ps pulley and both were ~6 inches. Phew lots of room. So I mock up the camaro shroud/fan assembly and by golly, it's a darn close fit. 4 inches on one side and about 1 inch on the bottom. So I might forgo the aluminum shroud and just run with the stock camaro complete unit. Trying to keep this as easy as a swap as I can incase others want to do this too.
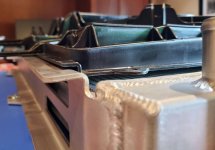
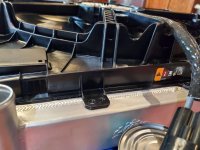
I will probably utilize the U oem mounts and just bend them out of aluminum and braze them onto some flat stock aluminum. So 2 cradle mounts and 2 top bolt on mounts. So it looks like I'll have to cut off all the tabs on the top and the bottom of the shroud and use aluminum 90° and rivet or bolt on to the top and bottom to seal it against the radiator (using foam). I have some silicon radiator flaps I will add down the side where the 4" is.
Ok, so there are 4 options (out of the car) that I can see. Top right biased, fan closer to pass side and closer to the top. Bottom right, biased pass side and toward the bottom. Top left, biased drivers side and towards the top. Bottom left, biased drivers side and towards the bottom. You could center it too, but there will be 4 mounting plates needed instead of just 2 "filler" plates used. Now this can all change when I mock up in the 4runner.
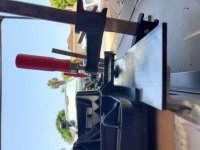
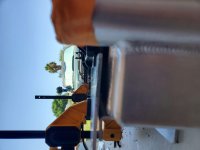
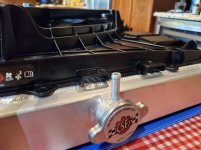
The csf core to fan motor, or highest point is 3 5/8". Just from that I'll have over 2 3/8" of clerance, again that might change in the car. Also I bought a El cheapo fan bearing mount and pressed out the bearing, and will cap it off to keep debris out, to gain even more clerance. Any ways here are some pics.
7-12-25 update. Biasing the fan top right to add clerance at bottom for the ps hoses and trans cooler hose. Found out the csf rad is a single pass like oem, IMHO, the CSF is way over priced for what it is. I'll still run it for now to see if the extra thickness benefits heat rejection or makes it a pain to get good airflow through the heat exchange stack. But then again the heat stack on the camaro this fan came off of is double the thickness of the 4runners lol.
Edit 7-20-25 - the fan didn't end up working while driving. It was perfect idling. My guess is it stayed on while at speed and caused a sort of air lock. I'll dive into this a bit further, but for now I have the stock fan clutch and shroud back on.
Ok fellas, here is the thread I promised regarding a e-fan swap. This is for a brushless fan set up. Specifically for a 2016+ camaro SS 19" brushless spal fan. Technically it's a 18" fan. I started doing research on pwm (pulse width modulation) brushless fans a few months ago.
I'll answer your question now, no, my 4runner isn't overheating, or having any kind of cooling issue right now. I am currently using the koyo aluminum radiator, and I like it.
I'm purely doing this mod for a few reasons:
1 - mechanical fans don't work great at low off road speeds.
2 - can turn it off for water crossings.
3 - I have a plate bumper, winch, big trans cooler, so 2/3rds of the rad is blocked from natural airflow.
Ok back to the e-fan. As I did my research I originally was looking into the 2 speed Ford taurus/lincoln mk8 fan. Well those cars are old now and finding them in a junk yard is very hard. Sure there are aftermarket (tyc, Dorman etc.) But they are proven to not perform like stock (amp draw and cfm). Also I'm not Ok with the amp draw on start up and running.
The spal camaro fan has "soft start" function which significantly reduces amp draw on start up. Yes this (spal camaro) fan draws around 77ish amps at full speed. But it should not have a need to run at full speed (unless your controller uses full speed for ac fan use). Also take a look at a SS camaro cooling stack, yikes! If this fan can keep that car cool, I have high hopes of it working well on the 4runner. Also to add, this fan might require a alternator upgrade.
Also lots of pics/info re: others using this fan for some crazy thick cooling stacks.
So onward I went with research. I found pwm brushless fans. Specifically Spal aftermarket. They are expensive and offered up to 16" easy to find and very hard to find 18" pwm brushless fans. So onward I read. I found this totally amazing 240 volvo website. It is a treasure trove of info! My God, basically everything I was looking for. Here is the site:
Brushless Cooling Fan Conversions
Read his site, then re-read it again. Only one thing I will completely disagree on is the delta pag fan being #1 on his list. I'll hold onto my opinions. Only thing I'll say is if it's to good to be true, it probably is. Do your own research on this brand.
So with that said more research I go. Radiator specs now. The oem 4runner (3rd gen v6) is as follows:
Oem core size - 22 5/8" by 25 1/4" with 1" thickness single pass
Koyo rad - 22 5/8" x 25 1/4" and 1.41" thick, "triple pass"**
CFS - 22 5/8 x 25 1/4" and 1.65" thick, single pass.
** triple pass and dual pass are descriptions from manufacture. Flow is down, up, down.
Coolant flow from the 5vz is out from the upper hose, through the radiator and out the bottom hose, through the thermostat and back into the engine. This is important for proper temp sensor location.
So I have found a seller on ebay that has the 18" spal brushless fans for sale.
SPAL 12v Brushless Axial Fan VA164-ABL806HT/R-116A | eBay
The fan is spal aftermarket line of fan. So per the 240 volvo site, spal changed the pwm signal to positive for aftermarket line of fans. Read his site again for further explanation. Spal offers their own sensor/fan controller for the AFTERMARKET fan line. These sensors WILL NOT WORK ON OEM SPAL FANS.
More digging for pwm control modules. Some are from 70$ up to and over 300$+. Lingenfelter's offering was looking really nice! Until I read with the ac activation, it sends the fan into full speed! Fire truck! But a jeep motor swap company had lingenfelter mod their software to turn fan on w/ac to 50% speed.
Lingenfelter Controller – Jeep Speed Shop
Delta pag also offers their controller, which I have confirmed via email with them, it is now user adjustable for fan speed with ac activation, sweet.
I found widgit man's pwm fan controller. 70$ or so, tiny and super easy to program. Runs fan at 50% plus current fan speed for ac. Can be programmed for an array of coolant temp sensors, including oem (not a fan of tapping into a ecm temp sensor). And can switch between positive and negative pwm modes (can use oem and aftermarket spal fans and any other pwm fan for that matter).This is the controller I went with.
VARIABLE PWM FAN CONTROL works with ANY sensor, compare to Lingenfelter VSFM-002 | eBay
It fits my needs to a T.
Ok with all this said, I bought the 16+ camaro fan, widget man controller, and some connectors for the hook up.
I'M NO LONGER GOING TO USE THE BELOW FAN SHROUD.
I also bought a dirt track fan shroud. It's not exactly the same size as the 4runners core size, but it is very close to the correct width. With some modding to make it the right height, it will fit. Here is the link:
Northern Z40023 High Performance Aluminum Engine Fan Shroud Kit for 31" Radiato | eBay
A northern radiator model # Z40023. I'll cover the mods when I get to that part. I'm also moving to a CSF radiator as well. It's thicker thus more heat rejection capability. So when I get that, I can start measuring for shroud mods. I'm also going to mod a aftermarket fan bracket to remove the pulleys to gain more clerance for fan.
Also I'm running 8 awg wire to feed the fans with a midi blue sea fuse holder. 16awg wire for sensors and power & ground for the controller. The fan doesn't need a relay as well, since it has a soft start function its initial start up amp draw is low.
Wire was purchased from:
https://www.wireandsupply.com/
Connectors bought from both:
https://www.corsa-technic.com/item.php?item_id=1896&category_id=390
https://www.bmotorsports.com/shop/product_info.php/cPath/109_182/products_id/5780
THIS ECT WONT FIT WHERE I WANT IT SO I WON'T BE USING IT, YOU CAN USE IT, JUST FIND A SUTABLE LOCATION.
Coolant temp sensor I'm planning on using:
https://www.bmotorsports.com/shop/product_info.php/cPath/129_142/products_id/398
https://www.bmotorsports.com/shop/product_info.php/products_id/849
UPDATE 7-4-25
I'm either going to use widget man's RTD sensor or tap into the oem toyota harness (make my own jumper for the 5vz). Down side is the wire is either 28awg or 30awg on the RTD, but I'll update which route I go.
Wigit man RTD
This is where I'm at thus far. I'll update and add pics as time comes/permits.
ADDED INFO:
The shroud inner lip width: 22 5/16"
Shroud max outter: 23 3/8"
Shroud height: 22"
Shroud/fan thickness: 3 3/16"
Micked out the wire size was: 5.5mm or .218" (8 awg) od. But this could use a thicker insulation, so it could also be 10 awg. Spals aftermarket jumper harness is marked 10awg. Granted spal offers "aftermarket" brushless fans up to 16" that are easy to find. They do offer 18" fan, but are hard to find.
Spals "jumper harness"
Sensor hookup to fan harness:
Harness
Or the whole wire kit with sensor:
Kit
Spals aftermarket temp sensors/control module:
185 on, 165 off
215 on, 190 off
https://www.speedwaymotors.com/SPAL...rature-Control-Sensor-175-195-Deg,497969.html
165 on, 140 off
Update:
One step closer today, ordered the CSF radiator this AM through teq offroad. Also got the fuse for the fan as well. Circuit breakers don't work good under hoods. The heat from the engine can cause false trips. It's a blue sea fuse block with 90a terminal fuse. Went with 90a as the fan is close to 77a at full boar, add 10% above max load and it 88a. So 90a it is.
Fuse block
Terminal fuse
New info
**This is being mocked up on a CSF radiator, I'll check on the koyo, I don't have a stock rad **
Got the CSF radiator in today and it's fancy. Really really wish they would have stuck with the oem style mounts though. Other then that it's good. So with that said, began fitting the fan. I measured the core clerance with the koyo core to crank pulley and ps pulley and both were ~6 inches. Phew lots of room. So I mock up the camaro shroud/fan assembly and by golly, it's a darn close fit. 4 inches on one side and about 1 inch on the bottom. So I might forgo the aluminum shroud and just run with the stock camaro complete unit. Trying to keep this as easy as a swap as I can incase others want to do this too.
I will probably utilize the U oem mounts and just bend them out of aluminum and braze them onto some flat stock aluminum. So 2 cradle mounts and 2 top bolt on mounts. So it looks like I'll have to cut off all the tabs on the top and the bottom of the shroud and use aluminum 90° and rivet or bolt on to the top and bottom to seal it against the radiator (using foam). I have some silicon radiator flaps I will add down the side where the 4" is.
Ok, so there are 4 options (out of the car) that I can see. Top right biased, fan closer to pass side and closer to the top. Bottom right, biased pass side and toward the bottom. Top left, biased drivers side and towards the top. Bottom left, biased drivers side and towards the bottom. You could center it too, but there will be 4 mounting plates needed instead of just 2 "filler" plates used. Now this can all change when I mock up in the 4runner.
The csf core to fan motor, or highest point is 3 5/8". Just from that I'll have over 2 3/8" of clerance, again that might change in the car. Also I bought a El cheapo fan bearing mount and pressed out the bearing, and will cap it off to keep debris out, to gain even more clerance. Any ways here are some pics.
7-12-25 update. Biasing the fan top right to add clerance at bottom for the ps hoses and trans cooler hose. Found out the csf rad is a single pass like oem, IMHO, the CSF is way over priced for what it is. I'll still run it for now to see if the extra thickness benefits heat rejection or makes it a pain to get good airflow through the heat exchange stack. But then again the heat stack on the camaro this fan came off of is double the thickness of the 4runners lol.
Attachments
Last edited:








 I must be lucky as I don't have the overheat radiator issues. I can understand an electric fan to help cool things down. Especially on a heavy modified rigs.. Good job. I hope it works out as your hoping it will.