lightfreak
New member
Exterior Door Handle Removal Tutorial - 4th Generation 4Runner ('03-'09)
Those of us in the salt belt have this nagging rust problem under the exterior door handles. It's been discussed here:
http://www.toyota-4runner.org/4th-gen-t4rs/64327-rust-beneath-door-handle-s.html
Mine started showing rust several years ago and has gotten worse over time.
Whether you have rust or not, if you're just replacing the handle for some other reason , I highly recommend getting these 3 parts from Toyota, the original nut and bolt are very likely seized and you won't be able to re-use them.
You'll need one of each per door. Same for all 4 doors.
90179-05118 nut
90386-08066 plastic bushing
69296-48010 bolt
The nut is updated from Toyota and is now treated and should not rust in the future.

This first post covers the rear door handle removal, same procedure for both rear doors. Pics will show the driver's side rear door.
Will update thread later with front door tutorials. Driver Front and Passenger Front are slightly different due to the key lock.
Reference diagram of the rear door lock and handle

First you'll need to remove the inner door panel to gain access to everything. Here's a video showing how.
https://www.youtube.com/watch?v=bFhs9b_SBz8
TOOLS
No.2 Phillips
T-27 Torx Head
5/32 Allen Head
4mm Punch
Hammer
Panel Removal tool (if metal, wrap it with tape so you don't scratch your paint)
Tools need to be 4+ inches long to reach into the door.
I also used a stubby No.2 Phillips screwdriver for the screw holding the inner door handle/lock to the door panel, I find it easier.
Socket wrench and penetrating lubricant will also come in handy


Once you have the door panel removed, peel back the vapor barrier carefully, about half way. You can re-seal it later when you're done.

Note the 2 areas marked with a red arrow.
Peel off the white sticker covering the hole. There is a screw behind there you need access to.
Unhook the white connector.
Make note of the black ring around the connector, this ring is part of the lock mechinism inside the door.
Also make note of the blue film in the center of the vapor barrier , it has a slit in it which will come in handy shortly.
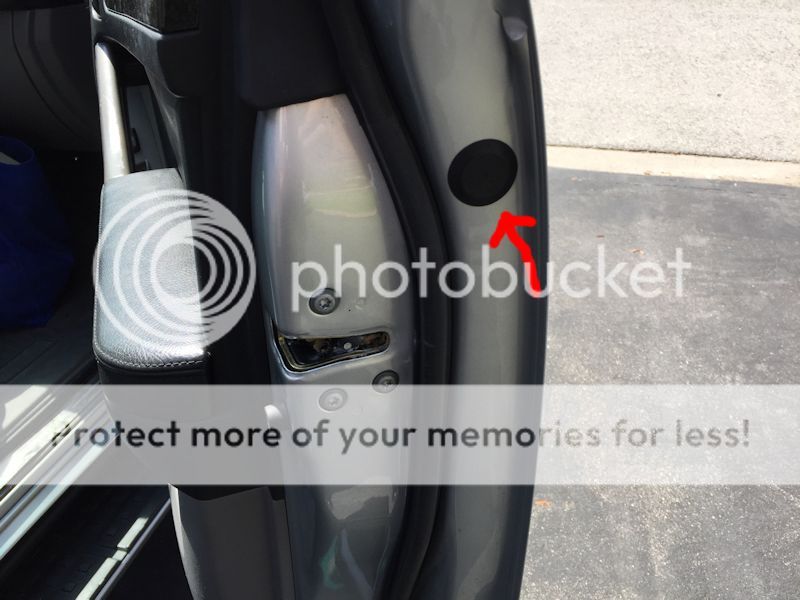
Next find the 3 torx screws on the side of the door, these hold in the lock mechnism.
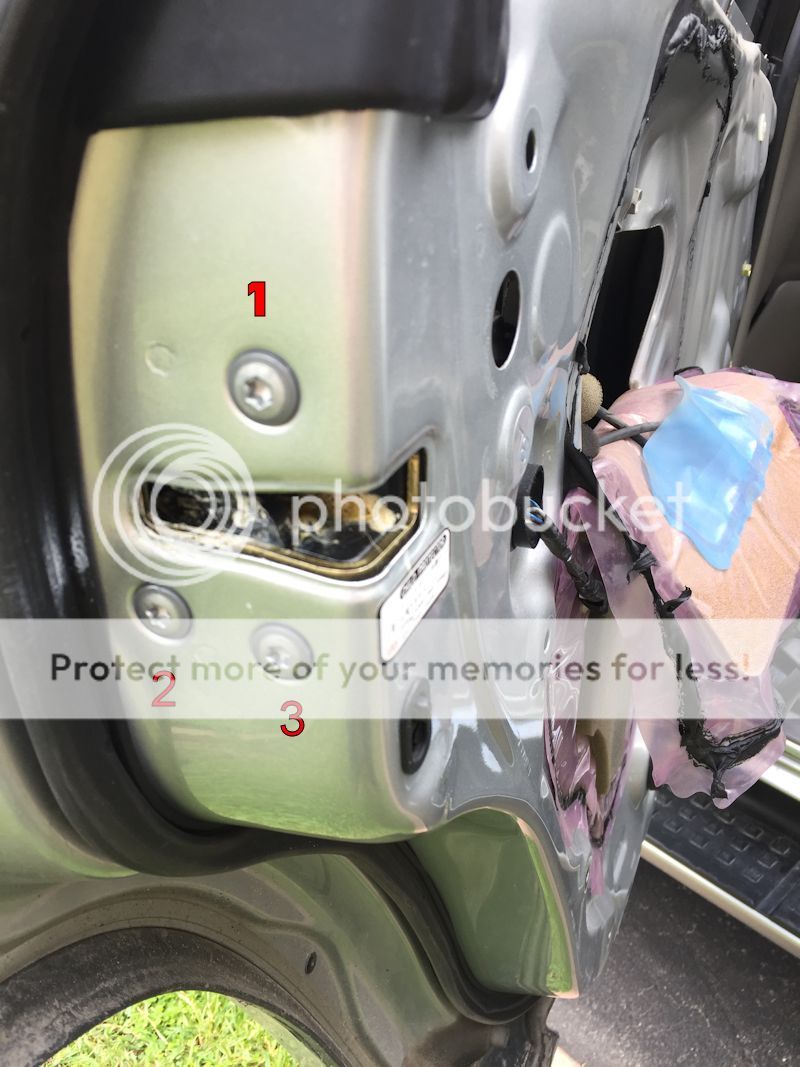
Remove screws , socket wrench with torx head will come in handy here, they are on pretty tight.
The lock mechanism has 2 cables coming from it, and has the inner door handle/lock button on the other end of it.
To properly remove the lock mechanism, while supporting the lock on the screws side with your fingers, push the black ring through the hole until it clears,
then lower the lock mechanism 2 inches or so, then fish it out towards the opening of the vapor barrier.
Do this carefully, there is a plastic lever on the inside that interacts with the lock mech. Dropping it 2 inches will clear this lever. More on this plastic lever later.
Should look like this

Run the cables and inner door handle through the slit in the middle of the vapor barrier. Put aside.
With that out of the way now you can start taking apart the plastic door handle frame support which sits inside the door.
Look through the hole where you removed the white sticker earlier, there is an allen screw there.

Unscrew it 5 or 6 rotations until fully loose. NOTE this screw does NOT come out, there is a retainer in the frame support holding it in place. You just need to loosen it in order to remove the cap on the other side.
Here is the cap on the other side:

While holding the door handle slightly open, use your panel remover tool and pry out the flat side of the cap. It should pop right out.
Should look like this

Next you're going to remove the exterior door handle.

Get a good grip of the handle, give it a good tug in the direction of the arrow. Once released you can wiggle it out.

Next remove the black rubber pad that sits under the handle. (you can remove the other pad too, or just leave it on the door)
Should now look like this, revealing the rusted nut.

The nut clamps against the door skin. Make a mental note of this for later.
Next look through the vapor barrier opening, towards the top, you should see this.

That is the torx head bolt that is likely seized.
Give it a good twist and it should snap off clean.
Then take your punch and hammer and wack the bolt/nut from the inside out.
Get a friend to hold the door while you wack (LOL), or support the door with something sturdy.
I soaked it in Seafoam Deep Creep penetrating spray for a few minutes. Took a few hard wacks to pop out.

Once the nut is out, the door handle frame support should now be free.
Back to the exterior side, use some rubbing compound or scratch remover cream to clean the rust.

The new bushing slips over the new nut like so

Now it's just a matter of reversing all the steps.
When you're re-installing the door lock mechanism, swing the lever on the frame support towards the exterior, then put the lock mech in place ensuring the lever catches the part on the loch mech.
Lock mech on the left, lever from frame support on the right.

Another view

When done , I put a piece of tape over the hole where the sticker used to be, and greased the lock mech.
Should take about 30 minutes or less to complete one door.
Good luck!
---
--
-
Those of us in the salt belt have this nagging rust problem under the exterior door handles. It's been discussed here:
http://www.toyota-4runner.org/4th-gen-t4rs/64327-rust-beneath-door-handle-s.html
Mine started showing rust several years ago and has gotten worse over time.
Whether you have rust or not, if you're just replacing the handle for some other reason , I highly recommend getting these 3 parts from Toyota, the original nut and bolt are very likely seized and you won't be able to re-use them.
You'll need one of each per door. Same for all 4 doors.
90179-05118 nut
90386-08066 plastic bushing
69296-48010 bolt
The nut is updated from Toyota and is now treated and should not rust in the future.
This first post covers the rear door handle removal, same procedure for both rear doors. Pics will show the driver's side rear door.
Will update thread later with front door tutorials. Driver Front and Passenger Front are slightly different due to the key lock.
Reference diagram of the rear door lock and handle
First you'll need to remove the inner door panel to gain access to everything. Here's a video showing how.
https://www.youtube.com/watch?v=bFhs9b_SBz8
TOOLS
No.2 Phillips
T-27 Torx Head
5/32 Allen Head
4mm Punch
Hammer
Panel Removal tool (if metal, wrap it with tape so you don't scratch your paint)
Tools need to be 4+ inches long to reach into the door.
I also used a stubby No.2 Phillips screwdriver for the screw holding the inner door handle/lock to the door panel, I find it easier.
Socket wrench and penetrating lubricant will also come in handy
Once you have the door panel removed, peel back the vapor barrier carefully, about half way. You can re-seal it later when you're done.
Note the 2 areas marked with a red arrow.
Peel off the white sticker covering the hole. There is a screw behind there you need access to.
Unhook the white connector.
Make note of the black ring around the connector, this ring is part of the lock mechinism inside the door.
Also make note of the blue film in the center of the vapor barrier , it has a slit in it which will come in handy shortly.
Next find the 3 torx screws on the side of the door, these hold in the lock mechnism.
Remove screws , socket wrench with torx head will come in handy here, they are on pretty tight.
The lock mechanism has 2 cables coming from it, and has the inner door handle/lock button on the other end of it.
To properly remove the lock mechanism, while supporting the lock on the screws side with your fingers, push the black ring through the hole until it clears,
then lower the lock mechanism 2 inches or so, then fish it out towards the opening of the vapor barrier.
Do this carefully, there is a plastic lever on the inside that interacts with the lock mech. Dropping it 2 inches will clear this lever. More on this plastic lever later.
Should look like this
Run the cables and inner door handle through the slit in the middle of the vapor barrier. Put aside.
With that out of the way now you can start taking apart the plastic door handle frame support which sits inside the door.
Look through the hole where you removed the white sticker earlier, there is an allen screw there.
Unscrew it 5 or 6 rotations until fully loose. NOTE this screw does NOT come out, there is a retainer in the frame support holding it in place. You just need to loosen it in order to remove the cap on the other side.
Here is the cap on the other side:
While holding the door handle slightly open, use your panel remover tool and pry out the flat side of the cap. It should pop right out.
Should look like this
Next you're going to remove the exterior door handle.
Get a good grip of the handle, give it a good tug in the direction of the arrow. Once released you can wiggle it out.
Next remove the black rubber pad that sits under the handle. (you can remove the other pad too, or just leave it on the door)
Should now look like this, revealing the rusted nut.
The nut clamps against the door skin. Make a mental note of this for later.
Next look through the vapor barrier opening, towards the top, you should see this.
That is the torx head bolt that is likely seized.
Give it a good twist and it should snap off clean.
Then take your punch and hammer and wack the bolt/nut from the inside out.
Get a friend to hold the door while you wack (LOL), or support the door with something sturdy.
I soaked it in Seafoam Deep Creep penetrating spray for a few minutes. Took a few hard wacks to pop out.
Once the nut is out, the door handle frame support should now be free.
Back to the exterior side, use some rubbing compound or scratch remover cream to clean the rust.
The new bushing slips over the new nut like so
Now it's just a matter of reversing all the steps.
When you're re-installing the door lock mechanism, swing the lever on the frame support towards the exterior, then put the lock mech in place ensuring the lever catches the part on the loch mech.
Lock mech on the left, lever from frame support on the right.
Another view
When done , I put a piece of tape over the hole where the sticker used to be, and greased the lock mech.
Should take about 30 minutes or less to complete one door.
Good luck!
---
--
-