
You are using an out of date browser. It may not display this or other websites correctly.
You should upgrade or use an alternative browser.
You should upgrade or use an alternative browser.
DIY: Replacing 3rd gen alternator
- Thread starter War Sprout
- Start date
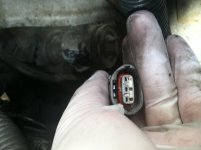
replaced my alternator with a duralast from autozone, in a 172k miles 1997 SR5. the 3 prong plug connector looks pretty shot. i've attached a photo for review. my battery light stays on, and i replaced the old one with a battery with 10 cold cranking amps less than the old one. guy at the shop said it shouldn't matter, but my real concern is the shot connector. edit: i'd like to add that my new battery won't hold a charge, even though i replaced the alternator. i'm not sure if it's a shot connector or a bad replacement alternator.
Attachments
Last edited:

mwm695
New member
@%1;War Sprout
Curious how many miles you have on your truck. My alternator went bad on mine right around 175,000.
Mine went bad at 171k. Started the truck up, drove 5 mins to the gas station, pulled off to the side when I finished to wait for a friend, then nada. I could tell it was going because when I turned my lights on, the engine started to whine and act like it had quite the strain on it.
Re-man put in by my local mechanic, good as new. I wish I had this thread then, could have saved me a couple hundred bucks.
@%1; an plans to replace the A/C Compressor? That's next on the list Haha.
 hoto:
hoto:Just to update if anybody gets stuck on this, the lower bracket arm is adjustable. Just follow the arm and it will take you to a hidden bolt, I think it's a 14mm. Just loosen that, get the lower alternator bolt on and then re-tighten the hidden lower bracket arm. If I would have read about this I would have gotten the whole thing done in 20 minutes, instead it took me 2 hours, bc I put the original alternator back on to see if my new/used one was too big, but I couldn't get the original one back in either. Somehow the bracket moved on me and I didn't know it.
My alternator died at 157,864. I'm going to see if it's the brushes. If so I want to say the brushes (pn 27370-35060) for $15.00 should be a PM item.
My alternator died at 157,864. I'm going to see if it's the brushes. If so I want to say the brushes (pn 27370-35060) for $15.00 should be a PM item.
Last edited:
camdenbuck
New member
Duralast or CarQuest
Nice tutorial.
Will use the wheel well technique this time.
Does it make a difference whether it is Duralast or Carquest? Are they generally "drop right in" part?
Thanks
Nice tutorial.
Will use the wheel well technique this time.
Does it make a difference whether it is Duralast or Carquest? Are they generally "drop right in" part?
Thanks
Last edited:
Or just lift the truck higher. I had NO issues getting to my alternator when it went out. .01
.
Not necessairly true......
Good idea.
One thing I don't thing people really understand, is that there are better alternators than the whimpy little 80amp that Toyota puts in the trucks.
I'm running the CS-144 out of a '95 Caddy. It puts out 140amps. Plenty to run the truck, lights, ect ect. And for <150, why not? You're spending that much to replace the measly 80amp one?
I've been running it for 5-6 months now, on the stock wiring, and haven't had any issues at all.
Just my .01......
any follow up or long term results on this yet ? Everything still good ? Is it plug and play with the stock wire connectors ? Pulley ?
if its that simple, when mine goes....ill look into that
more power, if the wires can handle it is always a good thing, esp if your gonna start running more things like running lights, driving lights, 12 volt comverters....etc..etc
Last edited:

Doc2012
Senior Member
any follow up or long term results on this yet ? Everything still good ? Is it plug and play with the stock wire connectors ? Pulley ?
if its that simple, when mine goes....ill look into that
more power, if the wires can handle it is always a good thing, esp if your gonna start running more things like running lights, driving lights, 12 volt comverters....etc..etc
No issues at all. Just get the adapter mentioned in my thread and you're good to go.
nathansfight
New member
how do you remove the plastic cap covering the alternator wire, i cant figure out how to take off the gray cap with out breaking it off.
I changed out mine a few months ago, and a strange thing happened.....
It Turned RED!!!

$550 Unit for only $150. Couldn't pass it up.
WOW! That is a steal, do you know how many amps thats putting out now? And do you have a sound system?

psraff
New member
WOW! That is a steal, do you know how many amps thats putting out now? And do you have a sound system?
240 or 250 Amps I believe. Custom made for higher idle amps, but I don't remember what. I talked to them on the phone and gave them the serial number and he gave me some details. I asked for an email so I could keep track of it and never got it. Been wanting to call them again.
No Stereo System. But will have large inverter soon and other things planed.
240 or 250 Amps I believe. Custom made for higher idle amps, but I don't remember what. I talked to them on the phone and gave them the serial number and he gave me some details. I asked for an email so I could keep track of it and never got it. Been wanting to call them again.
No Stereo System. But will have large inverter soon and other things planed.
Nice maybe think about putting a second battery in also.

jstim
New member
I changed out mine a few months ago, and a strange thing happened.....
It Turned RED!!!
$550 Unit for only $150. Couldn't pass it up.
So how do you think that alternator is? If you had to rate performance since you got it? I mean...I’m not gonna be getting a deal like you did...I wish. I’m thinking two batteries later on maybe, and the winch. Considering the 180 amp upgrade since my alternator I crapping out.

calimobber
Member
Unless you got a crazy deal like him I would never consider anything other than the ac-delco setup.
https://www.amazon.com/gp/product/B007QBQJHY/ref=oh_aui_detailpage_o03_s00?ie=UTF8&psc=1
Clipping the coupon you only spend like $85 shipped.
I got this one for $60 shipped in a damaged box item. All you need to adapt this is 4 washers and a chevy to toyota adaptor($20). My stock belt fix just fine(installed 3 years ago) and it still solid.
This baby puts out 100amps at idle and 150amp at like 1200rpm. I have 2 batteries, 1000w inverter, arb fridge, led lights, subwoofer. Ive never seen any signs of lack of power ever. But to be honest even the stock alternator puts out a ton of power and I didn't notice anything while running it.
unless your batteries are dead and you have every accessory on you alternator will never even run at max amps.
https://www.amazon.com/gp/product/B007QBQJHY/ref=oh_aui_detailpage_o03_s00?ie=UTF8&psc=1
Clipping the coupon you only spend like $85 shipped.
I got this one for $60 shipped in a damaged box item. All you need to adapt this is 4 washers and a chevy to toyota adaptor($20). My stock belt fix just fine(installed 3 years ago) and it still solid.
This baby puts out 100amps at idle and 150amp at like 1200rpm. I have 2 batteries, 1000w inverter, arb fridge, led lights, subwoofer. Ive never seen any signs of lack of power ever. But to be honest even the stock alternator puts out a ton of power and I didn't notice anything while running it.
unless your batteries are dead and you have every accessory on you alternator will never even run at max amps.

octanejunkie
Elite Member
:worthless
Photobucket strikes again!
DIY: Replacing Alternator 3rd gen V6
What you will need:
new or remanufactured alternator
12mm Deep socket
14mm, and 10mm sockets
Di-electric grease
band-aids
gloves
electrical cleaner
Notice: While you have the alternator out, its a great time to replace the 4ga wires from the battery to alternator and the battery to engine ground.
Also, the adjuster bolt may be seized, so be ready to make a run to the hardware store for a replacement.
Because this was my first time replacing this part, it took me a little over an hour, from start to finish. If I was to do it again, it would probably take me about 15 minutes. The vehicle used in the demonstration is my 1997 limited 4x4. So let's get started!
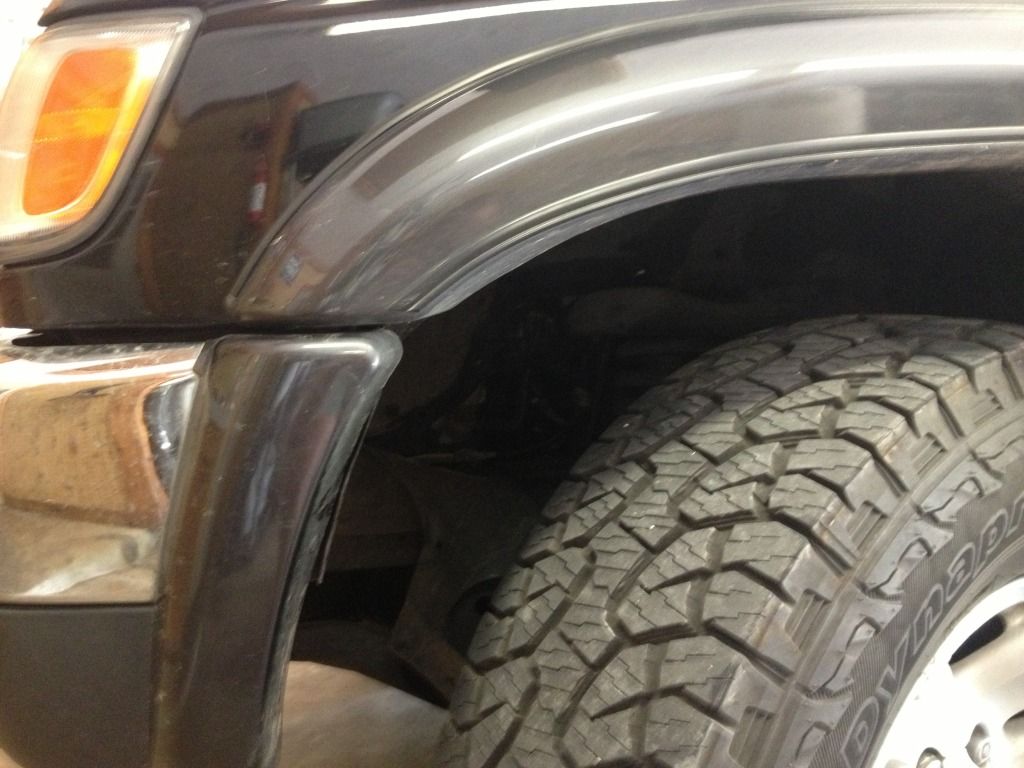
First, whenever you park your car to replace this part, it is important to turn the steering wheel ALL THE WAY to the left. Like this:
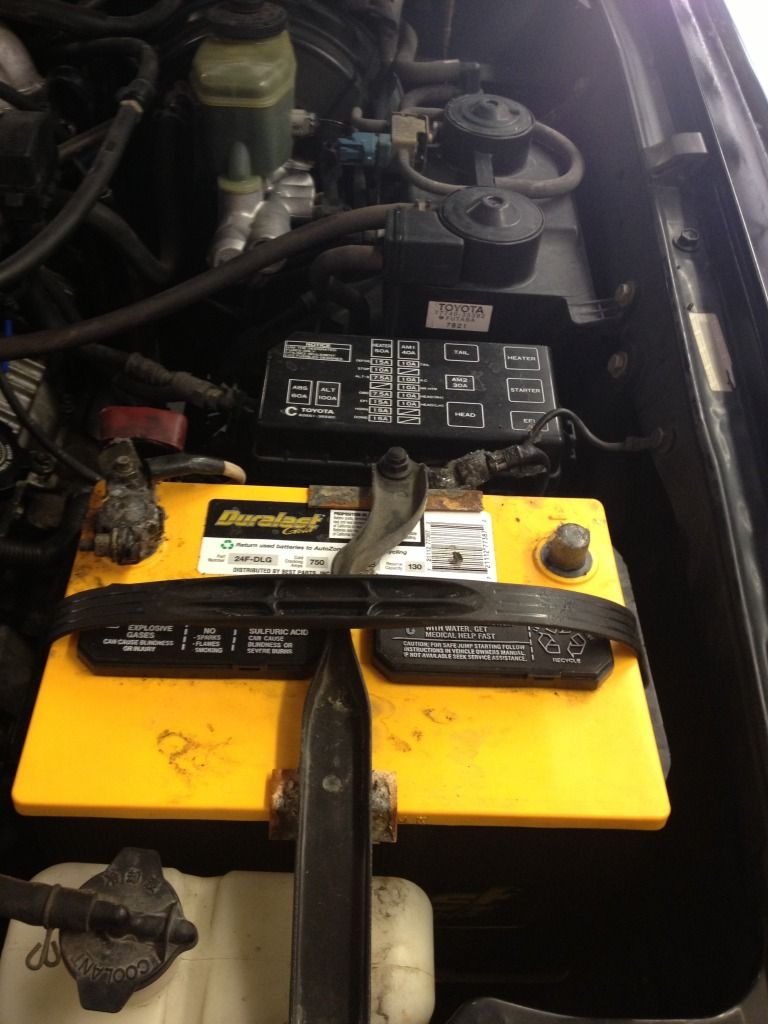
Next, open up your hood and disconnect the negative battery terminal.
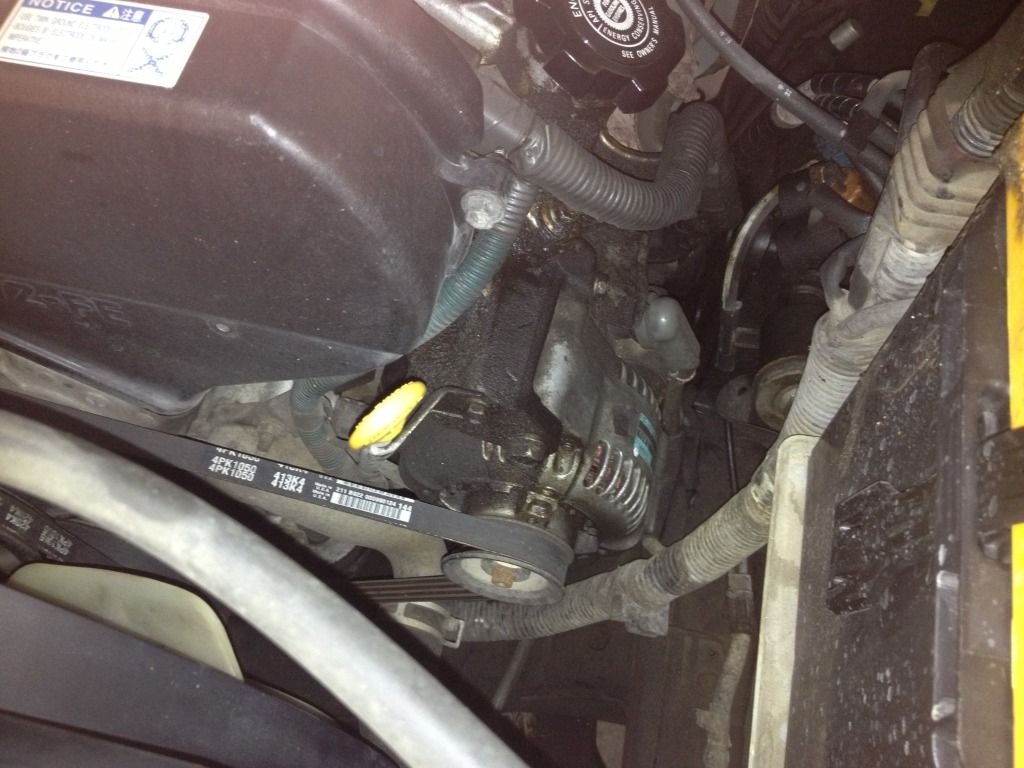
This is the beast you will be removing. The alternator is located on the front left side of the engine block, (reference you sitting in the vehicle facing forward) next to the dipstick, and is connected to a drive belt. Another way to describe it's location would be 4 inches down from the engine oil cap on the V6. Mine has crud all over it because of my leaky valve cover.
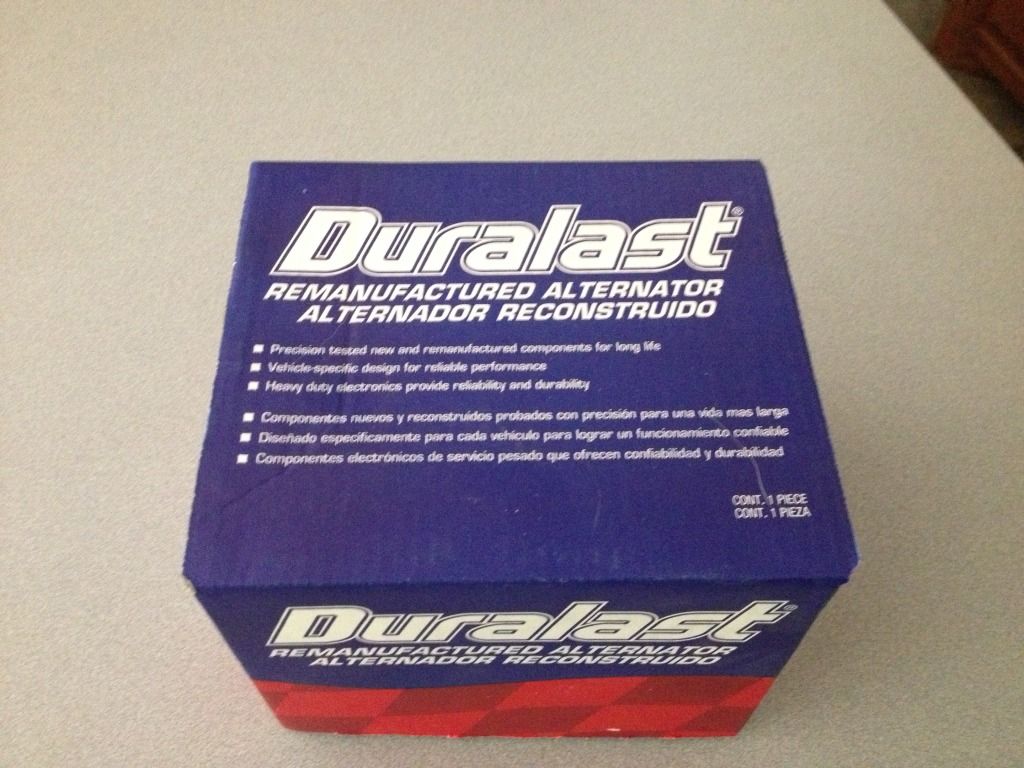
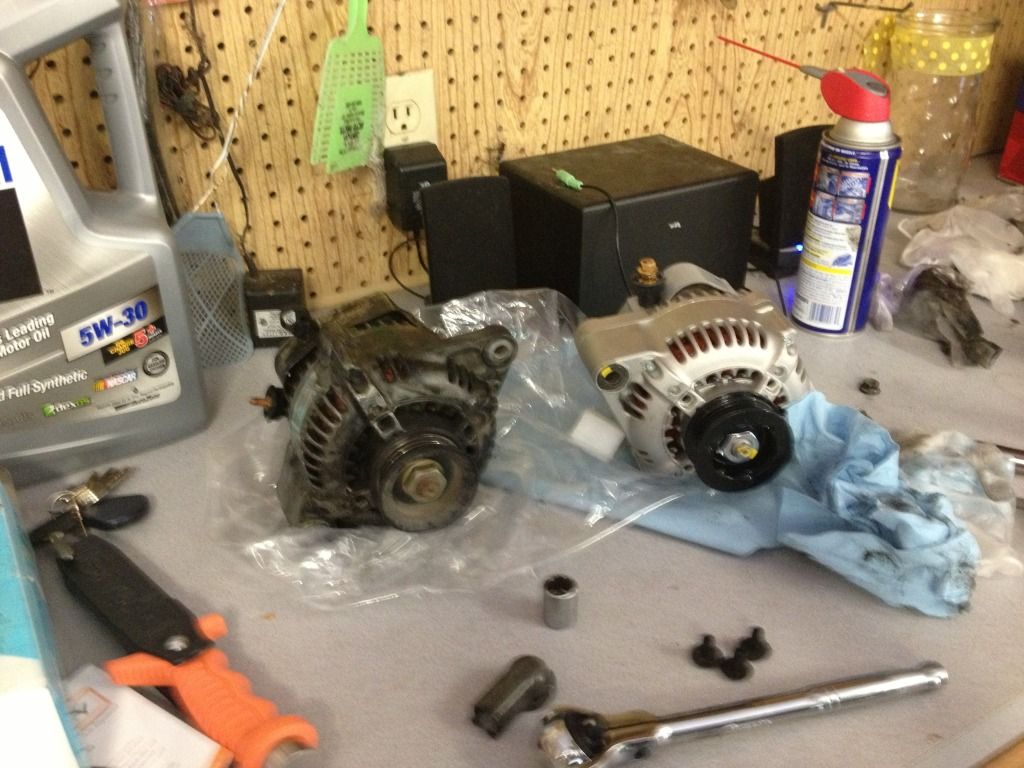
And this is what I replaced it with
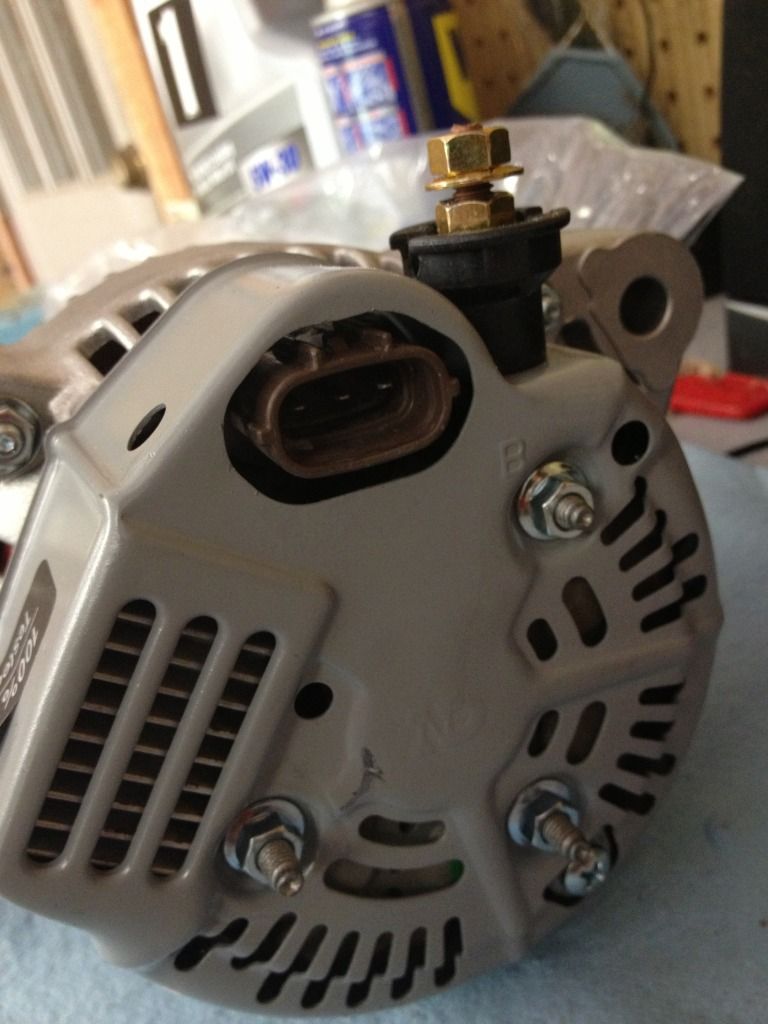
It's probably not necessary, but for the new alternator I put di-electric grease in the plug for the connector here.
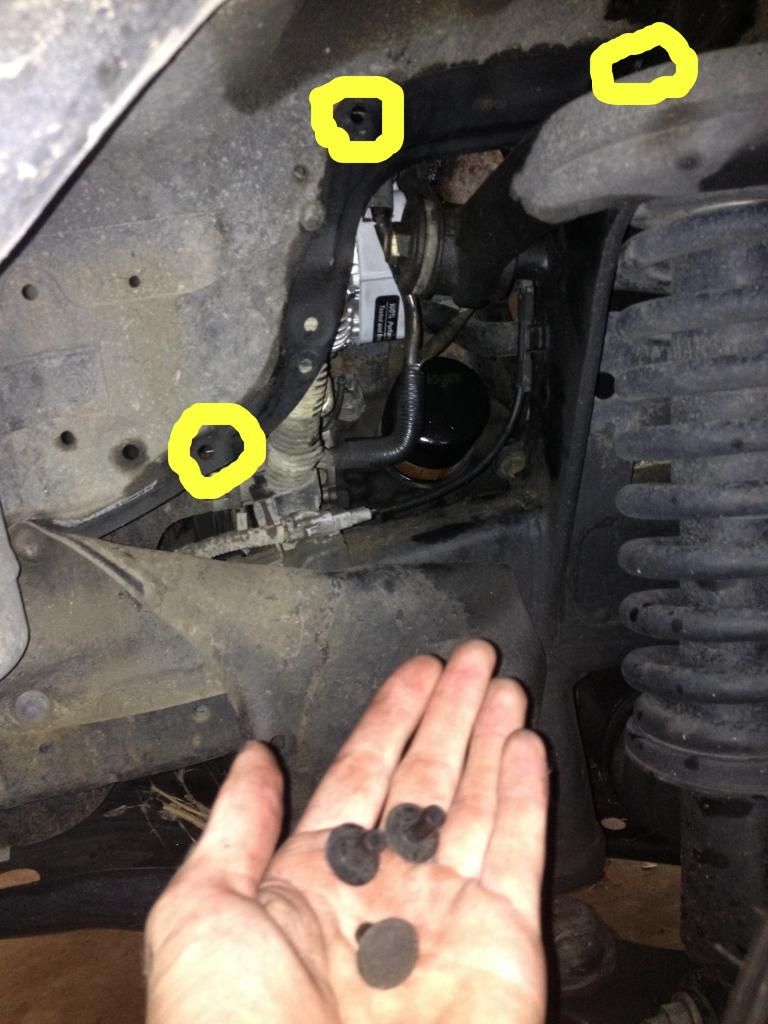
There are 2 methods you can use to give you enough space to remove the alternator. It has been suggested that removing the battery and the battery tray works just as well, if not better. Do what you think is best, and what works for you. For this write-up, I went through the fender lining.
When turning your steering wheel to the left, it allows you to gain access to an area of the fender lining that can be removed. Because the alternator is on the left side of the vehicle, you will need to remove these grommets under the left, front fender.
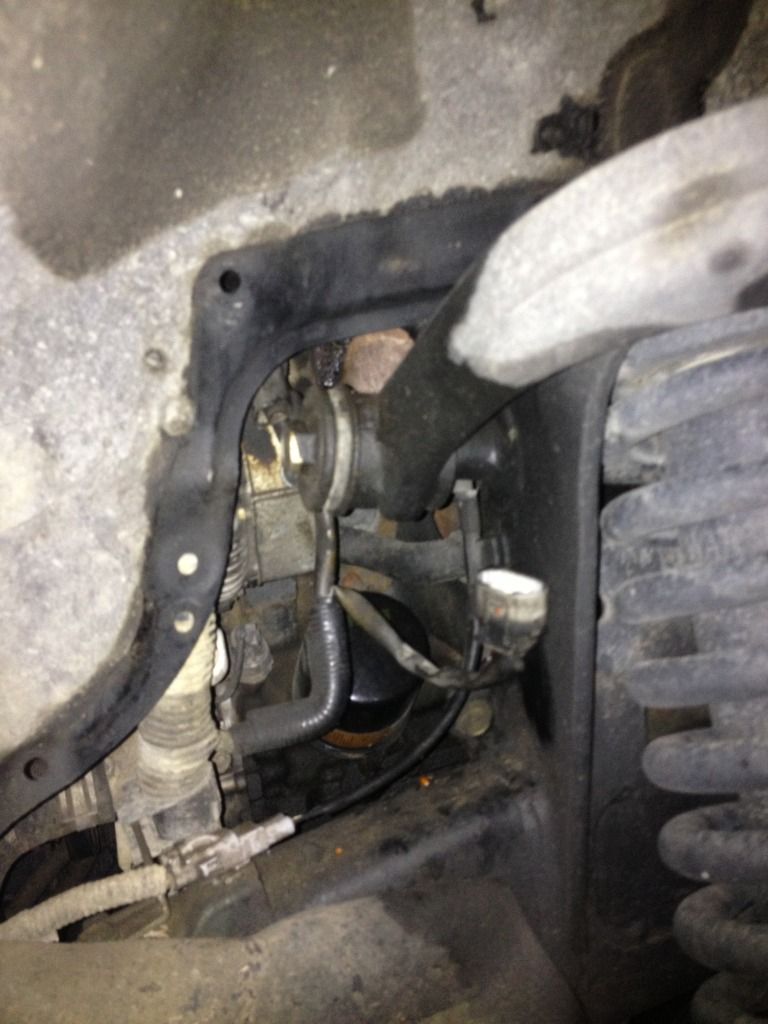
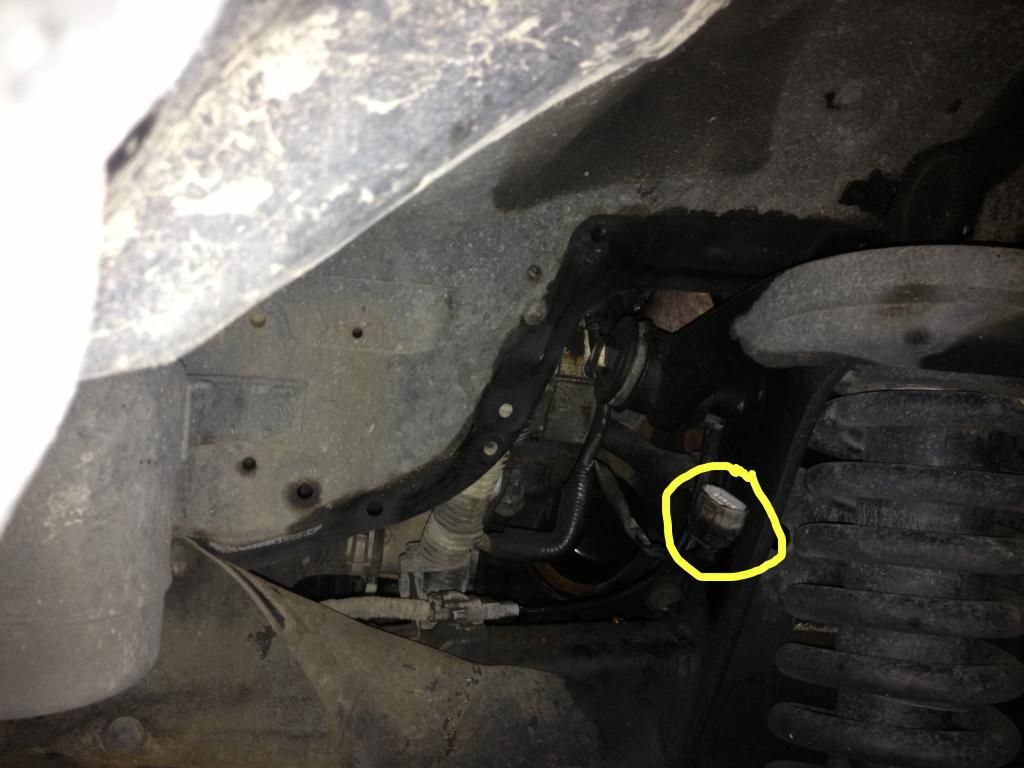
After removing these grommets, you should be able to gain access to the connector plug on the back of the alternator shown here. Push in on the clip, and pull out. Some people have reported problems removing this connector due to build up, so it might be best to spray some electrical cleaner on the connector before attempting this. The connector is shown below:
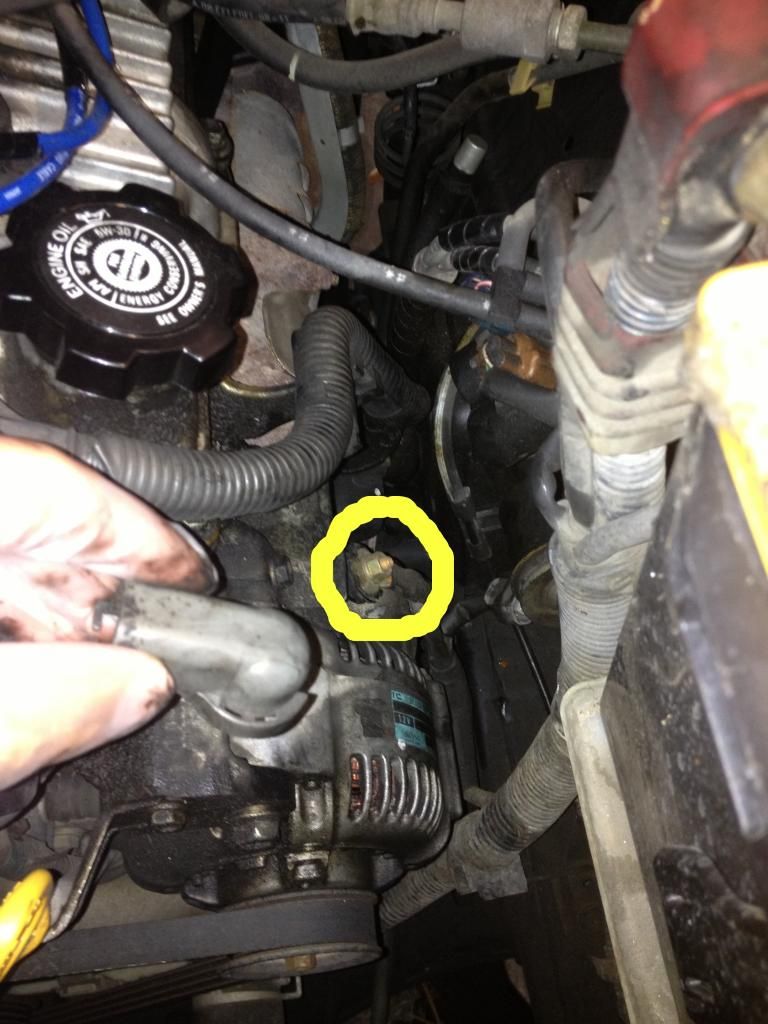
Back up top, remove the plastic cap covering the alternator wire, shown here. Unscrew the fastener and disconnect the wire.
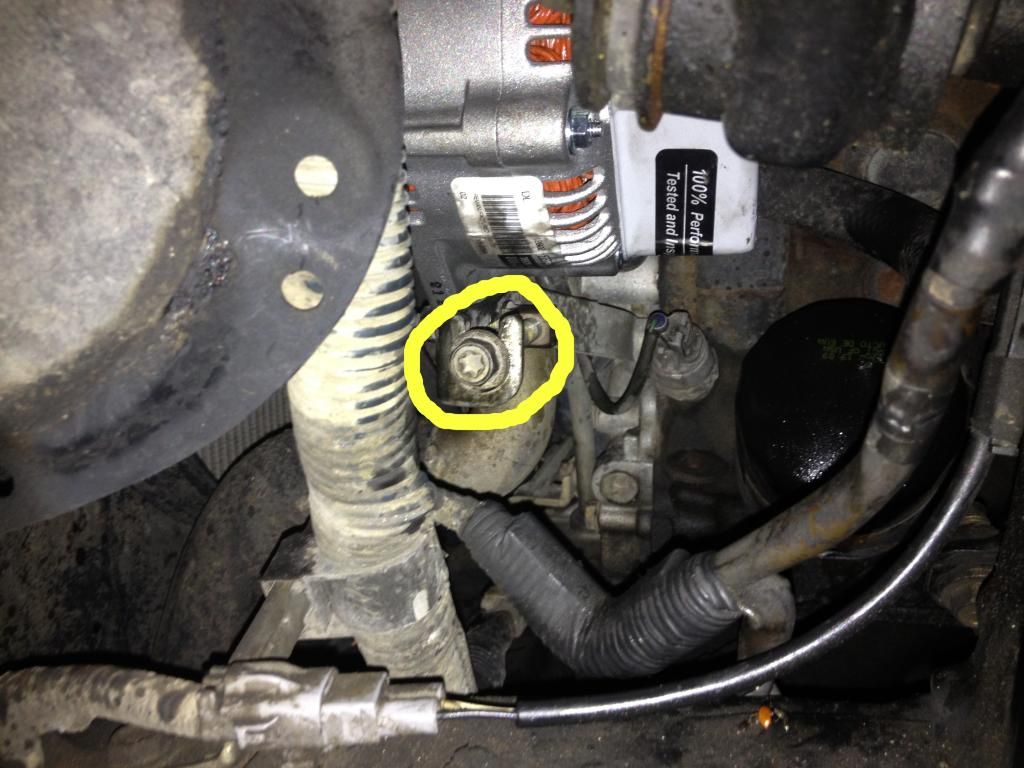
Now you must loosen the alternator's tension to remove the drive belt that cranks it. This tension can be released by loosening two fasteners until you can slip off the drive belt. Access fastener #1 from the left fender lining.
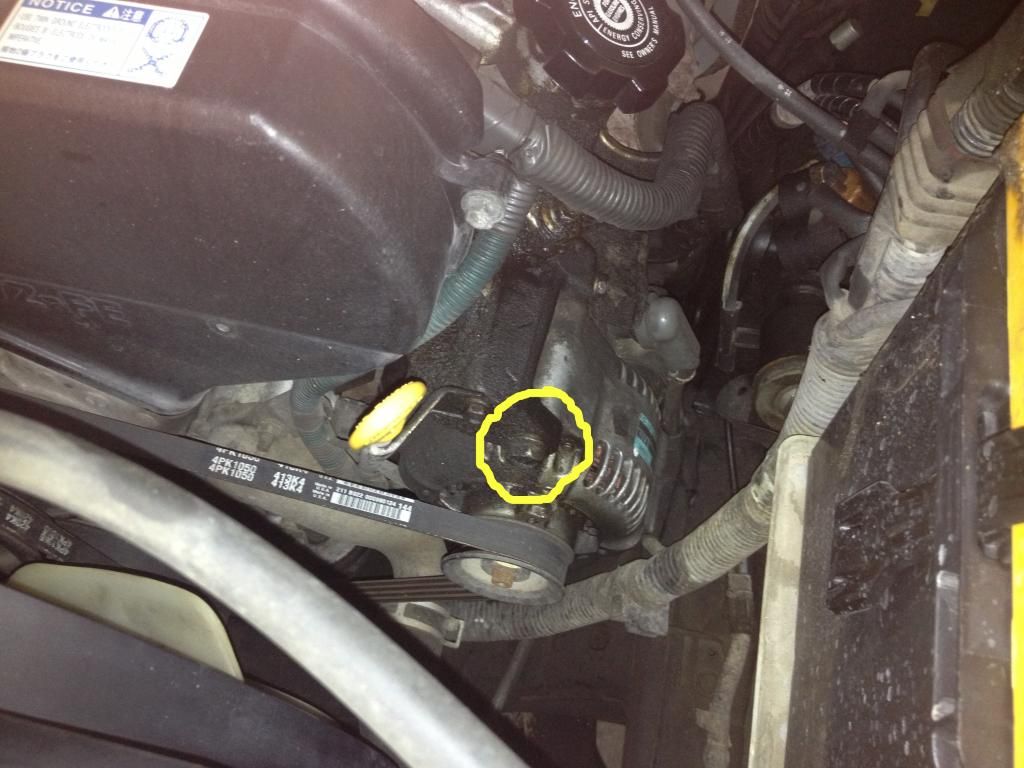
Next, loosen fastener #2, located under the drive belt pulley. First photo is for reference:

Second photo is the fastener itself:

Once these are removed, the bracket connecting the alternator to the fasteners should come right out. You will need this for the new alternator, so just set it aside for now.
After removing the fasteners and the bracket, the drive belt should just slip off, and the alternator should be held on only by the top pivot bolt, shown here:
This is where I needed the band-aids. This sucker felt like it was glued in (on my vehicle at least), so be careful removing it! This requires a 14mm.
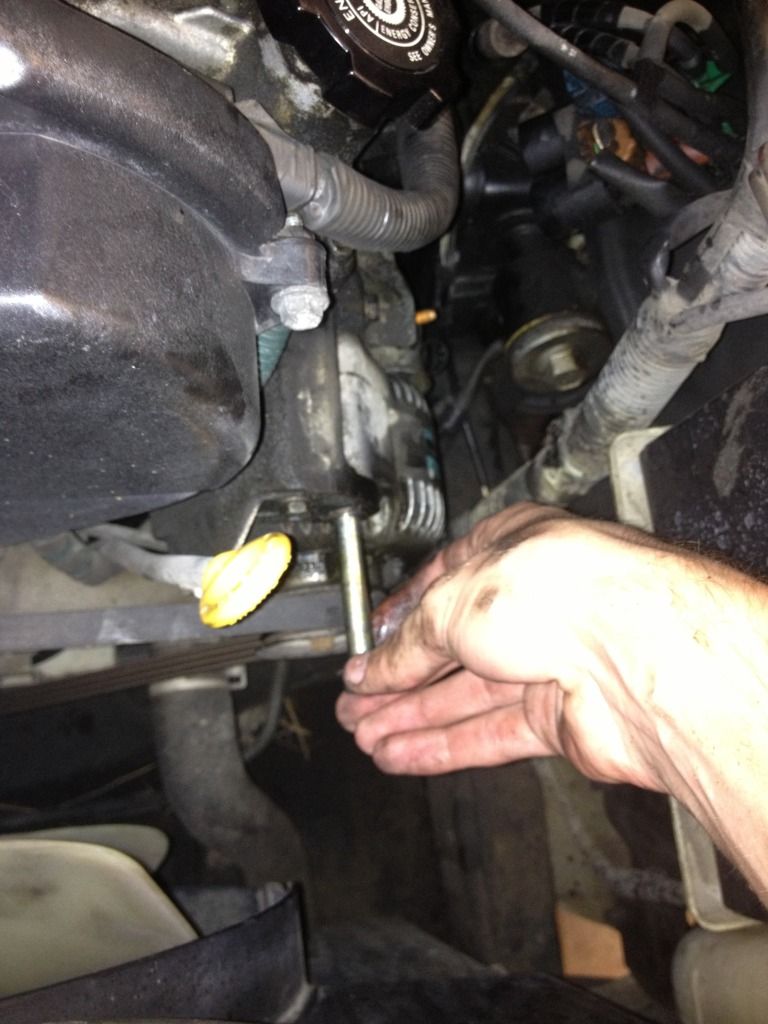
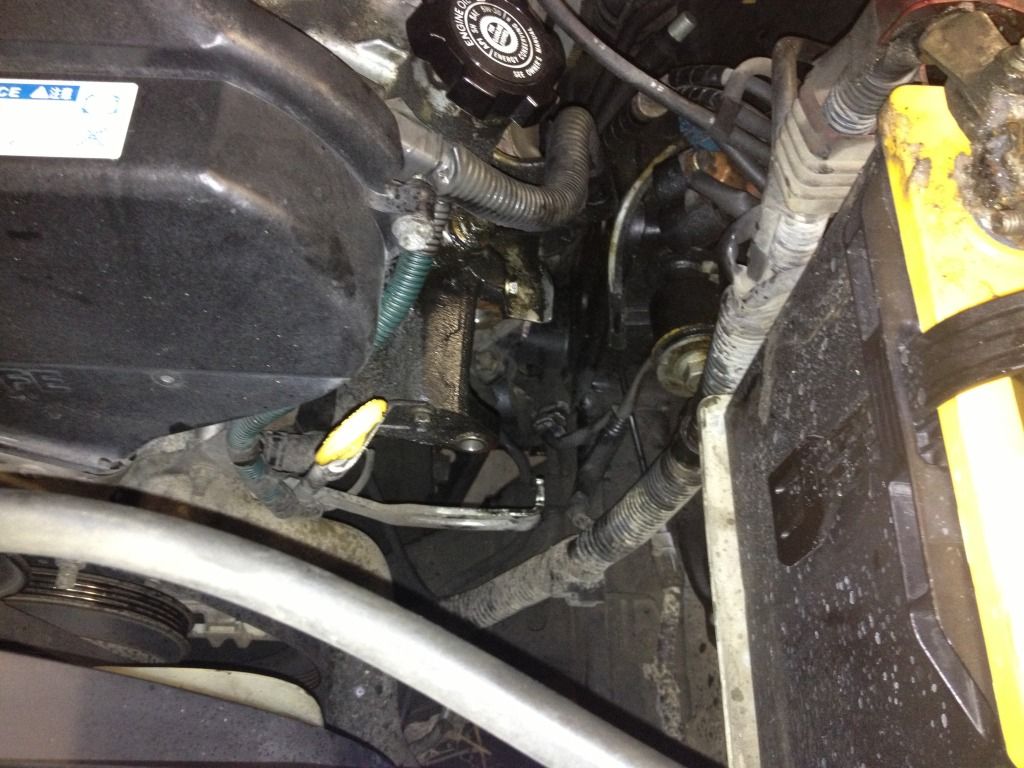
After removing the connector, wire, 2 fasteners with the bracket, the drive belt, and the top pivot bolt, the unit should come right out. However, I had issues from the build up, so use electrical cleaner here if you have to. Carefully but firmly remove it by pushing down until it breaks free, bring it underneath the metal that was holding it in place, and maneuver it until you can get it out through the space in between the engine bay, battery, and radiator.
OUT:
OLD vs. NEW
Installation of the new alternator is in the reverse order of disassembly. (See post #3 below)
Photobucket strikes again!
Anyone ever tried using a T100 alternator to replace your OEM? I was bequeathed a lightly used same year alt and am considering getting it gone through to see if it's good/worth repairing. It looks like all the guts are the same part numbers except the stator and voltage regulator. Form factor looks nearly exact but I have not yet yanked my oldy to compare.

BrianSD_42
New member
You can still manually click the pictures I believe. And any member here can take the time to restore the original thread by either commenting with the full posts and restored pictures (say imgur) or just make a new thread that is a copy.
If OP doesn't respond or fix the pictures then just restore the thread and give him credit for the original post.
These are community posts, not private property.
If OP doesn't respond or fix the pictures then just restore the thread and give him credit for the original post.
These are community posts, not private property.
Similar threads

- Replies
- 1
- Views
- 3K

- Replies
- 7
- Views
- 3K

- Replies
- 0
- Views
- 3K


