Dobinsons 4th Gen 4Runner Snorkel - In Stock

That's a good idea. I think the riv-nuts are a better idea, but they don't supply them like that since the special tool is required for them, although so is a pop rivet gun. Haha

I like the trick in the instructions for using a block of wood on the drill so that you can't bottom out the drill into the a-pillar.

Where my pillar holes ended up, the lower 2 were right over what looked like an internal rib of some type, and it appeared that you'd need to drill through at least (2) layers of actual sheet metal to get in to where the airbag lives. The 5mm max depth seems VERY conservative, but understandably so.

A 10-24NC riv-nut requires a bigger hole (.28 dia approx.) than the plain pull rivet, and I had to drill away part of that 2nd internal metal rib to get enough depth to fully seat the riv-nuts for install. Went super slow/careful doing it, but encountered no sign of airbag material. If anyone is inclined to use riv-nuts like I did, all I'd say is exercise caution and patience so you don't accidentally go TOO deep/far with your drill. Paint your drilled hole edges, and cover the shank of the riv-nut in silicone sealant before squeezing it into place, then wipe away the excess.

Don't forget the anti-seize if you use stainless screws in stainless riv-nuts.

I liked the idea of using riv-nuts and it gave me an excuse to buy the tool. Now I can put a threaded hole anywhere on the truck.

Here's a snap of it installed. Good fit! Looks about as close to "factory" as you could hope for I think.
S9v6vgh.jpg
 
Last edited:
Is this introductory pricing while bringing the product to market or can we expect a price increase in future batches?
 
Is this introductory pricing while bringing the product to market or can we expect a price increase in future batches?

$300 is the standard price for now. There will be a price increase in a few months on all Dobinsons parts though, most likely.
 
Installed mine this past weekend. Was pretty straight-forward. I opted to put 10-24NC Riv-Nuts into the A pillar and use 3 button-head machine screws rather than just the pull rivets that were supplied

This was going to be my approach as well but I chickened out. I felt fine about drilling the massive fender hole but between the air bag and virtually zero chance of reversing the A-pillar holes, I wanted to explore other options.

I read about several Tacoma guys using double sided 3M vehicle adhesive for the A pillar. I'm trialing this right now and so far after a few hundred miles it's working okay. I've been watching the snorkel frequently and haven't noticed any movement at freeway speeds.

I'm not sure I can personally recommend it (yet) but others have tried it and seems to be working just fine. With the number of fasteners holding the snorkel on, I don't think it'll fly off. Worst case I'm imagining is it'll loosen/rattle and I'll have to take the fender liner off again to tighten the hardware.
 
This was going to be my approach as well but I chickened out. I felt fine about drilling the massive fender hole but between the air bag and virtually zero chance of reversing the A-pillar holes, I wanted to explore other options.

I read about several Tacoma guys using double sided 3M vehicle adhesive for the A pillar. I'm trialing this right now and so far after a few hundred miles it's working okay. I've been watching the snorkel frequently and haven't noticed any movement at freeway speeds.

I'm not sure I can personally recommend it (yet) but others have tried it and seems to be working just fine. With the number of fasteners holding the snorkel on, I don't think it'll fly off. Worst case I'm imagining is it'll loosen/rattle and I'll have to take the fender liner off again to tighten the hardware.

This method will likely hold up pretty well. The 3M mounting tape is pretty robust stuff if the surfaces are prepped right. The number of studs/nuts holding the snorkel to the fender alone is really more than enough to keep the entire thing in place. Even if your double sided tape fails, it shouldn't result in any catastrophic problem. And if it does fail, it's easy and cheap enough to replace. Even if you had to do it every few years, it wouldn't be a big deal.

One train of thought with the riv-nuts was that if the snorkel ever leaves the vehicle for some reason, the holes will just be filled by the stainless cap screws that are in them now, and if I wanted to, I could mount something else there. No idea what, but the option would exist.
 
I know a lot of forum guys have bought the snorkel from my site these past few months. Any more install photos to share??
 
I know a lot of forum guys have bought the snorkel from my site these past few months. Any more install photos to share??

It’s still cold in Chicago (36° and snow today), so I probably won’t install mine until mid-June. I’d do it earlier, but I might be out of town end of May/early June. (“Summer” starts here 6/1, and I don’t have a warm garage to work in.)

I’ll try to remember to take helpful/useful pics of my install.
 
Mine is waiting for the last salt of the year before I install. I wash my truck several times a week at the drive through car wash, which I won't be able to do with the Snorkel installed.

-Rob
 
+1 I wanna see some install and fitment photos, plus overall impressions of the product.


In retrospect I should have taken pictures during the installation, but I didn't take a single one.

Overall, I'd say fitment and assembly quality is about as good as you could possibly hope for.

Once all the nuts are tightened, the body of snorkel conforms and fits to the fender and flare nice and tight. There are no weird gaps or anything. It looks about as close to "factory/OEM" as it could be.

The alignment between the snorkel, the rubber elbow and the airbox inlet, looked at first like it was going to be trouble to make work, but at final assembly it all slid together just fine. I didn't have to "fight" with any of those parts to get them put together. If you make all your holes and openings to match the provided template, you'll be good to go. Simple as that.

As I mentioned in my earlier post, the most difficult part for me was getting my arm up inside the back part of the fender to get all those nuts started and tightened. And also getting up in the fender with a tool to tighten the hose clamps. BUT I made the whole job harder on myself doing the install with the truck on the ground and most of the fender liner still attached. If you jack the front end up or put it on a lift, and take the wheel/tire off, those steps of the install will be MUCH easier.

Before the snorkel my IAT's were typically ambient +15 to 20 degrees or more depending on how fast I was moving, or not moving at all. Now they're ambient +3 degrees if I'm moving any faster than 35-40 mph, and ambient +15 or so at a dead stop. Pretty significant improvement there.
 
In retrospect I should have taken pictures during the installation, but I didn't take a single one.

Overall, I'd say fitment and assembly quality is about as good as you could possibly hope for.

Once all the nuts are tightened, the body of snorkel conforms and fits to the fender and flare nice and tight. There are no weird gaps or anything. It looks about as close to "factory/OEM" as it could be.

The alignment between the snorkel, the rubber elbow and the airbox inlet, looked at first like it was going to be trouble to make work, but at final assembly it all slid together just fine. I didn't have to "fight" with any of those parts to get them put together. If you make all your holes and openings to match the provided template, you'll be good to go. Simple as that.

As I mentioned in my earlier post, the most difficult part for me was getting my arm up inside the back part of the fender to get all those nuts started and tightened. And also getting up in the fender with a tool to tighten the hose clamps. BUT I made the whole job harder on myself doing the install with the truck on the ground and most of the fender liner still attached. If you jack the front end up or put it on a lift, and take the wheel/tire off, those steps of the install will be MUCH easier.

Before the snorkel my IAT's were typically ambient +15 to 20 degrees or more depending on how fast I was moving, or not moving at all. Now they're ambient +3 degrees if I'm moving any faster than 35-40 mph, and ambient +15 or so at a dead stop. Pretty significant improvement there.
That's really good info. Thanks for sharing.

Also interesting about the IAT's as well!!
 
I'll throw up some pictures of the install i did today.
Took longer than i thought. But, it was due to not having the correct tools.
rsiakiZ.jpg

zMfEsWW.jpg

j0vfLGw.jpg

stwKVvR.jpg
 
I installed mine because I ran out of options to relocate my air intake. *Make sure that you really want a snorkel before ordering one because once you pay shipping and restocking fees, there is not much left....

The installation was "okay". It took me more time to commit to drill the holes in my beloved 4runner than drilling. I triple check everything with the template before drilling and I was off by about 10 mm when I did the dry fit. Don't bother buying the hole saws, go get a body saw with a long blade and just follow the pattern.

That snorkel is bulky and IMHO quite an eyesore but you get use to it.
 
I installed mine because I ran out of options to relocate my air intake. *Make sure that you really want a snorkel before ordering one because once you pay shipping and restocking fees, there is not much left....

The installation was "okay". It took me more time to commit to drill the holes in my beloved 4runner than drilling. I triple check everything with the template before drilling and I was off by about 10 mm when I did the dry fit. Don't bother buying the hole saws, go get a body saw with a long blade and just follow the pattern.

That snorkel is bulky and IMHO quite an eyesore but you get use to it.

If a buyer decides he/she doesn’t want the snorkel after buying it, selling it on this forum would probably be better financially.

I haven’t done my install yet, but I hope my drilling isn’t off by 10mm using the template! I bought the hole saws. I hope they work ok.

I hope the snorkel isn't an eyesore - it looks good in the photos on the Exit Offroad website!
 
A few months back, I said I might be installing my snorkel in early June and taking pics.

When it was still cold here, my 4Runner developed a leak in one of the rear brake lines due to rust. I replaced all six of my flexible brake lines with braided steel lines, and had to replace or repair several hard lines, including the long lines on the rear axle. I’m a novice mechanic, so it took a lot longer than I expected. Even using heat and PB Blaster, I couldn’t remove most of the hard lines, and had to cut them. I just finished on 6/11/21.

Hopefully, I’ll have time to install my snorkel this month and post as much info and pics as I can. Stay tuned!
 
Last edited:
I spent the past few days doing some basic prep work, then spent a good part of the day today installing my Dobinsons snorkel. I’m not a fast worker - it took me a lot longer than the 3 hour estimate in the instructions. I don’t mind going slow and making sure I do everything correctly. My time also includes breaks for cold water/Gatorade/etc. and looking for tools.

I’m happy with the results, the way it looks and functions so far.

I took a bunch of progress pictures as I worked, and I’ll post my install in the next few days. Hopefully it will be useful to future installers!
 
Like I posted yesterday, I installed my Dobinsons snorkel.

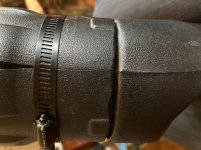
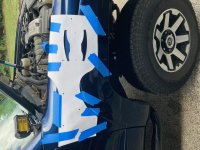
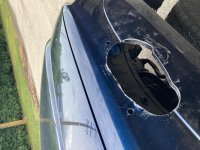
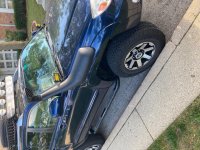
The instructions are actually very good, so I decided I would just add my comments relating to the installation and the provided instructions. I only took a few photos that add to the instructions. The rest are pretty much duplicates of the Dobinsons photos.

There are 39 steps in the Dobinsons instructions, and I will be referring to those steps.

Before going through the 39 steps, just a quick comment. I did steps 15 (rubber fender infill) and 36 (ram head) before starting the process at step 1. I lined up the ram head so the seams on the snorkel body and the ram head line up. It was the perfect setting so the ram head faces straight forward.

1. My mud flaps were already off. I removed the big plastic liner inside the wheel well. I was confused by the instructions saying to remove the “RH Flare liner” and the “plastic wheel arch guard”. I just removed one part.

2,3,4. Nothing to add

5. It took me a couple tries to get the template lined up on the fender so that the top and rear edges matched the fender perfectly.

6. I used a red marker to mark the curves on the fender.

7. I used a 9/64” drill bit for the starter holes.

8. I used a 1/2” drill bit for the 5 holes. I was too cheap to buy a step drill bit, and 1/2” was enough, no need to go to 16mm.

9,10. Nothing to add. My hole saws got stuck a few times, maybe because my electric drill wasn’t strong enough.

11. I didn’t have a narrow blade, so my curves were not perfect, but close enough to work.

12. I did minimal deburring

13. I didn’t do step 13 because I didn’t drill my A pillar.

14,15. I did these steps before step 1.

16-21. I didn’t do these steps (see 13.)

22. Nothing to add.

23,24. I didn’t do these steps.

25,26. I used a Dremel tool.

27. I didn’t seal the holes in the airbox.

28. I didn’t need a reducer sleeve, and there wasn’t one in the kit.

29. The rubber joiner hose is a very tight fit in the hole between the engine bay and the fender well.

30. I didn’t apply sealer to the oval.

31,32. Nothing to add.

33. I tightened the nuts completely right away - I didn’t keep the snorkel loose. I have long arms, so attaching the nuts and washers was pretty easy. To help me muscle the rubber joiner hose to the snorkel body more securely, I removed the right front wheel.

34. Done in step 33.

35. Nothing to add.

36. Done before step 1.

37,38. Nothing to add.

39. I didn’t use sealant, so there was no sealant to cure.

Pics (in no particular order). I couldn’t figure out how to rotate them, so they might be rotated 90°:
 

Attachments

  • 2CB36239-5CFA-42CC-95AF-E53ED19EFB98.jpg
    2CB36239-5CFA-42CC-95AF-E53ED19EFB98.jpg
    138.2 KB · Views: 649
  • 8E9D1CD9-6CB6-4931-A5EC-ADFCF4297636.jpg
    8E9D1CD9-6CB6-4931-A5EC-ADFCF4297636.jpg
    134.7 KB · Views: 704
  • 44285BD0-57B2-4489-B129-28D5C10427C2.jpg
    44285BD0-57B2-4489-B129-28D5C10427C2.jpg
    134.3 KB · Views: 670
  • 408752BF-741A-423F-B9F1-6DDE151929F3.jpg
    408752BF-741A-423F-B9F1-6DDE151929F3.jpg
    140.7 KB · Views: 696
Last edited:
Here's why you need a snorkel!

Glad I had the snorkel installed this weekend. The trails were dry as a bone all day, then we ran into a series of deep pits right at the end of the trail.

My truck:
https://www.youtube.com/watch?v=BjgNxAEgsaw&feature=youtu.be

My buddys truck:
https://www.youtube.com/watch?v=rU8jJOqGMi0&feature=youtu.be

The Aftermath (After the next hole):
https://www.youtube.com/watch?v=yVMphK0ZuHY&feature=youtu.be

Luckily he killed the motor before it sucked in too much water. It ran like garbage on the first start, but the MAF sensor was covered in mud. Cleaned that out and it ran like a top again.

-Rob
 

Members online

Forum statistics

Threads
278,316
Messages
3,554,120
Members
248,016
Latest member
Advally Service

Trending content

Back
Top