Dropzone's 1994 4Runner Expedition/Overland Build

Decided to take the easy route to clean up a set of free headlight housings :laser:
80-20151108_144719_75ac4cdce800b36363e451e2c942948544bf6a74.jpg
 
Another red 2nd gen... WOOT!
One day we will rule the classics section!

Great info on your SAS... I'm in the researching parts phase as well.

That Trekker "was" SICK!!! Would love to find one of those to restore and just use as a daily.
 
Another red 2nd gen... WOOT!
One day we will rule the classics section!

Great info on your SAS... I'm in the researching parts phase as well.

That Trekker "was" SICK!!! Would love to find one of those to restore and just use as a daily.

Thank you Sir:D
Hopefully you are correct, but for some reason I am still getting use to the idea of a 94 being a classic


Found some high power emergency vehicle LED's I was gonna use on the Trekker..
Thinking about mounting them on the mirrors
80-20151109_145649_435ce45fdbac02f3dc4acf3e1a822a9178c404b9.jpg

80-20151109_145731_65c9add39691a465b2cf84ff26e13fad9c140722.jpg


Going to also try a $15 ebay experiment and hopefully add heated mirrors to this hunk
80-20151109_161132_dea0e59d87fbbd59bcfe0c7e5176e653bbd3ae7a.jpg
 
2nd Gen 4Runner Heated Mirrors

Started on my heated mirror experiment :
$15 heated inserts from eBay

First step was to get the mirror apart, there is a screw on the bottom of the mirror that will allow you to get the motor assembly and mirror out from the housing

Assemble your chosen weapons:
Is this case a wide putty knife and plastic pry bars worked for separate the mirror from the mount

I trimmed the heated insert slightly

No pics but I drilled a couple of holes in the mount to allow the power wires for the heated insert power and remountEd the mirror with some 3M tape

There is a small screw you can remove disassemble the the pivot point on the mount

Remove that screw in addition to the 3 bigger screws on the bottom of the housing, this will allow access to feed your wires through.


I went ahead and added a high power LED for a signal

Should be pretty bright


So I threw the mirror in the freezer with some water on it for a couple of hours and went to grab some dinner with friends.
Hooked up the battery charger set to two amps

After about 3-4 minutes

I have an extra defroster switch that I might use or just wire them into the rear defrost circuit.
Am happy for an experiment they seem to work OK

 
Nice build but I'm really digging the Trekker :jump:
Thanks. The Trekker has been a fun project, almost part of the family.
This is going to look great once completed.
Thanks, I wish it was going a little faster..
Haven't really had much time to work on this project lately.
Recently switched shifts to day shift, after almost 15 years on nights my body is having a heck of a time adjusting.

Lame update but made a little headway. I had taken the running boards off and screwed up thinking I had gotten everything removed from the mounts and accidently ripped off the d/s rear quarter guard.
Ordered a pack of the moulding clips off ebay.
80-20160127_170031_c38e59bec5b519b1bbaa6ecec5bb674274790f66.jpg

4runner moulding clips
Cleaned up the wheel arch so some 3M tape would stick for the next few years
80-20160127_163013_b276da82ccfa5fa3615f939f75553872080af5c6.jpg

Between the 3m tape and the replacement moulding clips it fit like a charm
80-20160127_165837_02225a8fcc8687c72b0989764bcfb76985afbdae.jpg
 
I got this idea from [MENTION=60147]the great him[/MENTION] when I was snagging some parts from him.
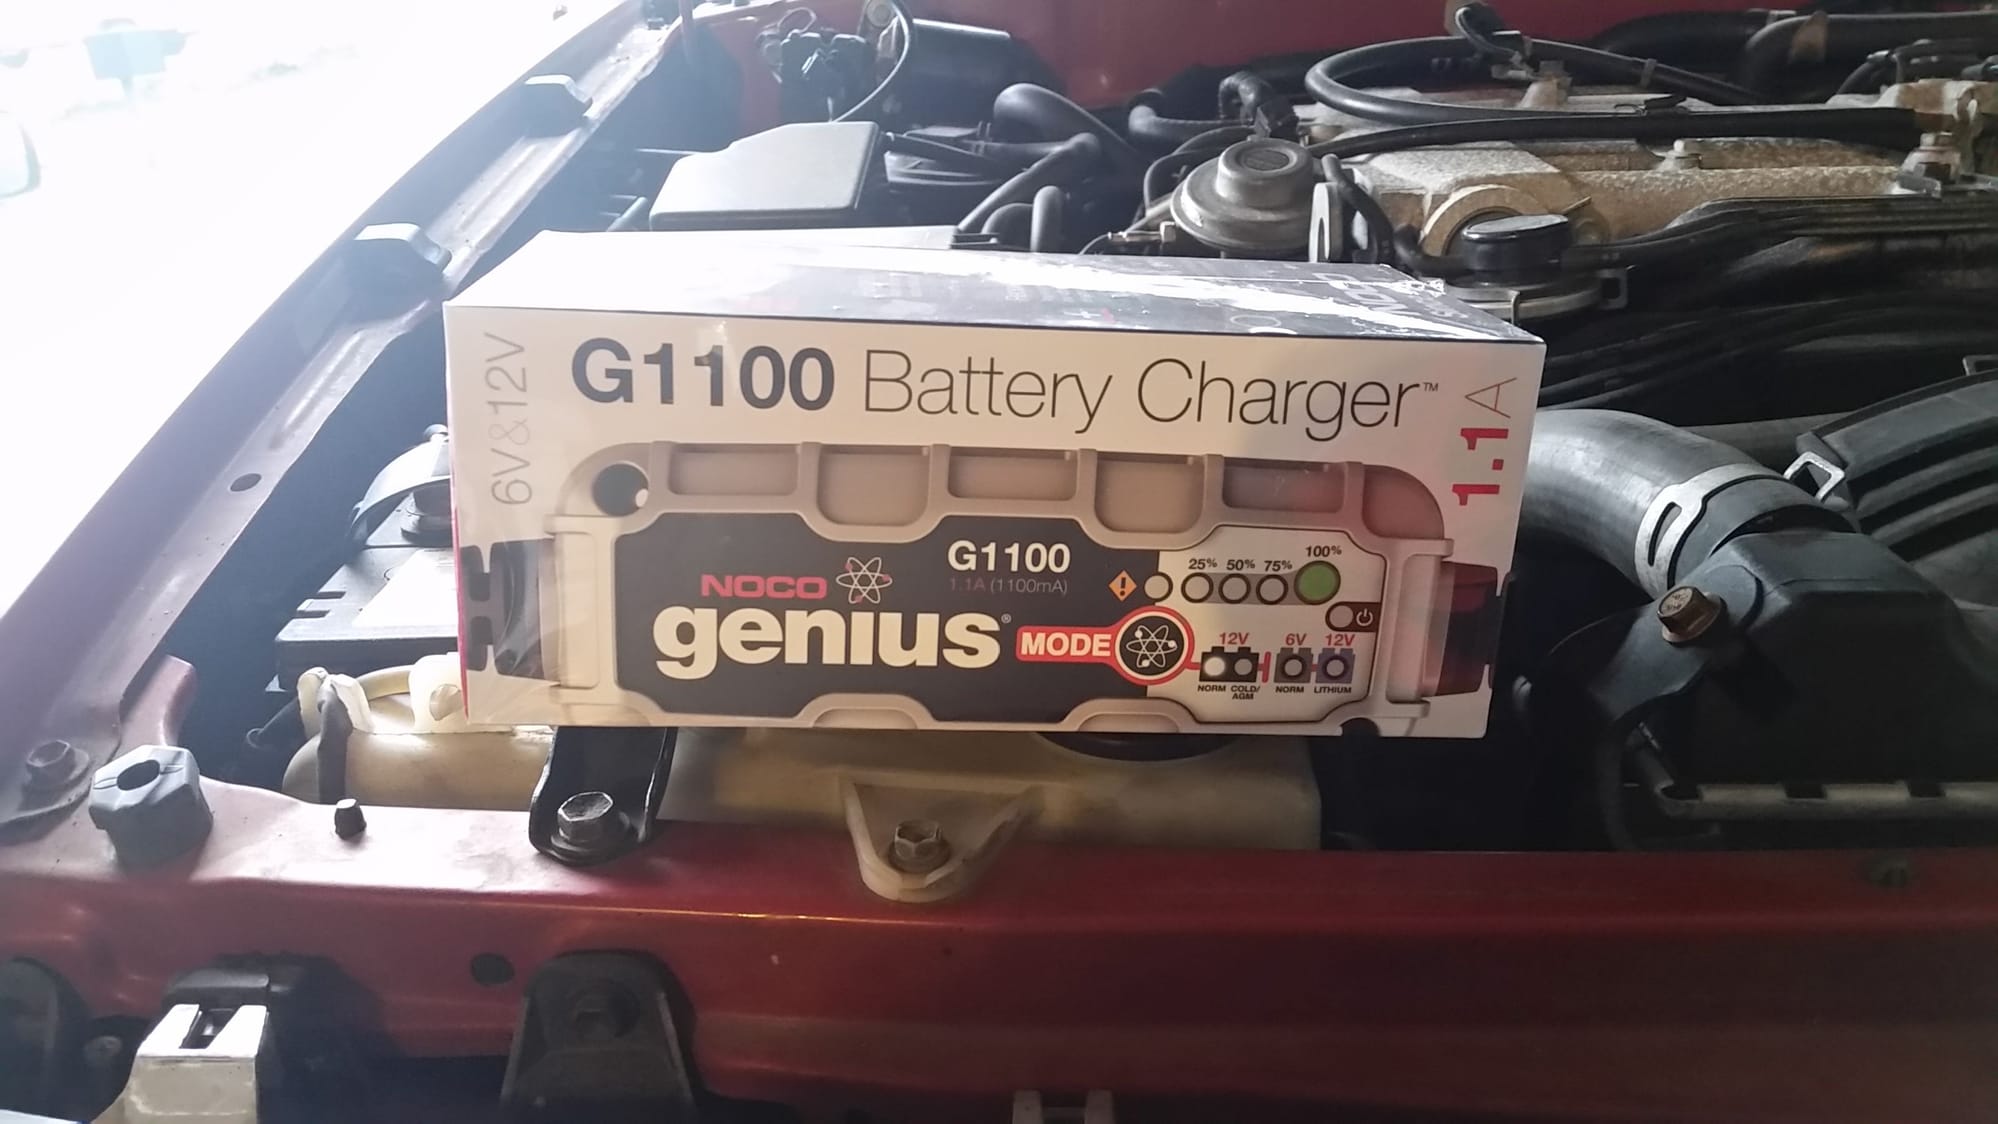
Quick 15 minute project to get a Noco Genius charger install. Trickle charger will help keep the battery maintained since the 4runner sits so long.
80-20160211_155230_8f2d454e75746a9404510bafe38b510e310ff716.jpg

80-20160211_165616_a03a66c7f990a4cfbb3de50849c00b8bd31756a4.jpg

Added the connector through the grill (grill will be replaced down the road)
80-20160211_165939_36e4a900041434db1b4df432f0a85e1fad0c959c.jpg

Easy connection
80-20160211_165903_e8aae078e9e033f7f867d3b12398a5ca3ecd8fe8.jpg

The charger has settings for different batteries, gives you battery status.
 
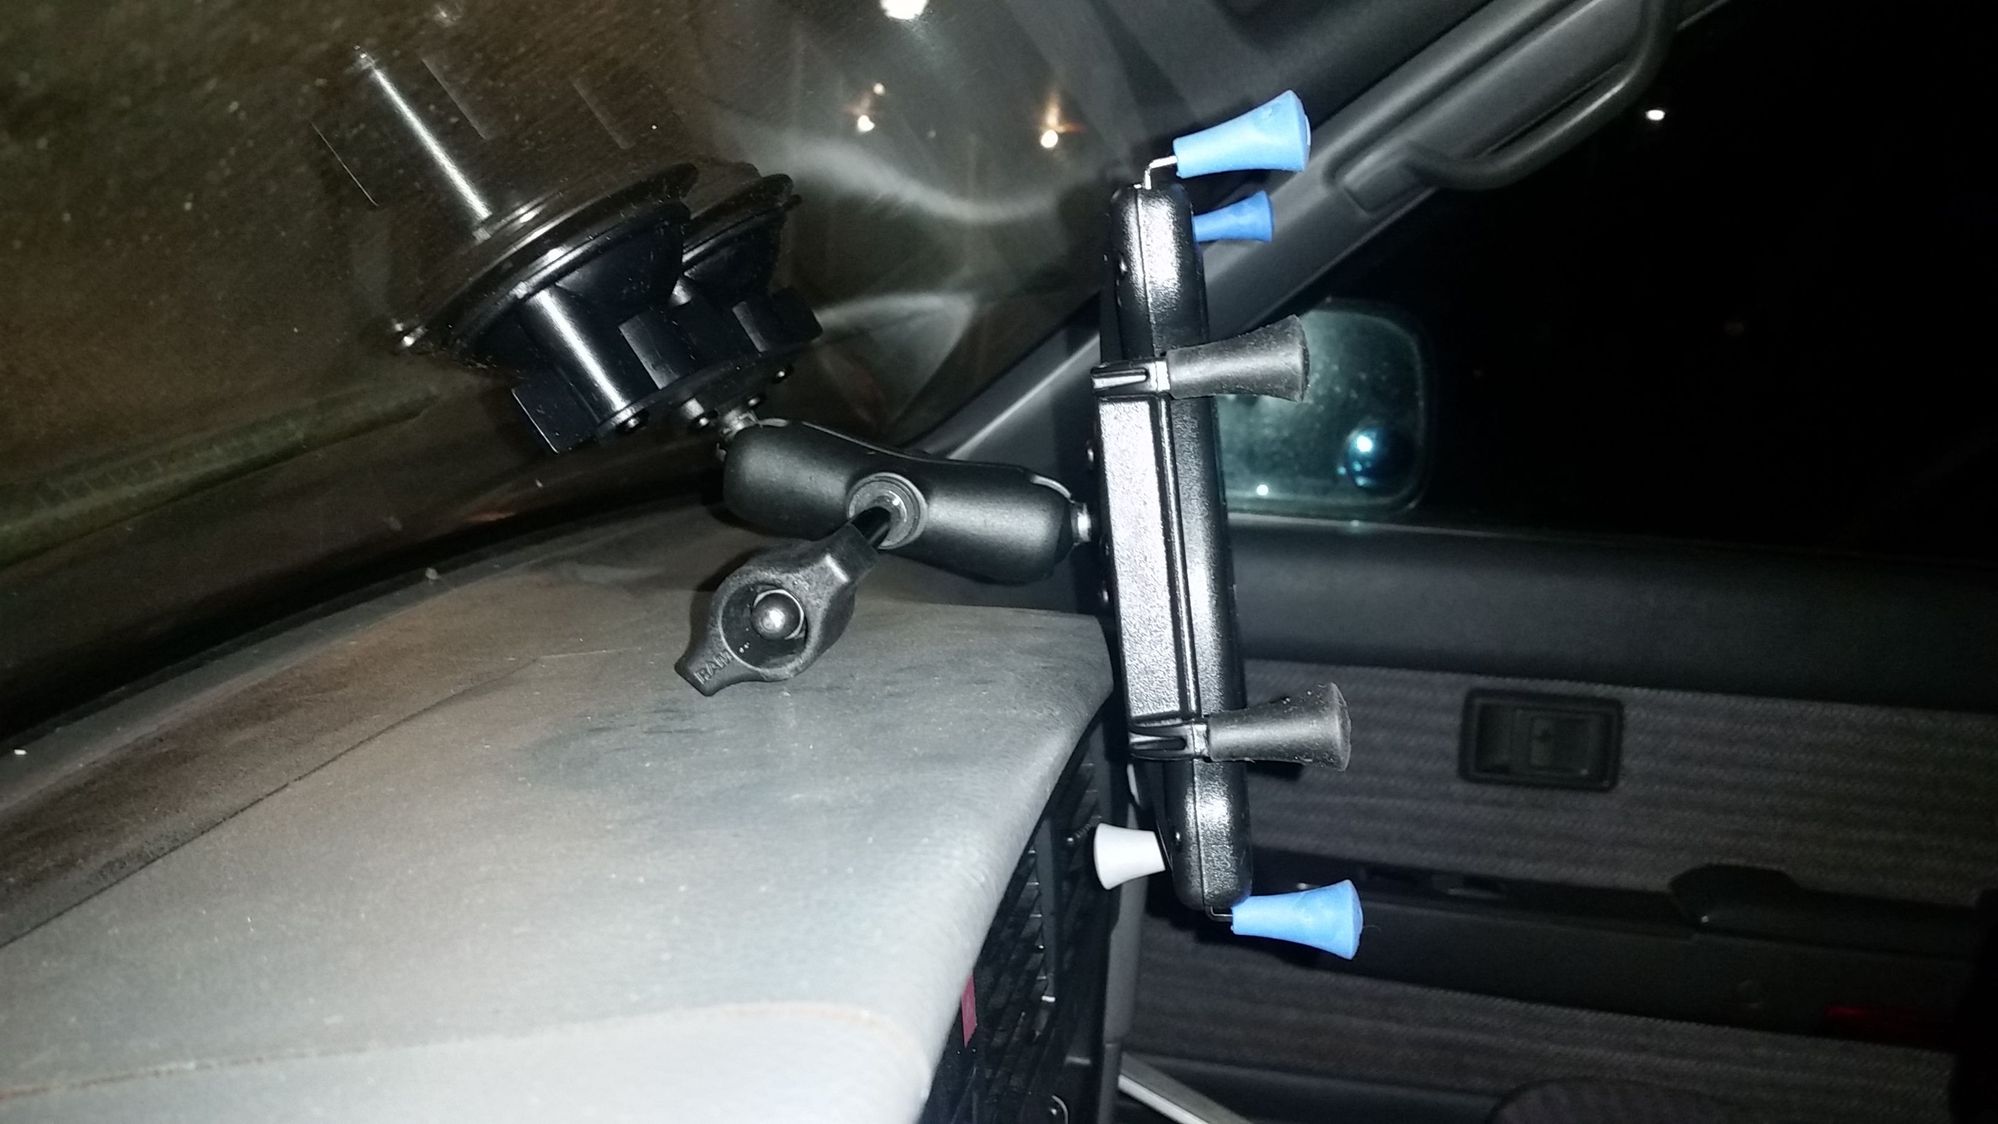
So today was sort of like Christmas for me when I got home from work. I scored a Ram Tablet Mount on eBay for 20% of what they go for new. This one is used but functions awesome. It is missing the right side retainer but the spring loaded tongs hold the tablet well.
80-20160216_212215_b2c5a0076375c4810db5b28b3d14367347a95aab.jpg

80-20160216_211932_4cdf6ddfd799f9317eb7bfe587448e72a7472df9.jpg

80-20160216_211726_9a5bdeb860d8417573a33cf694288b43d99d0e91.jpg

The dual suction mounts are extremely secure even with a 10" Tablet.
Even my blind old Vision balls can see the map.
Nice thing is it is easily moved from vehicle to vehicle
 
Had the afternoon to work on the 4Runner so started to tackle the rear tire mount
Looks like no one had touched the tailgate before

Some people said to take out the window...decided to chance it

Someone's not so good version of trailer wiring. .it will get fixed. ..not that these things can tow much

The afternoon went quicker than I thought so I don't have pics of the flat stock I used to beef up the inside mount

I will need to raise the tire mounting surface when I put the 35's on this thing but it should do the trick

Still need to cut the old license plate mount to cover the holes in the tailgate and repaint the swing out, it is a bit weathered after 25 years.
 
80-20160225_173042_1_ccfbfd0f51a2210ad3e18e7cb9af3283c9edce92.jpg

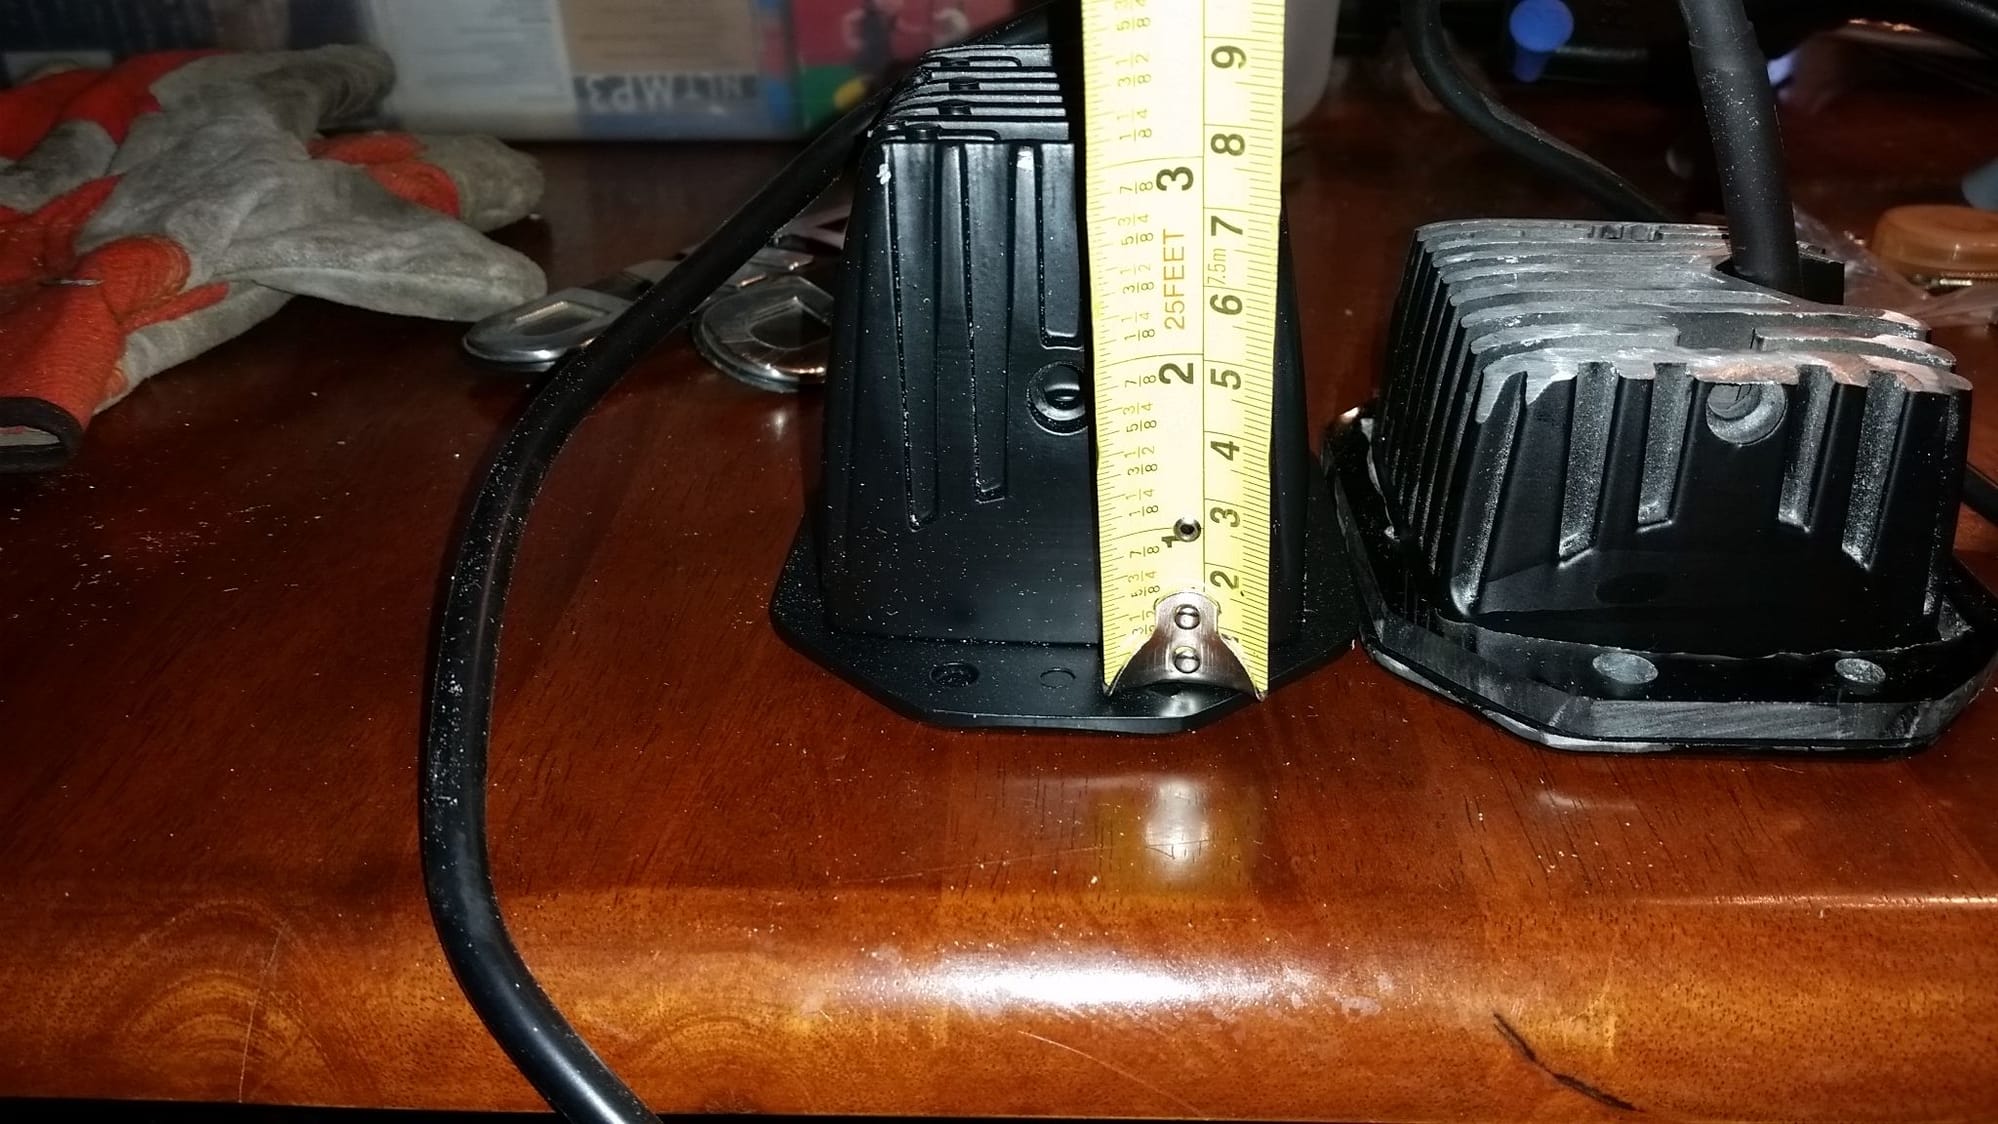
So since the stock back up lights are now useless due to the tire mount I dug into the stash of junk I bought for the Trekker and found some 18w flush mounted LED's
80-20160225_125512_abb68b8300e1044fc55ef4302c46aacf51c523ce.jpg

There were too thick
80-20160309_161050_d93a527cb10f64343fb79aca6ddee521b6411f16.jpg

So cut an inch off the cooling fins. I did this on the 81 too and didn't have any issues with the lights. They aren't on that long so heat dissipation should not be too big of issue
80-20160311_152522_1_2c3d91a6a8f30466c297192d19272bb75703f0ba.jpg

80-20160311_152607_1_d1e7e4d71081e8fb833d1f1f72bb712d80c1303b.jpg
 
Nice job on the backup lights, I actually have a similar set I am planning to do the same thing with. Hopefully I can make them fit.
 
Someone asked about clearance behind the window, it is a tight fit but the window works as it should

Night shot, the tree lit up pretty good

I wish it had a little more output to the side but I will cure that with a 10w flood on each side mounted to the t/c cross member like I did that on my Tacoma and the Trekker and it worked great, pics from the 81:


Hopefully get those added next weekend.
 
Today was a great day to tackle some wiring while wearing shorts and flip flops, wish I had more time to work on more of it:hillbill:

My new favorite wiring tool...speeds things up a lot.
80-20160319_173913_9eaab86294fb79147312cdb101667dd465422ba6.jpg

Crimped and heat shrinked momentary on-off-momentary off switch for the rear window
80-20160319_175013_80b6dc06cb149cb817a4f62129ffd9cee05bb291.jpg

Seeing AJohnson's build reminded me this would be a good addition rear Aux outlet for a future 12v fridge and dual USB for my rear camera
80-20160319_182009_b53258dd7439456fa158327d3164a7a51ebd0788.jpg
 
I looked around at how various people had covered up the area of the tailgate where the stock license plate holder and back up lights were.
I would have loved to have picked up a factory tailgate that was built for the swing out and would have had the correct factory fascia piece but in keeping with the keep it cheap theme of this built decided to experiment with stuff i had on hand.
using the stock license frame as a template

dug around and found some diamond plate in the garage

figured i would use it to cover up the hole left when the plate mount was removed, though it was hidden with the spare tire on:


Using my knee to bend the diamond plate got the contour pretty close to the curvature of the tailgate. Not perfect but it will do
 
Added some additional LED's in the cargo area. A single LED in the stock cargo lamp was pretty lame


Much better:hillbill:
 
What vehicle is the rear tire mount from? And how did you attach it? I'm looking to do the same thing on my first gen. Your's is looking great!
 
Last edited:

Members online

Forum statistics

Threads
278,316
Messages
3,554,113
Members
248,016
Latest member
Advally Service

Trending content

Back
Top