
FJ Springs Installed...

J.A.

Senior Member
Well I finally had a chance to work on my FJ Swap as I picked up a set of 4 springs about 6 months ago. I also picked up a 10mm OME trim packer to try to level out the 1/2" lean on the driver side.

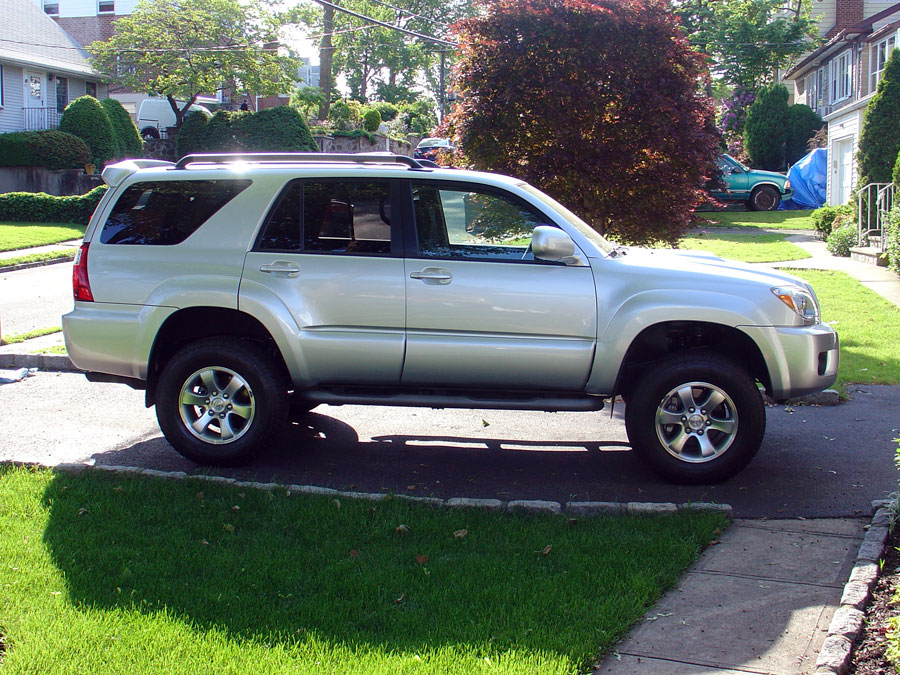
Rear installation went very smooth. One hour per side. Gained just about 3/4" lift on top of the 1.5" from my DS Spacers. The trim packer did not reduce the side to side variance at all for some reason.

As to the Fronts...wow, very difficult. I couldn't get it done. Worked on one side for 6 hours and had to give up and get the vehicle back in driving order.

First of all with the firmer and longer FJ spring, combined with the DS spacer set up I could not compress the spring enough to get the to nut back on the coil pack. Using the handheld springs on the factory 4R spring is no issue, but on the FJ spring you just hit a certain point where it gets so tight and starts to bend it gets a little scary.

I tried the "no compressor" method to no avail as well. Due to the longer overall length I couldn't get the bottom of the shock in place.

I guess I would have to pop the lower ball joint and mount and drop that down. Anyone else had this issue? If I pop the lower, do I leave the top ball joint connected? I absolutly do not want to mess up the XREAS lines, ABS/TRAC sensor wires or the Brake lines, hence the reason for only doing the job myself and not bringing it somewhere.

Here is a quick pic of the rear only install. Updated write up on my site.
 
Register to hide this ad
JA, I don't have the DS spacer but I also had a difficult time reinstalling my FJC coils when I moved my 5100's to the top level. It really just came down to using the two spring compressors I rented from O'Reily's and we ratched the h*ll out of them until we can compress them enough to get the top nut on tight. If I remember correctly, when it was all back together I have about 1/4" of the thread sticking out the top of the nut (if that makes sense).

I don't know what tools you were using but I highly recommend air tools to use with the spring compressors. It allows you to really wrench on the things and compress the coil a lot. Also, did you detach the sway bar? I totally forgot and then remembered half way through. Way easier to get the shock assembly in and out with the sway bar detached.
 
I did disconnect the sway bar and upper ball joint and used the factory jack upside down between the upper arm and the wheel well to push down. On the hand compressors, I used a 1/2" ratchet as much as possible but at a certain point it binds on the coil and you have to switch to a wrench.
 
Air tools are almost a must for the front. You can loosen the eccentric bolts on the lower control arm to get more room if needed. That doesn't help get them assembled but makes the install easier once that's done.

On the rear spacer, it actually lifts both sides since the coils are near the center of the axle and not out by the tires. People are using a single 1.5" spacer on the driver side and it comes out very close. A larger spacer will be required to correct the lean.
 
i installed both the fj springs and daystar yesterday - i also had a tough time with the fronts. i had to use a combination of threads to help me get through it. the front driver side i had to disconnect the xreas to compress the spring into the shock (i took it to my cousins shop for the compressor). the passenger side was easier and did not require the spring compressor, i also disconnected the xreas just to move the shock in and out with ease.

to prevent damage to the abs sensor i simply disconnected it and moved it out of the way. the only thing i reget about the install and follow the no compressor thread was that i damaged both of my lower ball joints - so now they are leaking and toyota has quoted me about $400 to get them fixed.
 
Air tools are almost a must for the front. You can loosen the eccentric bolts on the lower control arm to get more room if needed. That doesn't help get them assembled but makes the install easier once that's done.

On the rear spacer, it actually lifts both sides since the coils are near the center of the axle and not out by the tires. People are using a single 1.5" spacer on the driver side and it comes out very close. A larger spacer will be required to correct the lean.

Unfortunately I don't have air tools, but great tip on the EC bolts.

Re: the rear spacer...understood, thanks. Looks like I will have to live with the lean.
 
i installed both the fj springs and daystar yesterday - i also had a tough time with the fronts. i had to use a combination of threads to help me get through it. the front driver side i had to disconnect the xreas to compress the spring into the shock (i took it to my cousins shop for the compressor). the passenger side was easier and did not require the spring compressor, i also disconnected the xreas just to move the shock in and out with ease.

to prevent damage to the abs sensor i simply disconnected it and moved it out of the way. the only thing i reget about the install and follow the no compressor thread was that i damaged both of my lower ball joints - so now they are leaking and toyota has quoted me about $400 to get them fixed.

I guess I would have to disconnect XREAS at the union fitting and take to a shop with wall mounted compressor and get the coil pack assemble there. Not too big a deal or expense, but install will still be virtually impossible without dropping the LCA. Is that easy enough to do?
 
Unfortunately I don't have air tools, but great tip on the EC bolts.

Re: the rear spacer...understood, thanks. Looks like I will have to live with the lean.


I had the same problem with my SAW rear coils. As ARK mentioned, a single Daystar 1.5" spacer on the driver's side fixed the problem. I am completely level depending on my fuel level.

I can get you the exact measurments later if you want. If I remember correctly, it was around ~1.25" D and ~.75" P.
 
Last edited:
I guess I would have to disconnect XREAS at the union fitting and take to a shop with wall mounted compressor and get the coil pack assemble there. Not too big a deal or expense, but install will still be virtually impossible without dropping the LCA. Is that easy enough to do?

correct. in the no compressor thread it says to drop the lower ball joint - thats what i did - used a pry bar to lower the lca as far as it would go (be careful not to rip the ball joint with the pry bar)...

also when you take the shock and spring to get it compressed - made sure the lower shock eyelet and the 3 bolts up top are aligned how they need to be installed.
 
also when you take the shock and spring to get it compressed - made sure the lower shock eyelet and the 3 bolts up top are aligned how they need to be installed.

:iagree: Make sure the shop is aware of the alignmnet. The first time I had mine compressed, the shop did it completely wrong and it was crooked...no way it was going in. This was after I had already told them 3 different times. I think they just assumed I didn't know what I was talking about and ignored my advice.

Luckily, I have access to an auto shop and rebuilt them myself using a wall-mounted compressor. Extremely easy but a little unnerving knowing how much power will be released if the coils slip out.
 
Just did my fronts last night. The first side took a while with some trial and error, but now I can do 1 side in under an hour easy.

(Without xreas) Bilstein 5100s added in my case. I only jacked one side at a time to do work, may be easier to lift both sides on jack stands at once, not sure there.

Tools needed, 19mm wrench and ratchet, and 17mm? for top of shock, and either wrench or adjustable wrench to hold shock from spinning, floor jack and jack stands, and ratchet strap.

First off, forget the spring compressors! I went and bought some, shouldn't have.

-Jack up the front a ways, support frame with jack stands under front doors(roughly).
-Pull wheels, loosen shock nut on top and bottom bolt"
-Place floor jack under lower arm to hold pressure, remove 2 bolts to free lower arm from knuckle at ball joint.
-Loosen eccentric bolts (Note adjustment settings roughly at least), lower jack/control arm until shock/spring falls free of upper mount, pull out lower shock bolt, remove assembly, and DONE! (with diss-assembly) NOTE spring/bushing placements for reassembly

-Reverse procedure with new stuff, using the jack against vehicle weight to reassemble, and ratchet strap to gently pull knuckle and upper arm down to replace/align lower 2 bolts at ball joint.

Note, try to put eccentric bolts back where they were originally if you have to drive it to the alignment shop.

Pulling the lower arms free saved about 90% of the time I spent with the compressors and learning on the first side, and way safer overall!

Hope this helps someone save some time/cursing, it is super easy this way!
 
Just did my fronts last night. The first side took a while with some trial and error, but now I can do 1 side in under an hour easy.

(Without xreas) Bilstein 5100s added in my case. I only jacked one side at a time to do work, may be easier to lift both sides on jack stands at once, not sure there.

Tools needed, 19mm wrench and ratchet, and 17mm? for top of shock, and either wrench or adjustable wrench to hold shock from spinning, floor jack and jack stands, and ratchet strap.

First off, forget the spring compressors! I went and bought some, shouldn't have.

-Jack up the front a ways, support frame with jack stands under front doors(roughly).
-Pull wheels, loosen shock nut on top and bottom bolt"
-Place floor jack under lower arm to hold pressure, remove 2 bolts to free lower arm from knuckle at ball joint.
-Loosen eccentric bolts (Note adjustment settings roughly at least), lower jack/control arm until shock/spring falls free of upper mount, pull out lower shock bolt, remove assembly, and DONE! (with diss-assembly) NOTE spring/bushing placements for reassembly

-Reverse procedure with new stuff, using the jack against vehicle weight to reassemble, and ratchet strap to gently pull knuckle and upper arm down to replace/align lower 2 bolts at ball joint.

Note, try to put eccentric bolts back where they were originally if you have to drive it to the alignment shop.

Pulling the lower arms free saved about 90% of the time I spent with the compressors and learning on the first side, and way safer overall!

Hope this helps someone save some time/cursing, it is super easy this way!

Exactly what I did when I installed my OME lift. I just marked the spot of the eccentric bolts and bolted it back as close as I could. Worked out great. I had the coils and shocks together as one unit and just slipped them in. I was able to do the whole truck in 4 hours.
 

Members online

Forum statistics

Threads
278,307
Messages
3,554,053
Members
248,016
Latest member
Advally Service

Trending content

Back
Top