FoundedSine14's build thread

FoundedSine14

New member
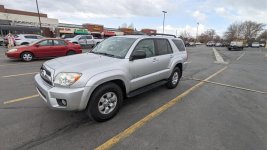
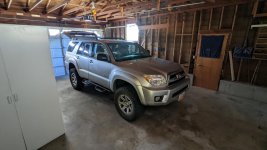
In 2021, I bought a 2008 SR5 V6 with about 140k miles. I unfortunately had to sell my 1973 VW Westfalia right before this, but I don't regret moving from vintage inconsistency to profound reliability.

I was raised on both air-cooled VWs and 90s Toyotas anyway. My family had an 80 series that my oldest brother converted into a rock crawler when I was just a kid, so that's my inspiration.
 

Attachments

  • PXL_20220329_172501616.MP-min.jpg
    PXL_20220329_172501616.MP-min.jpg
    138.6 KB · Views: 2,723
Register to hide this ad
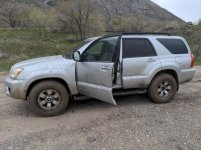
Over the course of about a year, I got to know the car by taking it out in the foothills by my house. I've lived right on the edge of the mountains my whole life, so I am not lacking for places to test out my vehicles!

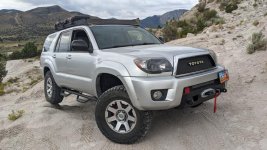
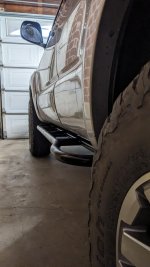
I found a set of used N-Fab step bars from a 5th gen owner, and they bolted right up to my 4th gen. They don't look as good on a 4th as they do on a 5th, but they fit and grant clearance that the OEM stepboards don't.

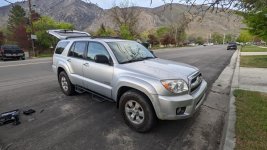
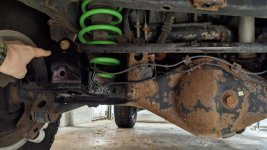
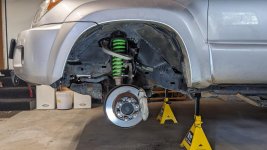
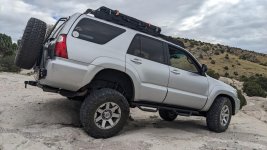
Then I installed an Ironman4x4 Nitro lift with UCAs and an Eimkeith panhard correction kit (I know my rear axle needs some rust treatment, don't judge). At the time, I had planned on armor and bought the Medium Load springs front and back. Looking back, I wish I hadn't done that because I typically don't carry more than myself and a couple tools. Now I'm eyeing some LT setups, so I'll just live with the stiffness until then.

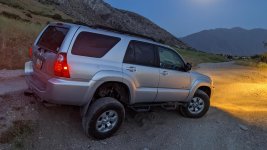
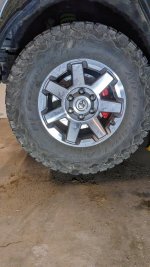
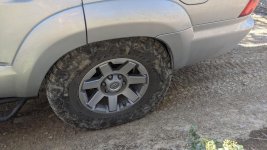
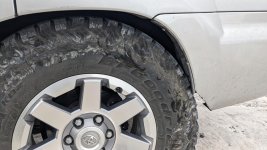
Then finally I installed a set of Spidertrax 1.25" spacers with some OEM Trail Edition 17s and 285 KO2s. This required a BMC which I had done by a local offroad shop. Impulse Offroad in SLC, they are super nice and liked meeting my dogs so they get 5 stars from me.
 

Attachments

  • IMG_20220413_165735_01-min.jpg
    IMG_20220413_165735_01-min.jpg
    138.1 KB · Views: 2,715
  • PXL_20220506_015021689.MP-min.jpg
    PXL_20220506_015021689.MP-min.jpg
    140.9 KB · Views: 2,672
  • PXL_20220613_033110843-min.jpg
    PXL_20220613_033110843-min.jpg
    137.4 KB · Views: 2,708
  • PXL_20220817_000927769.MP-min.jpg
    PXL_20220817_000927769.MP-min.jpg
    135.7 KB · Views: 2,674
  • PXL_20230112_005715821-min.jpg
    PXL_20230112_005715821-min.jpg
    133.2 KB · Views: 2,684
Last edited:
The whole goal of this build was to tackle trails that my '73 VW had failed on. As cool as the VW was, the 4Runner just goes.

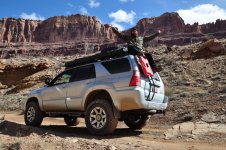
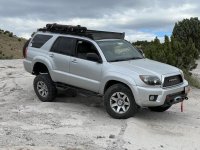
I added a Gobi ladder and a used Prinsu roof rack from another local 4Runner owner which was perfect for a cheap eBay awning.

These photos are near Goblin Valley, a state park about two hours away from Moab. The natural history of this area is deep with pictographs and petroglyphs everywhere. I can't recommend it enough.

Try to spot my garage buddy in her camping pajamas
 

Attachments

  • DSC_0486-min.jpg
    DSC_0486-min.jpg
    143.2 KB · Views: 2,766
  • PXL_20230506_143536362.MP-min.jpg
    PXL_20230506_143536362.MP-min.jpg
    140.3 KB · Views: 2,587
  • DSC_0261-min.jpg
    DSC_0261-min.jpg
    137 KB · Views: 2,713
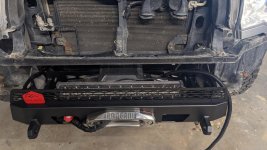
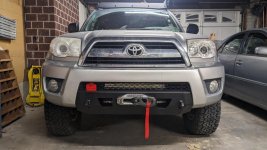
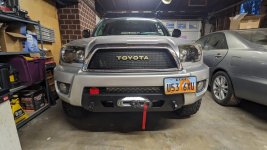
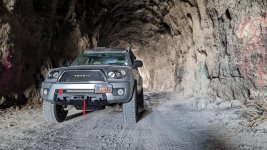
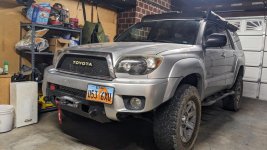
Next I added a low-profile winch bumper from Lost Trails. I love the lines of this bumper, how the front nearly keeps it's OEM style.

I threw in an Apex 12k winch from Harbor Freight and a 20 inch lightbar for good measure.

As much as I like the look of the Lost Trails bumper, it hangs a little lower than the OEM plastic. It's also heavier especially with the added winch, so I ended up with a worse approach angle. Not a huge deal usually, but it has bit me in the ass a couple times so I'll probably end up swapping this out for a high-clearance bumper. Nothing against Lost Trails, it just doesn't fit my use case as well as I hoped it would.
 

Attachments

  • PXL_20230512_010022978.MP-min.jpg
    PXL_20230512_010022978.MP-min.jpg
    141 KB · Views: 2,758
  • PXL_20230512_042921640.MP-min.jpg
    PXL_20230512_042921640.MP-min.jpg
    139.1 KB · Views: 2,857
Last edited:
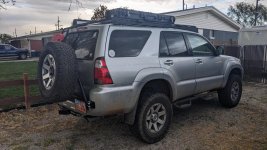
Since the fullsize spare doesn't fit very well under the cab, I got a swingout kit from 80% Offroad and had a buddy build it. I am learning how to weld, but this project was too much for me. Besides, I like supporting my friends and giving them business.
 

Attachments

  • PXL_20230518_004821735.MP-min.jpg
    PXL_20230518_004821735.MP-min.jpg
    142.3 KB · Views: 2,699
Last edited:
With all the added weight, I felt like I needed an upgrade to the brakes. Maybe the stock brakes were fine, but I love an excuse to work on the car.

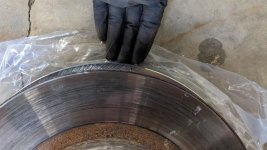
I got a Power Stop kit for a 5th gen from RockAuto for the fronts. Rotors, calipers, and fancy brake pads. Look at that extra girth from the rotors! New rotor on bottom, stock rotor on top.

I'm not the biggest fan of red brake calipers, but that's how the Power Stops come and it's a quality powder coat on there, so I figure I'll leave it.

I had to do some.... modification.... to the dust shields. Anywhere that was touching the new rotors got a firm smack from my trusty BFH.

Installing 5th gen brakes on a 4th gen is well documented all over this forum and it's an upgrade that I recommend (so far, at least). I have a small-ish trailer that I tow sometimes and, fully loaded, I am confident in the braking system.

I have yet to do the rear brakes. I haven't felt a need to.
 

Attachments

  • PXL_20230604_013304335.MP-min.jpg
    PXL_20230604_013304335.MP-min.jpg
    137.8 KB · Views: 2,671
  • PXL_20230604_011052972.MP-min.jpg
    PXL_20230604_011052972.MP-min.jpg
    137.1 KB · Views: 2,670
  • PXL_20230607_044131915.MP-min.jpg
    PXL_20230607_044131915.MP-min.jpg
    139.1 KB · Views: 2,616
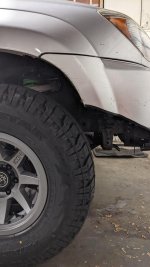
Under full flex in the rear, it's clear that I need to do some trimming. I did some in the 2nd pic, but obviously it wasn't enough.
 

Attachments

  • PXL_20230704_154405366.MP-min.jpg
    PXL_20230704_154405366.MP-min.jpg
    140.4 KB · Views: 2,697
  • PXL_20230902_154425049.MP-min.jpg
    PXL_20230902_154425049.MP-min.jpg
    138 KB · Views: 2,652
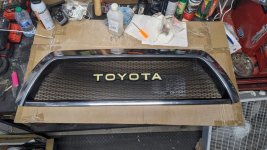
In the meantime, I made myself a Satoshi-style grill and upgraded my headlights.

I do not recommend anyone do a DIY Satoshi grill. It sucked and was confusing. It took me probably 15 hours but I will freely admit that I am an idiot. (really I just don't like using glue). Here is the tutorial I followed

The headlights on the other hand I highly recommend. I found a pair of used OEM lights on the local classifieds for $25! Such a steal. I baked them open then replaced the stock projectors with true HID projectors. I also blacked out the housings to match my new grill.

The HID conversion parts:
- Bi-Xenon: Morimoto Mini H1 8.0
- H1: XB 5000K HID Bulbs
- 35w / AMP: Morimoto XB Ballast
- 06-09 4Runner H1 8.0 / D2S Micro Brackets

Since the projectors are bi-xenon, they fully open when I turn on my high beams. So with the high beams switched on, I have both the stock high beams plus fully open HID projectors. (if you don't already know, projectors have a physical cutoff behind the lens which gives that crisp line to avoid blinding oncoming traffic, but that cutoff can be on an actuator attached to a switch).

I can't stress enough how important it is to aim your headlights when you're done installing new ones. Don't be one of those *******s blinding other drivers.

The last photo is from Little Moab, an offroad park on the west side of Utah Lake.

 

Attachments

  • PXL_20230817_200259069.MP-min.jpg
    PXL_20230817_200259069.MP-min.jpg
    143.9 KB · Views: 2,700
  • PXL_20230818_022516237.MP-min.jpg
    PXL_20230818_022516237.MP-min.jpg
    139.3 KB · Views: 2,694
  • PXL_20230902_150814631.MP-min.jpg
    PXL_20230902_150814631.MP-min.jpg
    141.7 KB · Views: 2,624
Last edited:
Some more photos and a video from Little Moab

I installed Overland Custom Design swaybar disconnects up front and you can see them working in the video, letting the body stay flat while the FR and FL are flexing independently, you know, like IFS should.

I honestly think the disconnects are the best offroad upgrade I've made to this vehicle. I still travel on the highway so being able to reconnect the swaybar is huge. I know the swaybar debate is a hot one, but this mod fits my use case perfectly
Video
 

Attachments

  • PXL_20230902_165621131.MP-min.jpg
    PXL_20230902_165621131.MP-min.jpg
    143.9 KB · Views: 2,645
  • PXL_20230902_154514492.MP-min.jpg
    PXL_20230902_154514492.MP-min.jpg
    141.2 KB · Views: 2,638
  • IMG_3340-min.jpg
    IMG_3340-min.jpg
    138.5 KB · Views: 2,631
Last edited:
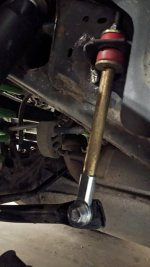
Per Tinkerer's Adventure on YouTube, I decided to upgrade my rear swaybar with a stiffer one on top of the front swaybar disconnects. I tried to test it out on a popular trail called Forest Lake but unfortunately I broke one of the rear swaybar links at some point and the test was invalidated. In the video, you can hear the rear swaybar hitting against the control arm on the offending side.

Don't judge my friend for his spotting skills, he's learning.

I've since rebuilt my rear swaybar links with a slew of parts from McMaster-Carr and can confirm that the stiffer swaybar is awesome. It forces the IFS to do more work

Rear swaybar link parts list:
- 2x 60645K341
- 1x 98957A805
- 2x 95034A300
- 1x 90630A155
- 1x 92240A360
- 1x 93441A471
- 1x 90107A127
- 1x 91458A560

The stiffer swaybar is ACO-K2-301-0U

Video
 

Attachments

  • PXL_20231008_203607642.MP-min.jpg
    PXL_20231008_203607642.MP-min.jpg
    132.7 KB · Views: 2,533
Last edited:
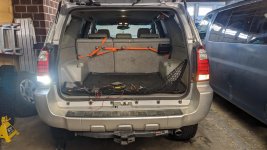
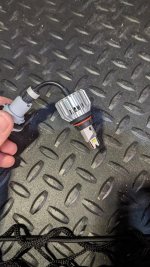
One thing I've disliked about this truck is how weak the reverse lights are. With the OEM tint at night, the stock bulbs seemed like they weren't even on. So I fixed that.

I got these bright ass LEDs and had to do a bit of conversion to make them fit using these bulb sockets then tied the socket's pigtail into the OEM wiring for the reverse signal.

Even in my fully lit garage you can see significant difference between the new (left) and old (right).
 

Attachments

  • PXL_20230311_203207987.MP-min.jpg
    PXL_20230311_203207987.MP-min.jpg
    139.9 KB · Views: 2,450
  • PXL_20230311_203338586.MP-min.jpg
    PXL_20230311_203338586.MP-min.jpg
    144.4 KB · Views: 2,503
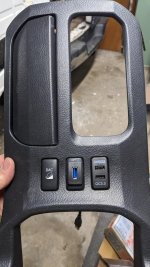
This is one of my favorite QOL mods.

My headunit has a USB plug-in for Android Auto and CarPlay. It doesn't support wireless, unfortunately, but I also don't mind charging my phone while I drive.

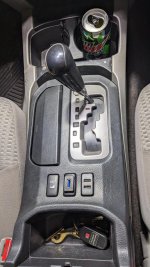
I routed this long USB3.0 passthru from behind the headunit, behind the AC controls, and through the center console. Then I cut out one of the button blanks for it. Now I don't have to worry about a long cord draped across the console or dash.

While I had the center console apart, I put in a dual USB port from CH4X4 into the other blank wired off of the cigarette lighter. This has been awesome for charging accessories while I'm camping. The chargers don't work unless the car is on, so it forces me to charge stuff while I'm driving, and I don't have to worry about depleting the battery out in the wild.
 

Attachments

  • PXL_20230204_230110106.MP-min.jpg
    PXL_20230204_230110106.MP-min.jpg
    138.7 KB · Views: 2,420
  • PXL_20230204_232745268.MP-min.jpg
    PXL_20230204_232745268.MP-min.jpg
    139.1 KB · Views: 2,445
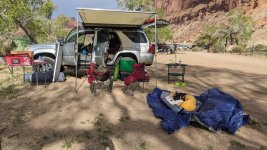
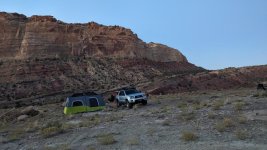
We took a trip down to Goblin Valley (state park in UT) for the 2023 solar eclipse. There were so many people there, but you wouldn't know it looking at our campsite. Something about a 4Runner be able to go further offroad (or maybe just my willingness to?)

This was somewhat of an emotional moment for me since my 73 VW failed to get up this specific trail a few years ago, then the 4Runner climbed up it no problem! (big surprise I know)

No rooftop tent for us since we take the dogs camping
 

Attachments

  • PXL_20231014_130919032.MP-min.jpg
    PXL_20231014_130919032.MP-min.jpg
    139.3 KB · Views: 2,357
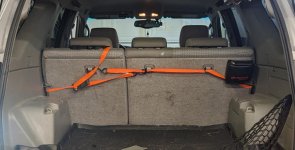
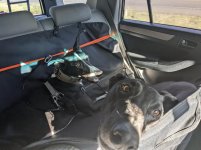
I love taking my dogs with me everywhere I can, so this is how I set them up.

First, the dogs wear a harness. It's the same harness they wear when walking, so it's very convenient.

Second is a hard-bottom car hammock. It's three-way foldable, so if I need to transport people then it can do that.

Third is a strap that goes around the seats and hammock. I've tried buckling the dogs into the seat belt receivers, but they have stepped on the releases and unbuckled themselves, so I like this better.

Then the dogs get "buckled" in from their harness to the strap. They tend to swap sides and their "seat belts" get a bit tangled so I need to figure something out for that. It's definitely not a perfect solution so I'm open to suggestions.
 

Attachments

  • PXL_20230311_203207987.MP-min.jpg
    PXL_20230311_203207987.MP-min.jpg
    134.3 KB · Views: 2,307
  • PXL_20230812_010736507.MP-min.jpg
    PXL_20230812_010736507.MP-min.jpg
    129.3 KB · Views: 2,305
4xinnovations rock sliders installed by my friend at GOOCH Auto Services. If you're in the Utah County area, hit him up, he's a Toyota guy.

I went with the DOM w/ Kickout option and no treadplate. I regret not getting the treadplate, so I'll probably just weld up my own.
 

Attachments

  • PXL_20230928_010305063.MP-min.jpg
    PXL_20230928_010305063.MP-min.jpg
    132 KB · Views: 2,301
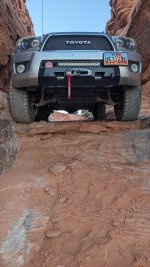
Took a trip to Sand Hollow and it became abundantly obvious that my approach and departure are inadequate.

My friend does tours there, here's a video he put together of my experience. You can see the first obstacle (dubbed "The Funnel") where I scraped my Lost Trails bumper. Not in the video is when I also scraped my hitch.

You can see the scrapes in this photo. It's not a huge deal, but I do think it would be fun to weld up my own custom tube bumpers, so this is my excuse to do it really.
 

Attachments

  • PXL_20231021_144654753.MP-min.jpg
    PXL_20231021_144654753.MP-min.jpg
    141.8 KB · Views: 2,583
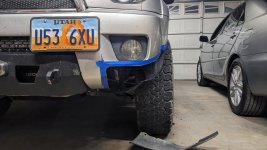
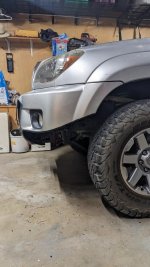
I followed this tutorial to do a "viper cut" on the front bumper, similar to what 5th gens have. I think it came out pretty ok. I think the tutorial creator is on this forum, but check out his channel either way, he has some cool stuff.

I made the cuts with this oscillating tool and a plastic cutting blade
 

Attachments

  • PXL_20231026_005123105.MP-min.jpg
    PXL_20231026_005123105.MP-min.jpg
    136.4 KB · Views: 2,612
  • PXL_20231026_012346504.MP-min.jpg
    PXL_20231026_012346504.MP-min.jpg
    141.8 KB · Views: 2,582
  • PXL_20231026_012321078.MP-min.jpg
    PXL_20231026_012321078.MP-min.jpg
    136.6 KB · Views: 2,572
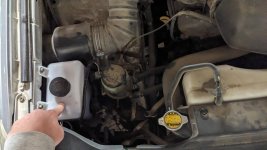
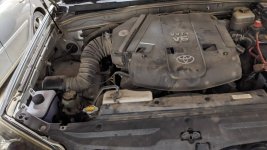
The viper cut bumper exposed my windshield washer fluid reservoir on the passenger side, so I followed this tutorial to relocate it. I've seen Loose Axles on this forum, too. Seems like a chill dude.

My new reservoir leaks, so I need to put some silicone seal around the pumps or something, but otherwise this was pretty cut and dry. An easy welding project. And it really cleans up the front end
 

Attachments

  • PXL_20231229_010857201.MP-min.jpg
    PXL_20231229_010857201.MP-min.jpg
    131.8 KB · Views: 2,556
  • PXL_20231229_010938174.MP-min.jpg
    PXL_20231229_010938174.MP-min.jpg
    133.1 KB · Views: 2,507
  • PXL_20231229_010943272.MP-min.jpg
    PXL_20231229_010943272.MP-min.jpg
    135.6 KB · Views: 2,598

Members online

Forum statistics

Threads
278,306
Messages
3,554,045
Members
248,016
Latest member
Advally Service

Trending content

Back
Top