• If you plan to post to Classified forums, you must follow these rules, or your post will be deleted.

    1. Thread title must include at a minimum: FS or FT, Item(1st, 2nd, 3rd, 4th or 5th gen), Price and Location. For Example: FS: 4th GEN Carpet Floor Mats - Tan, $50 Denver, CO.
    2. All Threads must contain the following information
      • What is for sale/trade (model, specs, etc.)
      • Condition
      • Price/What you want to trade for
      • Location of item
      • At least one picture of the item for sale or for trade
    3. No "Feeler" Threads - Its either for sale or it isn't.
    4. Moderators lock Classified Threads that have not had any activity in 90 days or when the part is announced SOLD.
    5. Threads not complying with the rules will be deleted without notice.

FS: 4th Gen Body Lifts. (Just like my 3rd gen page)

I just got mine today. I can't wait to install. Thanks a ton.


Sent from my iPhone using Tapatalk

Awesome! Hit us with some pics when your done! Its a pleasure doing business with someone who is available throughout the process....before and after purchase! much mahalos shootmymime!
 
You say that it helped you clear your body mounts...have a picture of the clearance you've gained? I've been considering this for my 5th gen and I didn't think it would help with body mount clearance..


Sent from my iPhone using Tapatalk

Sure thing my friend...ill get pics for you soon! I'm not sure if the 5th gen and 4th gen are the same as far as body mounts go but ill get them for you.
 
I recently ordered the 1" lift and let me thank you for incredibly fast service, everything came as expected if not better [emoji846]. I do have a few questions. Since I'm only lifting the body 1" on a 2005 SR5 V8, did I need to remove the radiator fan shroud? The lift is installed because i was too excited to wait - I noticed that, when lifted, the supplied bolts didn't pass through the front bushings or body slots without opening up the two with a 1/2" drill bit- is this normal? And after, the supplied bolts weren't long enough to put the bottom washer and nut on until i lowered the body almost completely and compressed the rubber bushings - but once on, easily torqued to 40 ft lbs after the end of the bolt barely passed the nylon in the nut - again is this to be expected? Also, I loosened the steering shaft but haven't installed the spacer yet - at 1" is it necessary? If not, the insanely tight bolts can just stay where they are.


Sent from my iPhone using Tapatalk
 
I recently ordered the 1" lift and let me thank you for incredibly fast service, everything came as expected if not better [emoji846]. I do have a few questions. Since I'm only lifting the body 1" on a 2005 SR5 V8, did I need to remove the radiator fan shroud? The lift is installed because i was too excited to wait - I noticed that, when lifted, the supplied bolts didn't pass through the front bushings or body slots without opening up the two with a 1/2" drill bit- is this normal? And after, the supplied bolts weren't long enough to put the bottom washer and nut on until i lowered the body almost completely and compressed the rubber bushings - but once on, easily torqued to 40 ft lbs after the end of the bolt barely passed the nylon in the nut - again is this to be expected? Also, I loosened the steering shaft but haven't installed the spacer yet - at 1" is it necessary? If not, the insanely tight bolts can just stay where they are.


Sent from my iPhone using Tapatalk


Great questions. Thank you for the feed back. If I do miss one of your questions ask it again.
I do have "rough" install instructions on my website.
I am not sure about the fan shroud. If it is close or contacts the lower portion of the shroud, then yes it should be removed.
Drilling the front body mounts have been vaguely mentioned to me before, I guess it's only a couple people have this issue or others are not bringing up this issue. But I have heard it.
The bolts should all be long enough. Toyota uses all the same length bolts on their 4th and 5th gens but 3rd is a bolt nightmare. I am unsure if 8" long bolts would be too long for a 1" application. This would be something I would like to look into more.
For a steering spacer with a 1" lift it is not necessary but optional. If it works fine and there are still enough shaft length on the slip yoke. (The shaft splines slide into the slip yoke and then bolt to the other joint.) and not on the verge of pulling out causing the steering wheel to become detached than I'd say that you are fine. Leave those stubborn bolts.

Enjoy the lift. Any more questions feel free to ask! -Pat


Sent from my iPhone using Tapatalk
 
Thanks Pat! That covers all my questions- taking a 4 hour road trip this weekend, any questions I have after, I'll post them up. Thanks again!


Sent from my iPhone using Tapatalk
 
Ordered a 1/2" BL and it delivered very quick. Took me a week or two to get around to the install.
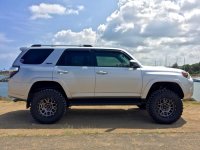
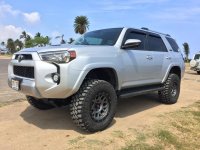
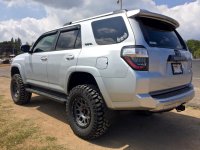
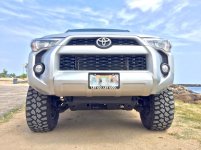
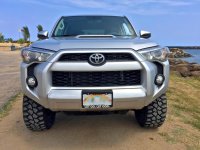
The main reason for this is to create a bigger gap between the front bumper, sliders and rear bumper. I only had a bout 1/2" or less of gap in those places. Although fitment looked nice and tight I found that while off rodaing the body and frame flex quite a bit. The front bumper was contacting the fenders sometimes and the rear bumper would bounce around and contact there as well. For the cost of this 1/2" BL I figured I wanted to give it a try on my 5th Gen. The install was pretty straight forward and made it easier with the help of a buddy. I like the little bit of taller stance it gave to it too.

Before


After


is there a way to adjust the aftermarket bumpers up to close the gap after the bl?
 
is there a way to adjust the aftermarket bumpers up to close the gap after the bl?


This customer specifically ordered a 1/2" lift because while flexing his bumpers would contact the body. Thus a need for a lift or spacer. It solved his problem.

It depends on how your bumper is manufactured. There is always a way tho.


Sent from my iPad using Tapatalk
 
Ordered a 1/2" BL and it delivered very quick. Took me a week or two to get around to the install.
The main reason for this is to create a bigger gap between the front bumper, sliders and rear bumper. I only had a bout 1/2" or less of gap in those places. Although fitment looked nice and tight I found that while off rodaing the body and frame flex quite a bit. The front bumper was contacting the fenders sometimes and the rear bumper would bounce around and contact there as well. For the cost of this 1/2" BL I figured I wanted to give it a try on my 5th Gen. The install was pretty straight forward and made it easier with the help of a buddy. I like the little bit of taller stance it gave to it too.

Before


After


Looks solid! I suggest painted or wrapping your flares black to match the armor
 
I saw the 1" BL along with 3" suspension installed on Blake's 5th gen SR5 MGM 4x4 and wow it looked awesome! Let's get one for my 15' TE and up on YouTube as an install video. I just ordered some 305/65R17 Deegan 38s that'll appreciate having the clearance!

i got your email about making a video. ill get your kit sent out tomorrow and we can work something out on a video.
 
i got your email about making a video. ill get your kit sent out tomorrow and we can work something out on a video.

All good brother. No obligation on your part. I saw the shipping confirmation and looking forward to getting my 4R a bit higher.
:cheers:
 
i got your email about making a video. ill get your kit sent out tomorrow and we can work something out on a video.

Installed 1" yesterday on my 2015 TE 4x4. Here are my install notes:

1. The bolts were slightly larger in diameter (3/4" head) than the OEM (18mm head) so we had to drill out all the body holes and washers to make them work. Wasn't a problem at the shop I did this at because they had 18" drill bits but you definitely need to get exact bolts for other 5th gen guys wanting this kit. The length wasn't a problem just the diameter.

2. No need to move nor trim radiator shroud. Didn't affect the fan movement at all.

3. Windshield water reservoir bottle just needs the three bolts taken out and hung/slid out of the way to access the mount. No need to disconnect all the hoses & wiring. I zip-tied it to my UCA.

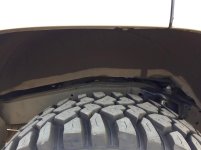
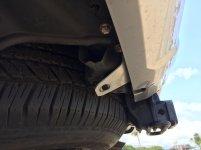
4. Front bumper can be moved up exactly one inch via its 8-bolt mounting holes and you have to in order to seam the plastic bumper cover back up tight. If not , you'll have a slight 1/8" gap between bumper and fender. By moving it up you can only use 4 of the 8 original mounting holes. Still plenty strong enough mount though. Weld it if you think differently.

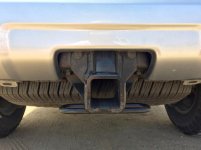
5. No problem with rear bumper/cover but you'll obviously have a space now between the cover and the frame support so I'll be buying a sheet of 1" foam from a craft store and glue to pre-existing bumper styrofoam support. In order to do this though, the bumper will have to be removed to access.

6. You'll definitely need a magnetic retrieval tool that has a strong pull in order to lift the OEM body mount bolts out, particularly for the front and rear set.

7. All the interior door panels are just snapped in/out but the rear is a bit trickier because you don't want to have to remove the entire panel. We just popped about a 3rd of it back enough for as hand and tool to get in there

8. Be prepared to have plenty patience, especially with carefully removing the OEM inner fender fasteners ;)
 
Last edited:
Installed 1" yesterday on my 2015 TE 4x4. Here are my install notes:


1. The bolts were slightly larger in diameter (1/4" head) than the OEM (18mm head) so we had to drill out all the body holes and washers to make them work. Wasn't a problem at the shop I did this at because they had 18" drill bits but you definitely need to get exact bolts for other 5th gen guys wanting this kit. The length wasn't a problem just the diameter.


I find it interesting that some people report that the bolts fit, the front mounts don't fit and need drilled a very little bit, or like you all need drilled.

If I recall correctly you are the only person (unfortunately) that has had to drill and open up every body mount.


Sent from my iPhone using Tapatalk
 
I find it interesting that some people report that the bolts fit, the front mounts don't fit and need drilled a very little bit, or like you all need drilled.

If I recall correctly you are the only person (unfortunately) that has had to drill and open up every body mount.

Sent from my iPhone using Tapatalk

I'm not 100% sure they all didn't fit each hole because I started drilling each one after the 1st one in the far back passenger side bolt got stuck and I wasn't risking that again with the others. The two rear body mounts are the hardest to access and were a PITA because the panels don't come all the way off too easily so we just pulled them open enough to get a hand in there. You definitely need a magnet tool to get it out and make sure it has a strong pull!
 
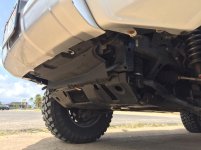
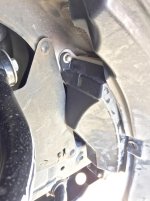
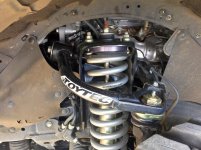
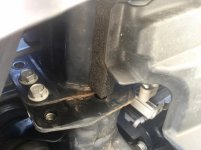
Some pics
 

Attachments

  • IMG_5463.jpg
    IMG_5463.jpg
    130.7 KB · Views: 432
  • IMG_5475.jpg
    IMG_5475.jpg
    133.8 KB · Views: 420
  • IMG_5472.jpg
    IMG_5472.jpg
    133.5 KB · Views: 470
  • IMG_5493.jpg
    IMG_5493.jpg
    135 KB · Views: 324
  • IMG_5491.jpg
    IMG_5491.jpg
    134.1 KB · Views: 325
  • IMG_5466.jpg
    IMG_5466.jpg
    92.6 KB · Views: 321
  • IMG_5469.jpg
    IMG_5469.jpg
    104.3 KB · Views: 325
  • IMG_5471.jpg
    IMG_5471.jpg
    79.4 KB · Views: 319
Bumper mount, inner front fender, and windshield wash reservoir
 

Attachments

  • IMG_5477.jpg
    IMG_5477.jpg
    113.3 KB · Views: 316
  • IMG_5497.jpg
    IMG_5497.jpg
    120.2 KB · Views: 329
  • IMG_5489.jpg
    IMG_5489.jpg
    134.1 KB · Views: 316
  • IMG_5461.jpg
    IMG_5461.jpg
    125.3 KB · Views: 316
Where you able to get a how to video up?? Really interested in doing this to my 16 trail. But sounds like more work than it should be with the bumpers and stuff


Sent from my iPhone using Tapatalk

Not yet but working on it. It honestly wasn't too difficult and the bumpers come off fairly easily. Well worth it to me for the additional 1"
 

Members online

Forum statistics

Threads
278,317
Messages
3,554,129
Members
248,016
Latest member
Advally Service

Trending content

Back
Top