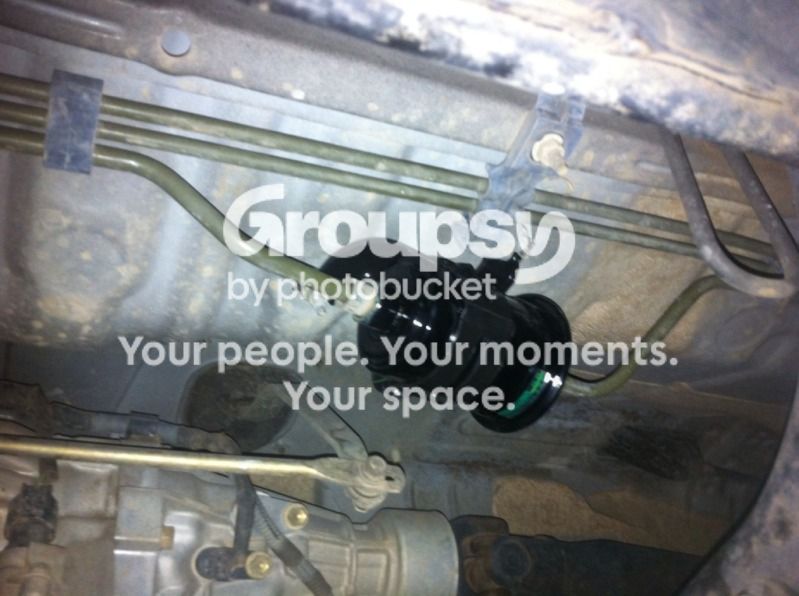
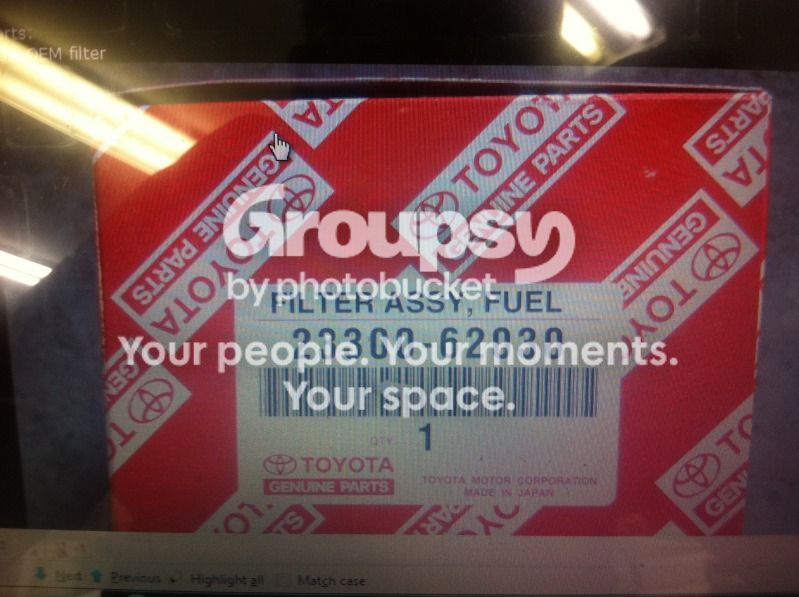
Fuel Filter Changed After 15 years...

I don't know if any of you ever tried to clean your MAF!!! It gave me back about 30HP right away and the engine runs very smoothly. No more sluggish power or hesitation when humid. It's like I got it new from the dealer again. I do it once a year now and I always get a kik in HP. Not as big as the first time after 10 years of dirt or so but still noticeable. Another thing, put some good gas in it. Super+. Gas it expensive yes, I buy regular gas and I put octan boost in it, work great and it's cheaper. Gas is expensive yes, but I do about 100k more millage on a tank with good gas. This is my second 4runner, always did that and got about the same millage difference. So good gas is not that expensive, but it sure run much better!!!

please give me your feedback if you tried it and worked for you.
 
Fuel filter - for something that they don't want you to change they sure made it pretty easy compared to things that they do want you to mess with. I do mine about every 4-5 years.

MAF- just make sure you use MAF cleaner and carb cleaner. I have heard stories of carb cleaner messing it up

No comments on extra power/MPG since I do mine every few years. I haven;t seen an increase or decrease
 
Just changed mine after 15 years as well. Thanks for the confidence boost!

Hello. Brand new to this thread. I just changed out my in-line fuel filter this morning on my 2000. I'm at just over 130K miles and I'm pretty certain this was the original filter. Just wanted to share my experience and say "thank you" to all who posted first! This thread gave me the confidence to finally tackle this project.

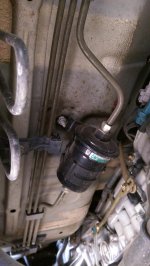
After reading many horror stories I was worried that I'd get under the vehicle and not be able to get the threads to move. I glanced at the filter this morning and it actually appeared to be in really good condition. Pretty clean, no visible rust or corrosion. I attached a picture of the old filter and assembly for reference.

I hit the threads with PB blaster anyway and let it sit for a half hour or so. I'm not sure that was really necessary in this case but it couldn't hurt either. I went ahead and popped open the gas tank and pulled the EFI relay from the front as others have suggested. All went as expected. Thankfully, the compression nuts on either side of the old filter came right off with only minimal exertion from me. I actually was able to use a simple crescent wrench for the job (and a socket wrench and 10mm socket for the bracket). I'm guessing some folks have run in to problems with really rusted threads. I live in a wet climate (Oregon) but this was not an issue for mine at all.

Once the threads came loose gas did start dripping from the assembly. It did not spray at all (very little pressure in the line apparently). I'd say about a half of a cup of fuel came out total. It was easily caught in a drip pan. After waiting for the fuel to stop dripping I removed the two nuts holding the bracket to the truck, continued removing the compression nuts on the fuel line, and then removed the bracket and old fuel filter from the vehicle. I loosened the bolt holding the old filter to the bracket, put the new filter in it's place and reversed everything I'd done before.

The only tricky part I experienced, and others have spoken to this as well, was getting the fuel line nuts to line up with and thread onto the new filter correctly. I wonder if maybe folks are trying to attach the bracket assembly first? I left the filter bracket loose from the vehicle and attached the fuel lines first. With a little force and a little twisting I was able to pretty easily get the threads to line up with just my hands. Once I was able to thread the nuts on most of the way by hand, I knew they were threaded properly and that I could move back to using a wrench for the final turns. I don't have a torque wrench and so estimated the (I believe) 18 pounds of torque required to tighten them. Very scientific, I know, but they did not leak! I read horror stories about folks having to go back and re-thread/re-tighten but mine went fine the very first attempt. Done!

I took the beast for a test run to see if I could tell the difference. Prior to the new filter install I had noticed the vehicle had started to feel "heavy" and a little sluggish. The idle felt just a little bit rougher than it had in years passed. I'd also noticed a slight smell of gas when I first start her up. This last noticing may have nothing to do with the fuel filter but I thought I'd start with the simplest solution first. As I merged onto a street near my home, turning to the right, I peeled out a little. This does not normally happen! It also seemed to me that the vehicle was peppier than before and seemed to run smoother, as if not working as hard to get fuel. This could be all in my mind (confirmation bias and all) but it definitely FELT better. I'll watch my fuel consumption for a more objective review...
 

Attachments

  • IMAG0814.jpg
    IMAG0814.jpg
    135.7 KB · Views: 3,309
The top cap moved freely on my old breather too but it made a loud whoosh noise when I removed it from the axle. There must have been something clogged up inside enough to cause some pressure to build up.
Are you sure it was positive pressure? It's usually vacuum...that is, air rushing in.
 
I realize this is an old thread, but I just changed my fuel filter yesterday.

Pretty easy job.

Here's a few tips...

definitely pick up some PB Blaster. you can get it at home depot or lowes

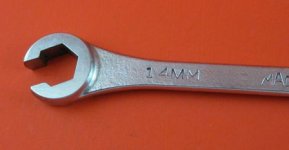
also recommend you use a 14 mm line wrench so you don't take a chance on rounding off the 14 mm fuel lines while loostening them to remove them.

you will need a 3/4 inch wrench or 19 mm to hold the fuel filter steady while removing the 14 mm fuel lines. you will also need a 10 mm shallow socket to loosten the top 10 mm bolt to remove the old fuel filter ( note: you do not need to loosten the 10 mm nut that holds the bracket to the frame )
 

Attachments

  • 14 mm line wrench.jpg
    14 mm line wrench.jpg
    11.5 KB · Views: 1,962
anyone have any suggestions on rusty nuts, i soaked them in PB blaster the night before but it wasn't enough, these things are rusty. any other things i can do to get this out? thanks
You may have no choice but to break them with a hammer and chisel (while soaked in pb), and buy new ones.

This is not an area you can use heat (mini torch) due to fuel in both the filter and the fuel lines.
 
Attempted to change the fuel filter this weekend.

Even with a line wrench, the front line nut rounded a bit and wouldn't budge. I've been soaking it in PB.

Any ideas on what to do at this point? I don't want to risk totally messing up the fuel line.

Would the dealership be able to get it changed?
 
hopefully soaking in pb blaster will help, of course if the dealer has trouble, they will just cut and replace the line, or splice in
which you might have to do if you continue your self
 
Dealership wants 1.5 hrs of labor = $200 to change it. Not sure I have much of a choice, other than not changing it. 125K on the truck.
 
A tip to add for those who plan to do it, once it's replaced, cycle the key a few times and let the fuel pump prime the lines, that way you don't have the extended crank like the OP described.

The fuel pump on our trucks only energizes when the key is in Start or when the crank sensor tells the ECU the engine is running. Just putting the key in Ignition ON does absolutely nothing (on THESE trucks.)
 
The fuel filter on the 3rd gen is so easy to change! In comparison, on my old 2nd gen, the fuel would continue to drip out once the filter was removed so you were always in a rush to do it FAST. Not so with the 3rd gen.

The reason why the filter is so clean is because the fuel pump filter in the tank does most of the primary filtering. I wonder what that filter looks like after 15 years...
 
Thanks for the thread! Got my filter changed with no problem. Even with a bit of a struggle to get the rear line centered and threaded, I probably only lost an ounce of fuel out of the lines (not including the filter itself). Truck started up after maybe 3 extra seconds.
 
Last edited:
Quality of the gas you buy has more to do with the condition of gas you buy. I NEVER stop at a station that has a refueling truck there. As they dump fuel into the tanks, all of the dirt that settles in their tanks is stirred up and will be pumped out into your tank.

Good practice! My dad warned me of the tanker refilling the station tanks when I started driving in '71!
 
Good practice! My dad warned me of the tanker refilling the station tanks when I started driving in '71!

You mean like, never stop at a station where there is currently a tanker truck there? Because the sediment needs time to settle at the bottom again?
 
Not as bad as i thought it would be...

living in Hawaii has its benefits with good weather and minimal rust if you stay away from the ocean..

everyone's horror stories of impossible fuel filter changes made me worried, and the whole depressurizing the system had me jumpy.

Here are my 2 cents

All i did was open the fuel cap and let that depressurize, then after letting the truck cool off, sat for about an hour, i started my fuel filter change.

I did NOT do anything else to depressurize the system other then the fuel cap and put some PB blaster on the fuel filter nuts.

Flare nut 14mm in hand, expecting an impossible opening, it actually opened without much force.

No fuel came shooting out under pressure, just what i expected just lots and lots of dripping from whatever was in the lines..
i just let to drop enough till it was a slow drip then cracked open the nuts all the way and continued with the change.

The nuts holding in the actual fuel filter itself are 10mm and those were cake.

Then change the fuel filter to the new and reinstall in reverse order.

10 minute job, TOPS.

First crank was slow as the fuel lines needed to be filled up
Second crank and was running smooth, checked underneath for any leaks and no leaks!
PERFECT.
FINISHED.
POST ON t4r.org :)

Pictures OF COURSE!

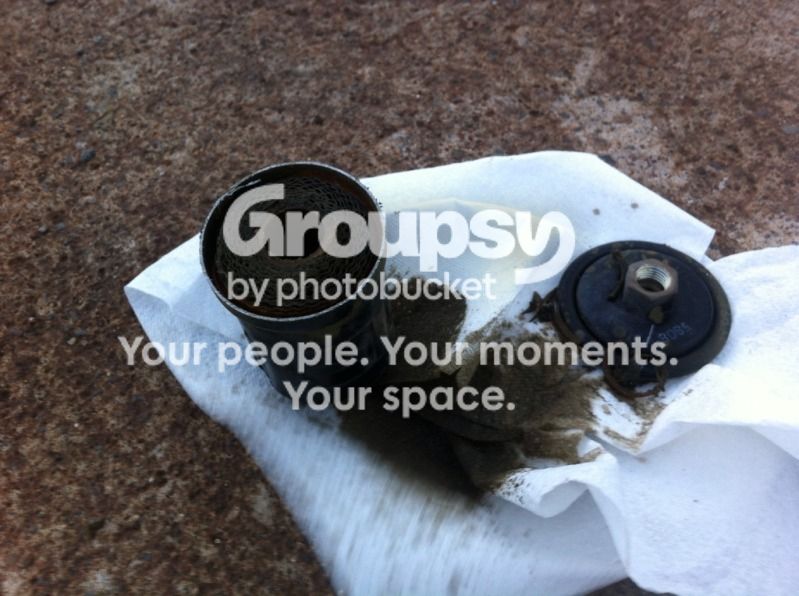
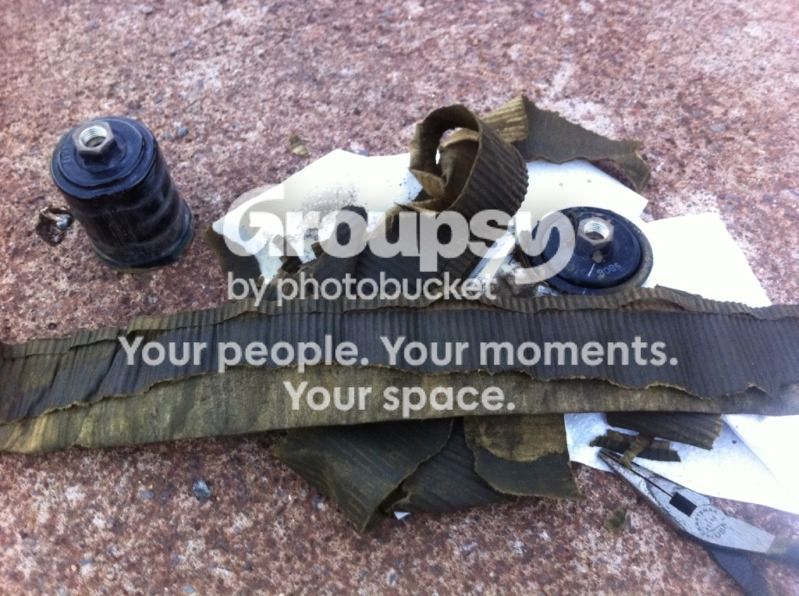
as everyone cracks open the fuel filter to see the 15 year damage..
9718b048.jpg~original


Used a hacksaw and vice to open it up.
3f80ea46.jpg~original


To my amazement, it really wasn't that bad at all.. HAHA
b71e519f.jpg~original


Close up.
34aa2d89.jpg~original


New Filter
c01b5f35.jpg~original


Part number for those who need.
f75480f6.jpg~original


At my toyota servco parts dealer the fuel filter was $45


Conclusion:
15 years with OEM filter, not bad at all. I have 136,xxx miles on my truck.
It was definitely dirty "looking" but no crud or crap or dirt or anything that didnt look like old fuel.
The fuel that drained out was clear as new and only the filter had some old dirty looking fuel. Meaning the fuel filter was still doing a good job and i am glad i went with an OEM filter. Knowing i got another 15 years to not worry about.

Performance Conclusion:
My butt monitor states it does feel a much smoother response from the truck. I did have the intentions of changing out my filter because it was feeling sluggish and it was the last piece to the puzzle for cheap maintenance.
Smoother response, a few more HP feeling, and the assurance of a new filter was all i needed to be COMPLETELY SATISFIED.

Next maintenance is valve cover gaskets, as i noticed today those were leaking.. and ill probably do at the same time the notorious rear axle seals.. my 3rd one now..

I just did my fuel filter after it was original 19 years and 250k. Valve cover job is next! Nice write up.
 
Hey guys,

Coincidentally, I replaced my fuel filter today and Jesus, it gave me hell. I depressurized the fuel system by disconnecting the connector on top of the fuel pump and when I got everything hooked back up, my fuel gauge won’t reset. It shows the tank being on E and only the fuel gauge is all the way to the bottom.

I’m going to try resetting it first thing tomorrow but does anyone know if I could have blown a fuse while cranking the ignition for a few seconds with the fuel pump power disconnected?

Thanks,
 
Just did mine tonight. Was quick and easy and on a 97 with 235k I think it was original.

Glad I changed it, the fuel that poured out of the filter was horrible looking.
 
Great write up. Definitely helped me replace mine today. I also used the reference over at ih8mud.com. Only challenges I ran into were a broken bolt head when removing the Radiator Support Splash Shield (Part Number: 5149535010) and a dipshit error related to turning one the rear 14 mm line nut the wrong way. The broken bolt came out easily after I cut a groove in it with a Dremel, torched it with a Bernzomatic ST2200T Butane Micro Torch, and unscrewed it with a flathead screwdriver. [Reminder: Don't use the torch too close to the fuel lines or filter]

The dipshit error [:facepalm:] was harder to figure out but it came down to this: if facing the rear of the vehicle, turn the 14 mm line nut clockwise to loosen. Counter-clockwise, when facing the rear, tightens the nut. (No wonder it wouldn't budge.)

My Radiator Support Splash Shield (not sure why it's called that) was all chewed up so I tossed it. I will get another one since I do think it protects the lines above it. I was actually surprised at how easily my filter was to change consider that it had been there for more than 20 years and 290K miles.

I did not pull the EFI relay.
 

Members online

Forum statistics

Threads
278,312
Messages
3,554,089
Members
248,016
Latest member
Advally Service

Trending content

Back
Top