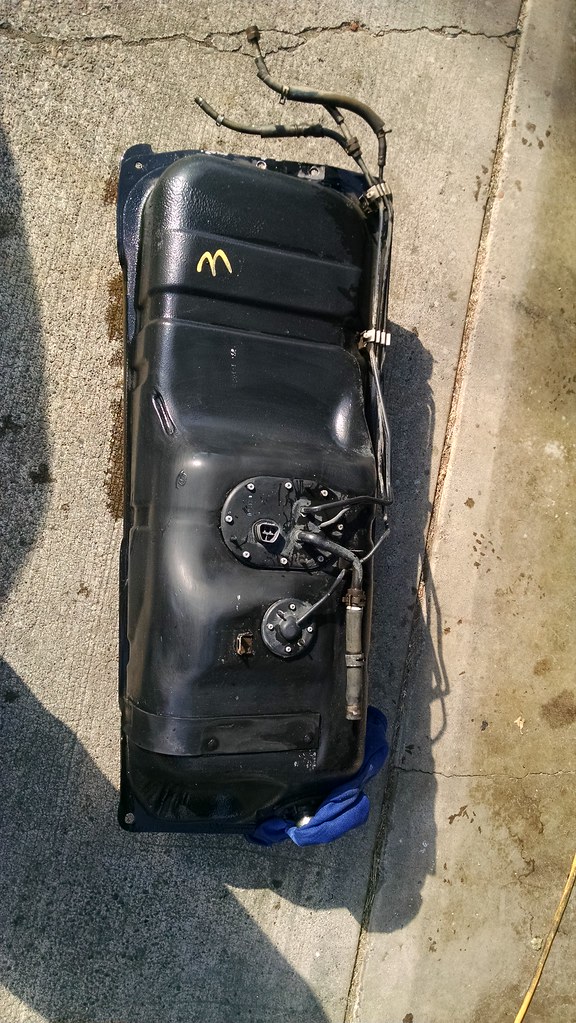
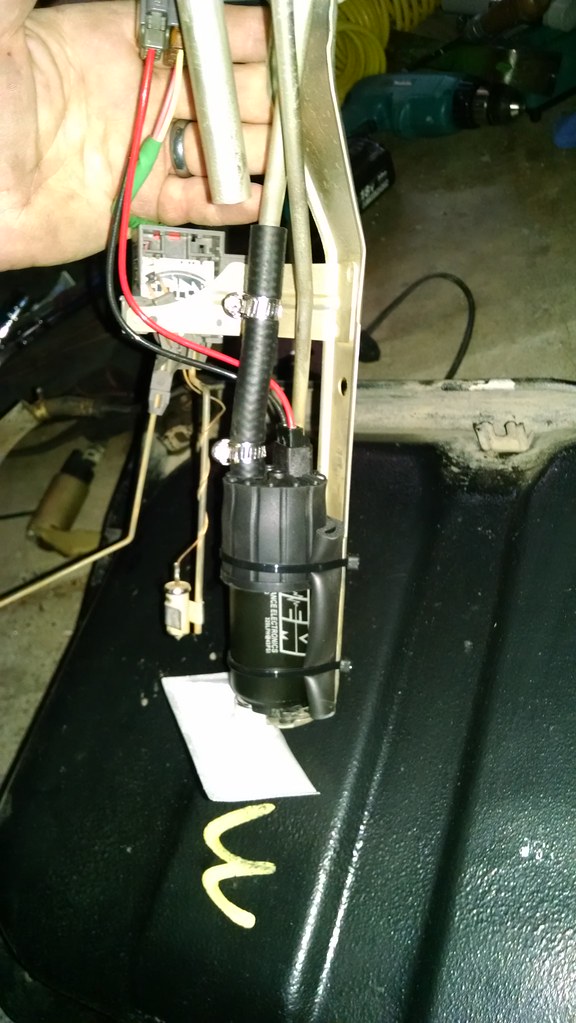
the great him
Elite Member
so due to age and other factors it has come time for me to replace my fuel pump. and since there are no "how to's" on this i figured id give it a shot at making one, and since others are probably not far behind in the age/milage from me as out rigs get older and older, i thought this might be useful to have around.
mine is a 97 so there may be some slight differences in the process but its all pretty much the same deal.
tools needed;
floor jack
19mm open ended wrench, flare nut wrench preferable -fuel filter
14mm open ended wrench, flare nut wrench preferable -fuel filter
12mm socket (3/8") -fuel tank bolts
6" extension
4" extension
3/8" ratchet
small needle nose pliers -keeper pin for tank strap
hose gripper pliers (small) -for twisting the soft fuel lines to break them free
hose clamp pliers
small long flat head screwdriver
small pocket screwdriver
#2 philips screwdriver
4 or 5 clean rags -covering opening where the filler neck comes into the tank
-optional;
cordless 3/8" impact (made the job much faster than using a ratchet)
ill start by recommending you do this with as little fuel as possible in the tank, or have access to a transmission jack. fuel is roughly 7lbs per gallon, and a full tank has about 18 gallons -do the math... 125lbs of fuel, then 10lbs for tank... its gonna be a major PITA to do full or even half full.
i ran mine for a day with the light on and dropped the tank at that point(only had about 1" of fuel in the bottom of the tank so maybe 1 gallon.
first step was to crack the fuel line, i did this at the fuel filter(because i am also gonna change the filter at this time as well).
next step was to fold forward the bottom part of the rear seat on the drivers side to provide access to the carpeting and the access the hatch/plug ins. unplug the connector inside the cab of the truck(its easiest to pull the entire clip off its mount on the floor pan under the carpet -this is also where i believe the plug in for the trucks with factory elockers is located at)
 IMG_20140918_183416302 by isaacyocum, on Flickr
 IMG_20140918_183258247 by isaacyocum, on Flickr
after that unscrew the 3 screws that hold the access hatch in place and lift it up, pull the wires free from the foam holder that seals and holds them in place and pull the wiring with plug down through the hatch and outside/under the truck -if you can reach your arm through and back, trace the wires back till where they attach to the top of the tank and seperate the harness from the tank(this might be easier done from outside the vehicle once the tank is free and can be lowered a little. but DO NOT FORGET to do this.
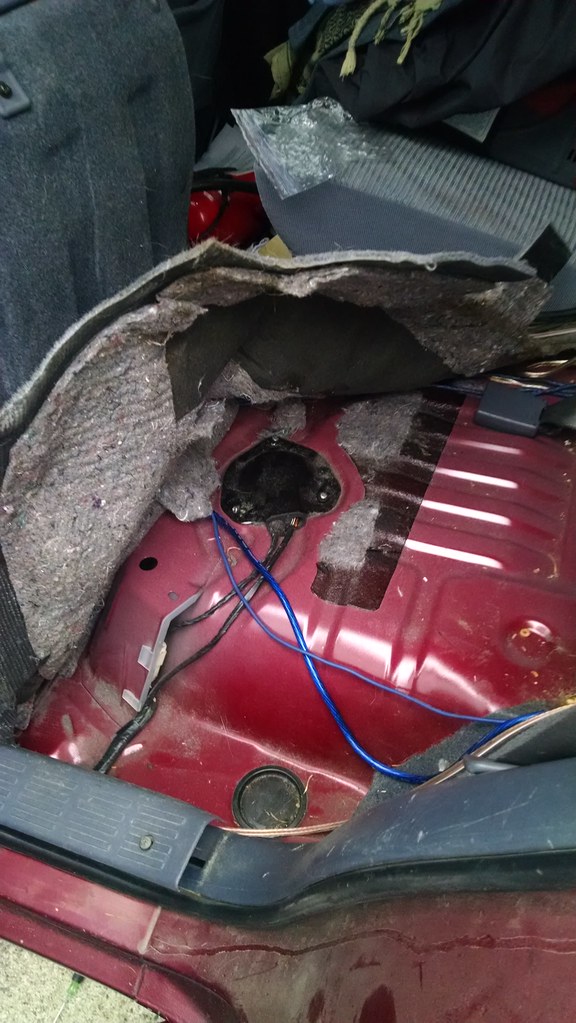 IMG_20140918_183129748 by isaacyocum, on Flickr
(this is that wiring you want to undo before dropping the tank)
 IMG_20140919_100508364 by isaacyocum, on Flickr
then unplug the sending unit and fuel pump power from the tank itself. -the wires you just were dealing with are not the pump harnes wires, not sure what they go to. this harness stays with the truck and inside the cab.
then after that locate the three hard lines at the front of the tank. they go from hard line to soft line to hard line... separate the soft lines from the hard lines at this point the soft line sections are about 9" long and i found it was easier to do this leaving the soft lines attached to the hard lines on the tanks side(the soft lines came out with the tank for me because this was easiest for me but it could go either way). two of the lines have hose clamps that are easy to free, but the main fuel line has a threaded fitting that will require the same 19mm and 14mm for the fuel filter
 IMG_20140918_184813600 by isaacyocum, on Flickr
at the back of the tank is a strap that supports the rear of the tank. on the inner side of the tank(closest to the drive shaft) there is a through pin with a retaining clip on it. remove the retaining clip and remove the pin. on the outside of the tank(closest to the wheel well) there is a 12mm bolt that you may chose to remove to remove the strap completely, however i did not do this and was ok with just letting the strap drop. -ONLY DO THIS STEP IF YOU HAVE AN EMPTY TANK, IF YOUR TANK IS OR HAS ANY MORE THAN 1/4 FUEL PROCEED TO THE NEXT STEP, THEN RETURN TO THIS STEP.
 IMG_20140918_184930131 by isaacyocum, on Flickr
after disconecting the hard lines from the soft lines then move the floor jack under the tank(of the tank is not empty you may want a piece of plywood of general shape of the tank to place between the tank and the jack as to help spread out the weight of the tank and fuel so as you do not dent/crush in the tank -id recommend at least 3/8" plywood). support the tank with the jack at this
now to the back of the tank and remove the filler neck/spout from the tank -use lower hose clamp to secure one of the clean rags over the opening of the tank as to prevent debris/foreign material from entering the tank.
 IMG_20140918_185129149 by isaacyocum, on Flickr
now lower the tank a couple of inches and hold it there you will want to reach up and undo the filler vent tube at the tank. this is a hard line to a soft line to a hard line, undo it at one of the soft line joints. its a hose clamp that will require the use of the hose clamp pliers and its rather a pain to get to and fiddle with, thus why i recommend dropping the tank a few inches first as well as undoing the filler neck completely from the tank to give you as much room as possible. -at this point if you were not able to get that wire harness free from the tank id do so now. it might take a pare of needle nose pliers if you cant do it by hand, but undo the clip and separate the wires from the tank.
 IMG_20140918_185216384 by isaacyocum, on Flickr
now move to the front of the tank, there should be one 12mm bolt holding the front of the tank to a bracket, undo that bolt and your tank should be free.
 IMG_20140918_184850124 by isaacyocum, on Flickr
slowly lower the tank down and pull out from under the truck. your fuel tank is now free to do with as you please.
this is it for removing the tank, if you need to replace the pump go on to the next post where i will continue with the pump replacement and reinstall
mine is a 97 so there may be some slight differences in the process but its all pretty much the same deal.
tools needed;
floor jack
19mm open ended wrench, flare nut wrench preferable -fuel filter
14mm open ended wrench, flare nut wrench preferable -fuel filter
12mm socket (3/8") -fuel tank bolts
6" extension
4" extension
3/8" ratchet
small needle nose pliers -keeper pin for tank strap
hose gripper pliers (small) -for twisting the soft fuel lines to break them free
hose clamp pliers
small long flat head screwdriver
small pocket screwdriver
#2 philips screwdriver
4 or 5 clean rags -covering opening where the filler neck comes into the tank
-optional;
cordless 3/8" impact (made the job much faster than using a ratchet)
ill start by recommending you do this with as little fuel as possible in the tank, or have access to a transmission jack. fuel is roughly 7lbs per gallon, and a full tank has about 18 gallons -do the math... 125lbs of fuel, then 10lbs for tank... its gonna be a major PITA to do full or even half full.
i ran mine for a day with the light on and dropped the tank at that point(only had about 1" of fuel in the bottom of the tank so maybe 1 gallon.
first step was to crack the fuel line, i did this at the fuel filter(because i am also gonna change the filter at this time as well).
next step was to fold forward the bottom part of the rear seat on the drivers side to provide access to the carpeting and the access the hatch/plug ins. unplug the connector inside the cab of the truck(its easiest to pull the entire clip off its mount on the floor pan under the carpet -this is also where i believe the plug in for the trucks with factory elockers is located at)
IMG_20140918_183416302 by isaacyocum, on FlickrIMG_20140918_183258247 by isaacyocum, on Flickrafter that unscrew the 3 screws that hold the access hatch in place and lift it up, pull the wires free from the foam holder that seals and holds them in place and pull the wiring with plug down through the hatch and outside/under the truck -if you can reach your arm through and back, trace the wires back till where they attach to the top of the tank and seperate the harness from the tank(this might be easier done from outside the vehicle once the tank is free and can be lowered a little. but DO NOT FORGET to do this.
IMG_20140918_183129748 by isaacyocum, on Flickr(this is that wiring you want to undo before dropping the tank)
IMG_20140919_100508364 by isaacyocum, on Flickrthen unplug the sending unit and fuel pump power from the tank itself. -the wires you just were dealing with are not the pump harnes wires, not sure what they go to. this harness stays with the truck and inside the cab.
then after that locate the three hard lines at the front of the tank. they go from hard line to soft line to hard line... separate the soft lines from the hard lines at this point the soft line sections are about 9" long and i found it was easier to do this leaving the soft lines attached to the hard lines on the tanks side(the soft lines came out with the tank for me because this was easiest for me but it could go either way). two of the lines have hose clamps that are easy to free, but the main fuel line has a threaded fitting that will require the same 19mm and 14mm for the fuel filter
IMG_20140918_184813600 by isaacyocum, on Flickrat the back of the tank is a strap that supports the rear of the tank. on the inner side of the tank(closest to the drive shaft) there is a through pin with a retaining clip on it. remove the retaining clip and remove the pin. on the outside of the tank(closest to the wheel well) there is a 12mm bolt that you may chose to remove to remove the strap completely, however i did not do this and was ok with just letting the strap drop. -ONLY DO THIS STEP IF YOU HAVE AN EMPTY TANK, IF YOUR TANK IS OR HAS ANY MORE THAN 1/4 FUEL PROCEED TO THE NEXT STEP, THEN RETURN TO THIS STEP.
IMG_20140918_184930131 by isaacyocum, on Flickrafter disconecting the hard lines from the soft lines then move the floor jack under the tank(of the tank is not empty you may want a piece of plywood of general shape of the tank to place between the tank and the jack as to help spread out the weight of the tank and fuel so as you do not dent/crush in the tank -id recommend at least 3/8" plywood). support the tank with the jack at this
now to the back of the tank and remove the filler neck/spout from the tank -use lower hose clamp to secure one of the clean rags over the opening of the tank as to prevent debris/foreign material from entering the tank.
IMG_20140918_185129149 by isaacyocum, on Flickrnow lower the tank a couple of inches and hold it there you will want to reach up and undo the filler vent tube at the tank. this is a hard line to a soft line to a hard line, undo it at one of the soft line joints. its a hose clamp that will require the use of the hose clamp pliers and its rather a pain to get to and fiddle with, thus why i recommend dropping the tank a few inches first as well as undoing the filler neck completely from the tank to give you as much room as possible. -at this point if you were not able to get that wire harness free from the tank id do so now. it might take a pare of needle nose pliers if you cant do it by hand, but undo the clip and separate the wires from the tank.
IMG_20140918_185216384 by isaacyocum, on Flickrnow move to the front of the tank, there should be one 12mm bolt holding the front of the tank to a bracket, undo that bolt and your tank should be free.
IMG_20140918_184850124 by isaacyocum, on Flickrslowly lower the tank down and pull out from under the truck. your fuel tank is now free to do with as you please.
this is it for removing the tank, if you need to replace the pump go on to the next post where i will continue with the pump replacement and reinstall
Last edited: