Hbryanlopez
New member
this is my first write up and I hope many can benefit from it, this is a quick one and I will be adding things as I remember them.
tools needed:
flat head
screw driver
dremel
metal cutting tool for dremel
grinding tool for dremel
JB weld
tape (marking headlight beam)
silicone sealant
80-32x2 screws
1/4 flat washers
marker
Phisey's link on headlight removal: http://www.toyota-4runner.org/5th-gen-t4rs/76226-5th-gen-hid-projector-retrofit-installation-pics.html
Philsey's link on wiring projector harness: http://www.toyota-4runner.org/5th-gen-t4rs/76226-5th-gen-hid-projector-retrofit-installation-pics.html
The Retro fit source:The place to purchase retrofit kits. http://www.theretrofitsource.com/
Plenty of information about HID, projectors and retrofits on here: HIDplanet
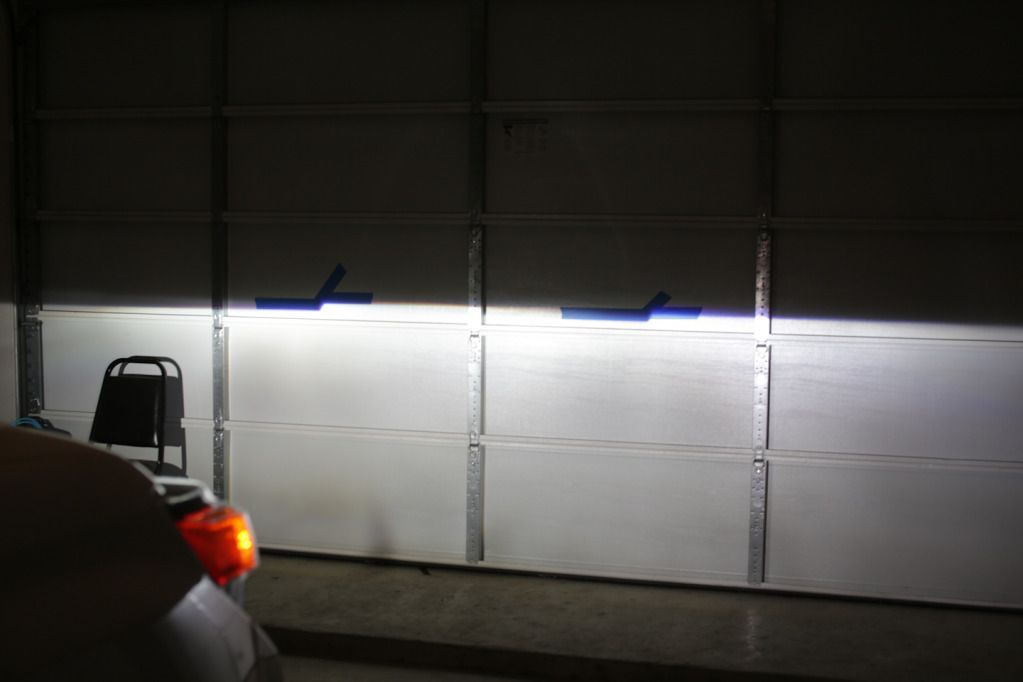
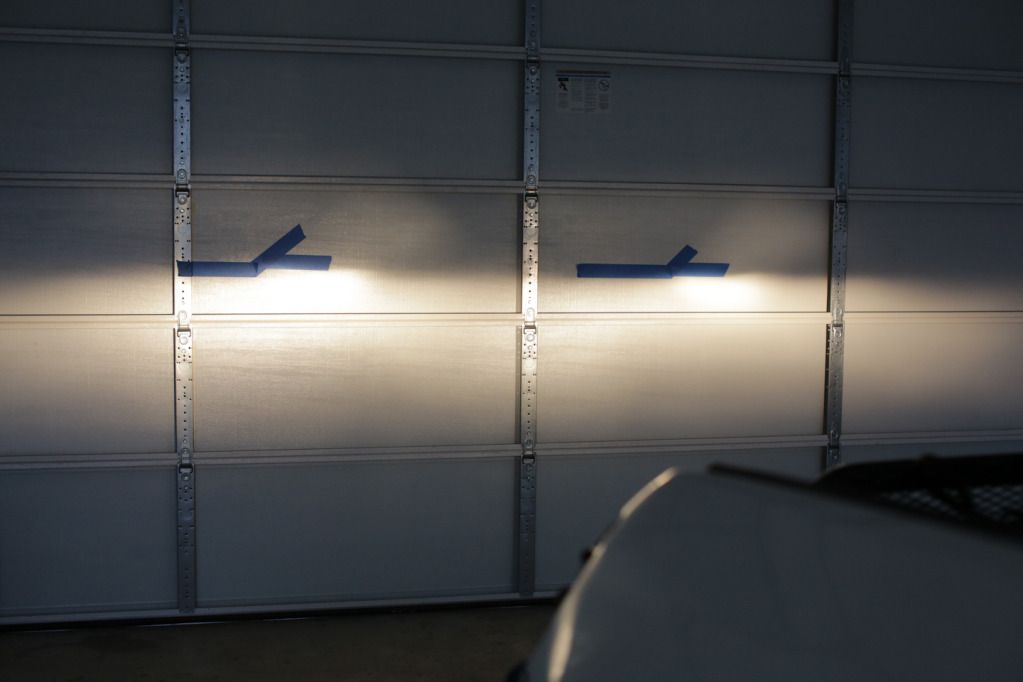
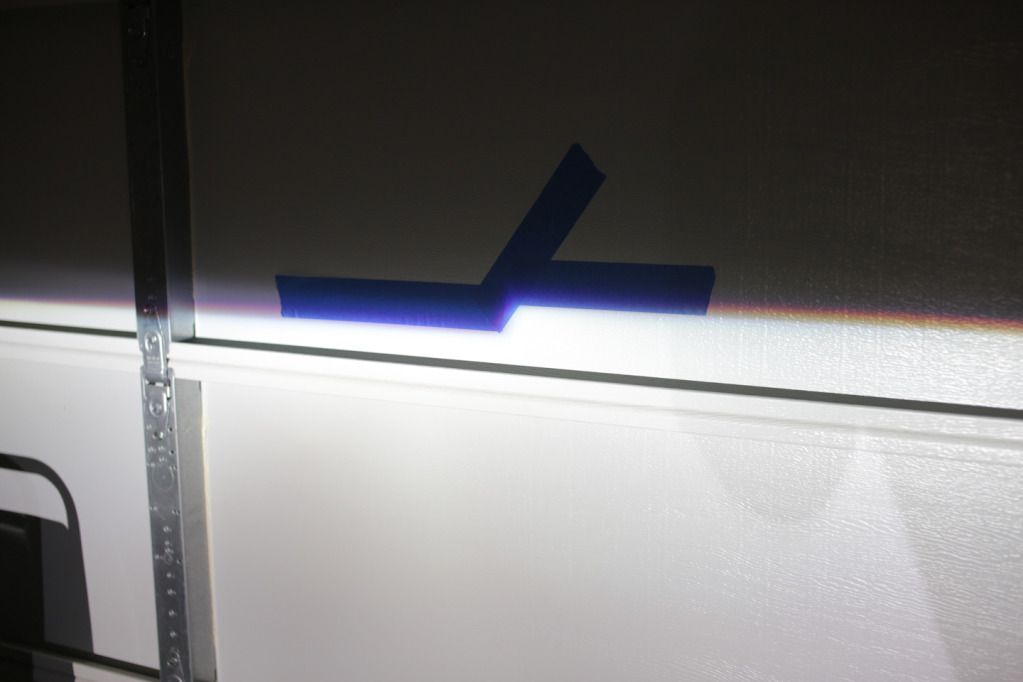
before taking out the headlihgts park atleast 10 feet from a wall and mark your lights like the photo bellow. keep in mind once you do this you will not be moving the vehicle until everything is finished. this is also a good time to wire up the harness and check everything.
to prevent things from getting scratched buy some masking tape and tape around the area that could possibly get scratched from installation and removal of headlights.
your tape should have this pattern _______/-----
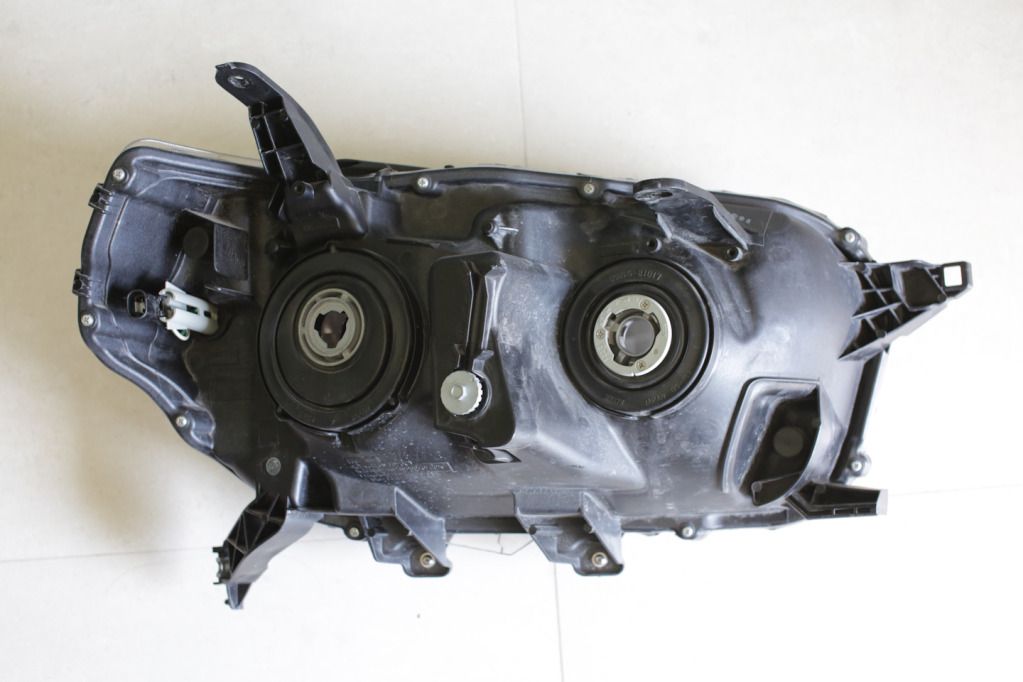
once your lights are off bring them inside and flip them over you will see this photo bellow: remove all the screws that you see in the back with the exeption of the headlight adjusment screws, also remove all the rubbers sealants.
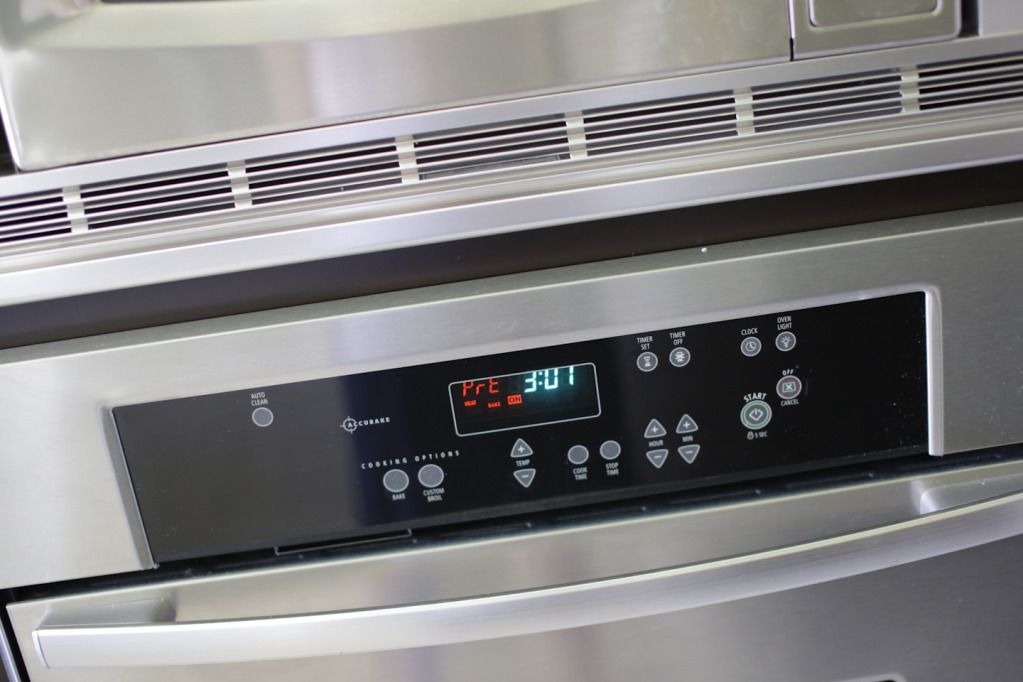
now preheat the oven to 250 degress, there is a ton of ways to do this and if you have one that has worked for you then stick to that one. put the lights in and time it for 3 minutes, once timer is done, pry the headlights open.
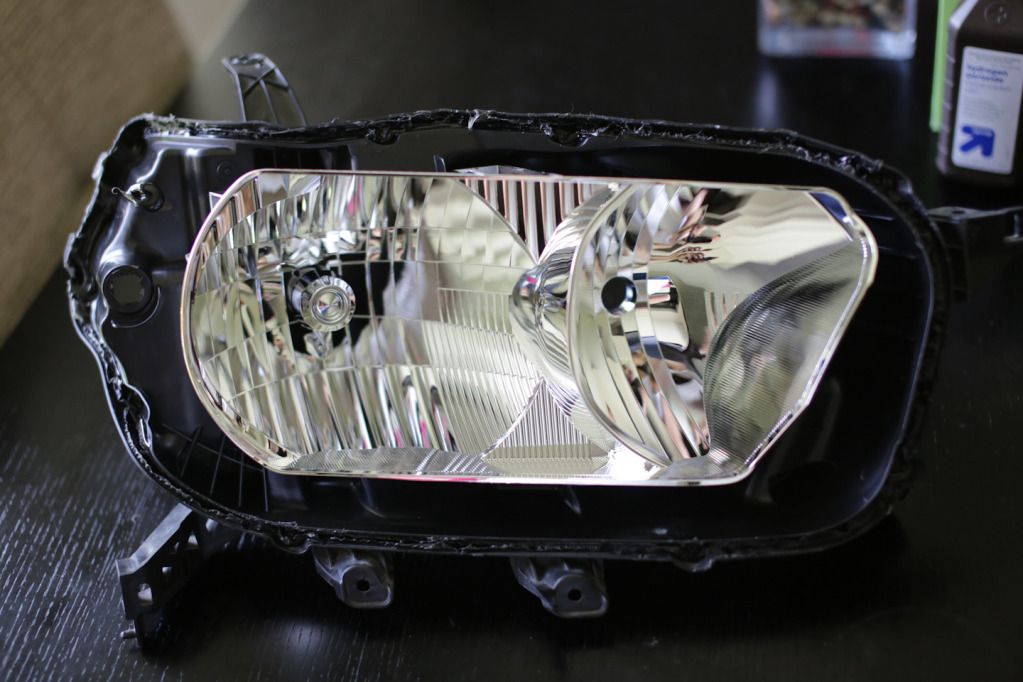
bowl removal: there are 2 of these plastic tabs pictured bellow and one screw holding the bowl. the plastic tabs have little hook looking plastic that can be pushed in by a flathead. release these two plastic and unscrew the adjuster and the bowl should come off.
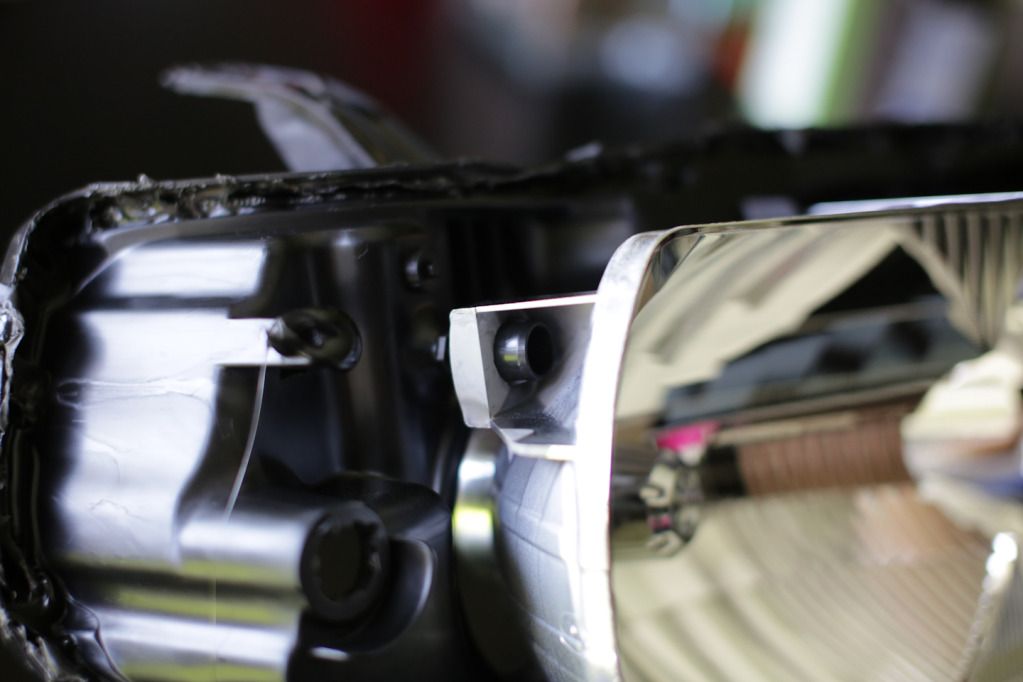
photo of the screw
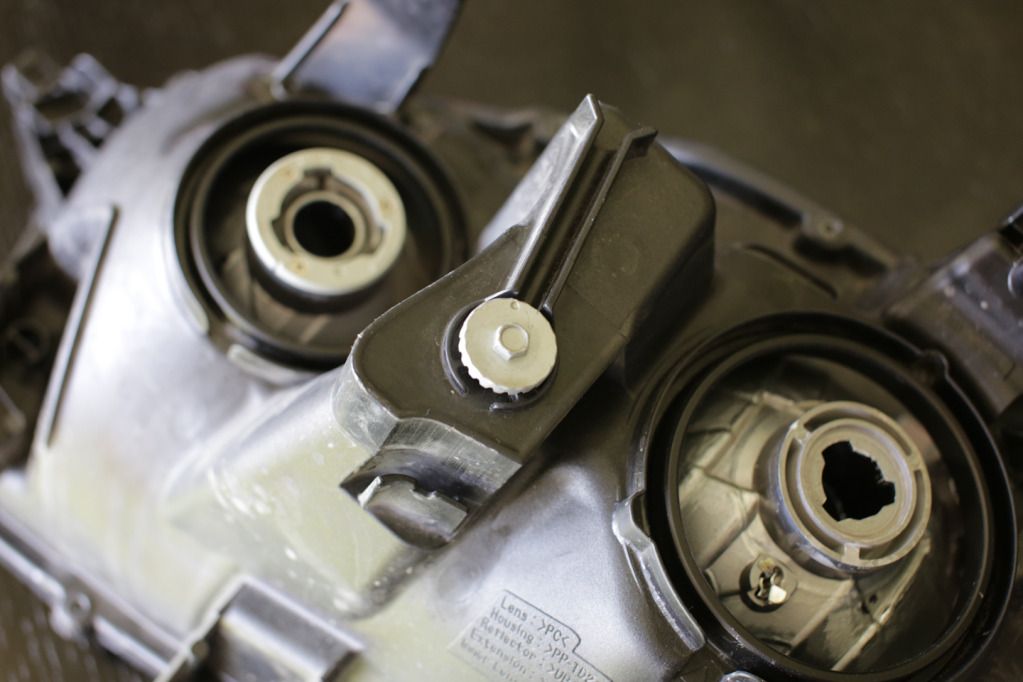
once the bowl is of flip it over to remove the low beam reflector, you will need pliers to remove them.
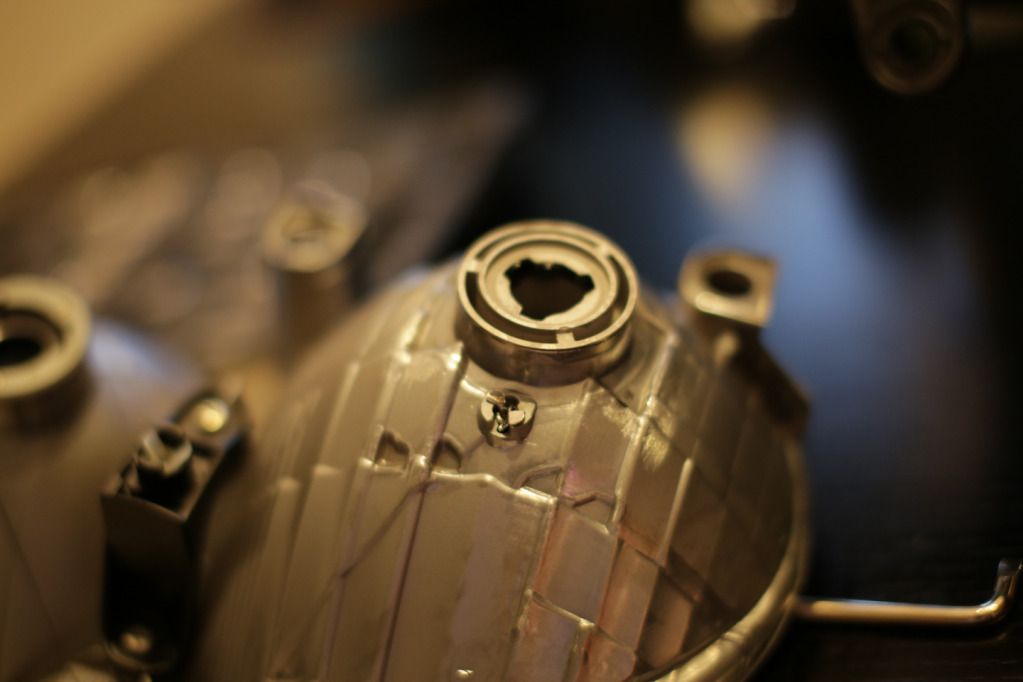
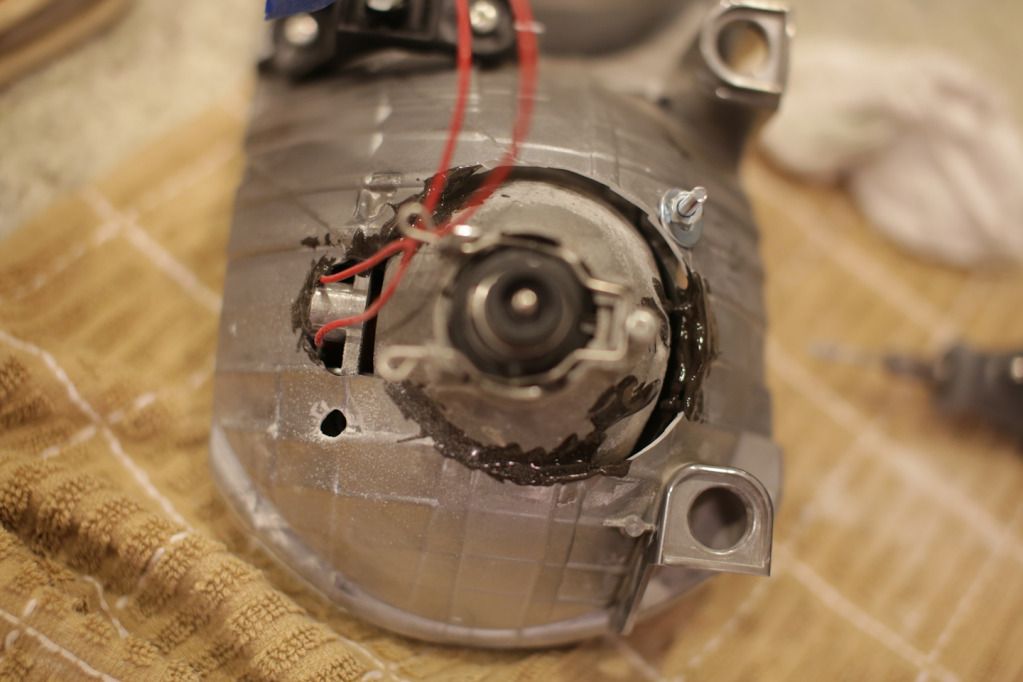
now your bowl is ready to be dremelled. mark your bowl with a marker. take a look at the lines and use it as a reference. this hole was too small and I had to make it larger.
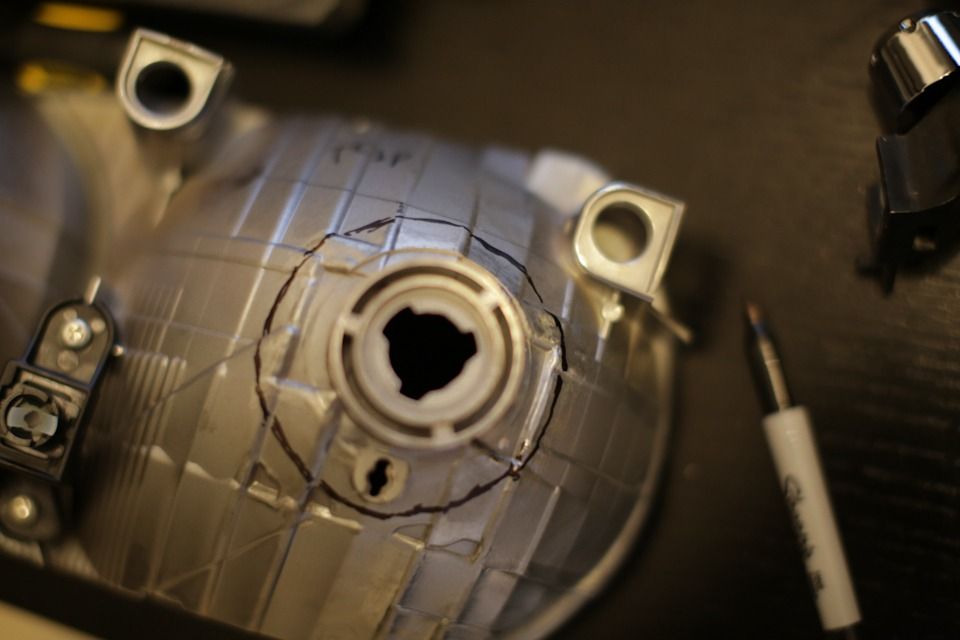
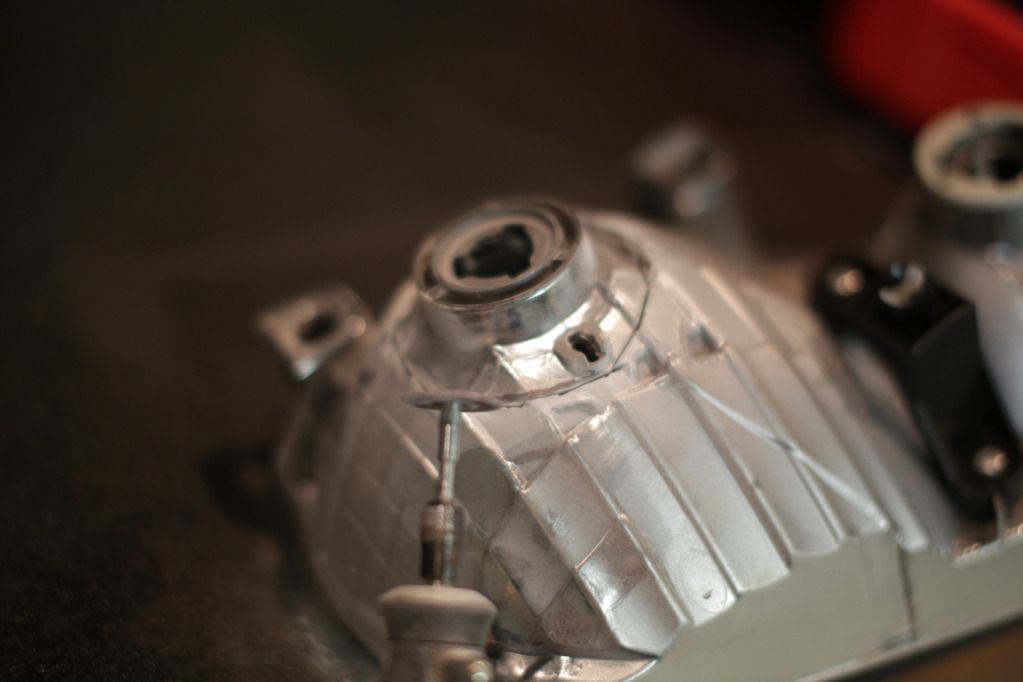
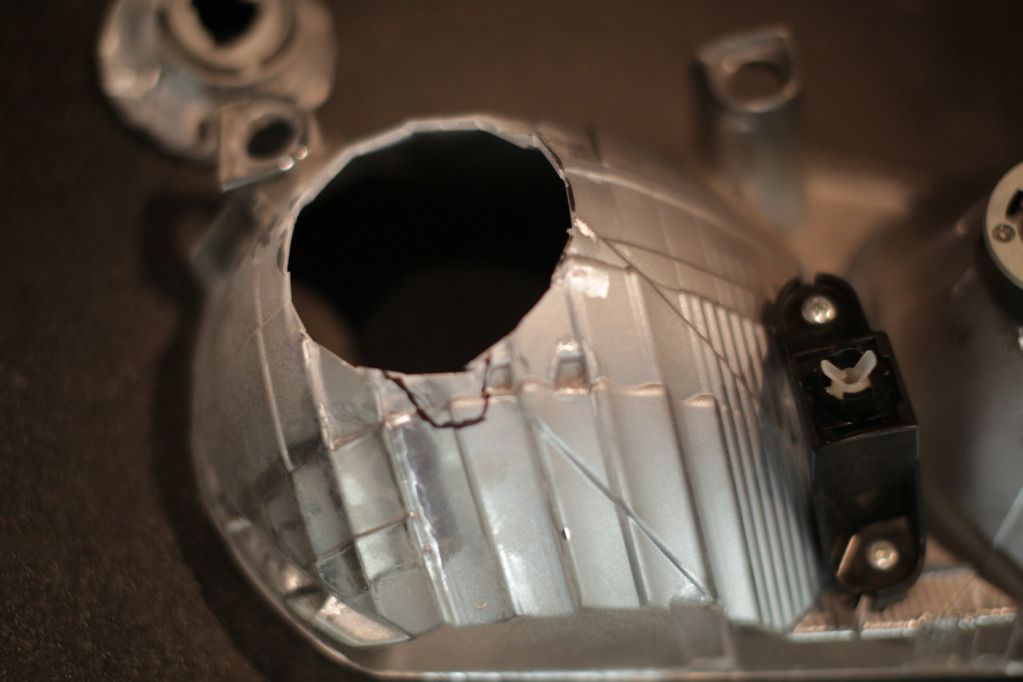
the hole doesnt have to be perfect.
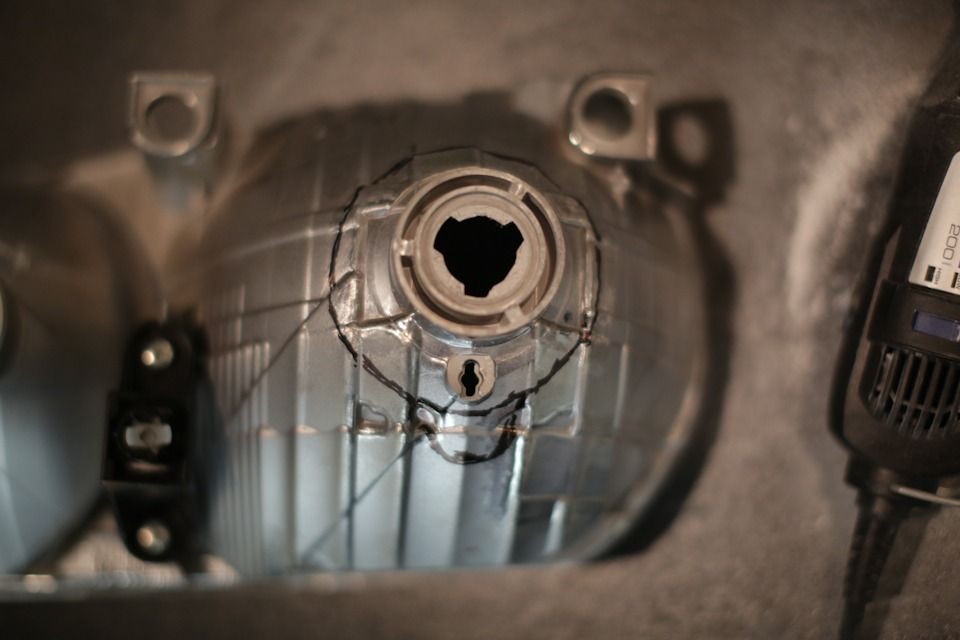
here's jesse1983's cut(photo bellow), this is more like what you want, use the lines on his bowl as a reference guide to cutting your bowl. I made mine too large and ended up with tons of unwanted space around the projector that didn't fit flush. this unwanted space made it harder for me to mount and aim the light, I believe the hole you want is 2inches in diameter. jesse's photo bellow is exactly what you want.
here's a link to jesse1983's thread: jesse1983's projector retrofit link
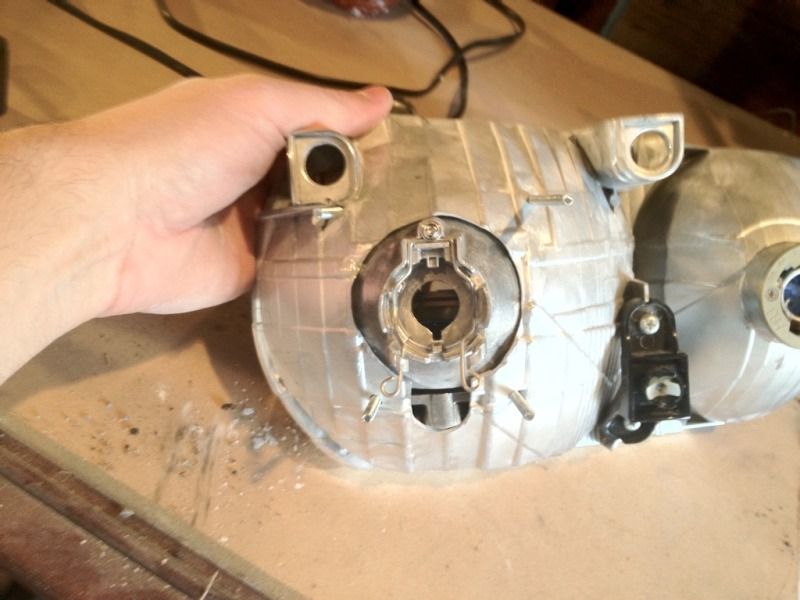
mount the bowl back to the rear headlight assembly and install it back to the front end.
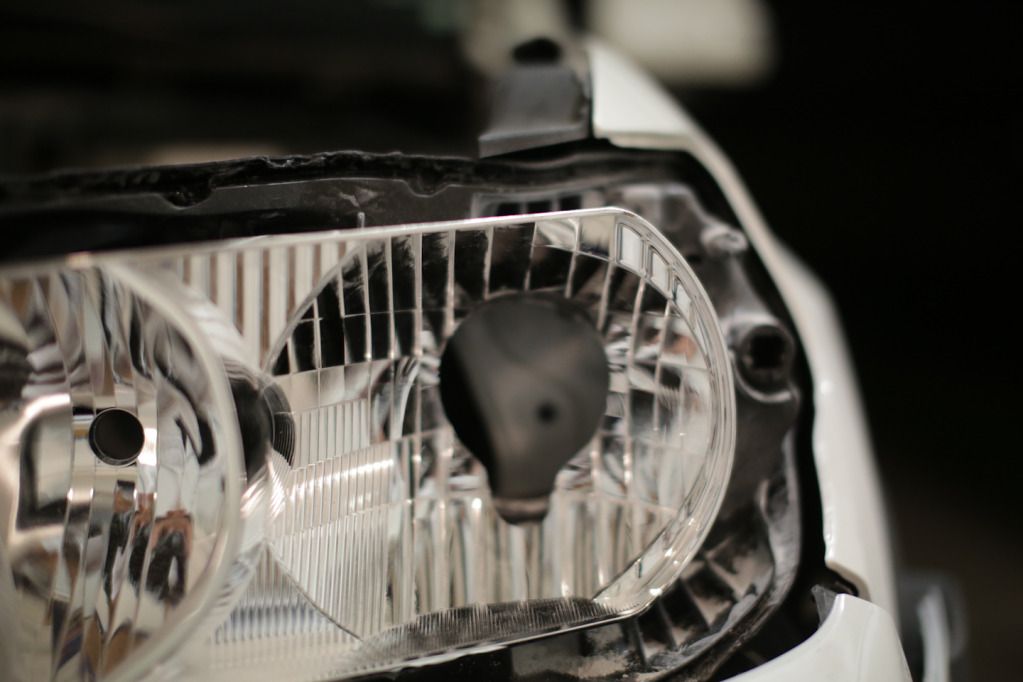
this is by far the hardest step to do, i used JB welled glue for this step. you will need to aim your projectors to the marks you made on the wall in the very beginning and glue it in place using your prefered glue. (i used jb weld) you will need gloves, it will be hot and you will need to hold it in place until the glue sets. hook everything up and turn on your lights aim your projector to match the marking on the wall, matching the cutoff and line _____/-------
once you have made sure the glue has set, you can now remove the headlight assembly and take it inside to apply more glue around the projector.
notice the unwanted space around the projector which is not sitting flush due to the cut being too open.
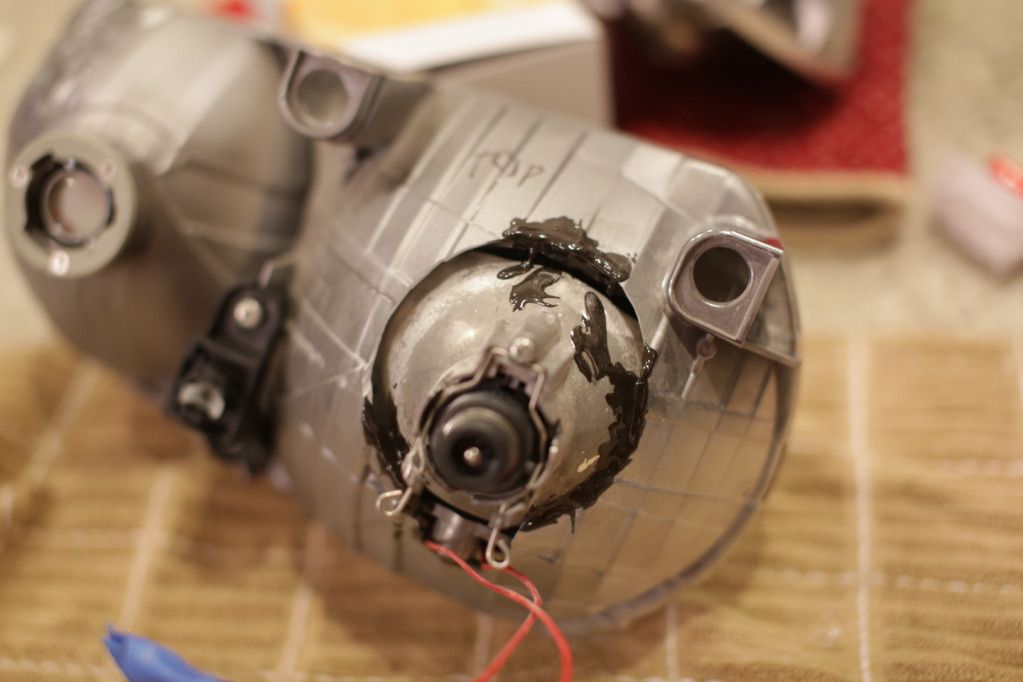
let the glue dry. I wasn't 100% satisfied with only glue holding my projectors so I drilled a whole on my bowl to match up the holes in the projector and used 80-32x2 screws with a 1/4 flat washer to secure it in place and dremelled the excess screws off.
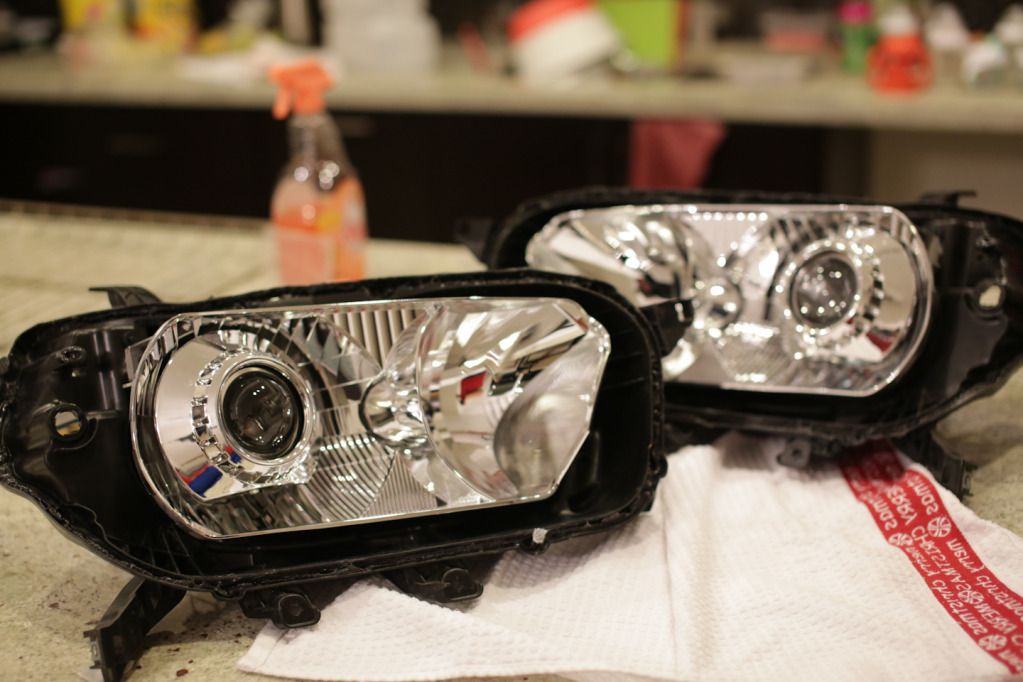
let the whole thing cure overnight and in the morning assemble everything together and bake the headlights once again. this is also a good time to mount the shrouds, i used JB welled and applied the glue around the area of the projector that will be touching the shroud so that I wont make a mess.
once you have assembled the headlights, put all the rubber seals back, your low beam rubber seal will not fit correctly due to the projectors so you will need to stretch the seal around the projector and apply silicone sealant around that to ensure proper seal. do not seal the bulb or anything near that just the area around the projector. if you need to you might have to push the rubber seal down.
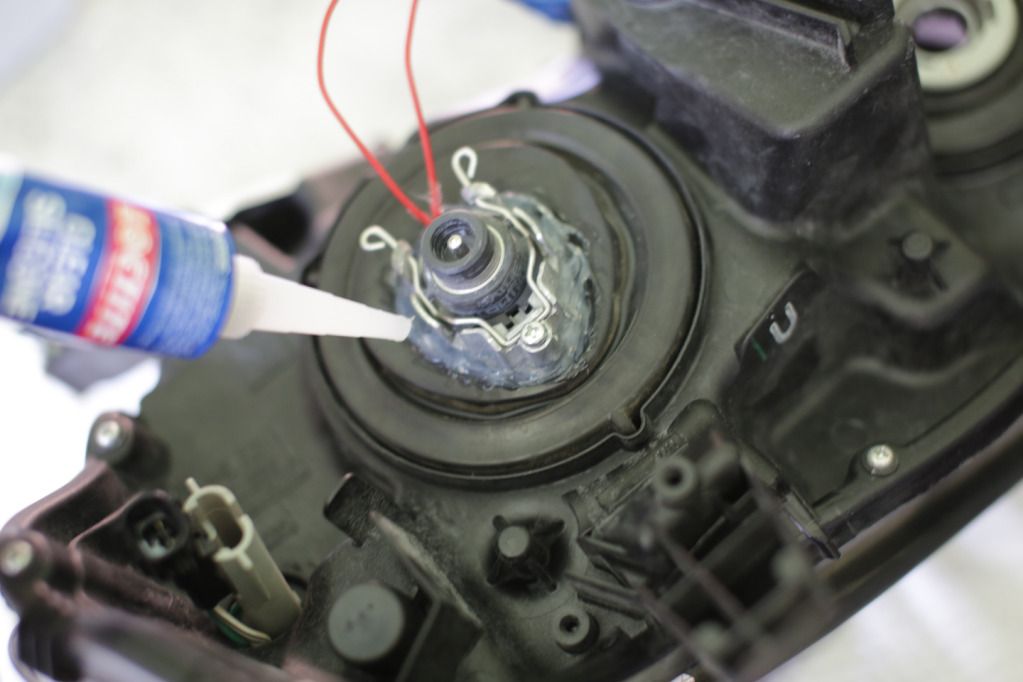
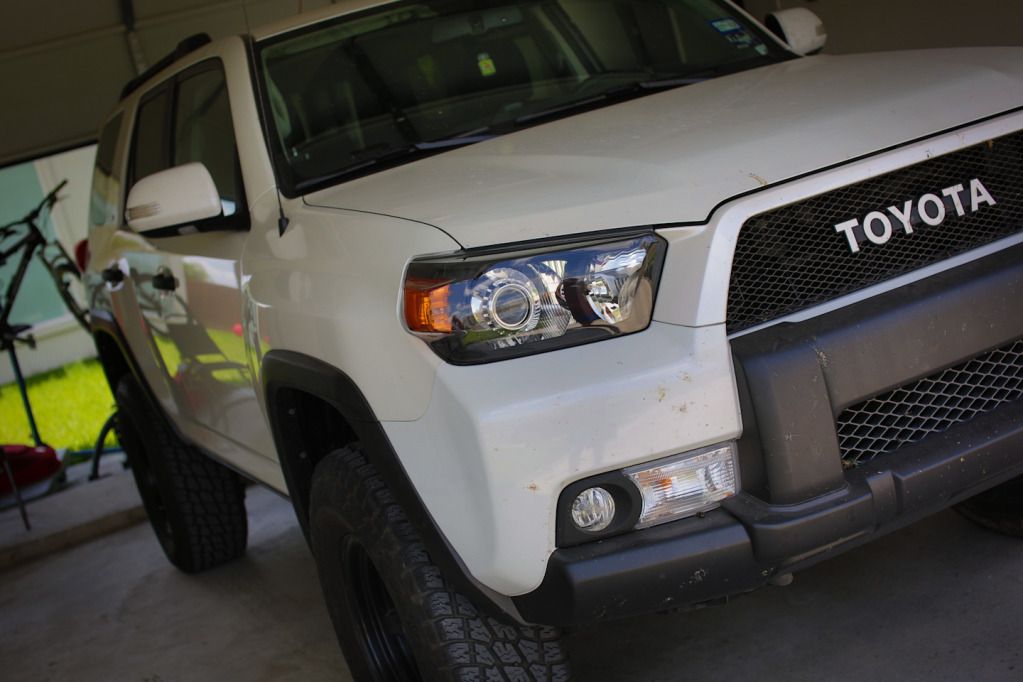
after this cures, sit back and give yourself a pat on the back and look at those sexy lights.
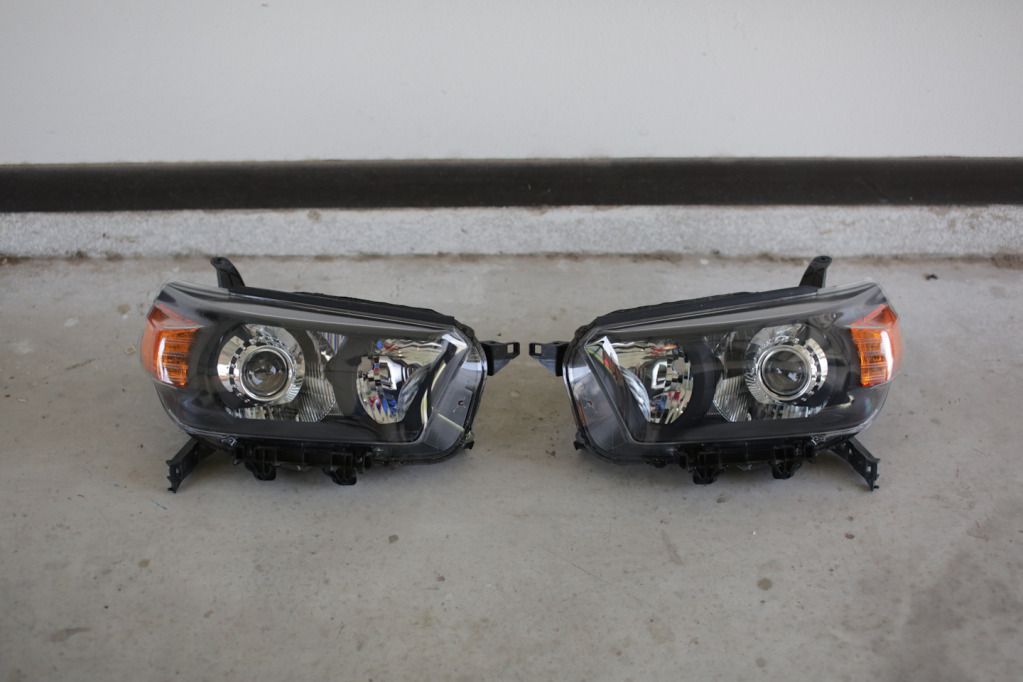
tools needed:
flat head
screw driver
dremel
metal cutting tool for dremel
grinding tool for dremel
JB weld
tape (marking headlight beam)
silicone sealant
80-32x2 screws
1/4 flat washers
marker
Phisey's link on headlight removal: http://www.toyota-4runner.org/5th-gen-t4rs/76226-5th-gen-hid-projector-retrofit-installation-pics.html
Philsey's link on wiring projector harness: http://www.toyota-4runner.org/5th-gen-t4rs/76226-5th-gen-hid-projector-retrofit-installation-pics.html
The Retro fit source:The place to purchase retrofit kits. http://www.theretrofitsource.com/
Plenty of information about HID, projectors and retrofits on here: HIDplanet
before taking out the headlihgts park atleast 10 feet from a wall and mark your lights like the photo bellow. keep in mind once you do this you will not be moving the vehicle until everything is finished. this is also a good time to wire up the harness and check everything.
to prevent things from getting scratched buy some masking tape and tape around the area that could possibly get scratched from installation and removal of headlights.
your tape should have this pattern _______/-----
once your lights are off bring them inside and flip them over you will see this photo bellow: remove all the screws that you see in the back with the exeption of the headlight adjusment screws, also remove all the rubbers sealants.
now preheat the oven to 250 degress, there is a ton of ways to do this and if you have one that has worked for you then stick to that one. put the lights in and time it for 3 minutes, once timer is done, pry the headlights open.
bowl removal: there are 2 of these plastic tabs pictured bellow and one screw holding the bowl. the plastic tabs have little hook looking plastic that can be pushed in by a flathead. release these two plastic and unscrew the adjuster and the bowl should come off.
photo of the screw
once the bowl is of flip it over to remove the low beam reflector, you will need pliers to remove them.
now your bowl is ready to be dremelled. mark your bowl with a marker. take a look at the lines and use it as a reference. this hole was too small and I had to make it larger.
the hole doesnt have to be perfect.
here's jesse1983's cut(photo bellow), this is more like what you want, use the lines on his bowl as a reference guide to cutting your bowl. I made mine too large and ended up with tons of unwanted space around the projector that didn't fit flush. this unwanted space made it harder for me to mount and aim the light, I believe the hole you want is 2inches in diameter. jesse's photo bellow is exactly what you want.
here's a link to jesse1983's thread: jesse1983's projector retrofit link
mount the bowl back to the rear headlight assembly and install it back to the front end.
this is by far the hardest step to do, i used JB welled glue for this step. you will need to aim your projectors to the marks you made on the wall in the very beginning and glue it in place using your prefered glue. (i used jb weld) you will need gloves, it will be hot and you will need to hold it in place until the glue sets. hook everything up and turn on your lights aim your projector to match the marking on the wall, matching the cutoff and line _____/-------
once you have made sure the glue has set, you can now remove the headlight assembly and take it inside to apply more glue around the projector.
notice the unwanted space around the projector which is not sitting flush due to the cut being too open.
let the glue dry. I wasn't 100% satisfied with only glue holding my projectors so I drilled a whole on my bowl to match up the holes in the projector and used 80-32x2 screws with a 1/4 flat washer to secure it in place and dremelled the excess screws off.
let the whole thing cure overnight and in the morning assemble everything together and bake the headlights once again. this is also a good time to mount the shrouds, i used JB welled and applied the glue around the area of the projector that will be touching the shroud so that I wont make a mess.
once you have assembled the headlights, put all the rubber seals back, your low beam rubber seal will not fit correctly due to the projectors so you will need to stretch the seal around the projector and apply silicone sealant around that to ensure proper seal. do not seal the bulb or anything near that just the area around the projector. if you need to you might have to push the rubber seal down.
after this cures, sit back and give yourself a pat on the back and look at those sexy lights.
Last edited: