GetOut's Build Thread

GetOut

New member
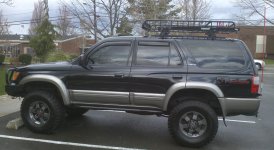
2012-04-01 4Runner.jpg

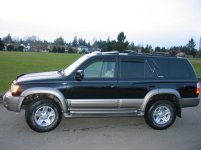
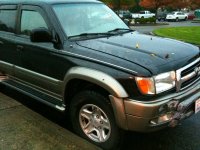
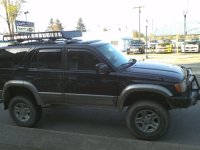
2000 Toyota 4Runner - Limited w/Factory e-Locker

Suspension:
Front:

SS Eco-Coilover (Tundra Progressive Bilstein)
Toytec Top ½” Plate spacer
Toytec 1” front Differential drop
Rear:
Land Cruiser- 7.75 Wrap Coils & Bilstein 5125

Wheels & Tires/ Braking:
FJ Cruiser TRD (Anthrcite)
285/75/16 Dck Cepek FC-II
Tundra 199mm Disc Brake Conversion

Engine & Drivetrain Upgrades:
K&N High flow air filter
Lots of Maintenance

Stereo/ CB/Electronics:
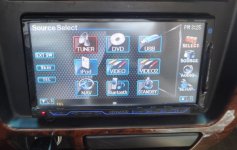
Kenwood Excelon DNX-8120 w/Garmin Navigation
Boston Acoustics SE60 Components front & rear
Cobra 75 WX ST Handheld CB
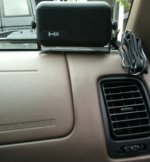
Custom In-Dash External Speaker
4’ Firestik Firefly CB antenna
Alarm – Undisclosed (pretty much everything under the sun)

Lighting:
Sylvania Silverstar Ultra headlight bulbs
LED Dome lights - Passenger & Cargo area
LED Dash Lights (white)
LED Markers (amber)
Disabled DRLs
In progress

Exterior Upgrades:
ARB Front Bumper
4x Innovations DOM Slider w/ Kickout
20% Color-Match Tint
EGR Window visors (in-channel)
Smoked 3rd brake light
Tail Light Guards (removed)
Custom Grill
Replaced factory rack
w/Thule steel rack and
Yakima LoadWarrior Basket w/extension
TRD Decal – custom color

Recovery
Hi-Lift Jack HL485 48"
Wab-Fab Slider Adapter
Front 3/4" D-Ring Shackles
Smittybilt Rear 3/4" D-Ring Shackle Hitch Receiver
Smittybilt CC330 3" x 30' Recovery Strap - 30,000lb
Q Industries MV50 SuperFlow Compressor
 

Attachments

  • 2012-04-01 4Runner.jpg
    2012-04-01 4Runner.jpg
    140.5 KB · Views: 22,075
Last edited:
Register to hide this ad
I decided it was time for a 'build' thread. I've seen a lot of yours and was beginning to feel left out :violin: :hello:

2008020001.jpg

I have always have a limited budget, and I'm not 'good with my hands' by any stretch of the imagination... but I love outfitting my rig for those days off!

I bought my 2000 Limited in 2005 I believe. The sticker price was $15,998 and it had 98,000 original miles. I walked out the door with a price that I was more than happy with - $12,000. Not bad at the time, and I had my eye on factory black :D

I went and ordered EGR window visors before I even got her home. In Washington state it's the best mod you can have on your rig.
This is the first pic I can find after I got the visors in!
 

Attachments

  • 2008020001.jpg
    2008020001.jpg
    131.3 KB · Views: 3,148
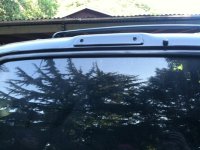
This rig was originally from Canada. It did not come with the rear "visor" behind the third brake light. I like it. It also did not have a hitch.
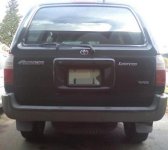
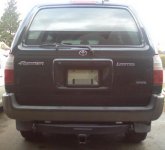
I thought the spare always looked a bit like a saggy diaper. It wasn't long before I found a factory hitch on CL for $40.

However, before that I had a misfortunate event where my truck was 'keyed' by what I believe was high school kids. We're talking the hood and most of the passenger side. It was bad. I had then also clean up some of the champagne trim that was flaking, fix a dent in the side of the front bumper from an apartment carport, and .....drum roll.... color match my rear license plate trim.
lunapic_133365288399439_17.jpglunapic_133365288399439_20.jpg

I have since added a Trimax T-3BLACK Premium 5/8" Key Receiver Lock.

Amazon.com: Trimax T-3BLACK Premium 5/8" Key Receiver Lock Rugged BLACK epoxy powder coat: Automotive
 

Attachments

  • lunapic_133365288399439_17.jpg
    lunapic_133365288399439_17.jpg
    87.4 KB · Views: 3,048
  • lunapic_133365288399439_20.jpg
    lunapic_133365288399439_20.jpg
    111 KB · Views: 3,019
Last edited:
When I decided to do a lift, I knew 3" just wasn't going to be enough lift for me. I also knew that this being my daily driver... I wanted a bit of give from rigid springs.
Lifting my truck was a stretch for my budget. But I like to take it to the backcountry... particularly the snow.

I didn't lift it for quite sometime, and my stock runner did better in the snow that A LOT of other stock rigs. I definitely wanted some more clearance though.
I decided on the LC Coil/Tundra lift.
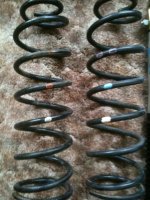
I scored some 7.75 / 7.5 LC coils here on the forums - Yahoo!
LC coils only-600h.jpg

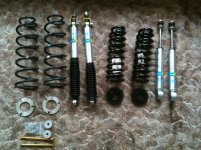
It is basically a model of the SS 1.2, but since I was on a budget, I pieced my lift together using the Sonoran Steel Eco-coilovers and the rear from Toytec. All Bilstein shocks.
Econo-Adjustable Front Coil-Over 4Runner (1996 to 2002) [] : Sonoran Steel, Sonoran Steel Custom Metal Fabrication L.L.C. Custom Toyota Truck Parts
Rear Bilstein Shocks for 96-02 4RUN - Toytec Lifts: Toyota Lift Kits: FJ Cruiser Lift Kits, Tacoma Lift Kits, Tundra Lift Kits, 4 Runner Lift Kits, Sequoia Lift Kits, Toyota Truck Lift Kits

Props to all these guys for dialing in T4R-specific parts. I also got top out spacers from Toytec to get as much lift in the front and eliminate rake.
Differential drop to dial it in.
Lift Parts-600hx800w.jpg

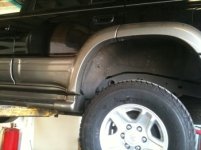
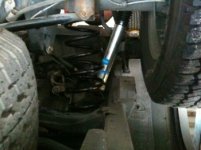
Put it on the lift and went to work!
IMG_0198-350w.jpgIMG_0201-350w.jpg

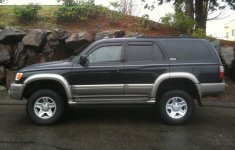
The final result landed right where I wanted it. Got almost exactly 4" of lift.

Final-800w.jpg
 

Attachments

  • LC coils only-600h.jpg
    LC coils only-600h.jpg
    97 KB · Views: 3,218
  • Lift Parts-600hx800w.jpg
    Lift Parts-600hx800w.jpg
    99.4 KB · Views: 3,223
  • IMG_0198-350w.jpg
    IMG_0198-350w.jpg
    36.5 KB · Views: 3,075
  • IMG_0201-350w.jpg
    IMG_0201-350w.jpg
    39 KB · Views: 2,986
  • Final-800w.jpg
    Final-800w.jpg
    120.5 KB · Views: 3,206
I have to give a big thank you to my nephews who have the lift and helped me with my mechanical challenges! They like to build cars with 'switches'. Bless their hearts....

downsized_0211001519.jpeg.jpg downsized_0519000906.jpeg.jpg
 

Attachments

  • downsized_0211001519.jpeg.jpg
    downsized_0211001519.jpeg.jpg
    38 KB · Views: 3,062
  • downsized_0519000906.jpeg.jpg
    downsized_0519000906.jpeg.jpg
    37.8 KB · Views: 2,958
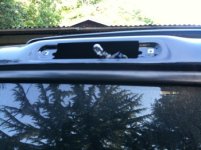
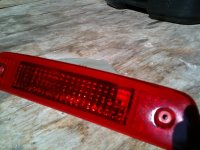
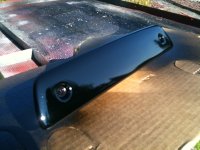
I decided to blackout my third brake light for some vanity.

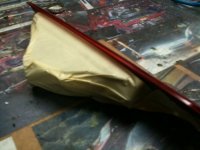
First, got it out and taped'er up
Taped Off -400w.jpg

Then I prepped it with some light sanding and cleaned it up.
prepped - 400w.jpg
Admittedly, with a few years on it, it didn't clean up as good as some I've seen, but not bad.

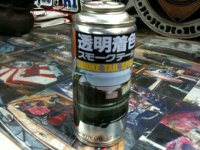
I used a brand I can't pronounce that was recommended by a friend over the typical ones you've heard of...
can- 350w.jpg

ready to roll...
after sprayed - 350w.jpgempty light - 350w.jpg

Final result
Final on Truck-350w.jpg
 

Attachments

  • prepped - 400w.jpg
    prepped - 400w.jpg
    48.8 KB · Views: 2,959
  • Taped Off -400w.jpg
    Taped Off -400w.jpg
    40.5 KB · Views: 2,941
  • after sprayed - 350w.jpg
    after sprayed - 350w.jpg
    46.4 KB · Views: 2,933
  • empty light - 350w.jpg
    empty light - 350w.jpg
    43.2 KB · Views: 2,919
  • Final on Truck-350w.jpg
    Final on Truck-350w.jpg
    69.1 KB · Views: 2,913
  • can- 350w.jpg
    can- 350w.jpg
    78.5 KB · Views: 2,915
October 2010 - came straight down on a big rock. Ouch!

Bumper smash - 400.jpg


Time for a bumper! I found an ARB Tacoma bumper on CL. I will say also, that while finding things on CL here in WA is not impossible, is not as easy as some of the lists I have looked at elsewhere, like CA.
Really nice guy who had an LC. The bumper was going to go on his wife's T4R. He had purchased ALL NEW hardware from ARB. He was a great guy, invited me over to expeditionportal and invited me to head out on the trail.

November 2010:
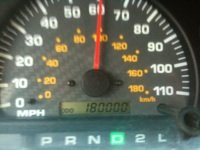
November 2011 Odometer.jpg


At the time, I also had a OEM (vanity) skid plate from a Tacoma that I hadn't put on yet. I ended up throwing it on CL to another owner who had a nice black '98. He also bought my grill. I had picked up another - painted it black and put a grill in it - courtesy of Burtman.
Burtman Industries

I will say ahead of time, that I purposely chose the 99-00 grill over the 01-02 grill. I think the 99-00 grill looks more like a "Toyota" grill - in line with the rest of Toyota grills. I've never really been a fan of a 01-02 grill.


At the same time, I got a pin strip remover and went to work.
Something like this:
Amazon.com: Pinstripe Eraser Pad (Qty: 1): Automotive

When the front fender was painted from the key-job, they added new pin striping that was 'newer' and didn't match. I never really cared for the pin striping to begin with. The older pin striping didn't come off as easy as the new stuff, and I pulled off a little clear coat in one place. It still turned out pretty good.

At the same time I put the bumper on, it was time to remove the side steps!
I had the front windows tinted at 20% to color-match for a bit of privacy.

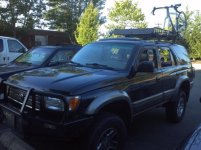
rack bumper.jpg
 

Attachments

  • Bumper smash - 400.jpg
    Bumper smash - 400.jpg
    64.6 KB · Views: 3,016
  • rack bumper.jpg
    rack bumper.jpg
    63.9 KB · Views: 3,016
  • November 2011 Odometer.jpg
    November 2011 Odometer.jpg
    17.5 KB · Views: 2,888
Last edited:
I got a lot of pics along the way that I no longer have. My iPhone 3GS broke and I hadn't synced the pics in a long time.... so a little is missed.
You'll notice I now have a sexy rack!

I wanted stronger crossbars than stock. I went with Thule bars and in-track feet. The only thing that was a disappointment here is that it's slightly taller than stock.

The basket is a Yakima Load Warrior with the extension. I have most of the attachments available.
The reason for my rack choice was simple - best quality at the best price.
The best price is because I work for an outdoor retailer, and got these straight from Yakima and Thule below wholesale. I couldn't help myself.
Also, I wanted a rack that I can easily (and cheaply) find attachments for. I want to be able to carry any kind of toy from a bike to a kayak to firewood to jerry cans and a spare. This was an easy decision.
I only wish it was slightly more low profile. That extra couple inches raises the center of gravity (slightly) on this rig.

lunapic_133365288399439_23.jpg

As sits without the bike, it just barely slides under a 7' clearance. Perfect for most parking garages around here. However - at 6'10" - 6'11", sometimes I'll get a slight scrape if the ramp is tilted just right (or wrong).

When I installed my ARB bumper, I added clear turn signals the same day.
I learned on Yotatech that the turn signal replacements are the same as those found in the European VW Golf MK2. I got them on urotuning.com as recommended on that thread.
http://www.urotuning.com/shop/front-bumper-turn-signals-clear-p-1303.html
 

Attachments

  • lunapic_133365288399439_23.jpg
    lunapic_133365288399439_23.jpg
    41.2 KB · Views: 2,942
Last edited:
I installed the ARB bumper in February 2011, and installed the head unit the next month.
I got a used DNX-8120. I don't normally recommend buying electronics on CL, but I do my homework and am careful. The previous owner worked at a stereo shop. It was professionally installed/uninstalled, and came with a brand new ipod cable. Again, I've had to build on a budget.
I targeted a Kenwood unit for the Garmin navigation.

kenwood.JPG
 

Attachments

  • kenwood.JPG
    kenwood.JPG
    73.7 KB · Views: 2,999
Wow nice build. I like the FJ's with the black.

GetOut, let me know if you want me to delete my post so yours are all together.
 
Last edited:
CB:

At the same time I did the stereo, I began my CB install. I started with a custom idea that I had for quite sometime, and had not seen done before.

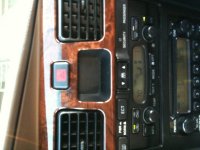
Q: 3rd Gen Clock fix?

A: External CB speaker!

My head unit had a clock, so I decided this was the choice for me.

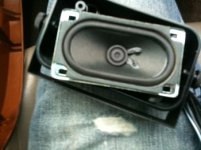
I sourced one of the smallest external CB speakers, that had excellent reviews - CB980.
CB980 Most Popular Small Speaker - WalcottCB.com

This is what it looks like:
Full speaker-350w.jpg

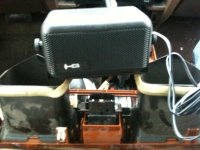
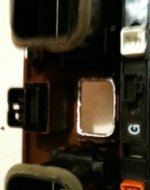
I took the non-working 3rd gen clock out. Here's how it measures up:
width with shell-450.jpg

I knew that it would have all the parts I need:
Pull out350w.jpg

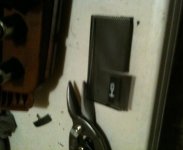
Clipped the screen to size:
clippers and screen-300w.jpg

screen ready-450w.jpg

I originally used liquid nails, but in the end, landed on a 2-part epoxy.
glue- 400w.jpg

Not sure why it's spinning my images around, but I'll continue in another post.
 

Attachments

  • Pull out350w.jpg
    Pull out350w.jpg
    35.6 KB · Views: 2,822
  • screen ready-450w.jpg
    screen ready-450w.jpg
    41.2 KB · Views: 2,968
  • width with shell-450.jpg
    width with shell-450.jpg
    47.1 KB · Views: 2,822
  • clippers and screen-300w.jpg
    clippers and screen-300w.jpg
    31.2 KB · Views: 2,946
  • Full speaker-350w.jpg
    Full speaker-350w.jpg
    35.5 KB · Views: 2,934
  • glue- 400w.jpg
    glue- 400w.jpg
    33.4 KB · Views: 2,931
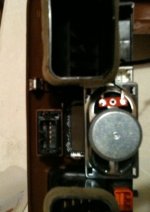
This shows the speaker staged for epoxy:
staging speaker after screen - 400w.jpg better staging -400.jpg

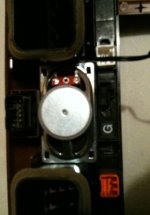
and the final product:
Final-450w.jpg

I can't figure out why it's spinning my images.. If anyone knows let me know and I'll edit. I've already tried resizing. Thanks!
 

Attachments

  • staging speaker after screen - 400w.jpg
    staging speaker after screen - 400w.jpg
    35.9 KB · Views: 2,872
  • better staging -400.jpg
    better staging -400.jpg
    33.7 KB · Views: 2,908
  • Final-450w.jpg
    Final-450w.jpg
    80.8 KB · Views: 2,929
I decided on a handheld CB. I can remove it from the truck when I'm not using it.
I bought it at the 4x4 swap with the 18' antenna cable
COBRA 75 WX ST

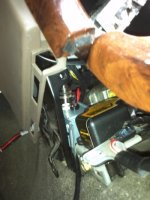
It installed right at the base of the center console below the head unit. This allowed the connector to come out just to the left of my shifters.

cb in console.jpg

Needed to add some wire to reach the battery. This allowed me to use better wire anyway.

The 18' Firestik antenna cable ran perfectly to the rear driver side:
FireStik K-8 18 foot single antenna coax cable

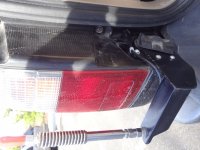
Thanks to Driffter33 who I got the antenna mount from! I like the mount. It uses factory holes, but I ended up adding a couple extra screws to the tail light.


http://www.toyota-4runner.org/3rd-gen-t4rs/80673-cb-ant-mount.html

CB Antenna Mount - 300w.jpg

I got a red 4' Firestik it matches my other recovery gear...
Firestik ® II FS Series 4ft Tunable Tip CB Antenna 900 Watts Red FS-4RD

I added a spring and a disconnect, that I got at the swap also:
SPRING SHOCK SS HD UP TO 5': Car Electronics
FireStik K-1A Push-n-Twist quick disconnect
 

Attachments

  • cb in console.jpg
    cb in console.jpg
    58 KB · Views: 2,905
  • CB Antenna Mount - 300w.jpg
    CB Antenna Mount - 300w.jpg
    48.4 KB · Views: 4,342
Last edited:

I like the build. Hopefully I'll get the chance to check it out in person soon.

That sounds great. I have been a bit shy to get out with rigs of people I didn't know because I am a noob to 'wheelin'. I have always been more of a forest roads - camping - and snow kind of guy. Also, never been of much help as far as working on trucks... but have been learning a lot along the way, and getting braver with each mile on the odometer.
 
That sounds great. I have been a bit shy to get out with rigs of people I didn't know because I am a noob to 'wheelin'. I have always been more of a forest roads - camping - and snow kind of guy. Also, never been of much help as far as working on trucks... but have been learning a lot along the way, and getting braver with each mile on the odometer.

That described me to a T. I'm not so into wheeling myself. Just use it to get me to the places I like to go play in. One of the reasons this forum is nice. People aren't super serious about themselves here or feel like you need to meet a certain criteria in order to be a member.
 
I think I've seen you down in Kent before a number of times. Down off Meeker on 64th, usually on weekdays? Could be another one with same color scheme though.
 

Members online

No members online now.

Forum statistics

Threads
278,306
Messages
3,554,045
Members
248,016
Latest member
Advally Service

Trending content

Back
Top