Getting Ready to Replace A/C Compressor

Take it as a good learning lesson OP. The 3rd Gen 4runner really likes its OEM parts or OEM parts maker (Denso).

I have never seen a condenser that bad. Ever. Wow. Always use new gaskets.

Replace the expansion valve without a doubt. It isn't hard.

If you need to save $$$, get two cans of Supertech 134 for $10 and change.

I have had leaks so bad in other cars where I ended up sucking moisture out of the air, through the system and into the pump. Not good to say the least.
 
While I'm at it does anyone know of a way to find a leak once you've found out that you have one. Obviously dye, but I can't put dye in if the lines are full of air and I can't keep a vacuum on them long enough to fill it up... maybe see if it will suck in smoke or something?
 
While I'm at it does anyone know of a way to find a leak once you've found out that you have one. Obviously dye, but I can't put dye in if the lines are full of air and I can't keep a vacuum on them long enough to fill it up... maybe see if it will suck in smoke or something?


Hyken, when I put my system all together, I took it to a buddy with a SnapOn brand AC machine and pulled a vacuum on the system for 30+ minutes. If you have a leak, I am not sure the vacuum test will help but these automated machines can also fill and vacuum to force air out of the system so you could possibly find the leak. Just brainstorming here but worth a shot.
 
Yes yes I have been quite busy with work and such. Been driving around with no A/C belt on so everything is just sitting there...

Hopefully that won't hurt anything. I also broke off the compressor tension adjuster bolt so I had to wait for that to come in...

I plan on getting back to it soon though! I will keep this thread updated.


Sent from my iPad using Tapatalk
 
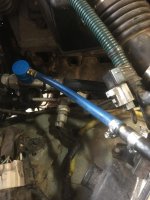
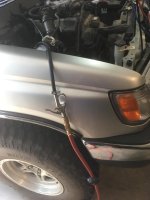
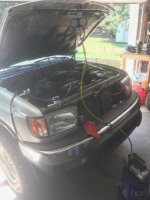
A little update - FINALLY! So thanks to my Dad (who is an engineer), we found the small leak and replaced the O-Ring with another new one that was slightly bigger in thickness. To find it, he had the brilliant idea to pressurize the system with his air compressor which has a drier on it (so as not to introduce too much moisture into the A/C lines. He rigged up a nice hose mashup using an old schrader valve off of one of those A/C recharge kits and some clamps.


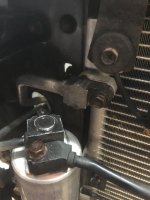
Once it we had about 30 psi in the lines, we used soapy water to find the leak and re-seal it with the PAG O-ring. Pretty ingenious really. It was leaking at the top of the condenser, just behind the drier.


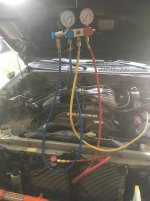
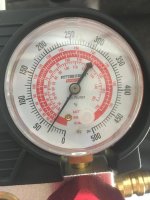
With that done, we used a vacuum pump to evacuate the system and then put in R134a until the gauges were in good range for the ambient temperature, which was about 88 degrees here in SC. The pic of the High gauge is when we had the air compressor hooked up to test for leaks though.


Took it on a test drive and everything was perfect and COLD. Put two and half cans on 12oz R134a into it (slightly overcharged).


Brought it back and as soon as I turned it off, the bottom of the radiator started pouring coolant... heated up but not into the hot range.


An hour and 150 bucks later, new radiator and all is well. So all in all both of these projects were pretty easy to do provided you have the right equipment and a whole weekend to devote to them.


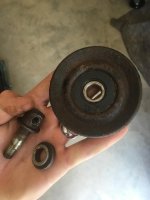
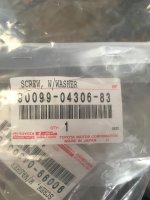
All said and done, we replaced compressor, condenser, radiator, drier, A/C belt, a A/C belt tensioner pulley adjustment bolt (broke off during removal, part number is on the bag in picture), and new coolant and refrigerant.


Please see the following pictures for everything except the radiator job. Also, buy Denso components, especially the condenser and compressor as we had parts that didn't line up exact, and the electrical plug for the compressor was not the same at all...
[MENTION=25434]BamaDrewski[/MENTION] thought you might want to see how we got along.

 

Attachments

  • IMG_0959.jpg
    IMG_0959.jpg
    128.8 KB · Views: 1,238
  • IMG_0960.jpg
    IMG_0960.jpg
    130.3 KB · Views: 1,233
  • IMG_0961.jpg
    IMG_0961.jpg
    129.6 KB · Views: 1,259
  • IMG_0962.jpg
    IMG_0962.jpg
    126.6 KB · Views: 1,197
  • IMG_0963.jpg
    IMG_0963.jpg
    122.4 KB · Views: 1,212
  • IMG_0965.jpg
    IMG_0965.jpg
    119.3 KB · Views: 1,186
  • IMG_0967.jpg
    IMG_0967.jpg
    118 KB · Views: 1,183
  • IMG_0971.jpg
    IMG_0971.jpg
    131.1 KB · Views: 1,176
Last edited:
Very nice. Congrats. Some AC recovery machines can do the same thing to find leaks but not quite as ingeniously as your dad did.

Keep an eye on the fan clutch if it is original. If temps at idle rise, such as at stop lights, it may be time for a new Aisin one. Get a vent thermometer as well from the grocery or auto parts store. South Carolina is quite hot and humid at the moment.
 
Very nice. Congrats. Some AC recovery machines can do the same thing to find leaks but not quite as ingeniously as your dad did.

Keep an eye on the fan clutch if it is original. If temps at idle rise, such as at stop lights, it may be time for a new Aisin one. Get a vent thermometer as well from the grocery or auto parts store. South Carolina is quite hot and humid at the moment.


For sure I will keep an eye on it! It didn't look to good when we were working on it. But so far the fan kicks in and out properly. And yeah SC is a hell-hole this time of year.


Sent from my iPad using Tapatalk
 
Nice work.

It would really suck if the expansion valve or evaporator goes out soon after all that hard work, lol. But probably not too bad if that happens.
 
Last edited:
Nice work.

It would really suck if the expansion valve or evaporator goes out soon after all that hard work, lol. But probably not too bad if that happens.

Very true! I have an extra expansion valve, but we took the chance on it working properly because the truck only has 150k on it and behind the firewall is not exposed to the elements as much.

But yeah, I will for sure keep a check on it. Two days and so far no problems whatsoever.
 
sorry to tap this thread but is there a how to replace a compressor pdf or doc anywhere on this site? I have a 2000 runner 3.4 v6 sr5. thanks guys
 
[MENTION=155669]cashflow50[/MENTION] Just as a preface question, do you have all the gauges and parts for working on A/C?

The first step is to evacuate the system with a vacuum pump and gauges. Without the pump and gauges, you're dead in the water.

If you do have those, great! The second step is to loosen the idler and take off the belt around the A/C compressor.I just slipped it off and left it dangling. Then remove the air box, air intake manifold, and I think the fan shroud? This will make it possible to get the old compressor out.

Third step is to undo the bolts on the intake/output (where the hoses connect) and the bolts that hold the compessor to the engine block. Don't forget to disconnect the small wire on the intake!

Fourth step is to remove the power steering pump (but leave the hoses on, just be careful not to strain them). You'll need this out of the way in order to get the old compressor out and the new one in.

Fifth, install a new GREEN A/C gasket (vehicle specific) in the manifold before bolting it to the intake hoses. If your compressor came with PAG oil, make sure to put in the right amount (some come pre-filled, so check this carefully). It helps to put PAG oil on the gasket as well, but be sure to keep everything CLEAN.

Sixth, reinstall the new compressor the same way it came off. the compressor sits on a little notch. Bolt the engine block bolts on, then the intake hoses bolt to the manifold. Attach the wire, then reinstall the power steering pump.

Seventh, slip the belt back on, tension it.

Eight, evacuate the system again with the vacuum pump. Before that though, a good way to check for leaks is to pressurize with air, the spray soapy water on hose connections and look for bubbles.

Once the system remains under vacuum -30 in/mg for about 40 minutes with the pump disconnected, it's safe to put in refrigerant. This must be done with the vehicle running and gauges properly connected. It should take about 2 of the small cans of r134a.

Hope this helps!
 
Last edited:
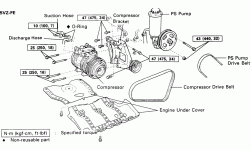
Also, [MENTION=155669]cashflow50[/MENTION] I found this schematic showing bolts and what not around the compressor.
 

Attachments

  • 0900c15280060fba.gif
    0900c15280060fba.gif
    131.6 KB · Views: 2,738
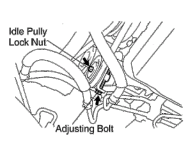
And [MENTION=155669]cashflow50[/MENTION], also one for the idler tension bolt.
 

Attachments

  • 0996b43f80205a02.gif
    0996b43f80205a02.gif
    39.7 KB · Views: 1,006
thank you hyken. This will help tremendously. To answer your question about the equipment used...a friend of mine has all those gauges and tools for removal.
 
Hey guys,

Are any of yall familiar with the ac compressor manifold that screws on top of the compressor and attaches to the hoses. I took it to a shop to see why my AC stopped working. They replaced the compressor but said the top plate is warped and leaking oil so they need to replace that too. That part is turning out to be like 300 dollars. Any idea where I can find it cheaper? I have a 3rz if that makes a difference.
 
Hey guys,

Are any of yall familiar with the ac compressor manifold that screws on top of the compressor and attaches to the hoses. I took it to a shop to see why my AC stopped working. They replaced the compressor but said the top plate is warped and leaking oil so they need to replace that too. That part is turning out to be like 300 dollars. Any idea where I can find it cheaper? I have a 3rz if that makes a difference.

I'm not sure about 4 cylinders at all, but typically if that plate is warped there will be leakage. The doubtful thing in my mind though is - is it even possible to warp a steel plate that is that shape. My guess would be the manifold gasket rather than the plate. Gaskets are much cheaper too. Start there, and if it's still not fixed, then look into costlier fixes.
 
I'm not sure about 4 cylinders at all, but typically if that plate is warped there will be leakage. The doubtful thing in my mind though is - is it even possible to warp a steel plate that is that shape. My guess would be the manifold gasket rather than the plate. Gaskets are much cheaper too. Start there, and if it's still not fixed, then look into costlier fixes.

Yeah that's what I was thinking. Its just a pain to evacuate/recharge the system at home or else I would never deal with shops.
 
It's time for my A/C Tune Up. Now that Winter is done, I've got to tighten up my loosened and squealing compressor belt. I expected it to stretch, but I was hoping it would take longer than this.
 

Members online

No members online now.

Forum statistics

Threads
278,306
Messages
3,554,045
Members
248,016
Latest member
Advally Service

Trending content

Back
Top