Gobi Stealth Rack Install: Problems? Issues? Tips?

Attempted to install the Gobi rack this past weekend. I had the 4 "GOBI" logo-ed brackets pretty snug when we lifted the rack and mocked it up against these brackets. The Rack looked and sat evenly on all 4 brackets. Per the instructions, the front legs are then installed.

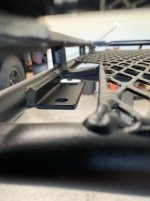
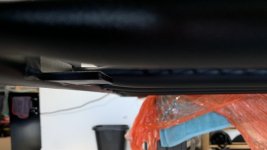
When I attempted to install the driver and passenger side front legs, the middle "GOBI" bracket on the driver side did not touch the rack. There was about a 1/2 gap between the middle bracket and the rack with the driver side front leg installed. I can also feel that the majority of the weight of the rack is on the front driver side leg. There are adjustments you can make on the front legs but they are set as low as possible and the rack still does not make contact with the middle bracket (front fixed "GOBI logo-ed bracket).

On the passenger side, the rack seemed to be touching the middle, rear "GOBI" logo-ed brackets and the front leg evenly. The weight of the rack on the passenger side also seems to be evenly distributed. It seems like if the adjustments on the driver side front leg would allow the rack to sit down further, it would then rest on the middle "GOBI" logo-ed bracket and sit correctly.

Did anyone else run into this issue? I'm afraid if I tighten the bolts on the driver side middle "GOBI" logo-ed bracket to the rack, it would pull the bolts holding bracket into the roof, out of the roof.

I just installed mine on a 5th gen, and had the EXACT same issue. The drivers side is definitely bent down, at least a 1/2". The passenger side less, but still not perfectly level. It was almost impossible to get the front supports squeezed under the rack - especially at the height they recommend. I just called Gobi to see if this was by design, or poor craftsmanship. The technical person I talked with didn't really have an answer, so I've been give another name there to try and connect with. The front supports have been redesigned, and I could see putting a slight bow in the rack to keep those supports in contact at all times. I just want to make sure that was on purpose. I spent too much $ on this rack to be satisfied with something that's not true and straight.
 
I just installed mine on a 5th gen, and had the EXACT same issue. The drivers side is definitely bent down, at least a 1/2". The passenger side less, but still not perfectly level. It was almost impossible to get the front supports squeezed under the rack - especially at the height they recommend. I just called Gobi to see if this was by design, or poor craftsmanship. The technical person I talked with didn't really have an answer, so I've been give another name there to try and connect with. The front supports have been redesigned, and I could see putting a slight bow in the rack to keep those supports in contact at all times. I just want to make sure that was on purpose. I spent too much $ on this rack to be satisfied with something that's not true and straight.

I just installed mine with the new front feet. I had to take the two pieces apart on the front feet and then bolt them back together again after I put them where they mount. Then I had my brother push the rack up to the recommended height while I tightened the bolts. It took a bit of adjusting with the 4 bolts. Also, the middle and rear mounts shouldn't be so loose that the rack lifts up 1/2 inch. Don't tighten them down all the way, but don't leave them so loose that the rack will move a lot.
 
Last edited:
I just installed mine with the new front feet. I had to take the two pieces apart on the front feet and then bolt them back together again after I put them where they mount. Then I had my brother push the rack up to the recommended height while I tightened the bolts. It took a bit of adjusting with the 4 bolts. Also, the middle and rear mounts shouldn't be so loose that the rack lifts up 1/2 inch. Don't tighten them down all the way, but don't leave them so loose that the rack will move a lot.

I had to adjust the front feet off of the rack as well. No way you could do it any other way. And then lift the front with all my might just to get the foot back under the rack and on the rubber strip. I sounds like yours was "bent" the same as mine. I don't agree on not tightening the bolts on the middle and rear supports. Otherwise they are going to spring once you load the rack. The rack should be designed to be tightened all the way around.
 
I had to adjust the front feet off of the rack as well. No way you could do it any other way. And then lift the front with all my might just to get the foot back under the rack and on the rubber strip. I sounds like yours was "bent" the same as mine. I don't agree on not tightening the bolts on the middle and rear supports. Otherwise they are going to spring once you load the rack. The rack should be designed to be tightened all the way around.

I meant leave them a little loose just for the install, but not so loose that the rack moves all over. Get everything in the correct position and then snug them all up.
 
I'm waiting on my Gobi Stealth as well

I have watched several youtube videos on the installation. On one video the operator had trouble breaking the factory mounting bolts loose. They appeared to have been "Red Loctited" in place. Has anyone else experienced this problem?
 
I have watched several youtube videos on the installation. On one video the operator had trouble breaking the factory mounting bolts loose. They appeared to have been "Red Loctited" in place. Has anyone else experienced this problem?

Yep. They have some loctite. But it wasn't that hard to break them loose with my ratchet.
 
Confirmation from Gobi on bow in rack and instal tips

I got an email from Paul and Gobi:

"All Gobi Toyota roof racks have a slight bow built into them towards
the front. I'm pretty sure your roof rack was not bent in shipping it's
the design of the Gobi rack. If you have not installed the Gobi rack yet
let me explain a couple of things first. After you have installed the
rear 4 support brackets and set the Gobi rack on top you will notice that
the rack curves down towards the front. This is normal but make sure
when installing the screws into the roof rack then into the 4 support
brackets that you leave them only finger tight as explained in the
installation instructions. When you install the front two mounting
brackets and set them in place and fully tighten them down as explained in
the instructions, you will notice a gap between the center brackets and the
roof rack. This is a designed in feature so that when you tighten the
screws down your putting a small amount of pressure on the front of the roof
rack preventing any potential lifting or shaking of the roof rack during
travel and use."
 
I remember I got my Gobi Stealth rack in 2015 when I still lived in San Francisco, almost top of Nob Hill. 2 of us took the packaging out and installed them on right there on the street, and it was quite easy and strait forward, about an hour to do the job.

Now I wish I got the Gobi Ranger instead. The stealth, gap between the crossbar and rack floor is less than 4", and that's making it very hard to install RTT. The GOBI crossbars is another thing that has adjustable design, that seems very flimsy to hold RTT weight. I have 100lbs rtt on them right now but I am replacing the crossbar configuration altogether.

Gobi rack still the best looking and toughest rack out there tho. FrontRunner is also a good one to look at, it has all the bell and whistle.
 
I got two 58" Yakima crossbars and this adapters to raised the crossbars up.
J110540


Took me a while to find the right part but here they have IT.
 
I got two 58" Yakima crossbars and this adapters to raised the crossbars up.
J110540


Took me a while to find the right part but here they have IT.

i have been looking for an adapter like this for so long! how have they held up to the elements / use / loading? thanks for posting.

anyone know of other similar 90deg round-to-round-bar adapters? (don't particularly like the yakima rail grab tower things)

I emailed Gzila to see if he'd make a set using his 1" clamps... he did not respond. lol
 
TLDR: Should the driver's side bracket be welded on at an angle?

I appreciate the creation & contributions to this thread. It's been helpful in preparing for my install.

I received my rack a couple weeks back and plan to install tomorrow (6/7). Though I opened the box and did a general inspection the day I received it (making sure it's still in one piece and all required hardware was included), it wasn't until a couple days ago that I completely took all of the packaging off. I put it up on two saw horses so I could begin applying a weatherproof coating.

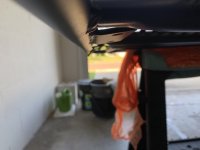
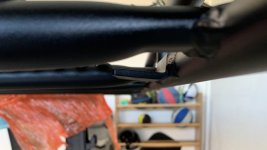
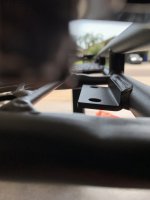
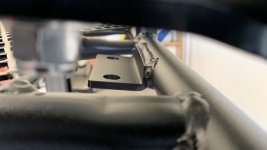
That's when I noticed the driver's side bracket that has been welded on is at quite an angle, as opposed to the passenger side which appears level / flat with the rack. I don't have a level small enough to seat on the bracket, however just eyeballing it, it's definitely not sitting "flat" like the other side. Hopefully that is depicted in the pictures below.

Correct me if I'm wrong, but this can't be normal can it? Has anyone else noticed this? I'm contimplating calling GOBI however, as many have experienced, their customer service isn't exactly top notch. I give some details of my experience in a different thread.

Anyway, I'd hate to get that far into the install only to realize this isn't going to work. Especially if it will be already be a challenge to getting the rack to lay flat on these brackets, as other members have mentioned in this thread. Also, note the 4 pictures below are all of the angled driver's side bracket. I took a couple pics and then decided to rotate the rack 180° in preparation of the install.
 

Attachments

  • Driver - Angled 1.jpg
    Driver - Angled 1.jpg
    93.7 KB · Views: 355
  • Driver - Angled 2.jpg
    Driver - Angled 2.jpg
    125.8 KB · Views: 376
  • Driver - Angled 3.jpg
    Driver - Angled 3.jpg
    125.3 KB · Views: 347
  • Driver - Angled 4.jpg
    Driver - Angled 4.jpg
    117.8 KB · Views: 359
Images of the "level" passenger side bracket for comparison.
 

Attachments

  • Passanger - Level 1.jpg
    Passanger - Level 1.jpg
    64.2 KB · Views: 348
  • Passanger - Level 2.jpg
    Passanger - Level 2.jpg
    136.6 KB · Views: 347
i have been looking for an adapter like this for so long! how have they held up to the elements / use / loading? thanks for posting.

anyone know of other similar 90deg round-to-round-bar adapters? (don't particularly like the yakima rail grab tower things)

I emailed Gzila to see if he'd make a set using his 1" clamps... he did not respond. lol

hey there! are you saying the adapters you pictured will allow me to attach yakima bars to the gobi rack? if that is the case can you give me a link or a name? I don't want to have to buy the $300 elevation kit from Gobi when I already have several sets of yakima bars and they won't sell the brackets without the bars... thanks in advance
 
I got two 58" Yakima crossbars and this adapters to raised the crossbars up.
J110540


Took me a while to find the right part but here they have IT.

well I found them on the Garvin site, but I can't see how these will attach yakima bars to the Gobi. Do you have a pic of your yakima bars installed?? that would be a HUGE help! thank you!
 
hey there! are you saying the adapters you pictured will allow me to attach yakima bars to the gobi rack? if that is the case can you give me a link or a name? I don't want to have to buy the $300 elevation kit from Gobi when I already have several sets of yakima bars and they won't sell the brackets without the bars... thanks in advance

had to dig back to figure out what I was even talking about then lol.

I never actually bought them, [MENTION=130622]puckitpuck[/MENTION] was the one who found/purchased so he could answer best.

but from what I'm looking at in his link, the answer to your question is yes:

Garvin Jeep Wrangler Yakima/Thule Crossbar Adapters for Adventure Rack 44087 (07-18 Jeep Wrangler JK)

ExtremeTerrain
 
Last edited:

Members online

No members online now.

Forum statistics

Threads
278,306
Messages
3,554,045
Members
248,016
Latest member
Advally Service

Trending content

Back
Top