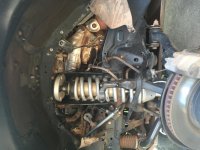
Greasing Upper Control Arms - Very frequently?

AirspeedX

New member
Who here needs to grease their upper control arm main pivot bushings very frequently? I'm talking 2-4 times / month.

I'm running Camburg Ball Joint UCA's and have noticed major play in the arms when the tires are lifted off the ground. I can grab each arm and rock it about the main pivot bushings / long mounting bolt. After I pump 5-10 shots of grease on each side - they go back to being normal with no play whatsoever.

This doesn't seem normal. The arms have had 6 months of use (and some abuse). I can't see my bushings being worn out already. Need to nail this down soon as I'm leaving for a 10 day trip next week.

Or is this normal and I just need to sock the grease to it all of the time?

I'm using Amsoil Multipurpose Synthetic FWIW


Tried emailing Camburg but no reply - I'll be calling them in the morning.
 
Register to hide this ad
Sounds like you destroyed your UCA bushings by over greasing with a grease gun, which is common. Replace the bushings and from now on use 2-3 pumps with the UCA pivot nut removed, then re-tighten, every 5-10K miles.
 
Sounds like you destroyed your UCA bushings by over greasing with a grease gun, which is common. Replace the bushings and from now on use 2-3 pumps with the UCA pivot nut removed, then re-tighten, every 5-10K miles.

Ah - now that makes sense. If that's the case, I can guarantee I was over greasing them.

I thought that if I disassembled anything, I would need another wheel alignment but after thinking about it, it's probably not required.
 
Damn, I think i did the same couple of weeks ago. Instruction was to loosen the bolts, pump gease until it seeps through and tighten. Maybe i can save it somehow. How does it get damage with the excess grease?
 
I think I found the culprit to my problem. The main bolt was no where near 85 ft lbs. I loosened the nut right off, added 2-4 pumps of grease and retorqued it to 85. I guess I was greasing it so much because it was near finger tight only.


Sent from my SM-G900W8 using Tapatalk
 
Last edited:
Damn, I think i did the same couple of weeks ago. Instruction was to loosen the bolts, pump gease until it seeps through and tighten. Maybe i can save it somehow. How does it get damage with the excess grease?
I would take the zerks out and see if any grease comes out. Loosen off the pivot bolt nut as well to take away the pressure. Add the zerks back in. Regrease. Then retorque the nut.

Other than that, you're looking at a new bushing and sleeve kit. $60usd

Sent from my SM-G900W8 using Tapatalk
 
Just a side note,

I am NOT a lubrication expert but I do know that the Grease supplied by Camburg for the Bushings feels much different then what I would consider "standard auto bearing grease". No idea if it matters but I bent over and bought the $40tube from them. I am sure there are cheaper options out there but I got new bushings with the same order. Mine lasted ~30kmiles.

FWIW to replace both UCA bushings was a 4hr weekend job for me (average shade tree mechanic) the 1st took about 75% of that time and the second was cake once I had done it once (technically I had already done it on the original install but that was a couple years ago)
 

Attachments

  • IMG_2366.jpg
    IMG_2366.jpg
    130.4 KB · Views: 6,726
Can someone advise if the camburg performance ballpoint kit (newer black style) has 2 or 4 greasing locations? I only see pictures of them disassembled, and in those it appears there are 4. But when I look at my installed unit I seem to only find 2, one on either end. I'd appreciate any insight. Also, anything needed to be greased under the dust cap?
 
Can someone advise if the camburg performance ballpoint kit (newer black style) has 2 or 4 greasing locations? I only see pictures of them disassembled, and in those it appears there are 4. But when I look at my installed unit I seem to only find 2, one on either end. I'd appreciate any insight. Also, anything needed to be greased under the dust cap?

There are 2 on the frame mounting bushings (the 2 you mention) they should be installed on the lower side and then there is 1 under the cap that is for the Ball Joint. The grease you use for the 2 are different then the 1.

Sounds like you already have them but make sure to follow the instructions for greasing, you need to looses the nut/bolt to pull the washers back from the bushings

The black arms are the same as the older grey arms the only change was color and that Camburg now sells them with the Ball Joints pre pressed in where as the old ones were pressed in by the end user OR a middle man like Wheelers etc
 
Out of curiosity - can anyone explain to me why they are using a greasable bushing with such a short lifespan when the OEM style is extremely durable, quiet, and needs no maintenance?
 
Out of curiosity - can anyone explain to me why they are using a greasable bushing with such a short lifespan when the OEM style is extremely durable, quiet, and needs no maintenance?

I can only assume they do it as a cost saving measure. The OEM bushings (48632-60040) seem to run from $30-$45 each, whereas the Camburg replacement kit is $60 for all 4. UCAs are pretty expensive already but you'd think they could offer it as an upgrade option maybe?
 
I had the camburgs on for about 10k and then sold them to run uniballs. They looked brand new and the bushings were in perfect shape. I think I greased them once..but only because it was easy. Just loosen the bolt to let the grease run out the channels.
 
I think I need some advice. I got the grease gun and grease. Per procedure I'd like to loosen the bolts first. One side is 17mm and the other 19mm. Only tool I can get onto either side is a wrench. I can't get a socket/ratchet in there. Basically space issue as the tools interfere with the inner body panel. As a result I think i just don't have enough leverage to loosen either side from the wheel well area. How should I be going about this?

Any advice is greatly appreciated.
 
Last edited:
I think I need some advice. I got the grease gun and grease. Per procedure I'd like to loosen the bolts first. One side is 17mm and the other 19mm. Only tool I can get onto either side is a wrench. I can't get a socket/ratchet in there. Basically space issue as the tools interfere with the inner body panel. As a result I think i just don't have enough leverage to loosen either side from the wheel well area. How should I be going about this?

Any advice is greatly appreciated.
Remove the splash shields, remove the 12mm bolt and push the brake lines out of the way.
 
Remove the splash shields, remove the 12mm bolt and push the brake lines out of the way.


Ahh, I didn't think about that. Assuming this works, then I think I'm set as I need to loosen one side effectively.

One more question, should I put anti-seeze on there?
 
Ahh, I didn't think about that. Assuming this works, then I think I'm set as I need to loosen one side effectively.

One more question, should I put anti-seeze on there?
I would go more for blue loctite. The bolt gets regularly splashed with grease from the LCA bushing, it is constantly moving, and having it loosen up is easily catastrophic. Personally, I use a lock nut.
 
I think I made some progress today thanks to this thread. The work is done on the passenger side and I'll tackle the driver's side later this week.

I bought the items needed from Amazon:

Grease Gun
Grease (contains PTFE)

Here are the rough steps:

- I jacked up the front of the car maybe 3 inches to get a little bit more room in the wheel well
- I removed the top clips of the rubber wheel well liner to get more room
- I removed the two bolts for the brake line (one from underneath hood and the other from wheel well) and moved the line slightly out of the way. Given the tools I used to do the job this may not have been needed.
- I used wrenches on both sides. On the 22 side (left in picture), I placed it on there and wedged it against the tire so it wouldn't move
- On the 19 side (right side of picture) I used two wrenches for leverage (got the idea from this video)

The last two steps above is what got the damn thing to turn. I suspect it was tightened with an air gun. I loosed the bolts enough so that I could see movement by the bushings next to them. Finally I pumped 3 or 4 pumps of grease into either side. Once done I tightened everything up by hand using the leverage trick. Not sure if the torque wrench would have fit on the 22mm side (although I couldn't find the socket, so didn't try).

I also did not use loctite because I couldn't really see the threads. I think though I could have removed the 22mm nut without any concern and put loctite on there. I'll try that on the drivers side.

The picture below shows the leverage trick as well as the wrench leaning against the tire during the loosening process.
IMG_3539.JPG
 
My recommendation, use a pair of vice grips on the 19mm (bolt) end, and get an impact socket and 24-36" breaker bar for the nut end. Ideally, tighten the UCA bolt with the UCA disconnected from the spindle and tighten until it makes noise, then back it off until it is quiet and locktite or locknut it in place.
 

Members online

Forum statistics

Threads
278,310
Messages
3,554,079
Members
248,016
Latest member
Advally Service

Trending content

Back
Top