hour
New member
I wrote this up because I was taking pictures along the way and most of the referenced links are more text than picture. It really wasn't that bad following the text directions but hey, what's the harm in having another write up?
I replaced my radiator because after doing a flush it was running hotter than ever, and I was certain that there was no more trapped air in the radiator. I / others on here suggested thermostat was bad or radiator was clogged... In any event, had I done all of this from the start I would have saved a lot of time.
Parts used:
ToughOne/Ready-Rad radiator from AAP (#431402) - $114
ToughOne 13psi Radiator Cap (#10241) - $8
OEM Thermostat (#90916-03075) - $21
OEM Thermostat Gasket (#16325-62010) - $7
3 gal Zerex Asian Formula Coolant (#675130) - $14/gal
Total: $192
Edit: Including some alternate radiator part #'s and comments
I can't comment on these entirely since I only used the radiator specified and haven't tried any others.
OEM radiator: #16400‑75180 - have to assume it'd fit like a glove
Koyo/TYC 1998 - I don't know how to comment, research indicates people say these are interchangeable (as in you order Koyo, get TYC) and some people claim it fits exceptionally or not well at all, such as post #4 in this thread. SEE BRIAN'S COMMENT ON KOYO/TYC IN THIS POST
Spectra (Autozone): #C1998 - didn't have any reviews on Autozone.com so I kept looking
End edit
You can also replace the upper and lower radiator hoses (and clamps) if you want. I didn't, but probably should have. Really wanted to get this wrapped up over the weekend, so maybe order those in advance if you can. I'd stick with OEM hoses to eliminate any possible variables. Camelback Toyota has the hoses and thermostat + gasket for way cheaper than my local dealership, wish I had planned a little better.
Tools used:
12mm socket (12pt), 12mm deep socket (6pt)
10mm socket
Socket extensions - one roughly 1.5", one about 3"... can improvise
Needle nose pliers
Bucket and drain pan, funnel
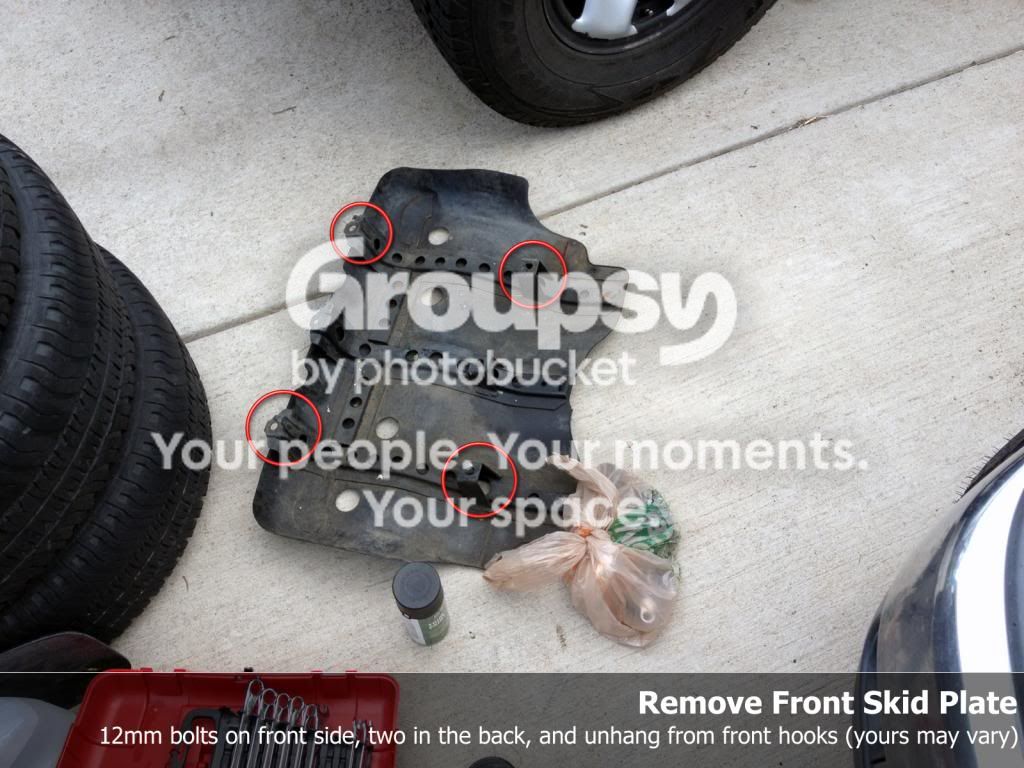
First thing to do is remove your front skid plate. I figure mine may not have all the bolts, or they're in different locations, but it's a few 12mm that you'll need to remove.
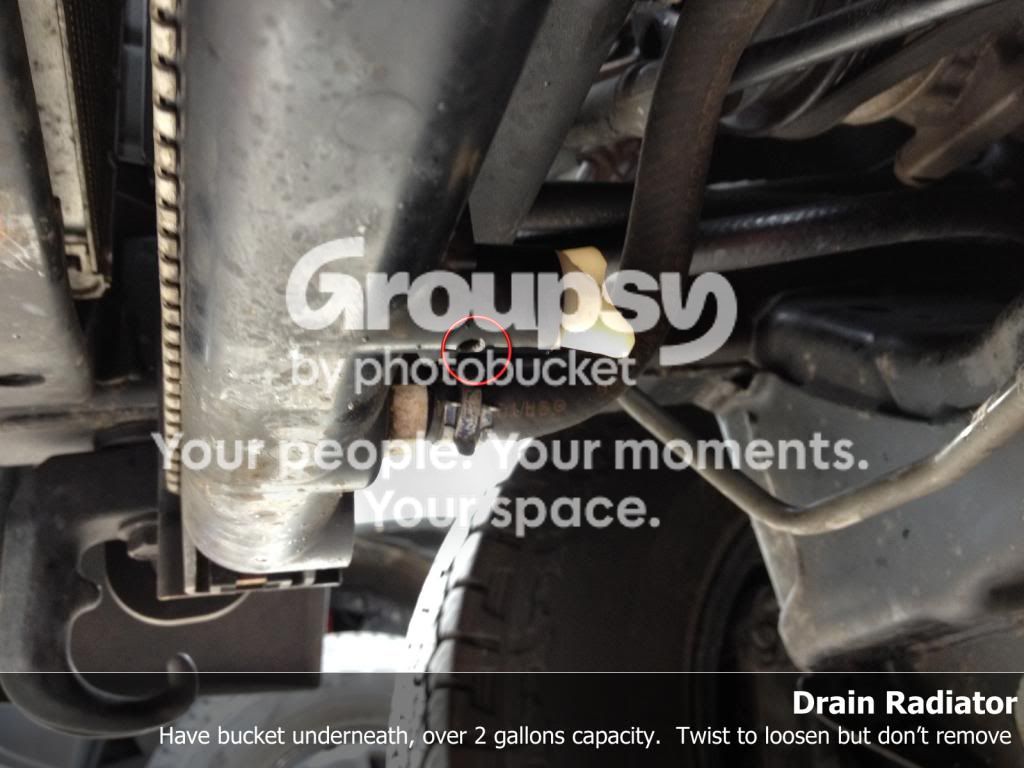
With the skid plate off you'll have good access to the petcock at the bottom of the radiator. Loosen/remove the fill cap, position bucket, and start the draining process. It'll flow from the circled hole, don't remove it entirely or you'll spill.
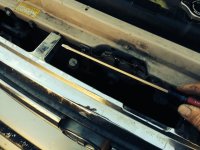
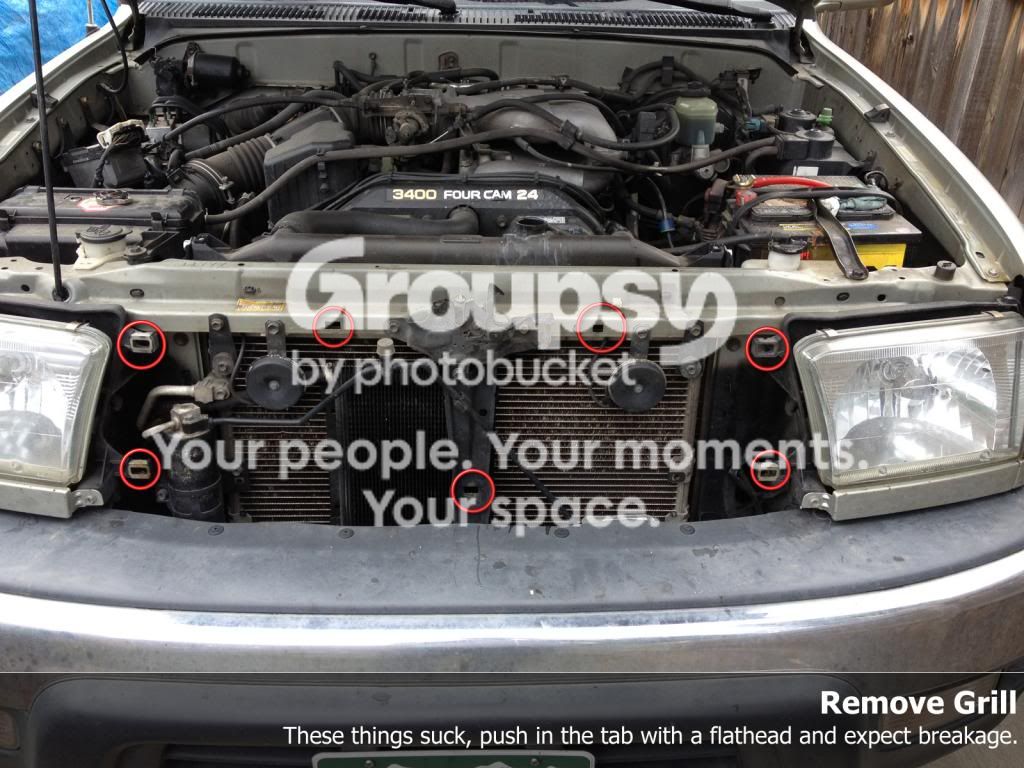
Draining can take a while so you may as well work on the stupid grill at this point. This is the second time removing mine and I'm pretty sure all my clips are toast. In my opinion, this was the most difficult part of the task - and I had already done it once before.
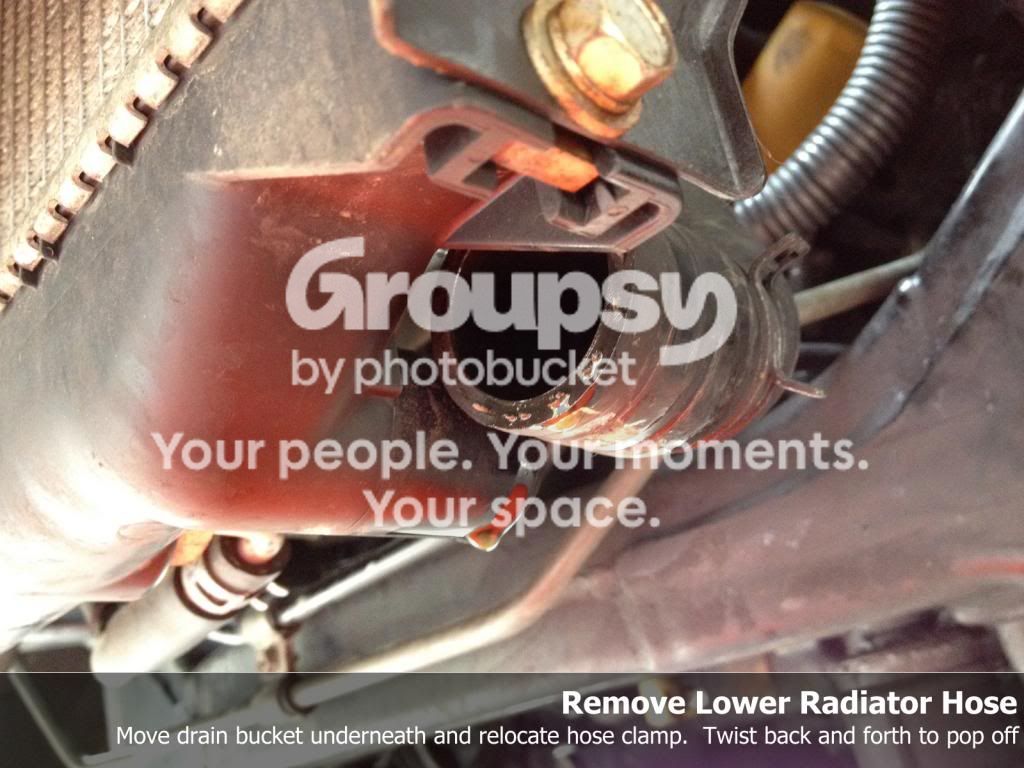
After the draining is complete, pull the lower radiator hose and expect a little more coolant to come out at this point.
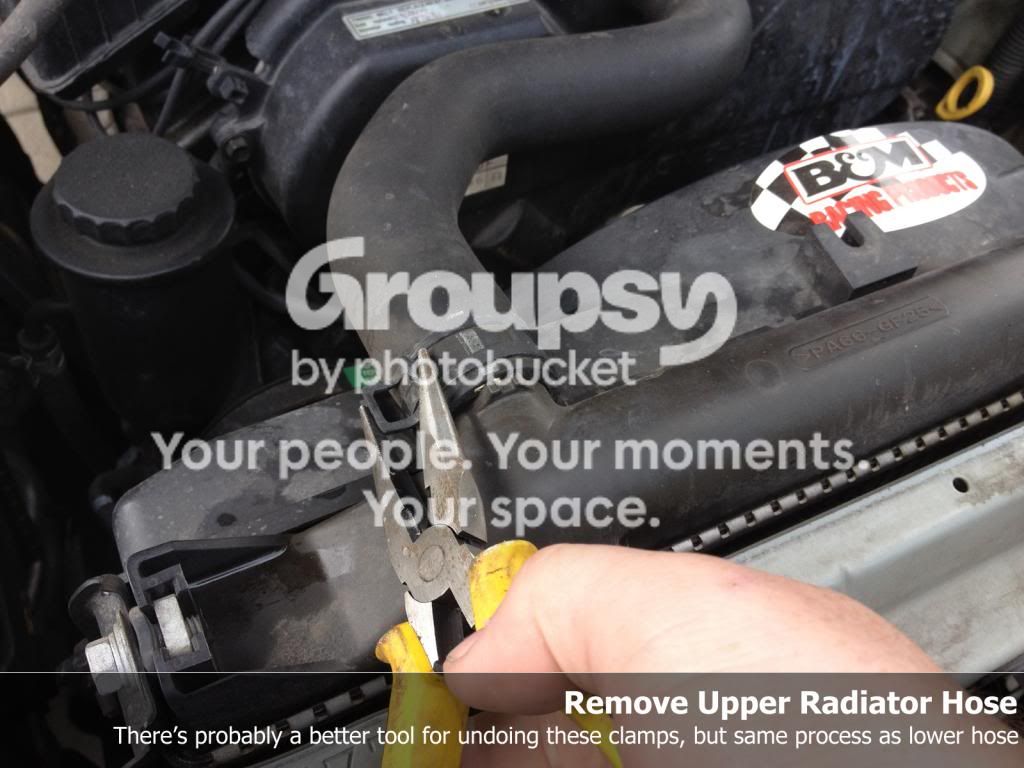
You can go ahead and remove the upper radiator hose too at this point to get that out of the way.
Disconnect your transmission cooler lines at this point, I photographed where they connected to the hard lines, but you'll be looking for the two on the bottom of the radiator. Yank one at a time and catch the little bit of transmission fluid in a proper drain pan. If you have an external cooler you may as well remove your zip ties from old radiator (or do nothing if you installed with brackets)

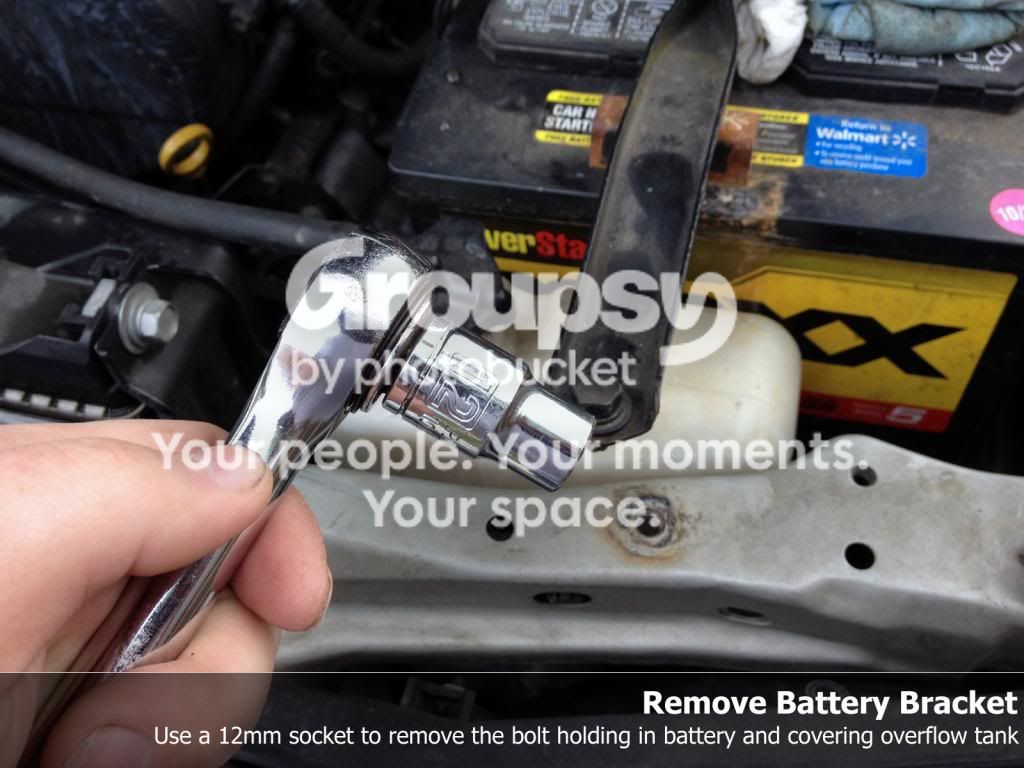
Remove battery bracket while the transmission cooler lines are dribbling. This will allow you to yank the overflow tank out and clean it.
You'll also want to disconnect the line to the overflow tank from the upper radiator neck. This will be the last tube running to the radiator, so have a beer if you weren't already... the messy part is nearing an end.

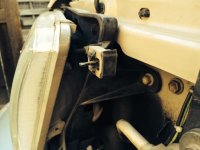
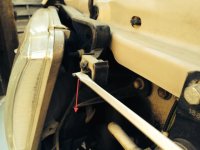
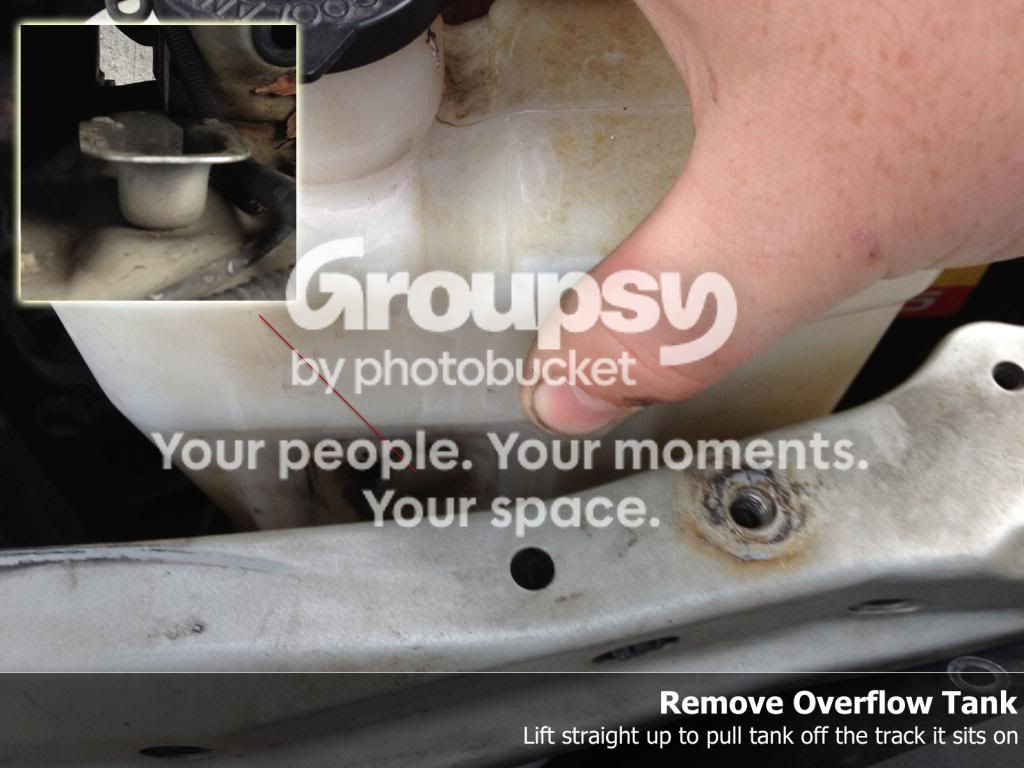
Lift the overflow tank straight up, it slides in on a track. I photographed this because mine was being a PITA to yank up, and I questioned whether that was the correct procedure. I didn't want to manhandle it and end up cracking the tank, so yeah... here's how it attaches.
You'll then want to remove the 4 10mm bolts that hold on the fan shroud. The passenger side bottom one was difficult to access because of the transmission cooler lines, but once I got it loosened with socket wrench I just undid it with my fingers. Two of em are down low, maybe use a flash light. Move it towards the windshield after you free it, to allow some wiggle room for the radiator.
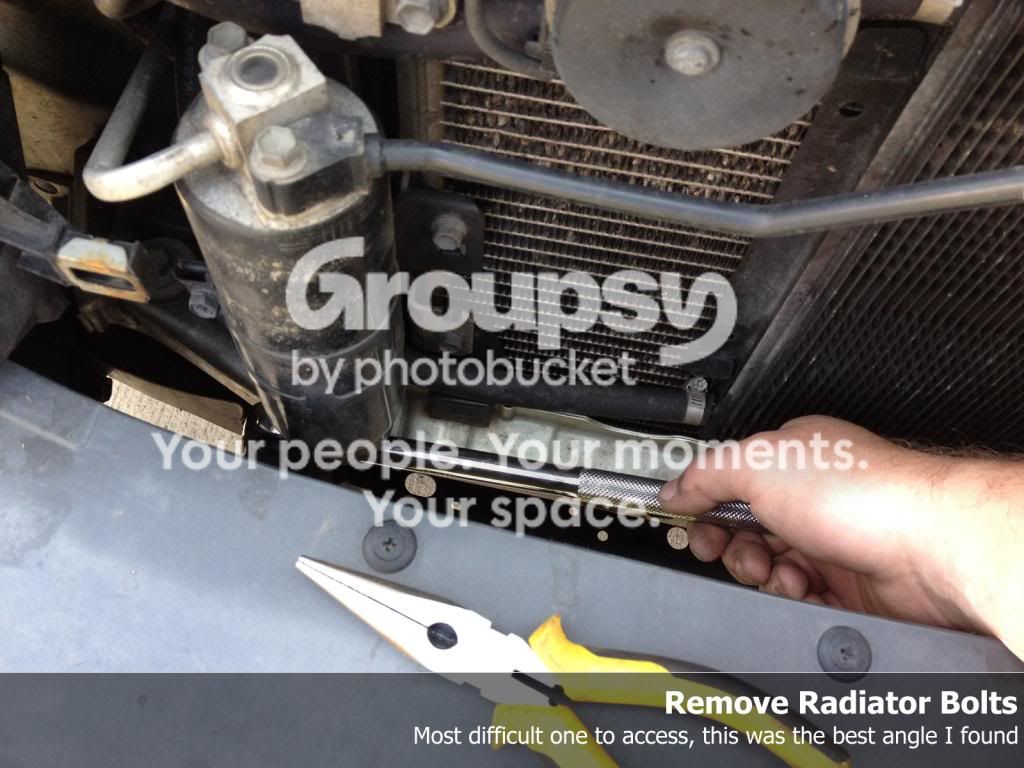
Use a 12mm socket to remove the four bolts now holding the radiator in. You'll be able to remove it next.
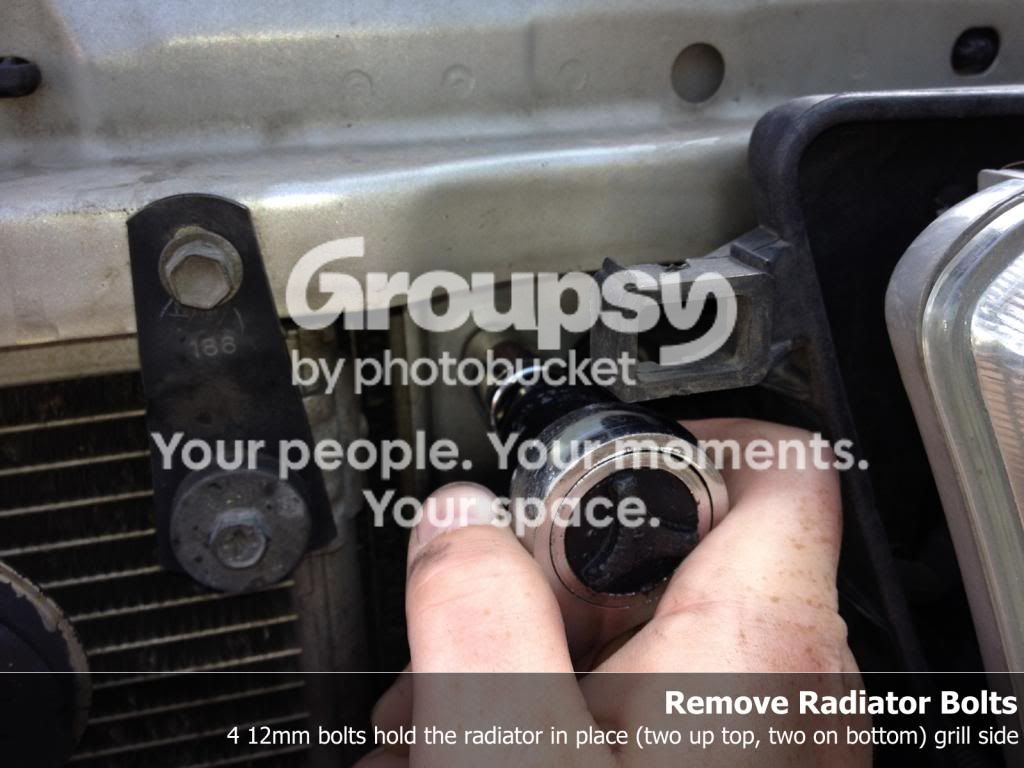
This bolt is in a terrible location, but having the grill off and attacking it from the underside made it doable.
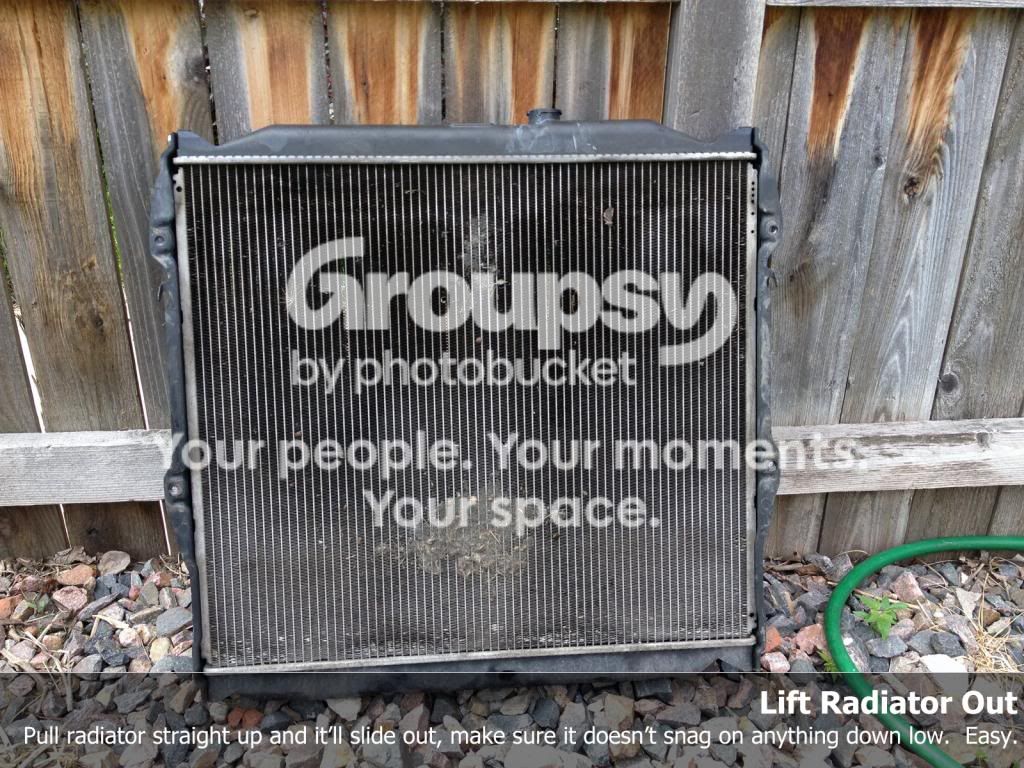
With the fan shroud off and moved back, all lines disconnected, and the 4 bolts out that hold the radiator on, yank it straight up like you did the overflow tank. It shouldn't weigh too much now that it's empty, and you get a good deal of satisfaction throwing it in to your yard. Once the radiator is out you can then remove the fan shroud entirely to free up some room for thermostat removal.
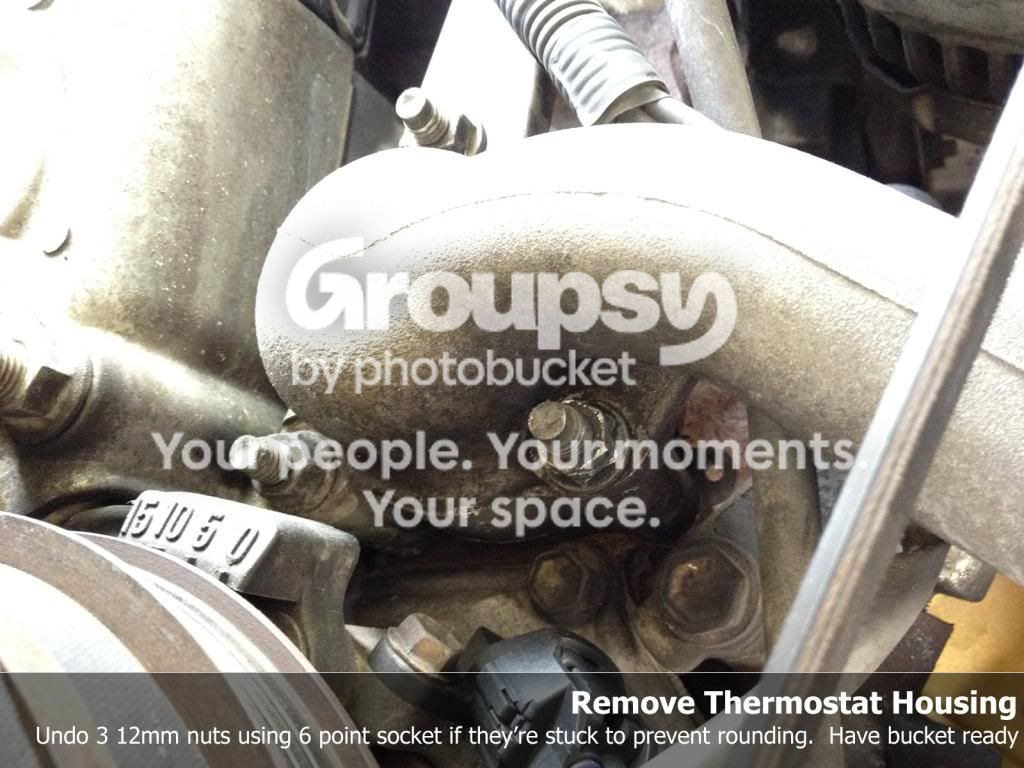
Now for the thermostat, if you're doing it. I stress using the 6 point socket on these nuts because one of mine started to round. Maybe hit them with PB blaster the night before. You may need a deep 12mm socket, as you're just removing a nut and the bolt/pin itself might be too long for a regular socket. I also disconnected the top of the hose that connects to the thermostat housing just to get everything out of the way. You'll do that anyway if you're replacing the hoses.
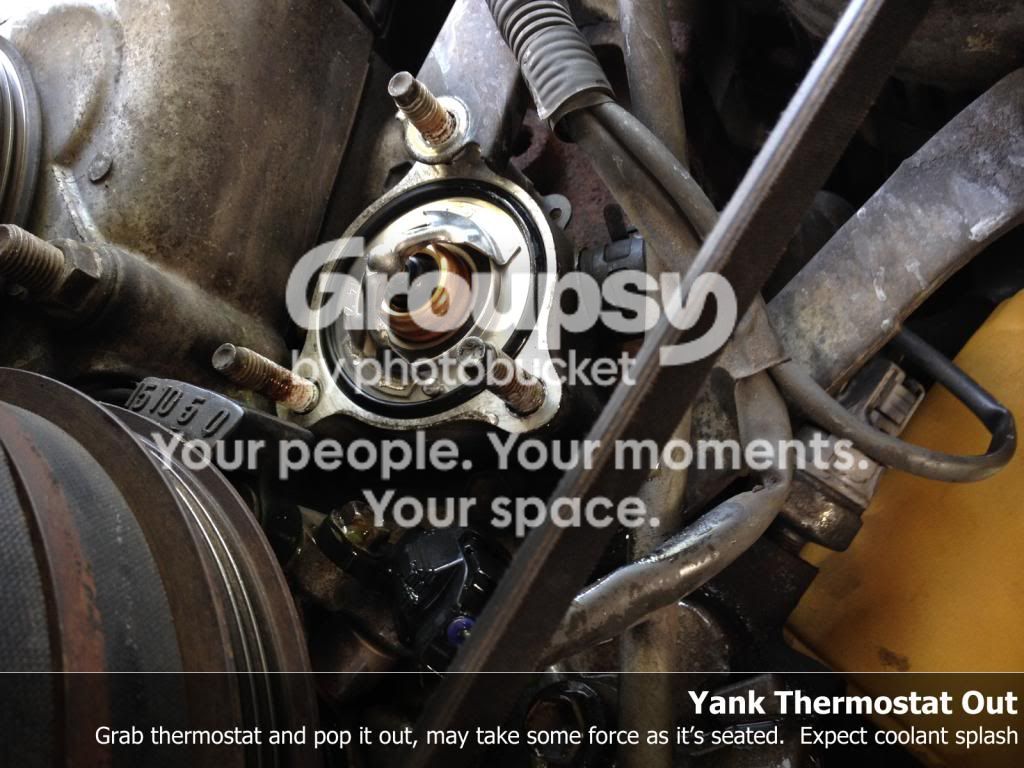
Here's the thermostat, grab it by whatever you can and give it a wiggle to unseal. You'll get another coolant splash doing this, so be prepared with your bucket or get your face out of the way.
Prepare your new thermostat by putting your new gasket on. Orient it so the circled jiggle valve is facing the ground. Pop it in. It might not stay too well inside the hole at this point, so orient it and try not to bump it as it will easily fall out.
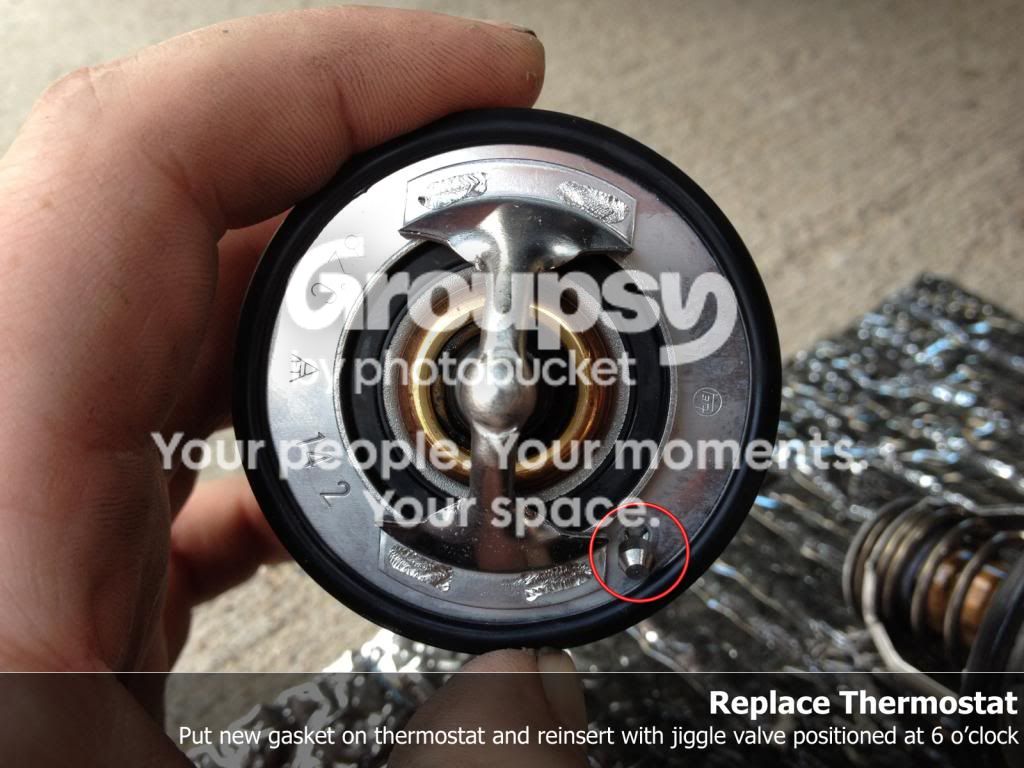
Have another beer because the next several steps are reassembly. Put the thermostat housing back over the three bolts, gentle to not bump the thermostat. Screw on the three 12mm nuts you took off, and using a socket, get them all finger tight equally. I may have not done this the first attempt as I had a leak, so... do this. Once they're all finger tight you can torque them to 14 ft lbs. Don't overdo it.
I installed the new radiator at this point, very easy. Just slid it down the reverse of how I removed the old one, and waited for the 4 bolt holes to line up. The fit was perfect with the mentioned radiator, and I simply put in my old 4 bolts.
Reconnect the bottom hose to the thermostat housing and the radiator, the transmission cooler lines (if using radiator's cooler), and move clamps in to position. I've read that people prefer to use new transmission cooler clamps when reattaching, I didn't since I have an external cooler. Connect the top hose and clamps, and then move the fan shroud in to position and put bolts in. Reconnect the overflow tank hose to the radiator fill neck.
Alright, almost done. Your thermostat is in and all hoses are reconnected to the radiator. Make sure your new radiator's drain valve is closed tightly, and start your filling process. After adding a little over a gallon, peek under the truck and make sure nothing is dribbling. It took right around a gallon for my thermostat housing to start dripping the first time around, hopefully you won't have this issue.
You should be able to get right around 2 gallons in before the radiator acts like it doesn't want to take anymore. Flip the temp control to full heat and fan to full blast. Also turn on the rear heater to full hot / high fan. Turn on the car.
You may see a little coolant accepted through the radiator shortly after turning on, maybe coincidence, but the level in the radiator will drop a good bit after the thermostat opens. This happened for me at about 181* displayed on my Torque app on phone. Add more coolant through the funnel and periodically give the upper radiator hose a squeeze. After about 15 minutes of total idle time I was pretty convinced that it had taken all it could. I capped the radiator, turned off the car, and filled the overflow tank to the F mark (it was still empty).
Take for a test drive with the heater control to COLD, ac blasting if you're like me (torture testing). My temperatures had consistently been 212*F after dogging it and hitting a stop, now I'm at 190*. If your temps are high, try pulling up on a curb or getting the nose high and adding more coolant. Be sure to let things cool down a bit before popping open the cap if you pull over to do this. I plan on carrying some extra coolant and a funnel around for the next several days just to be sure, but all seems A-OK.
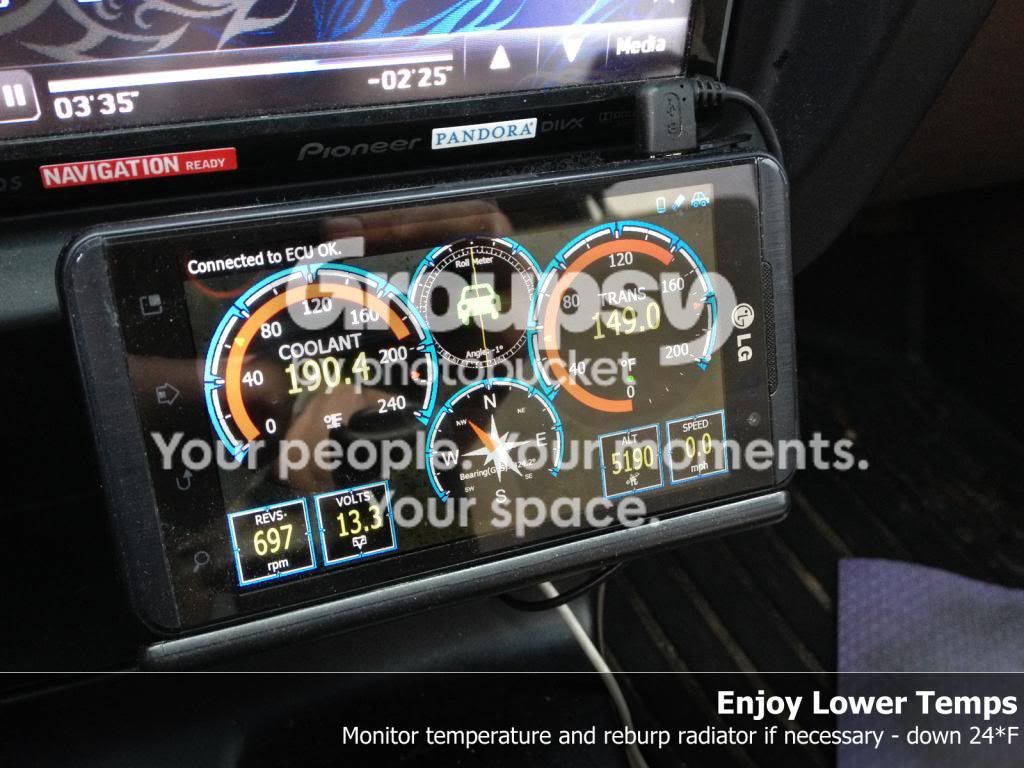
Again, this is really detailed for a seemingly simple task, but I managed to bork it yesterday by not installing a new thermostat, and again by having the thermostat leaking a bit. I've read of ridiculous dealership prices for this work, it's really not that bad!
I replaced my radiator because after doing a flush it was running hotter than ever, and I was certain that there was no more trapped air in the radiator. I / others on here suggested thermostat was bad or radiator was clogged... In any event, had I done all of this from the start I would have saved a lot of time.
Parts used:
ToughOne/Ready-Rad radiator from AAP (#431402) - $114
ToughOne 13psi Radiator Cap (#10241) - $8
OEM Thermostat (#90916-03075) - $21
OEM Thermostat Gasket (#16325-62010) - $7
3 gal Zerex Asian Formula Coolant (#675130) - $14/gal
Total: $192
Edit: Including some alternate radiator part #'s and comments
I can't comment on these entirely since I only used the radiator specified and haven't tried any others.
OEM radiator: #16400‑75180 - have to assume it'd fit like a glove
Koyo/TYC 1998 - I don't know how to comment, research indicates people say these are interchangeable (as in you order Koyo, get TYC) and some people claim it fits exceptionally or not well at all, such as post #4 in this thread. SEE BRIAN'S COMMENT ON KOYO/TYC IN THIS POST
Spectra (Autozone): #C1998 - didn't have any reviews on Autozone.com so I kept looking
End edit
You can also replace the upper and lower radiator hoses (and clamps) if you want. I didn't, but probably should have. Really wanted to get this wrapped up over the weekend, so maybe order those in advance if you can. I'd stick with OEM hoses to eliminate any possible variables. Camelback Toyota has the hoses and thermostat + gasket for way cheaper than my local dealership, wish I had planned a little better.
Tools used:
12mm socket (12pt), 12mm deep socket (6pt)
10mm socket
Socket extensions - one roughly 1.5", one about 3"... can improvise
Needle nose pliers
Bucket and drain pan, funnel
First thing to do is remove your front skid plate. I figure mine may not have all the bolts, or they're in different locations, but it's a few 12mm that you'll need to remove.
With the skid plate off you'll have good access to the petcock at the bottom of the radiator. Loosen/remove the fill cap, position bucket, and start the draining process. It'll flow from the circled hole, don't remove it entirely or you'll spill.
Draining can take a while so you may as well work on the stupid grill at this point. This is the second time removing mine and I'm pretty sure all my clips are toast. In my opinion, this was the most difficult part of the task - and I had already done it once before.
After the draining is complete, pull the lower radiator hose and expect a little more coolant to come out at this point.
You can go ahead and remove the upper radiator hose too at this point to get that out of the way.
Disconnect your transmission cooler lines at this point, I photographed where they connected to the hard lines, but you'll be looking for the two on the bottom of the radiator. Yank one at a time and catch the little bit of transmission fluid in a proper drain pan. If you have an external cooler you may as well remove your zip ties from old radiator (or do nothing if you installed with brackets)
Remove battery bracket while the transmission cooler lines are dribbling. This will allow you to yank the overflow tank out and clean it.
You'll also want to disconnect the line to the overflow tank from the upper radiator neck. This will be the last tube running to the radiator, so have a beer if you weren't already... the messy part is nearing an end.
Lift the overflow tank straight up, it slides in on a track. I photographed this because mine was being a PITA to yank up, and I questioned whether that was the correct procedure. I didn't want to manhandle it and end up cracking the tank, so yeah... here's how it attaches.
You'll then want to remove the 4 10mm bolts that hold on the fan shroud. The passenger side bottom one was difficult to access because of the transmission cooler lines, but once I got it loosened with socket wrench I just undid it with my fingers. Two of em are down low, maybe use a flash light. Move it towards the windshield after you free it, to allow some wiggle room for the radiator.
Use a 12mm socket to remove the four bolts now holding the radiator in. You'll be able to remove it next.
This bolt is in a terrible location, but having the grill off and attacking it from the underside made it doable.
With the fan shroud off and moved back, all lines disconnected, and the 4 bolts out that hold the radiator on, yank it straight up like you did the overflow tank. It shouldn't weigh too much now that it's empty, and you get a good deal of satisfaction throwing it in to your yard. Once the radiator is out you can then remove the fan shroud entirely to free up some room for thermostat removal.
Now for the thermostat, if you're doing it. I stress using the 6 point socket on these nuts because one of mine started to round. Maybe hit them with PB blaster the night before. You may need a deep 12mm socket, as you're just removing a nut and the bolt/pin itself might be too long for a regular socket. I also disconnected the top of the hose that connects to the thermostat housing just to get everything out of the way. You'll do that anyway if you're replacing the hoses.
Here's the thermostat, grab it by whatever you can and give it a wiggle to unseal. You'll get another coolant splash doing this, so be prepared with your bucket or get your face out of the way.
Prepare your new thermostat by putting your new gasket on. Orient it so the circled jiggle valve is facing the ground. Pop it in. It might not stay too well inside the hole at this point, so orient it and try not to bump it as it will easily fall out.
Have another beer because the next several steps are reassembly. Put the thermostat housing back over the three bolts, gentle to not bump the thermostat. Screw on the three 12mm nuts you took off, and using a socket, get them all finger tight equally. I may have not done this the first attempt as I had a leak, so... do this. Once they're all finger tight you can torque them to 14 ft lbs. Don't overdo it.
I installed the new radiator at this point, very easy. Just slid it down the reverse of how I removed the old one, and waited for the 4 bolt holes to line up. The fit was perfect with the mentioned radiator, and I simply put in my old 4 bolts.
Reconnect the bottom hose to the thermostat housing and the radiator, the transmission cooler lines (if using radiator's cooler), and move clamps in to position. I've read that people prefer to use new transmission cooler clamps when reattaching, I didn't since I have an external cooler. Connect the top hose and clamps, and then move the fan shroud in to position and put bolts in. Reconnect the overflow tank hose to the radiator fill neck.
Alright, almost done. Your thermostat is in and all hoses are reconnected to the radiator. Make sure your new radiator's drain valve is closed tightly, and start your filling process. After adding a little over a gallon, peek under the truck and make sure nothing is dribbling. It took right around a gallon for my thermostat housing to start dripping the first time around, hopefully you won't have this issue.
You should be able to get right around 2 gallons in before the radiator acts like it doesn't want to take anymore. Flip the temp control to full heat and fan to full blast. Also turn on the rear heater to full hot / high fan. Turn on the car.
You may see a little coolant accepted through the radiator shortly after turning on, maybe coincidence, but the level in the radiator will drop a good bit after the thermostat opens. This happened for me at about 181* displayed on my Torque app on phone. Add more coolant through the funnel and periodically give the upper radiator hose a squeeze. After about 15 minutes of total idle time I was pretty convinced that it had taken all it could. I capped the radiator, turned off the car, and filled the overflow tank to the F mark (it was still empty).
Take for a test drive with the heater control to COLD, ac blasting if you're like me (torture testing). My temperatures had consistently been 212*F after dogging it and hitting a stop, now I'm at 190*. If your temps are high, try pulling up on a curb or getting the nose high and adding more coolant. Be sure to let things cool down a bit before popping open the cap if you pull over to do this. I plan on carrying some extra coolant and a funnel around for the next several days just to be sure, but all seems A-OK.
Again, this is really detailed for a seemingly simple task, but I managed to bork it yesterday by not installing a new thermostat, and again by having the thermostat leaking a bit. I've read of ridiculous dealership prices for this work, it's really not that bad!
Last edited: