HokieRunner Build

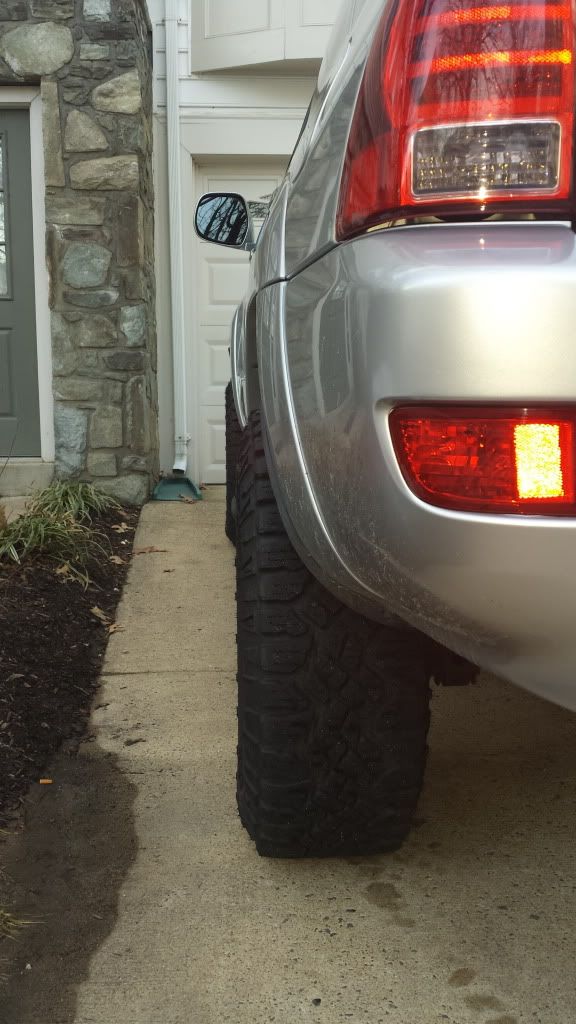
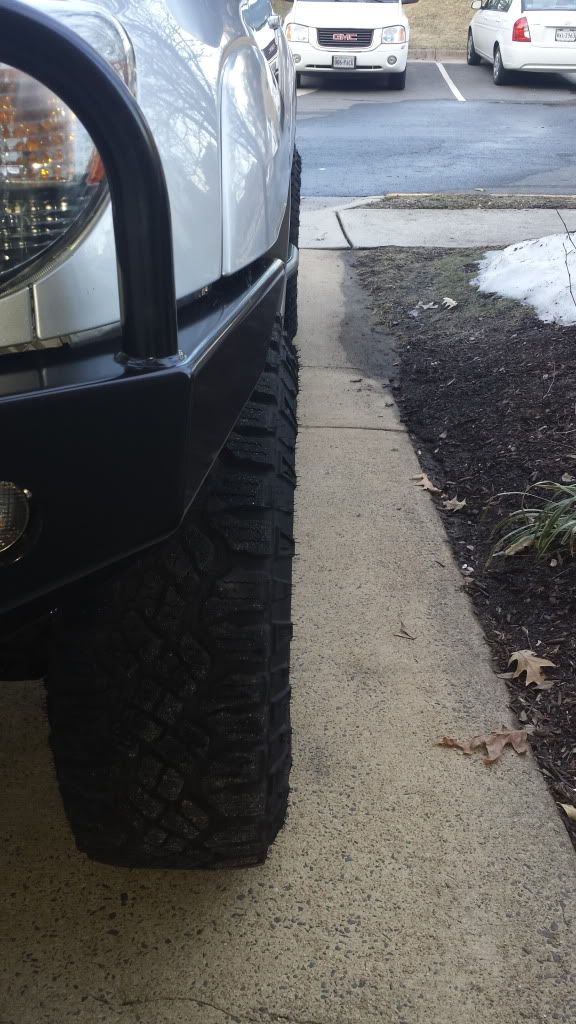
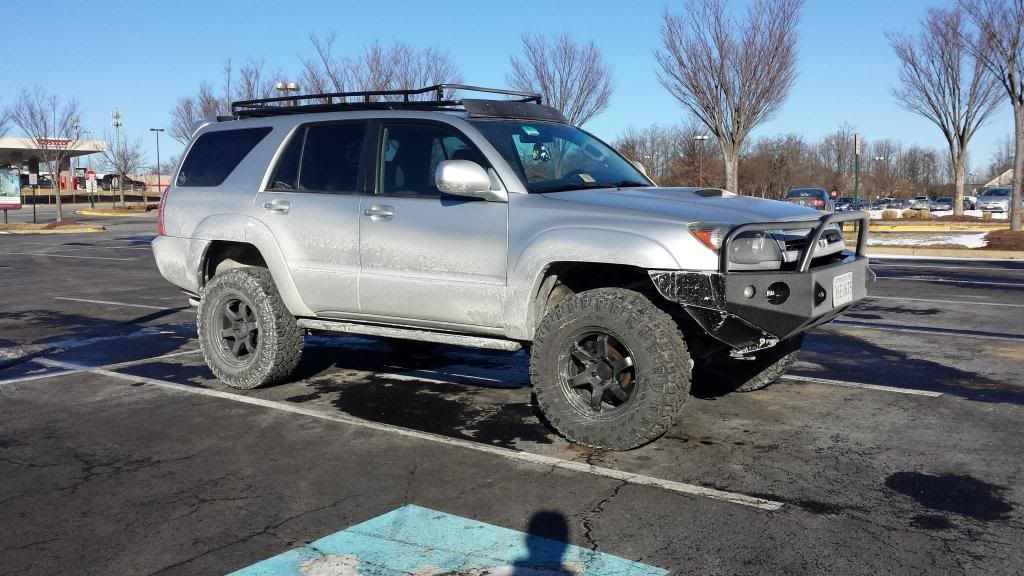
Snow pics and Konig wheel pics

Had a few folks inquiring about the wheel fitment and Konig Six Shooters so wanted to post up some better pics. [MENTION=98615]typehxr1[/MENTION]


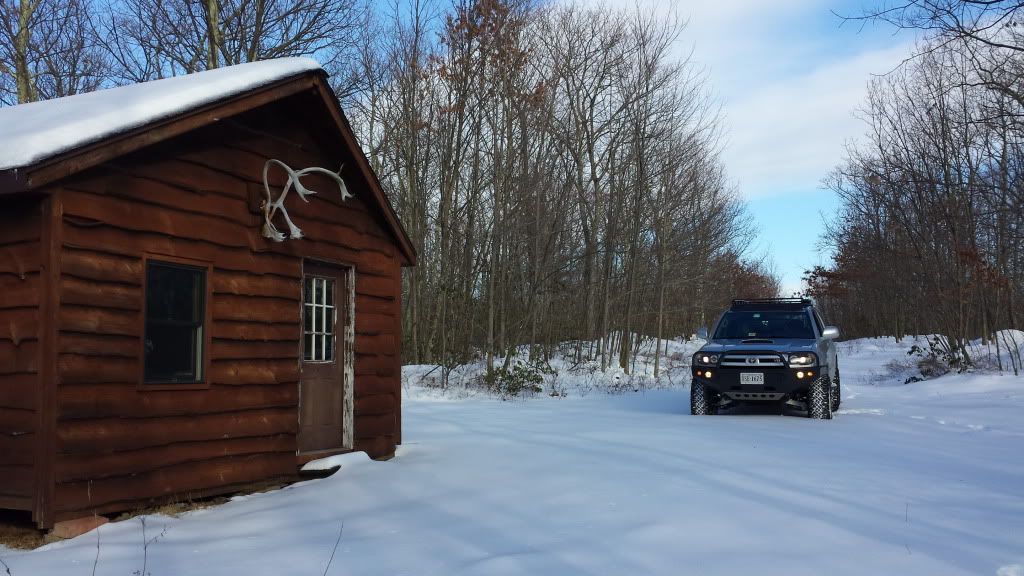
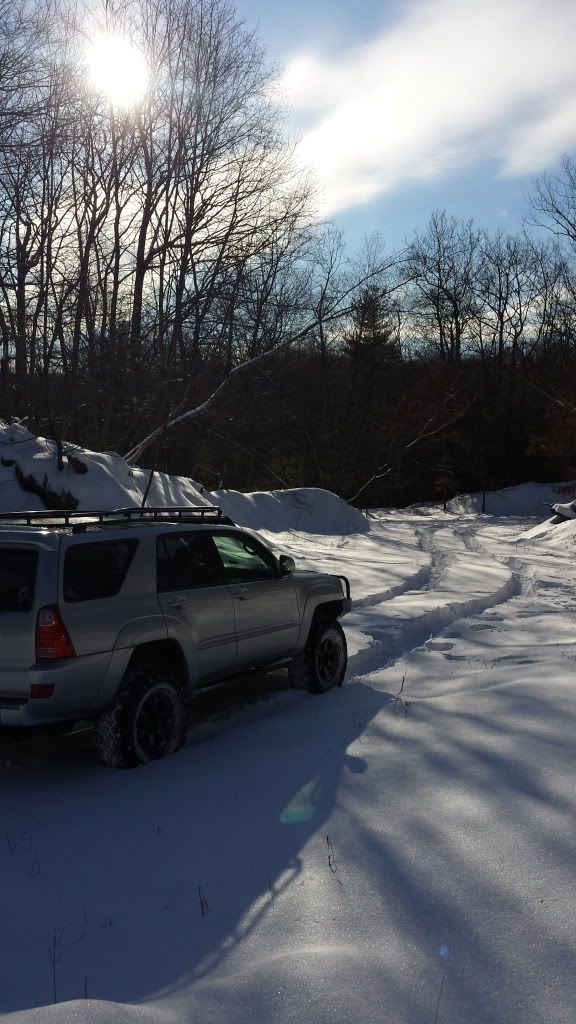
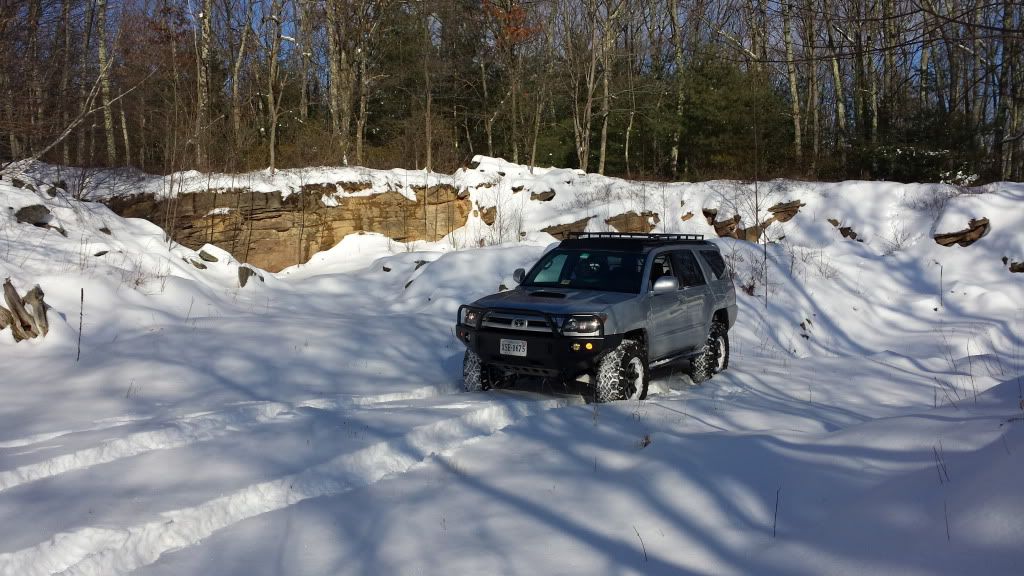
And some more up to date pics from some snow wheeling a few weeks back:


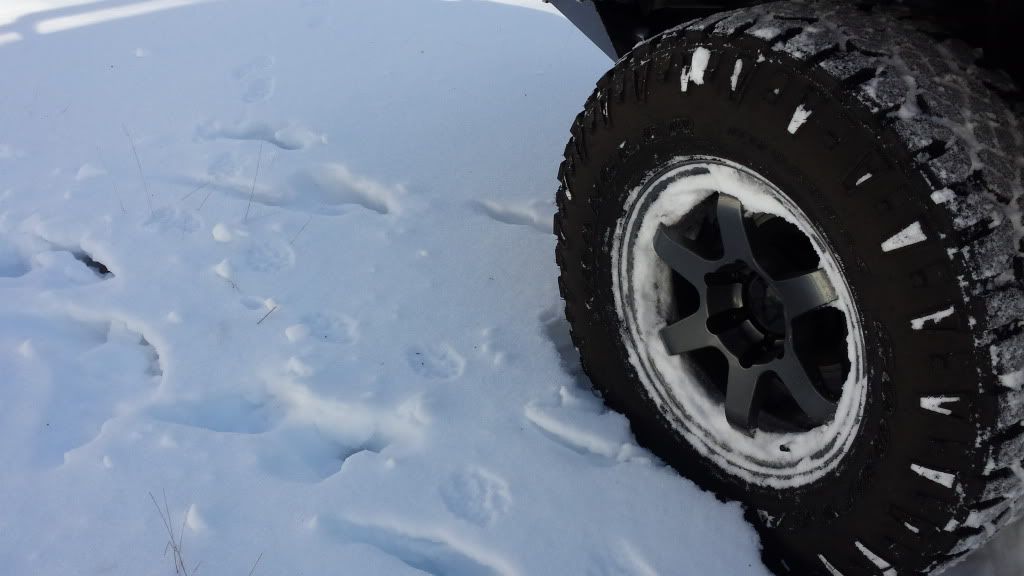
Found some fisher tracks - if you're not familiar with them they're basically giant weasels. Really nasty critters.


Mmmm. Salty.

 
Bussmann RTMR Relay Boxes

Managed to get a major step in my wiring project wrapped up. A lot of folks add accessories and tap into OEM harnesses and use 'add a fuse' etc. That works but I'm a big fan of leaving the OEM harnesses do the job they were designed to do and add separate relay and fuse boxes to power all the aftermarket additions. With these boxes wired to my dual battery, the main starter will only be running the OEM systems and eventually, a winch.

Enter the Bussmann relay panel. These are IP66 weatherproof rated boxes that are compact and house 5 micro relays and 10 mini fuses. They come in a variety of configurations. I opted for the dual buss bar box so I could wire the relays upside down and have one buss bar for 12v power and the other for the ground. The box can handle a max 80A and each relay is rated to 35A.

I built two boxes as I already have 6 relay driven accessories and want room to grow. Between the 2 boxes I'll have 10 relays and 20 fused power leads (10 of those will be used to fuse the relays). Everything was color coded to match the interior harness and leads from the switches and to the accessories. One box will be wired 'hot' with full time power while the other will provide power while the truck is on.

Anyways, figured I'd post up some details since I haven't seen these on this forum quite yet. It's definitely overkill but half of the build is learning new skills/abilities and trying new things along the way.

Ready to start:


My helper was too preoccupied to help....


The assembly process is basically a lot of wire stripping, crimping, and soldering.


Crimp and solder the fuse to relay 12v jumpers:


They plug and 'click' into place:


My roommates box completed (for his Jeep). He still has to decide his plug configuration:


From there I made my two boxes and added flexwrap and heatshrinking to bundle the wires. Each bundle contains colormatched 18 and 12 AWG wire. All GXL auto wire. The 18 AWG is the trigger wire which runs to the console switches. The 12 AWG is the accessory power wire which will run to the lights, horns, air compressor, etc.


One crimped and one soldered. Apply flux to the wire tips to promote the solder penetration.


Ready to snap into the weatherpack connectors. The weatherpack plugs will make any future changes very simple. Installation will be just installing harnesses and running the loom instead of a bunch of under hood and under dash solder/wiring work.


And the finished products:


WOW and I thought I got a little OCD about my wiring the last time I rewired it.

Can't wait to see this when it's finished. :bravo:
 
WOW and I thought I got a little OCD about my wiring the last time I rewired it.

Can't wait to see this when it's finished. :bravo:

haha. spent so much time laying out the schematics that I wanted this to be a one and done install. I spent enough time wiring under the hood and dash while building the mustang that I knew I wanted to be able to do 95% of the work inside at a bench instead of upside down with a flashlight.
 
Custom Console Switch panel with OTRATTW switches.

I don't use the little flip up tray next to the shifter very much and the OEM cig lighter is in a terrible spot given it's orientation. So I'll be mounting a 6 switch panel in place of it with Contura V switches from OTRATTW.com . You can tell them what design you want and they'll customize however you want.

Initial fitment:


Final fitment mockup before bondo and paint:


Started to build the wiring harness for the switches. These are SPST switches with red backlighting. Wiring is pretty simple. Ground gets jumpered to both light grounds and daisy chained along. Then there's a pin for illumination, pin for +12v and the switched pin that pushes power to the relay or accessories.


The switch output wires will be 18AWG since they won't carry much current. The 12v power feed, ground wire and illumination wire will all be 12AWG with 18AWG tails going to each switch socket.


Left a little room in the harness for adding in seat heaters down the line (although they may just get wired independently depending on power consumption).

Ground wire done - jumpered to grounds for both lights (light for text and light for when switched on):


Illumination and power lead done:


Relay trigger wires done, waiting on plugs. Don't forget to bench test - they sell 120v to 12v inverters that are extremely handy for testing all the wiring.


Wired in the plug for my still undecided switch...thinking it will be power switch for the ham.

 
Last edited:
Forgive me if this is a dumb question but I'd still like to know. What do you plug those connectors into? I have a couple of additional switches but I'd like to do more but I'd also like it to be much nicer than I did the last couple of times.
 
Forgive me if this is a dumb question but I'd still like to know. What do you plug those connectors into? I have a couple of additional switches but I'd like to do more but I'd also like it to be much nicer than I did the last couple of times.

No such thing man! Those connectors will plug into matching connectors for the wiring harness that runs from the engine firewall to the console area by the shifter. Then there will be another set of plugs which is where the switch panel harness will plug into.

I'm just making my own wiring harnesses so that everything is plug and play and any revisions or future additions can be very easily added.

Here's one of my many chicken scratch wiring sheets. more of the conceptual planned:

 
Whoa -- nice build! I've been eye'n the six shooters for my 08 Sport Edition (in silver as well), and I think your pics really sold me on the graphite gunmetal.

<- Also a Northern VA resident... You seem to like wiring, feel free to come help me install my TRS Quik-Retro's :P
 
Whoa -- nice build! I've been eye'n the six shooters for my 08 Sport Edition (in silver as well), and I think your pics really sold me on the graphite gunmetal.

<- Also a Northern VA resident... You seem to like wiring, feel free to come help me install my TRS Quik-Retro's :P

Thanks Navin. The six shooters are great since they only weigh 20/21 lbs. and the graphite offers a bit of contrast over matte black wheels. Also nice that not many people have them! Konigs customer service is top notch as well.

If you want to check the wheels out in person let me know. Never done a retro before but always willing to learn something new or lend a hand if need be!
 
I'll let you know once I get the retrofit in and running how it is -- the install is really simple :)

I hope I can find some used Six Shooters -- would love to have them in gloss black.
 
Thanks for all the positive comments! It is greatly appreciated and so many folks on this board have been incredibly helpful. Without this board and toyota120, a lot of my researching and subsequent build would have been infinitely more difficult.

Over the upcoming months I hope to post a lot more details on the why/how of products and methods used so as to 'pay it back' and to add a little explanation as to the thought process behind the build.

The electrical and cargo box projects are the ones I'm tackling over the winter and they'll be covered ad nauseum and probably in their own threads for other folks ease of use.

did you need to take the headlights out to install the shrockworks bumper? I want to add this a a summer project but I don't want to have to take five things off to add 1 new one. Also have you seen anyone but a shorckworks bumper on an 06-09 I feel like my front chrome center grill hangs down too low and would need to be trimmed to fit
 
did you need to take the headlights out to install the shrockworks bumper? I want to add this a a summer project but I don't want to have to take five things off to add 1 new one. Also have you seen anyone but a shorckworks bumper on an 06-09 I feel like my front chrome center grill hangs down too low and would need to be trimmed to fit

Headlights stay in during the install. No need to remove although it takes all of two mins to remove the headlights anyways. I'd actually suggest leaving them in with the trim piece so you can properly gap the bumper for frame flex.

And yes - there are a lot of 06-09 runners with the shrockworks and the grill is not an issue as the bumper is cutout there. I'll actually be putting my 06 grill in soon.
 
Headlights stay in during the install. No need to remove although it takes all of two mins to remove the headlights anyways. I'd actually suggest leaving them in with the trim piece so you can properly gap the bumper for frame flex.

And yes - there are a lot of 06-09 runners with the shrockworks and the grill is not an issue as the bumper is cutout there. I'll actually be putting my 06 grill in soon.

dang I wish we lived closer! and thanks for the help
 
dang I wish we lived closer! and thanks for the help

No problem! Glad to help. I know [MENTION=55855]zopperman[/MENTION] and at least two others are going to be installing their bumpers up here in a few months. you should get yours delivered up here and road trip it up for the install party! Think I'm going to tag along and help (drink beers haha).

I love you attention to detail and organization of the custom wiring harness for this rig. Cant wait to see more!

Thanks! It's a bit overkill but I've seen the other end of the 'custom' wiring spectrum and this will make life so easy for future modifications and add ons.

The switch harness turned out to be the biggest PITA to keep it all compact and orderly. Going to have about 10 hours in that panel between wiring and switch fitment/finishing by the time it's said and done.
 
Lower Control Arm bushing replacement/ upgrade to Energy Suspension Poly

I replaced my LCA bushings about a year ago with Energy Suspension Poly bushings. The rubber OEM ones were shot after about 125k miles and were causing an annoying vibration in the steering wheel at highway speeds.

This is not a hard job but it is time consuming and a PITA. I was in no rush and worked at it on and off for about 8 hours which included wire brushing, priming and repainting the LCAs as well as dealing with 2 seized cam alignment bolts. Without those issues/complications, the bushing swap can probably be done in a few hours a side.

Energy Suspension poly bushing P/N: 8.3128R (for black bushings use 'G' instead of 'R': 8.3128G)

Thanks to [MENTION=87178]NuclearN8[/MENTION] for the heads up on the black poly part coding.

Helpful tools:
-Dremel with sharp, carbide metal cutting bit
-Steel wire brush/sandpaper
-Torch
-Bench vise (some ppl will opt for the bottle jack method)

Without further adieu, here's the process:

1. Remove the LCAs from the truck. Be prepared to deal with seized cam alignment bolts. If you're lucky they won't be seized. If they are seized, you may be lucky and heat and an air hammer will knock them loose. If that doesn't work, break out the sawzall like I did and be prepared to pony over some $$ for new bushing/sleeve assembly.

2. Sleeve/bushing removal: Throw the LCA in a bench vise. Using the dremel and metal cutting bit, remove enough metal from the end of the sleeve that you can pull off the inner washers.
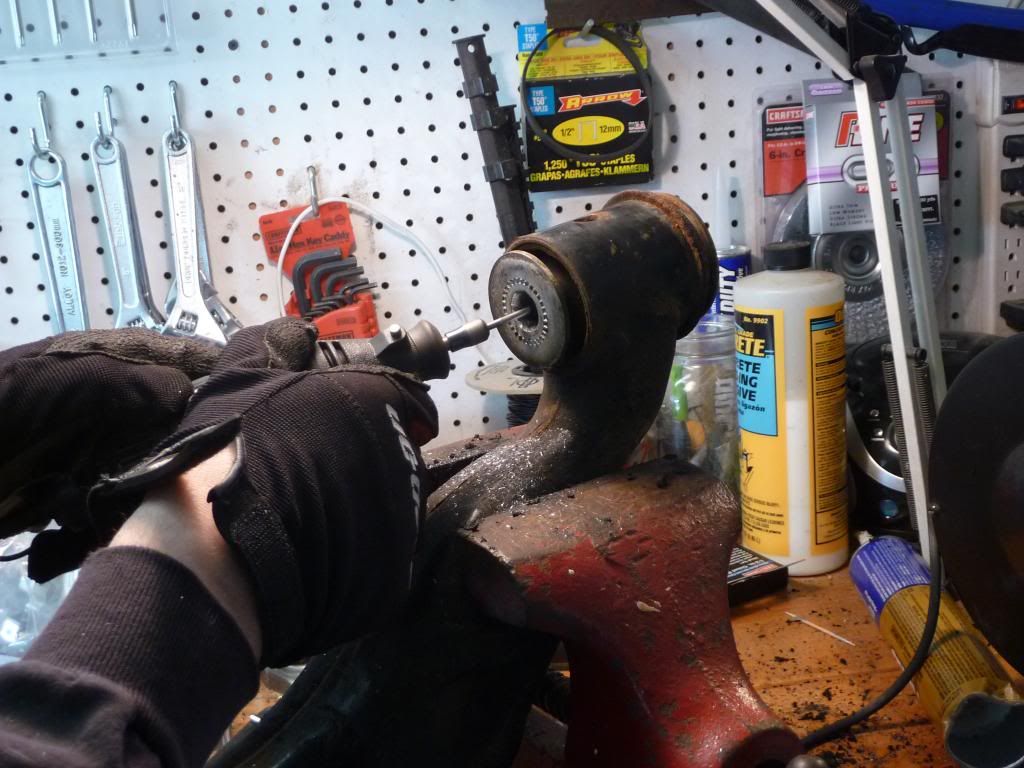


Remove washer:
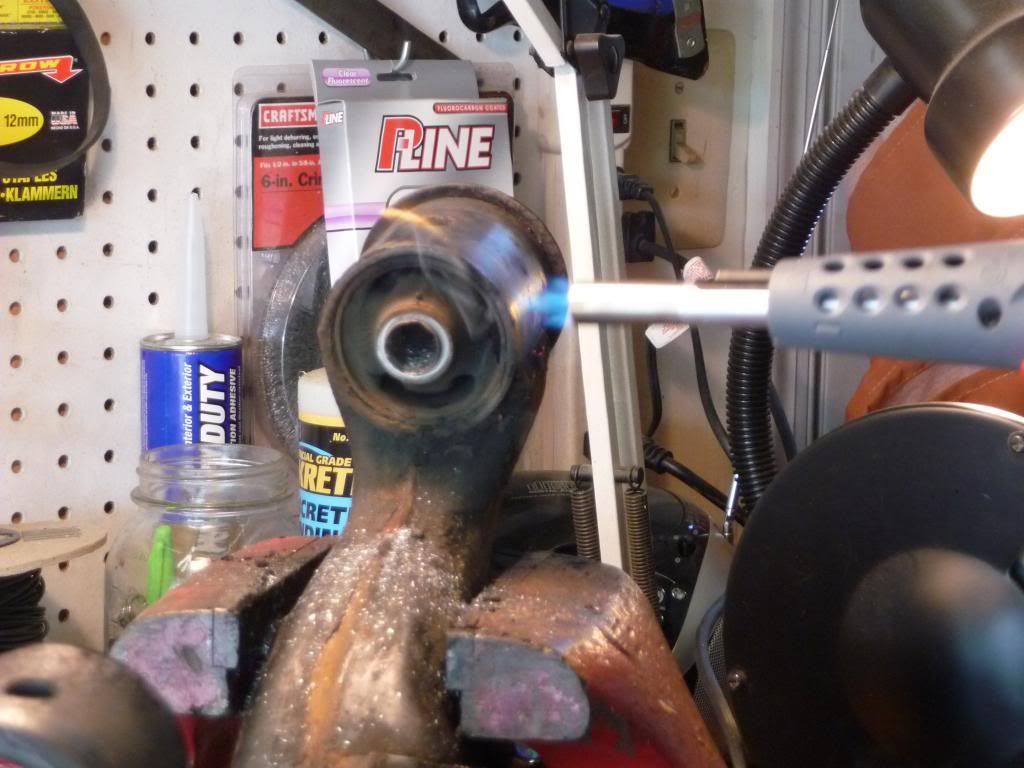


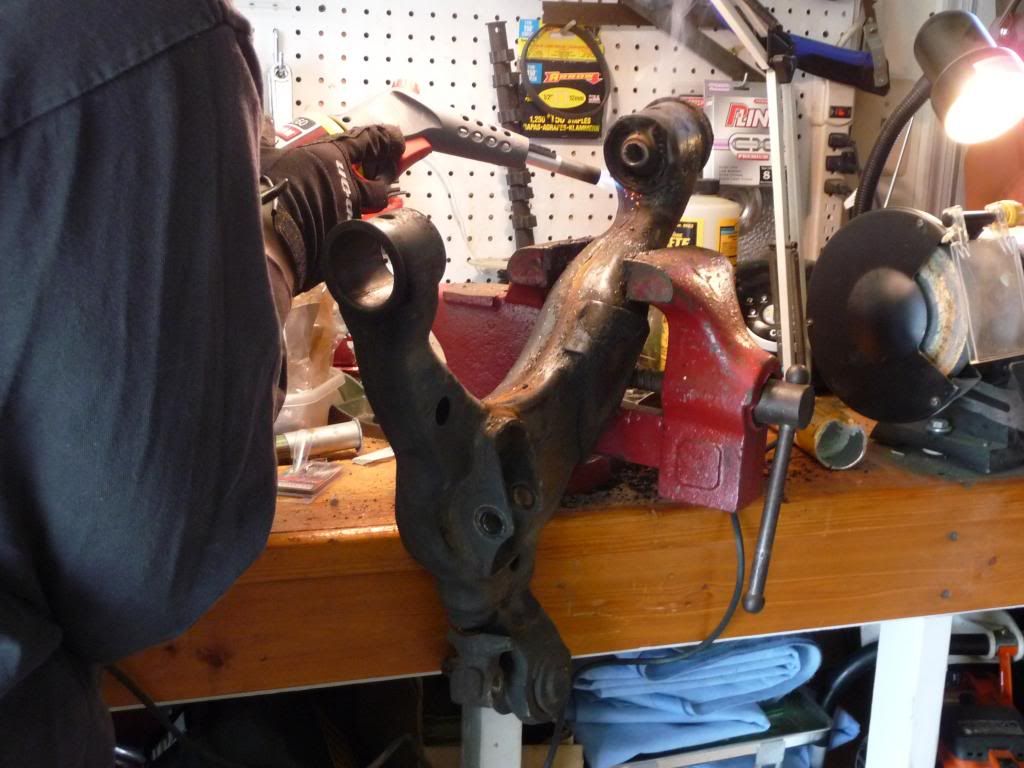
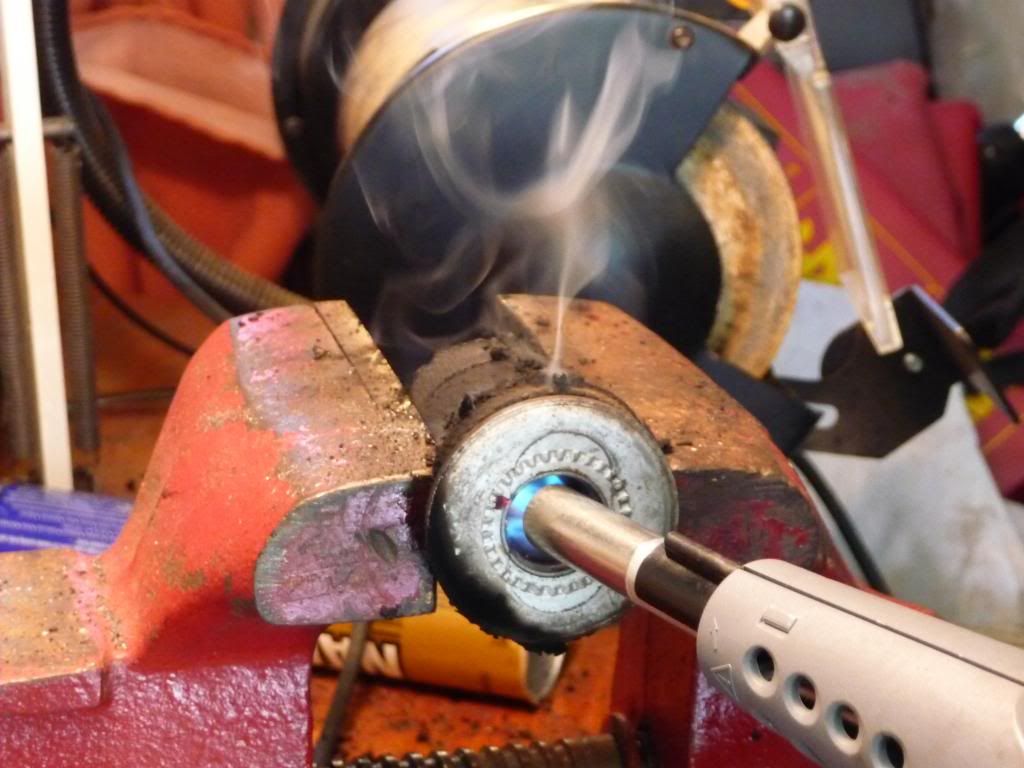
Apply even heat all around the LCA outer sleeve. It will make a 'pop' sound as the rubber detaches from metal. Yes - you can use the bottle jack method but I'd be concerned that the jack pushing on the inner sleeve may deform the metal you will eventually fold back around the inner washer. I'm sure it works - just to each their own. I just heated it until the bushing simply pushed out with a screwdriver. A bit of smoke off the bushing is fine but don't light it on fire.
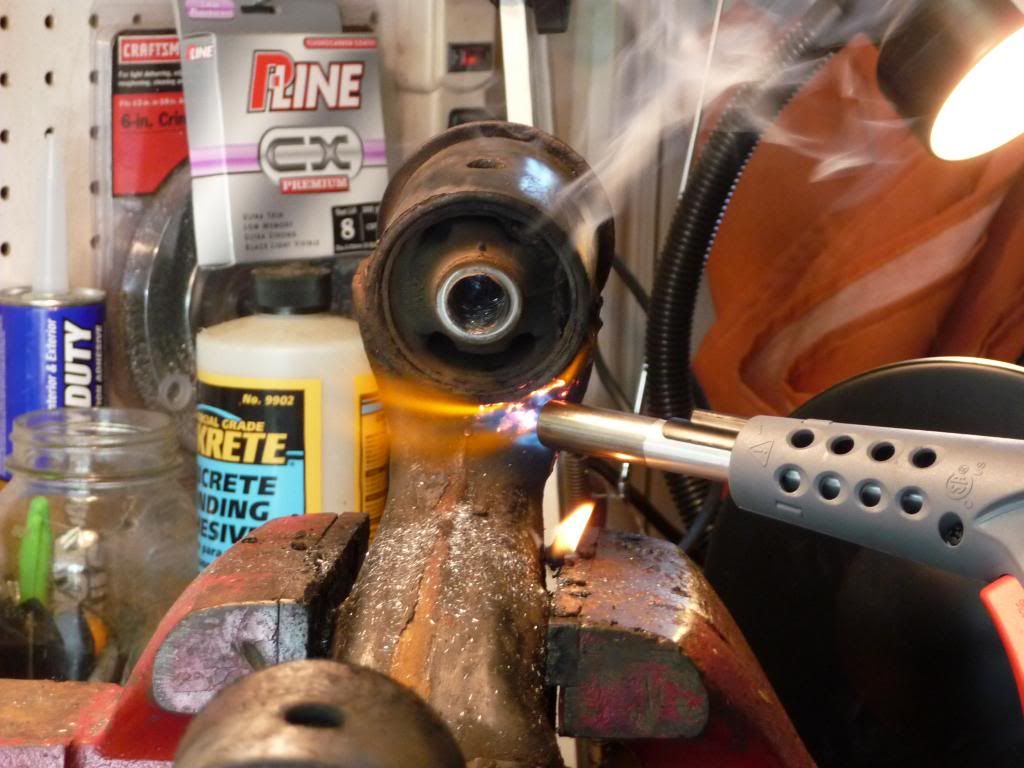


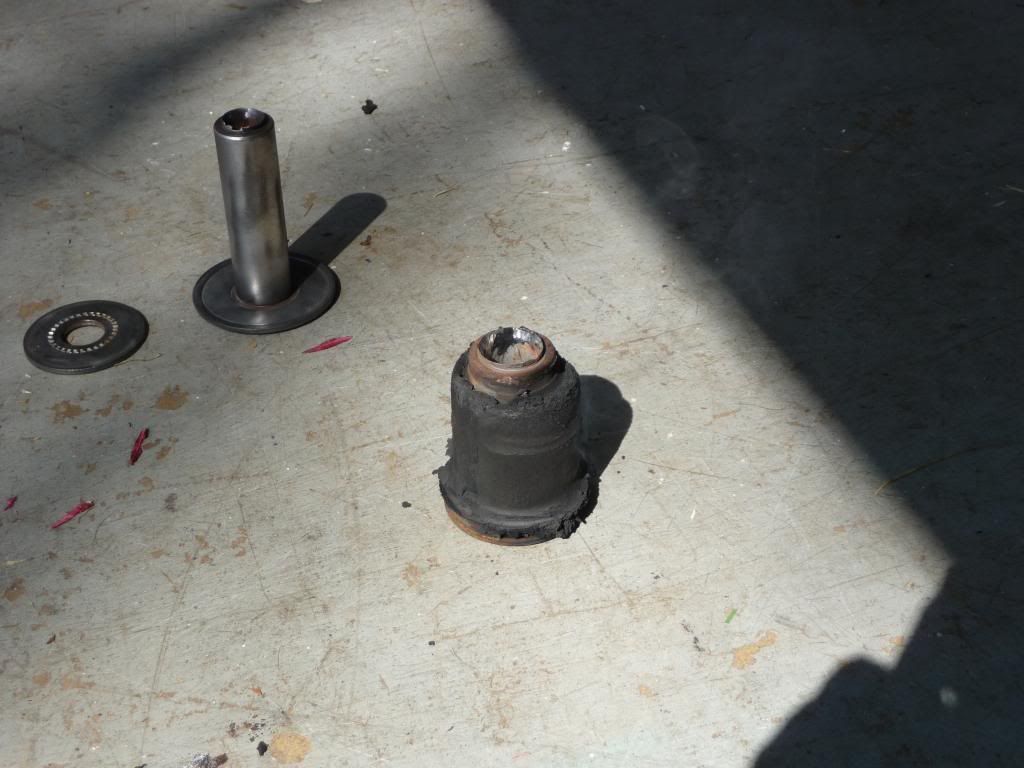
Push/pull out the bushing (and yes - be careful because it's freaking hot)
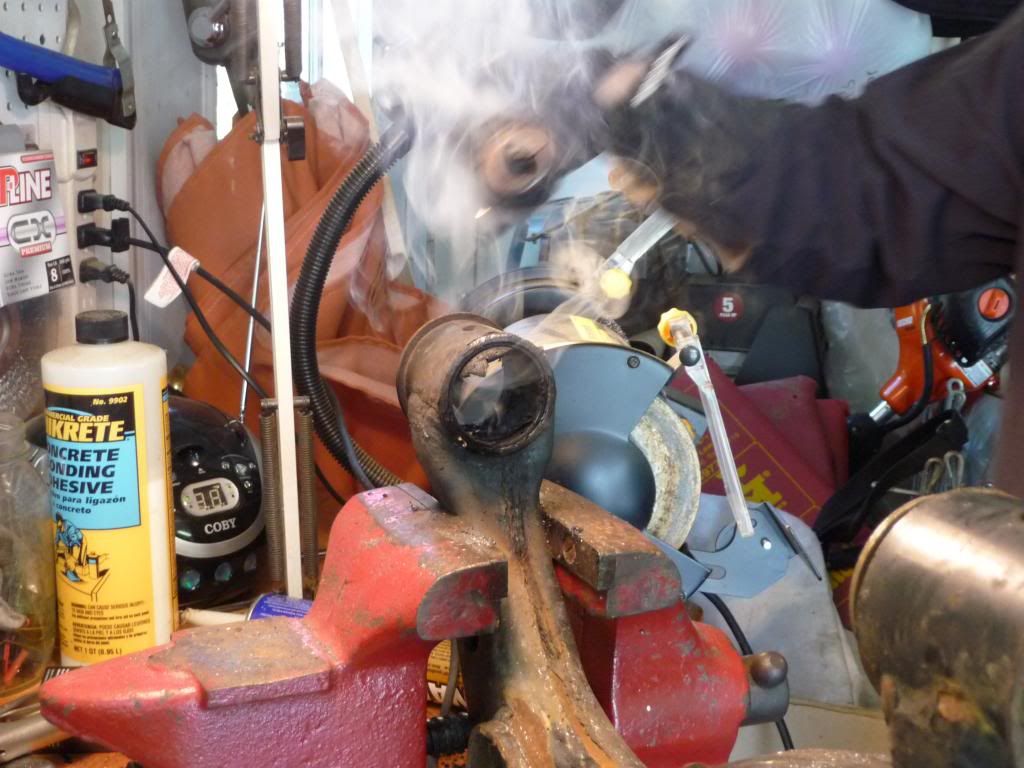


Place the bushing/inner sleeve in the bench vice. Using a sharp blade, cut a slit down the bushing. Heat the inside of the sleeve and again - after the rubber has 'popped' and separated, use pliers to peel off the old bushing.


Clean up all the metal surfaces with a wire brush/sand paper. Good time to refinish the LCAs too.


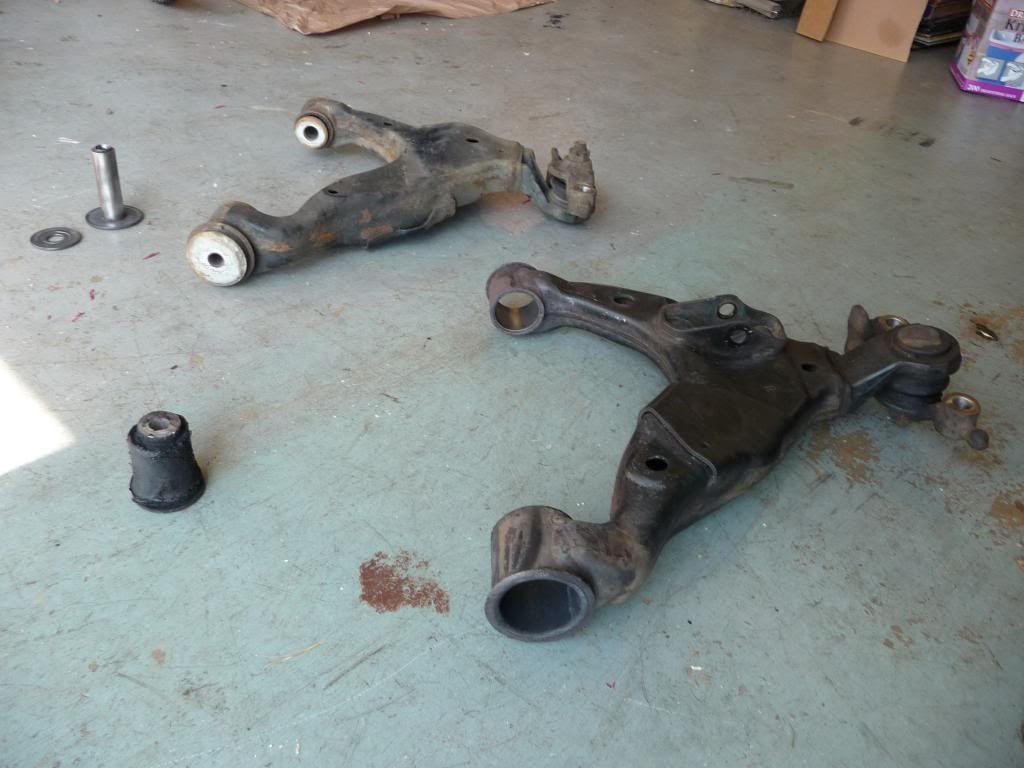
Original vs. halfway there:


3. New bushing assembly. Using the provided white grease - coat all the mating surfaces. It's better to use more than less as this is the only time you get to grease these. Once they're on - they're on. First press in the inner sleeve. Then place the LCA in a bench vise and press in the new assembly. *Other presses will work just fine - I just happened to have a bench vise.
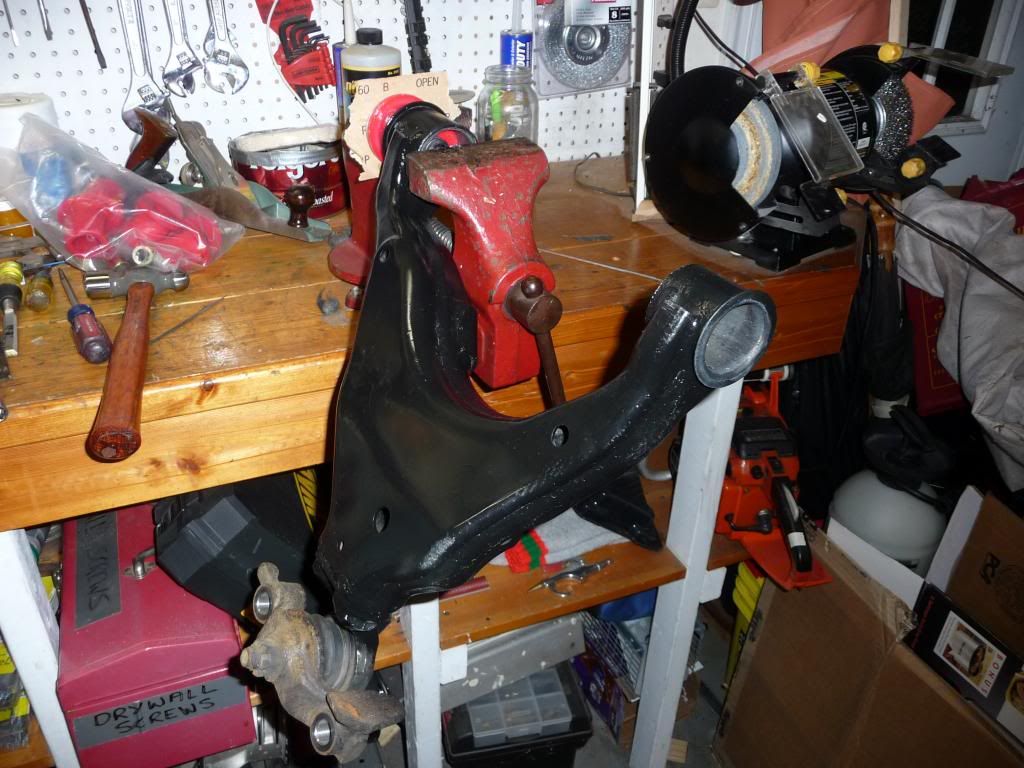
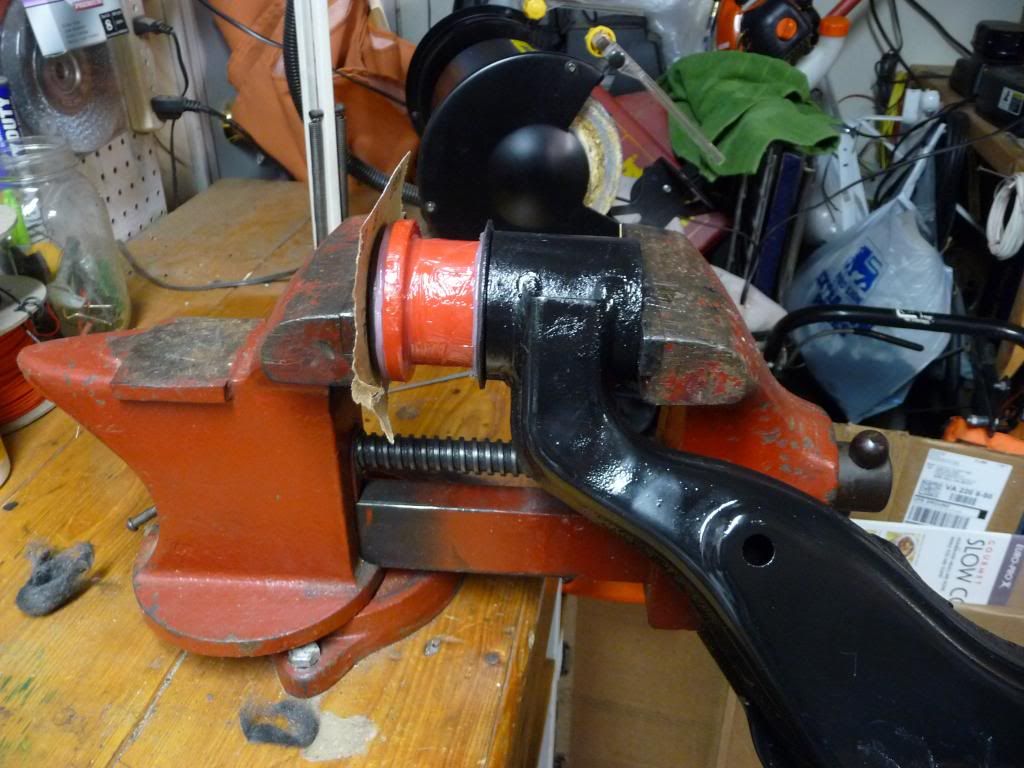


Once the bushing is properly seated - push the inner washer back on. Using a ball hammer or large ball bearing, re-seat the inner sleeve around the washer. That completes the bushing replacement.
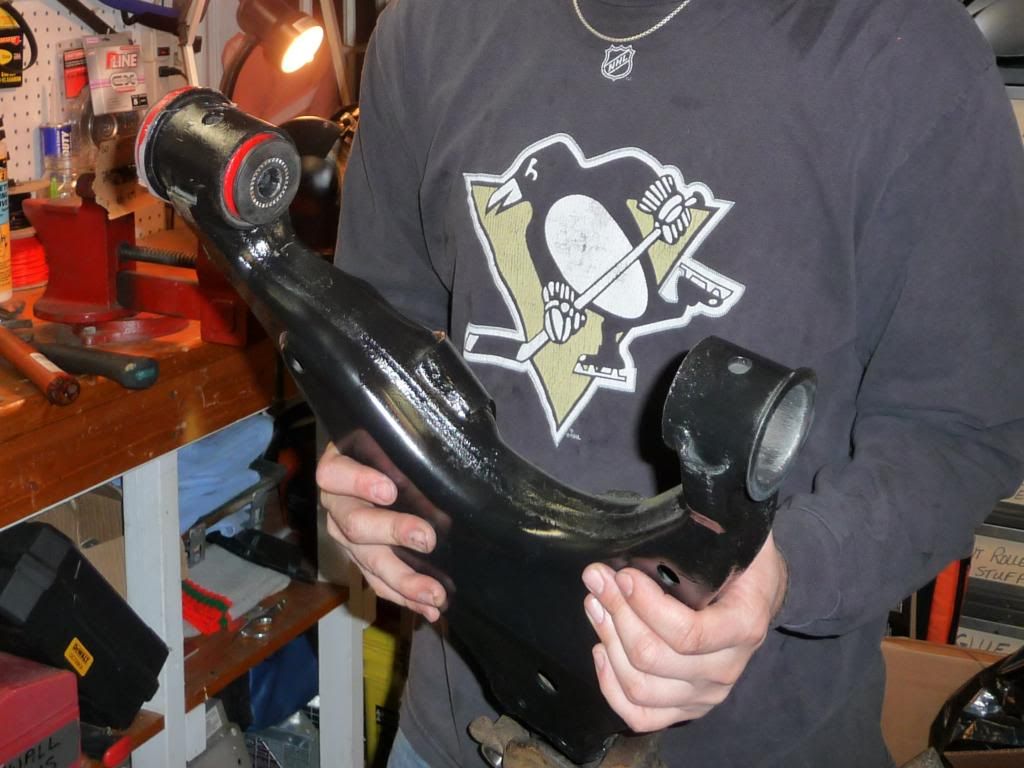


4. Re-install the LCA on the truck and get an alignment. Enjoy the smooth and solid steering wheel feel!
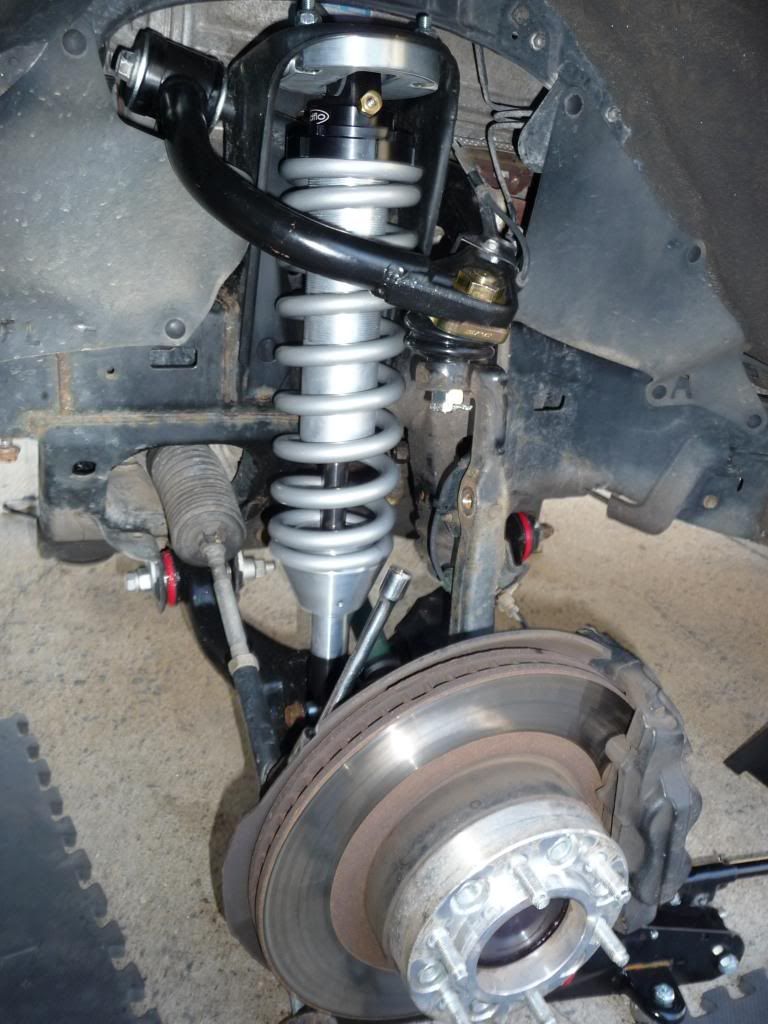


Let me know if you have any questions. While having the LCA off or while doing this work - it's a great time to replace the Lower ball joint as well. Of course - some folks would probably just opt to throw on a new LCA at that point.

 
No problem! Glad to help. I know [MENTION=55855]zopperman[/MENTION] and at least two others are going to be installing their bumpers up here in a few months. you should get yours delivered up here and road trip it up for the install party! Think I'm going to tag along and help (drink beers haha).


Thanks! It's a bit overkill but I've seen the other end of the 'custom' wiring spectrum and this will make life so easy for future modifications and add ons.

The switch harness turned out to be the biggest PITA to keep it all compact and orderly. Going to have about 10 hours in that panel between wiring and switch fitment/finishing by the time it's said and done.

I wish I could but if I buy the bumper I won't be able to afford anything for awhile hahaha plus with their shipping times who knows when it would get there
 
Dual Battery and Bussmann Relay Box Installation

I'll keep updating this post as things progress but this will cover all the under hood wiring, dual battery, etc. At the point of just waiting for the snow to end so I can start running the wires.

I needed a place to mount the 80 amp circuit breakers for each relay/fuse box. In an effort to keep thing clean and easily accessible, I decided to do a hinged panel that would sit in between the master cylinder and OEM fuse box. It will be hinged on the side nearest the engine so I can flip up the panel from the fender and have full access to the wiring underneath.

I made a few templates with cardboard and then using a jigsaw, cut the final panel out of a 12"x18" cutting board I picked up at Walmart. Everything fits snugly and I'm going to plastidip the panel black once I get the mounting brackets fab'd up. Lucky for me, there are already some threaded holes in both the fender and the wheel well so I shouldn't have to do any drilling to the body.


More to come once it warms up a bit....hopefully today was the last snowfall of the year......

 
No problem! Glad to help. I know [MENTION=55855]zopperman[/MENTION] and at least two others are going to be installing their bumpers up here in a few months. you should get yours delivered up here and road trip it up for the install party! Think I'm going to tag along and help (drink beers haha).


Thanks! It's a bit overkill but I've seen the other end of the 'custom' wiring spectrum and this will make life so easy for future modifications and add ons.

The switch harness turned out to be the biggest PITA to keep it all compact and orderly. Going to have about 10 hours in that panel between wiring and switch fitment/finishing by the time it's said and done.

I'm one of the ones that's gonna be installing the bumper as well. I'm very interested in how you wired up your electronic system. I like to keep my stuff as clean as possible, and you seem to have it put together. PM sent your way!
 

Members online

Forum statistics

Threads
278,309
Messages
3,554,075
Members
248,016
Latest member
Advally Service

Trending content

Back
Top