TOYSTRY
New member
How-To-Installation-Guide (Grillcraft Upper/Lower Grill)
Ok, so I'm attempting to make a how-to installation guide for the Grillcraft Upper and Lower grill since "Grillcraft" did a really crappy job with theirs. What I have below isn't perfect (I missed a few minor steps), but if you use this in conjunction with Grillcrafts directions in the box or online Upper Grill Instructions or Lower Grill Instructions you can't go wrong. Some pics borrowed from Grillcraft because I forgot to take them while doing this today.
Step 1:
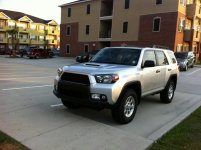
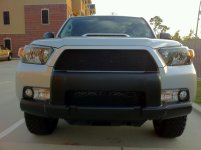
Take a before picture you start, because this is the last time you will ever see the old grill on your 4Runner.
NOTE: This modification is irreversible, you will cut up your old grill to insert the new grill. Again, this modification is irreversible!!!
Step 2:
Start by removing all the pop-down pins. Simply use a screwdriver to push down the center of them. Once you've pushed the center down, they pull right out as one piece. Now remove the plastic cover and set aside.
Step 3:
Once you've removed the plastic cover you will see a different style of black plastic pins. Simply use your fingernail to pull upwards and the pins will pull straight out.
Step 4:
Using a 10mm socket, remove the bolt attaching the grill to the radiator bracket.
Step 5:
Remove the 4 screws from the grill, you will only reuse the top two when you reinstall it.
Step 6:
This is the HARD part that everyone is having with removing the grill. Note the green and red circles in the images below. You MUST start with either the left or the right side GREEN circles. Using your STRONG THUMBS, lift on the tabs (they are the color painted tabs vice black tabs) and pull towards the front of the vehicle. Once you break the GREEN circle area tabs loose, you will then do the same thing for the RED circles. Lift and pull forward until you get all the way to the other side of the vehicle and you'll have one last GREEN circle area to tackle.
Step 7:
Cut the interior portion of the grill only. DO NOT CUT THE BOTTOM LIPS OFF OF THE GRILL. Trim the interior, then smooth out the nubs as pictured. You'll need to drill two holes on the top part to mount the grill onto the factory grill trim. I forgot to take a picture of the installation of the grill to the trim but it's self explanatory.
Step 8:
Using a 10mm socket, remove the bolt from the top of the lower grill. Next, using sheer brut force and muscle, you'll need to lift up and pull forward/backwards to break the tabs free from the lower grill. It's a PITA.....just have patience.
Step 9:
Trim the INNER grill portion only. Do not trim the sections where the tabs holes are because you are going to need to reinstall using those same dreaded tabs.
Step 10:
You'll need to drill/cut out 3 slots for the grillcraft grill to sit flush on your Toyota trim piece. It makes sense once you see it. Just follow the directions and use this as reference.
Step 11:
Reinstall the lower grill from the backside of the bumper and pull it forward into the tabs. It's a PITA to align the grill and tabs, takes a try or two, but once you get it aligned, it snaps in easily. Reinstall 10mm bolt. NOTE: Before you install either grills, determine if you want to spray paint the radiator/accessories because uninstalling and reinstalling sucks.
Step 12:
Finally, reverse everything you did to reinstall the grills.
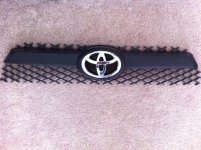
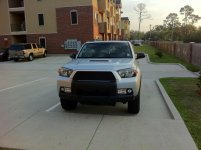
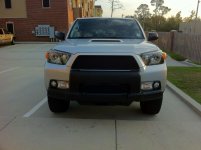
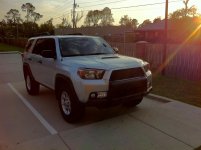
Pics attached. All the original pics I made for these were deleted by accident when I was modifying the privacy setting on photobucket so I apologize for that. All the steps above are still accurate however I don't have pics annotated in order like the post used to have. Sorry


Ok, so I'm attempting to make a how-to installation guide for the Grillcraft Upper and Lower grill since "Grillcraft" did a really crappy job with theirs. What I have below isn't perfect (I missed a few minor steps), but if you use this in conjunction with Grillcrafts directions in the box or online Upper Grill Instructions or Lower Grill Instructions you can't go wrong. Some pics borrowed from Grillcraft because I forgot to take them while doing this today.
Step 1:
Take a before picture you start, because this is the last time you will ever see the old grill on your 4Runner.
NOTE: This modification is irreversible, you will cut up your old grill to insert the new grill. Again, this modification is irreversible!!!
Step 2:
Start by removing all the pop-down pins. Simply use a screwdriver to push down the center of them. Once you've pushed the center down, they pull right out as one piece. Now remove the plastic cover and set aside.
Step 3:
Once you've removed the plastic cover you will see a different style of black plastic pins. Simply use your fingernail to pull upwards and the pins will pull straight out.
Step 4:
Using a 10mm socket, remove the bolt attaching the grill to the radiator bracket.
Step 5:
Remove the 4 screws from the grill, you will only reuse the top two when you reinstall it.
Step 6:
This is the HARD part that everyone is having with removing the grill. Note the green and red circles in the images below. You MUST start with either the left or the right side GREEN circles. Using your STRONG THUMBS, lift on the tabs (they are the color painted tabs vice black tabs) and pull towards the front of the vehicle. Once you break the GREEN circle area tabs loose, you will then do the same thing for the RED circles. Lift and pull forward until you get all the way to the other side of the vehicle and you'll have one last GREEN circle area to tackle.
Step 7:
Cut the interior portion of the grill only. DO NOT CUT THE BOTTOM LIPS OFF OF THE GRILL. Trim the interior, then smooth out the nubs as pictured. You'll need to drill two holes on the top part to mount the grill onto the factory grill trim. I forgot to take a picture of the installation of the grill to the trim but it's self explanatory.
Step 8:
Using a 10mm socket, remove the bolt from the top of the lower grill. Next, using sheer brut force and muscle, you'll need to lift up and pull forward/backwards to break the tabs free from the lower grill. It's a PITA.....just have patience.
Step 9:
Trim the INNER grill portion only. Do not trim the sections where the tabs holes are because you are going to need to reinstall using those same dreaded tabs.
Step 10:
You'll need to drill/cut out 3 slots for the grillcraft grill to sit flush on your Toyota trim piece. It makes sense once you see it. Just follow the directions and use this as reference.
Step 11:
Reinstall the lower grill from the backside of the bumper and pull it forward into the tabs. It's a PITA to align the grill and tabs, takes a try or two, but once you get it aligned, it snaps in easily. Reinstall 10mm bolt. NOTE: Before you install either grills, determine if you want to spray paint the radiator/accessories because uninstalling and reinstalling sucks.
Step 12:
Finally, reverse everything you did to reinstall the grills.
Pics attached. All the original pics I made for these were deleted by accident when I was modifying the privacy setting on photobucket so I apologize for that. All the steps above are still accurate however I don't have pics annotated in order like the post used to have. Sorry


Last edited: