How to install new CV Axles

any tips on differentiating oem cv axles from after market ones?, i came across a new cv axle, private seller claims its oem, unsure how to verify his claims

I can't speak with authority on this, but I remember reading back in this thread that the OEM ones have more of a cupped inner assembly with grooves cut into it. Auto stores tend to have a more rounded inner. Found a photo that might help explain that useless sentence:

cv%20axle%20comparisons%202_zpspkab9ohg.jpg

Hat tip to SFCamry on Toyotanation.com

Good luck!
 
Last edited:
Edited for clarity...talking about all my ball joints/control arms.

I looked at those as well, just haven't found too much on that company's reliability or reviews so I haven't jumped on those. I believe they're another sourced-from-china company that is probably the same factory as half the other brands.
 
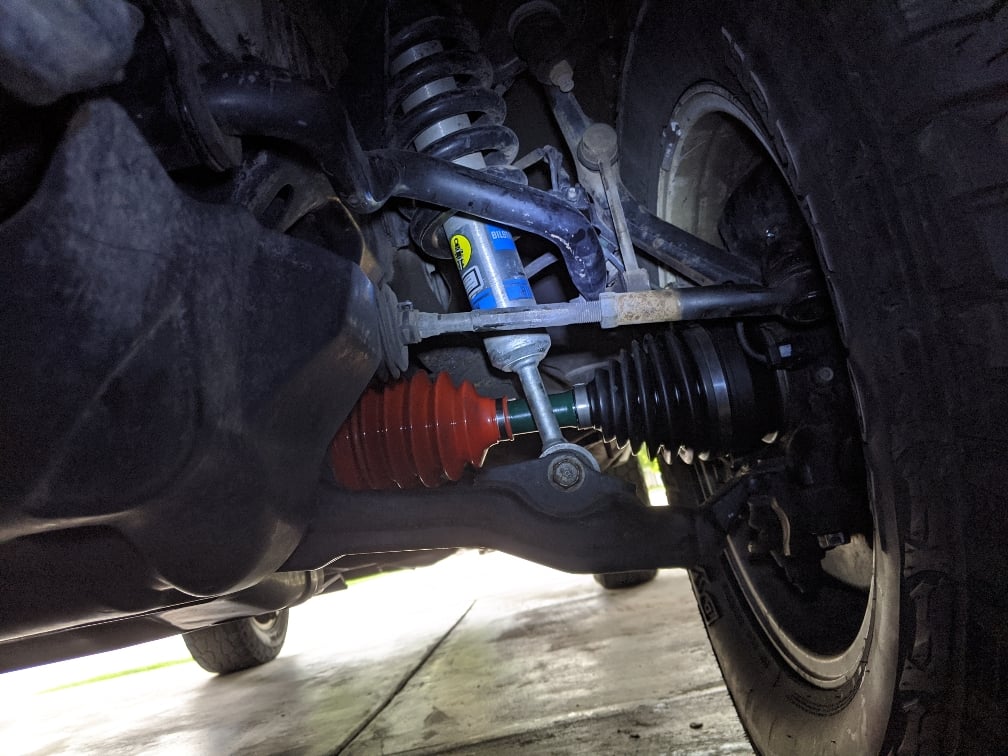
Followed this guide and replaced my CV joints, had a replacement set on the shelf for almost 3 years, and they only got worse from when I first noticed they were going bad. Went ahead and replaced the seals and drained and refilled the diff. So quiet now, so smooth.


Followed this guide and replaced my CV joints, had a replacement set on the shelf for almost 3 years, and they only got worse from when I first noticed they were going bad. Went ahead and replaced the seals and drained and refilled the diff. So quiet now, so smooth.


Holy cow

Sent from my SM-G986U using Tapatalk
 
Followed this guide and replaced my CV joints, had a replacement set on the shelf for almost 3 years, and they only got worse from when I first noticed they were going bad. Went ahead and replaced the seals and drained and refilled the diff. So quiet now, so smooth.


You almost beat me hahah


Ordered some axles from sparks toyota... researched cvj rebuilds but there are few posts of the red boots failing within a year. Original axles lasted 145,000 miles and most of that has been with a 2" lift. This will be the first time replacing any toyota axles for me...
 
Did mine today and replaced all four seals. My driver's side wheel bearing seal didn't quite seat... Does anyone have any ideas short of taking it out, greasing it, and trying again?
0735fd57317b21b7b8259c45cddba312.jpg
82cb7dcb76b05042834feddf5dafafcb.jpg


Sent from my Pixel 3 XL using Tapatalk
 
Did mine today and replaced all four seals. My driver's side wheel bearing seal didn't quite seat... Does anyone have any ideas short of taking it out, greasing it, and trying again?
0735fd57317b21b7b8259c45cddba312.jpg
82cb7dcb76b05042834feddf5dafafcb.jpg


Sent from my Pixel 3 XL using Tapatalk


Can’t think of any other course of action but maybe someone else here can. FWIW to people considering DIYing an axle, I didn’t get the inner seal exactly right and it leaked. Ended up 1) paying a shop to replace it & 2) deciding this is a job I won’t DIY again. If I had access to a lift, sure, but it was just impossible for me to get an adequate sightline where I could determine whether the seal was aligned correctly and if it’s not just right, it leaks.
 
Can’t think of any other course of action but maybe someone else here can. FWIW to people considering DIYing an axle, I didn’t get the inner seal exactly right and it leaked. Ended up 1) paying a shop to replace it & 2) deciding this is a job I won’t DIY again. If I had access to a lift, sure, but it was just impossible for me to get an adequate sightline where I could determine whether the seal was aligned correctly and if it’s not just right, it leaks.
From everything I've read, that inner one is a pain. The best course of action if I remember correctly is to just barely insert it and then use the cv to push it in. Should seal correctly. I've never had to replace them, even after several cv swaps, so I don't know for sure.

Sent from my SM-G986U using Tapatalk
 
I actually used the method of sticking the inner seals on the axles then gently pushing the axles in. After they're seated as far as they'll go, use a pry bar and hammer them home using the notches. I did have the seals in the freezer for a couple hours prior to doing this, which may have made it easier.

Surprisingly this wasn't the most difficult part and I don't believe I have any leaks yet.

The knuckle seals were terrible, but, if you disconnect the tie rod end link then you can rotate the hub/disc assembly so you have tons of room to work. A light smearing of Mobile 1 grease (that's all I had on hand, no idea if this will prove to be a bad decision) on the mating surface of the seal, then tapping it into the hub using the axle dust cap did the trick.

So, they're now seated and so far no issues.

To anyone reading this about to attempt it: no need to remove brakes, just remove one nut from the tie rod end link to swing the link out. Makes a world of difference in access.

Sent from my Pixel 3 XL using Tapatalk
 
I actually used the method of sticking the inner seals on the axles then gently pushing the axles in. After they're seated as far as they'll go, use a pry bar and hammer them home using the notches. I did have the seals in the freezer for a couple hours prior to doing this, which may have made it easier.

Surprisingly this wasn't the most difficult part and I don't believe I have any leaks yet.

The knuckle seals were terrible, but, if you disconnect the tie rod end link then you can rotate the hub/disc assembly so you have tons of room to work. A light smearing of Mobile 1 grease (that's all I had on hand, no idea if this will prove to be a bad decision) on the mating surface of the seal, then tapping it into the hub using the axle dust cap did the trick.

So, they're now seated and so far no issues.

To anyone reading this about to attempt it: no need to remove brakes, just remove one nut from the tie rod end link to swing the link out. Makes a world of difference in access.

Sent from my Pixel 3 XL using Tapatalk

I just swapped both my Napa MaxDrive HD CV axles that I JUST had installed 2-3 months ago when I did my lift - BOTH inner boots both had tears. Pretty disappointing but Napa did swap them out no problem. I’m currently rebuilding my OEMs as well, waiting on the smooth belt worm gear clamps to come in.

Anyway, removing the axles was a major pain in the ass for me, namely getting them out of the diff side. The trick for me was I had to get BEHIND the metal dust shields and bend them in order to get them to release and pry out. Hitting the tiny ledges with a screwdriver/pry bar and a 3lb sledge did basically nothing. I used the whole axle as a slide hammer to knock the c-clips into place once I had them seated as far as they’d go lol - that seems to work for reinserting. Getting the hub side in was interesting as well - I ended up having to I ack the brake discs up in order to get the axle in space enough to slide in - similarly this had to be done to line the spindle up with the lower ball joint mounting holes. I think I ended up moving the seal or something on the passenger side while prying the axle out since it leaked profusely after a test drive after everything was bolted back up/fillled. The first time I installed these 2-3 months ago I had a small leak from this side, but we pulled it and seated another seal around ~4.6-4.7mm as even as we could after reassembling and it never leaked. I might try freezing/seating it on the shaft itself this time - hopefully that works, manually seating and checking with a caliper took forever!

I did order this kinetic cv lasso as well which hopefully will work for yanking the inner side out with way less drama. I’ll report back on how this goes.

I also ordered the knuckle seals since they look a little beat up now, hopefully the dust shield driver works out - I ended up removing the tie rod castle nuts/cotter pins and disconnecting the tie rods for more clearance anyway but the ball joints on those were harder to get out than my UCA ball joints!. I ended up turning the castle nut around and even on the bolt and used it as a hammering point to get them free - I ordered a pitman arm puller to save my self the trouble when I drive back in later this week.

I was going to try to boot stretch mod on the inner boots of the napas since 2 of the flutes do touch but at this point I might just do that mod on the OEM axles I’m nearly done rebuilding - especially if the kinetic CV lasso works as I think it should. The passenger side has to come out for the seal anyway so I’m thinking I’d rather just have the napas as spares instead of the OEMs as I originally planned.

I swear the passenger side diff seal is gonna he the death of me.
 
Last edited:
As far as getting the axle out, it doesn't sound like it should have been necessary to bend the shields and pry it out. One thing I did that may have helped was rotate the shaft, give a couple whacks on the notch, then rotate to the next notch and do that again. I figured that if the c clip orientation mattered that much going in, it probably did coming out as well, so rotating it would allow the opening to be on the bottom eventually, I think.

Also, my 4lb hammer was probably not really enough, I'd think a 10lb would be much better.

Consider too body positioning under the vehicle. You want to be able to wind up as much as possible. I had to play around with my positioning to allow for this but that's when it finally came out for me.

Sent from my Pixel 3 XL using Tapatalk
 
As far as getting the axle out, it doesn't sound like it should have been necessary to bend the shields and pry it out. One thing I did that may have helped was rotate the shaft, give a couple whacks on the notch, then rotate to the next notch and do that again. I figured that if the c clip orientation mattered that much going in, it probably did coming out as well, so rotating it would allow the opening to be on the bottom eventually, I think.

Also, my 4lb hammer was probably not really enough, I'd think a 10lb would be much better.

Consider too body positioning under the vehicle. You want to be able to wind up as much as possible. I had to play around with my positioning to allow for this but that's when it finally came out for me.

Sent from my Pixel 3 XL using Tapatalk

That makes sense, I dunno, mangling the dust shield seems to have worked for me for whatever reason - it was the only way I had success. I had really awkward angles too, I couldn't really ever find a good one to properly strike at.

Hopefully the CV lasso tool works well - I'll be very happy if it does!

Regarding the passenger side inner axle seal though - did you freeze it, then grease it, then just slide on to the axle shaft then slide the whole thing into the diff? No leaking?
 
Last edited:
That makes sense, I dunno, mangling the dust shield seems to have worked for me for whatever reason - it was the only way I had success. I had really awkward angles too, I couldn't really ever find a good one to properly strike at.

Hopefully the CV lasso tool works well - I'll be very happy if it does!

Regarding the passenger side inner axle seal though - did you freeze it, then grease it, then just slide on to the axle shaft then slide the whole thing into the diff? No leaking?

Meh, if it worked for you then it worked! More than one way to skin a cat, or so I hear...

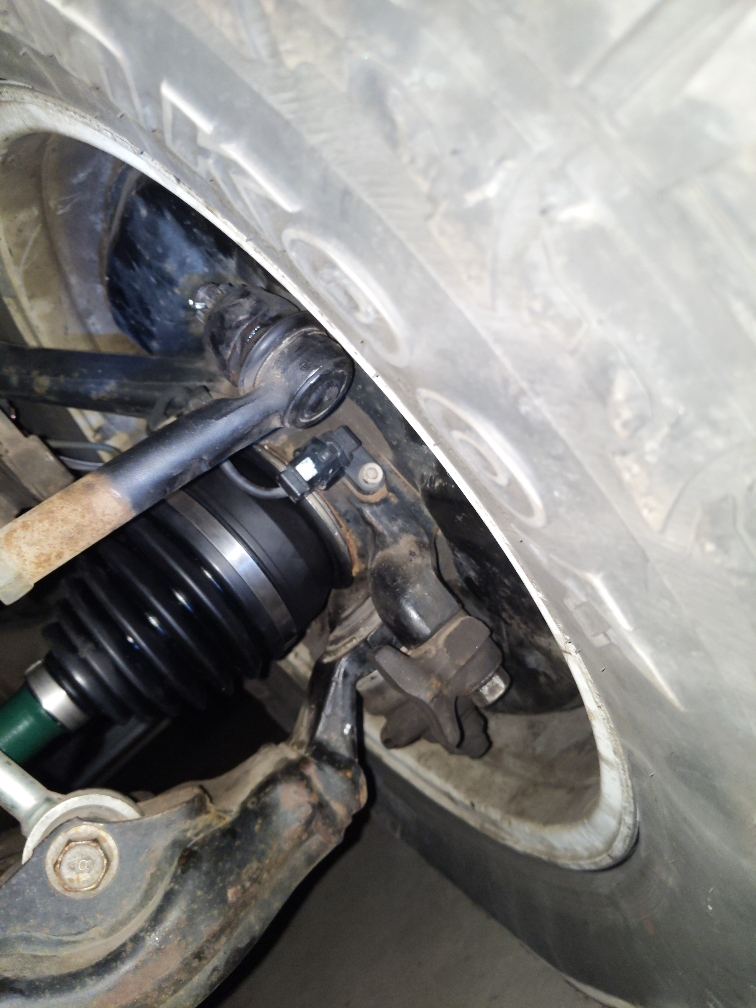
Before starting this (and I feel like I typed this before...maybe not on this thread though), I'd recommend taking the sway bar end link off (just one of the ends is all you need). This allows you to swing the brake/hub assembly 90 degrees, which then gives you a straight shot to the diff and tons of room to get your knuckle seal on and off.

So, for the passenger inner axle seal (the one that's inside the diff), I froze it for a couple hours, did NOT grease it, but I DID smother it in gear oil (same I used to refill the diff), popped it on the axle and pushed the whole assembly into the diff. It also seemed to help if you align the c clip with the opening facing down.

No leaks so far and i've put on at least a hundred, maybe more miles.
 
Meh, if it worked for you then it worked! More than one way to skin a cat, or so I hear...

Before starting this (and I feel like I typed this before...maybe not on this thread though), I'd recommend taking the sway bar end link off (just one of the ends is all you need). This allows you to swing the brake/hub assembly 90 degrees, which then gives you a straight shot to the diff and tons of room to get your knuckle seal on and off.

So, for the passenger inner axle seal (the one that's inside the diff), I froze it for a couple hours, did NOT grease it, but I DID smother it in gear oil (same I used to refill the diff), popped it on the axle and pushed the whole assembly into the diff. It also seemed to help if you align the c clip with the opening facing down.

No leaks so far and i've put on at least a hundred, maybe more miles.

Good tip - I undid the tie rod last time and I was able to swing it as well - maybe both would give me more clearance? I'll have to give it a shot as I'll be diving back in to either reposition or replace the seal (i got an extra one in the mail today). I also ordered a couple extra knuckle seals I'm going to be giving a go while I'm at it.

Interesting, the first time we did it, it was off and leaked a little bit, but we measured out exactly the depth needed (~4.7mm) with digital calipers when we did it the second time and no leaks. I'm really just mad that my excessive prying probably un-squared/shifted the seal when it was perfect before.

Hopefully this CV lasso works and I never have to mess with pry bars ever again (for this job). I'll report back after I try it!
 
Last edited:
Good tip - I undid the tie rod last time and I was able to swing it as well - maybe both would give me more clearance? I'll have to give it a shot as I'll be diving back in to either reposition or replace the seal (i got an extra one in the mail today). I also ordered a couple extra knuckle seals I'm going to be giving a go while I'm at it.

Interesting, the first time we did it, it was off and leaked a little bit, but we measured out exactly the depth needed (~4.7mm) with digital calipers when we did it the second time and no leaks. I'm really just mad that my excessive prying probably un-squared/shifted the seal when it was perfect before.

Hopefully this CV lasso works and I never have to mess with pry bars ever again (for this job). I'll report back after I try it!

I go straight for the little pry bar, that seems to work the best for me. Then use the inner joint to 'slide hammer' the CV back in when installing.
 

Members online

Forum statistics

Threads
278,316
Messages
3,554,113
Members
248,016
Latest member
Advally Service

Trending content

Back
Top