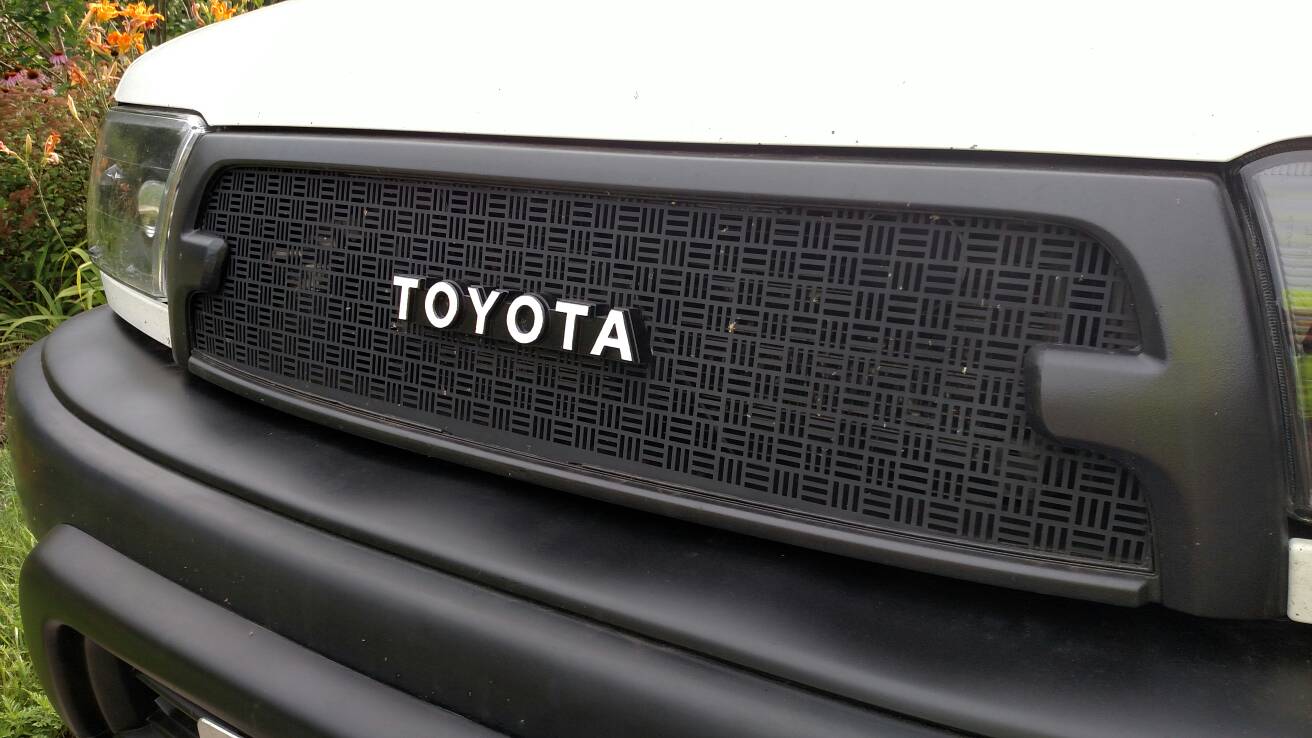
HOW TO: Mesh Grille on a 1999+

apohl17

New member
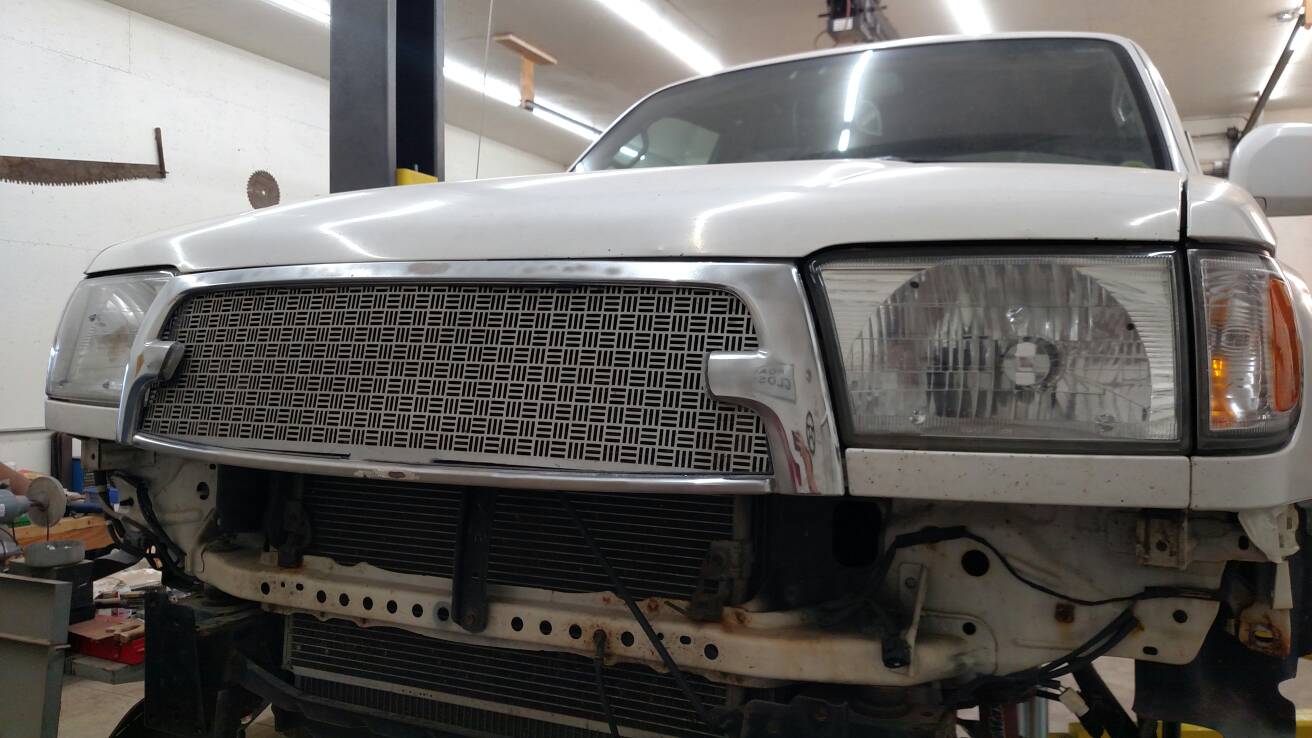
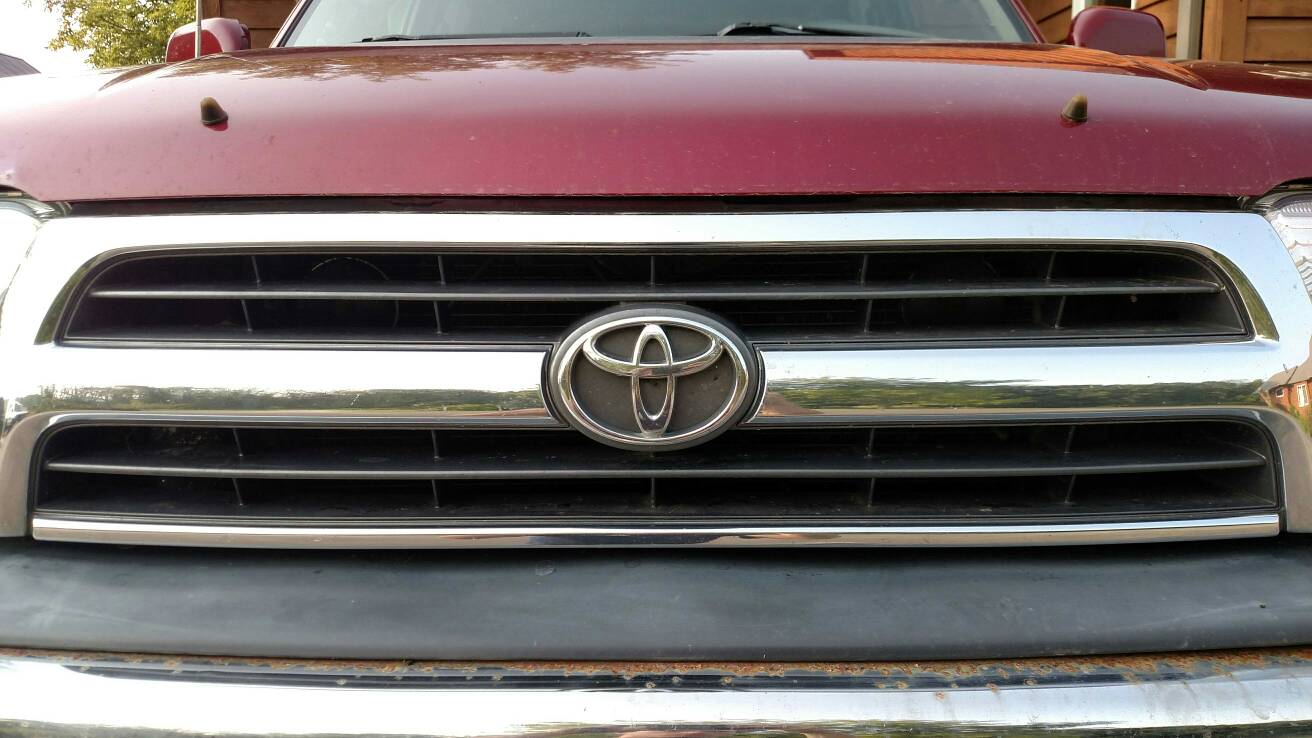
So I'm starting this thread to show everyone how I did the popular Satoshi grille mod on a 2000 model year grille. As much as the 1996-1998 grille frames are common, I both wanted something different and didn't want to spend the extra $$ for another grille, just to cut it up.

Before you start, make sure you have the following items:

-1x 1999+ Grille (note, 2001 and 2002 grilles have an extra indented line, and may be color matched, but all steps below can be done to one of them as well)
-1x Toyota emblem (or emblem or choice, I used one off an '84 pickup) and hardware
-1x piece of 2x4' expanded metal or wire mesh
-1x tube of Automotive GOOP
-1x tube of JB Clear Weld 5min epoxy (.85 oz)
-1x roll of blue 1-2" painters tape
-(optional) 90467-12040 Grille clips
-1x can of primer, paint of choice, clear coat if desired

TOOLS USED:
-Dremel 3000 series (trimming, detail, fine cuts, etc)
-Dewalt Sawzall (fast grille cutting)
-Makita cutoff wheel (to cut mesh faster than dremel)
-Sandblaster to remove chrome (optional)
-200-400 grit sandpaper
-Various screwdrivers

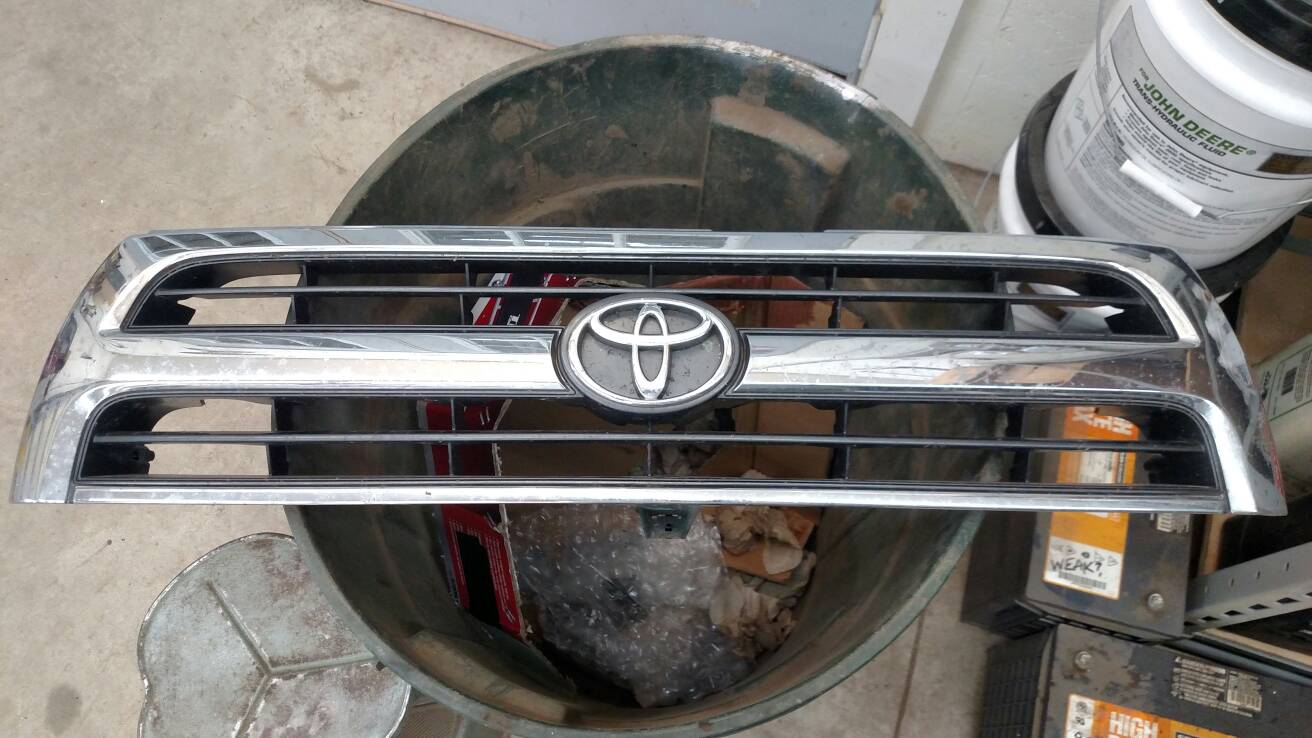
STEP 1:
Remove grille from vehicle. Use a flat blade screwdriver to press grill clips in and carefully pop out the grille assembly. *Note, this clips are easy to break, and it may be beneficial to either purchase extras beforehand or simply replace the broken ones with zip ties when you reassemble.
fefe40ade2c5abc2d111c63d36257411.jpg

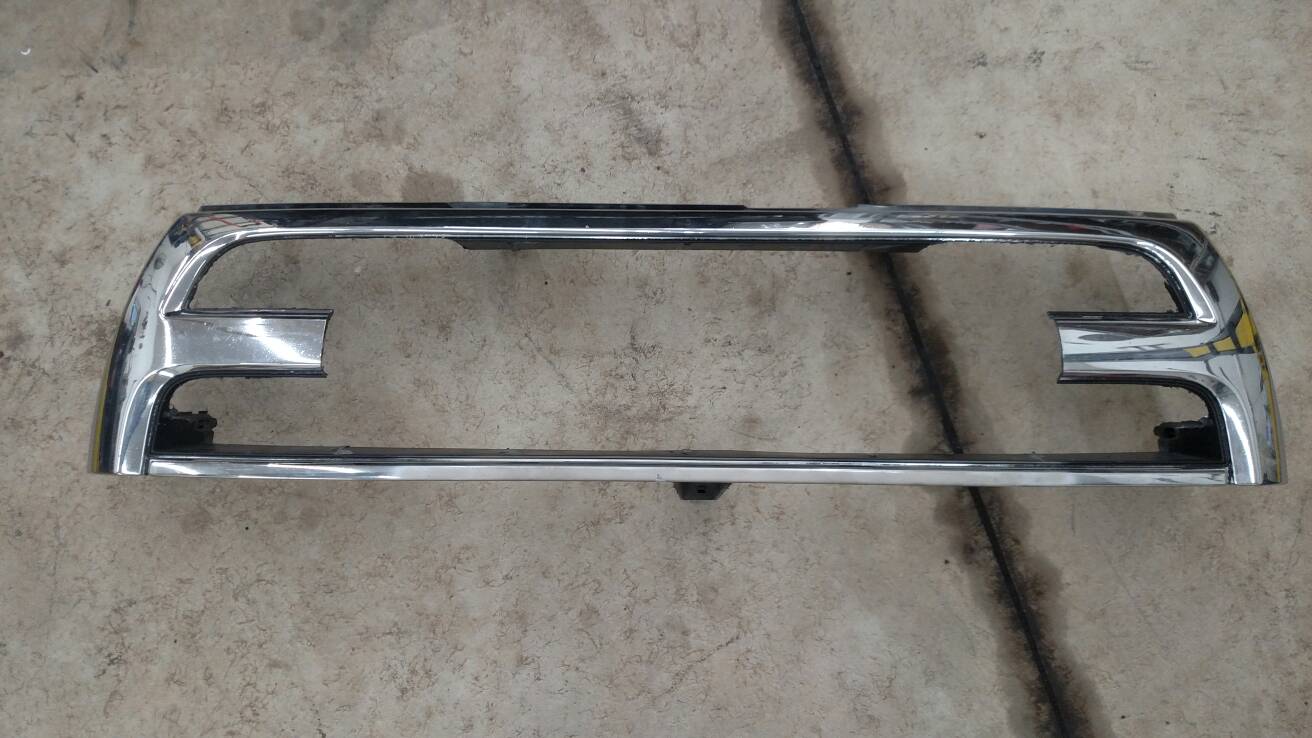
STEP 2:
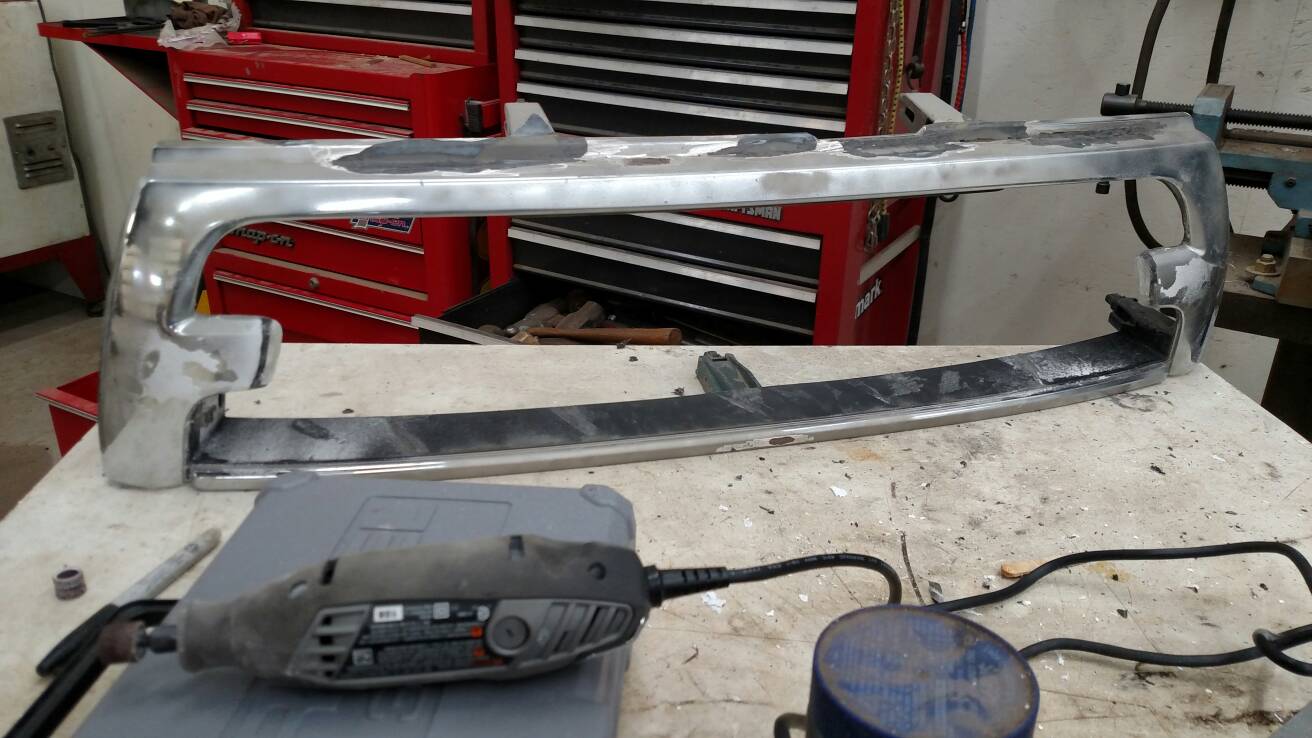
Use the Sawzall or hacksaw to remove all non-chromed supports as well as the middle emblem section of the grille. Cut flush to the front face. Feel free to leave plenty of material to the left and right of the emblem on the main chrome bar, as we will measure and trim those to size later.
2d0719b093c751bb33a49917ade49adf.jpg

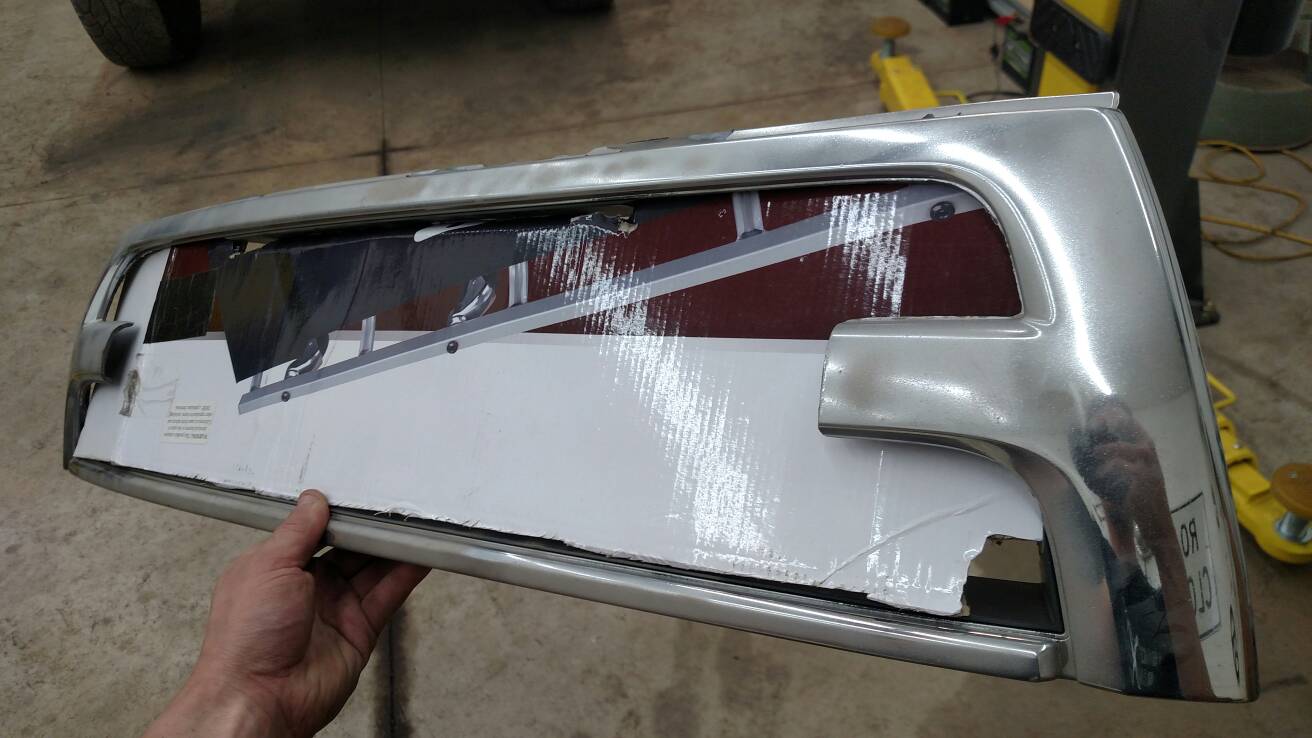
STEP 3:
Test fit using cardboard to determine a rough mesh size for the grille. Note that there are two separate curvatures we are dealing with, and depending on the mesh type and thickness, it may require effort the bend it into shape on multiple axis. In the picture below, the cardboard is straight, so make sure to cut your mesh an inch or two larger around each edge.
3577aec855cd005711ec42ab692c5b75.jpg
 
Last edited:
Register to hide this ad
STEP 4:
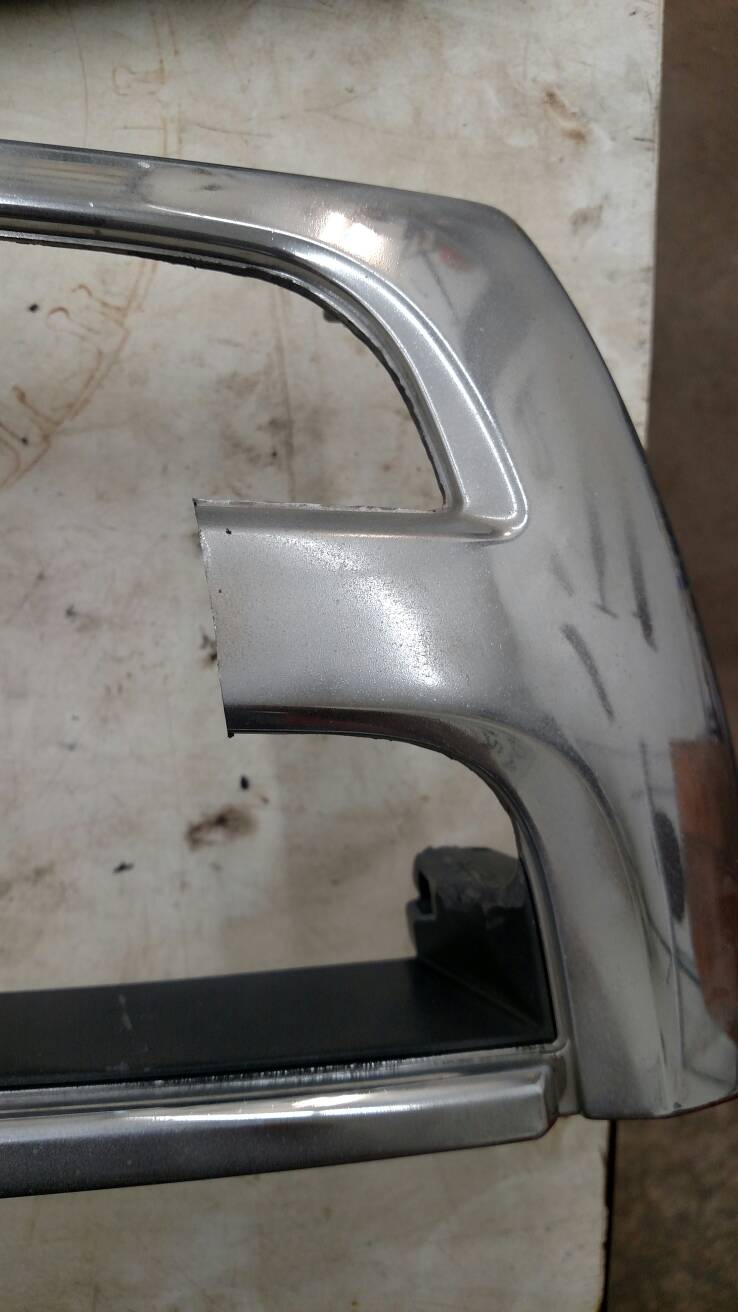
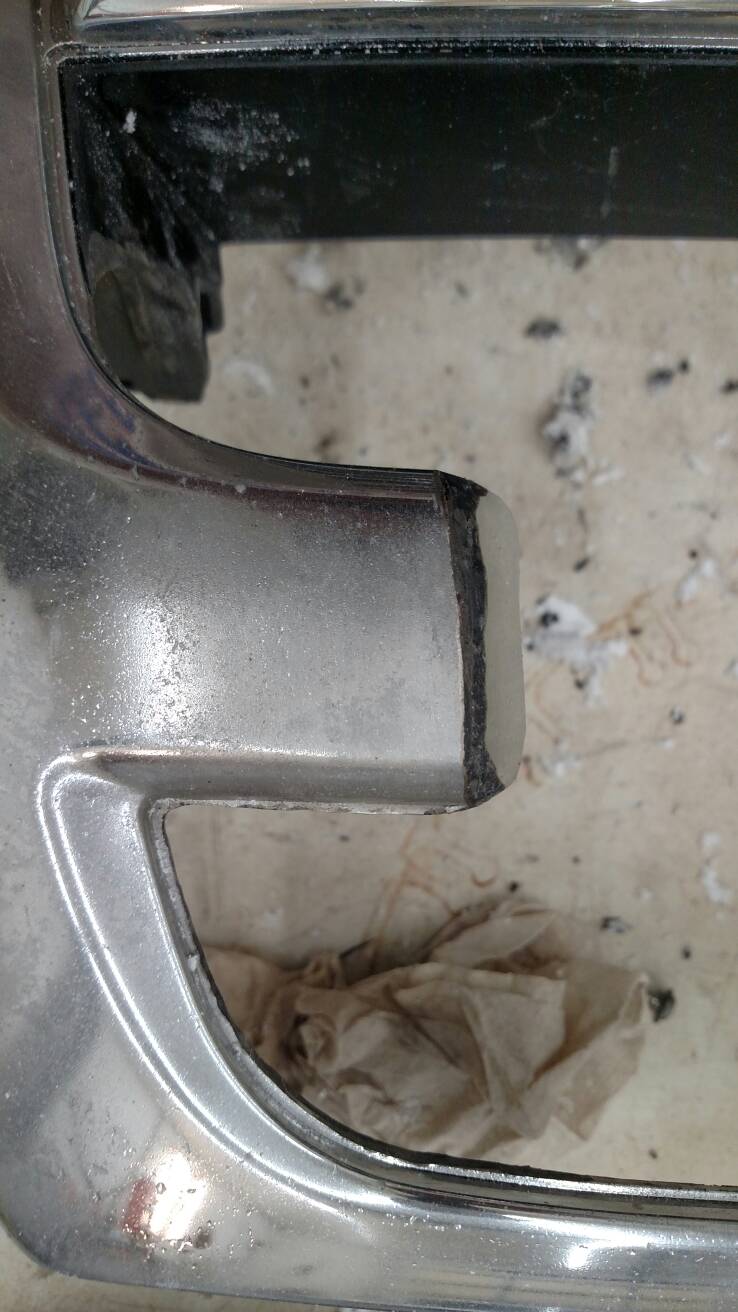
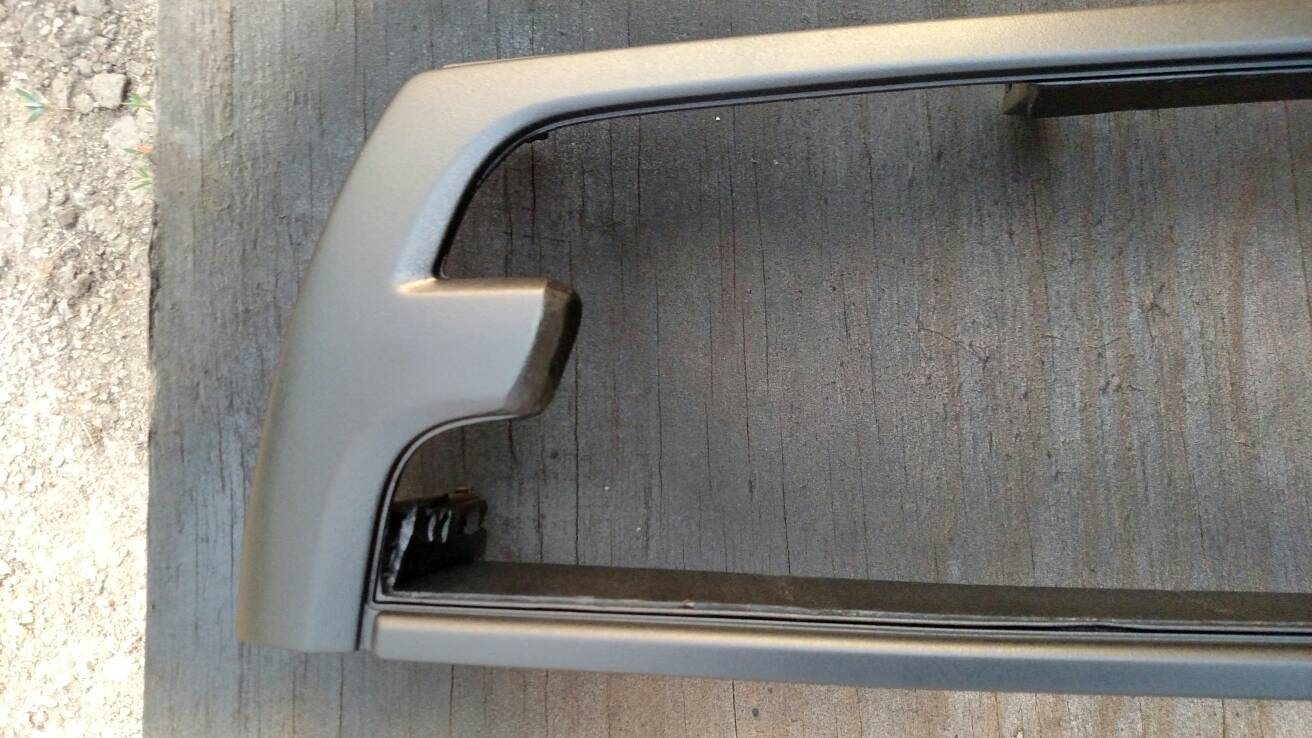
Trim the knobs to rough size. Use a tape measure or ruler to verify the left and right side are roughly the same. We will fine tune this later. I also matched the angle of the grille frame with my cut for aesthetics.
e04044406a9dd3a0e3c44205003509ee.jpg

STEP 5:
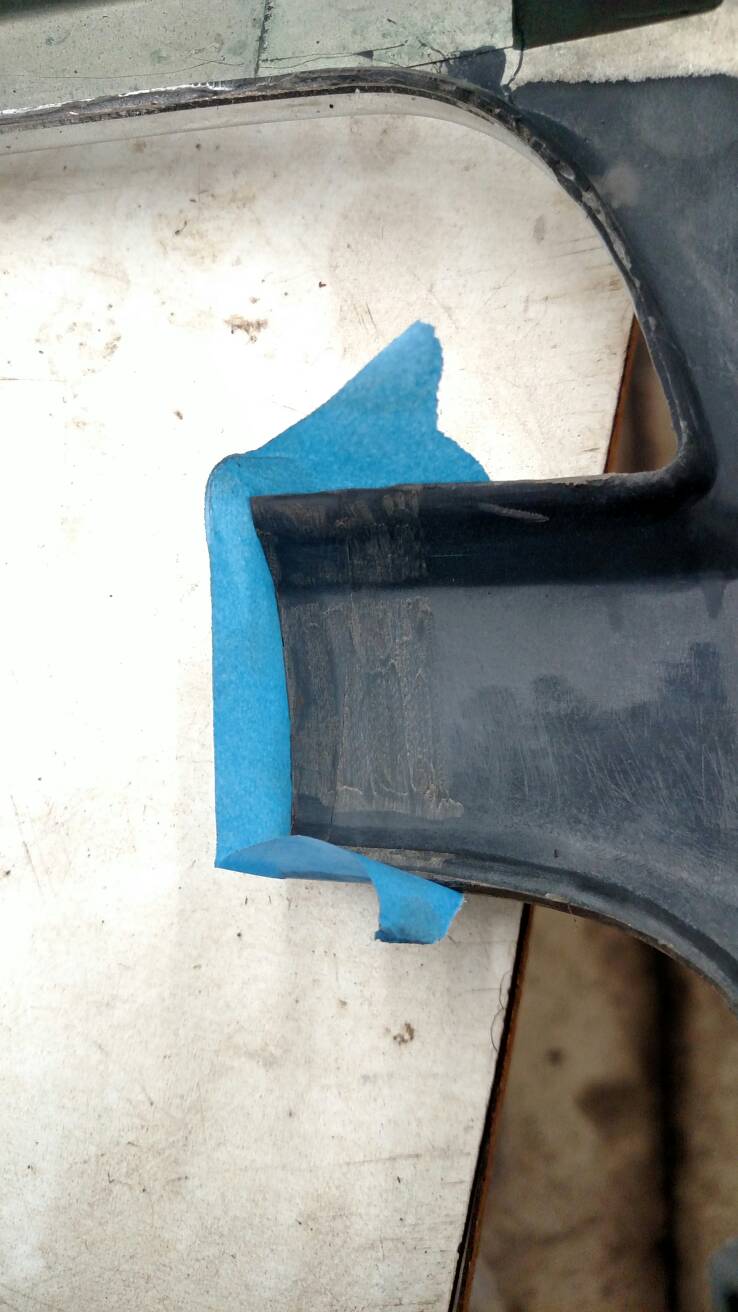
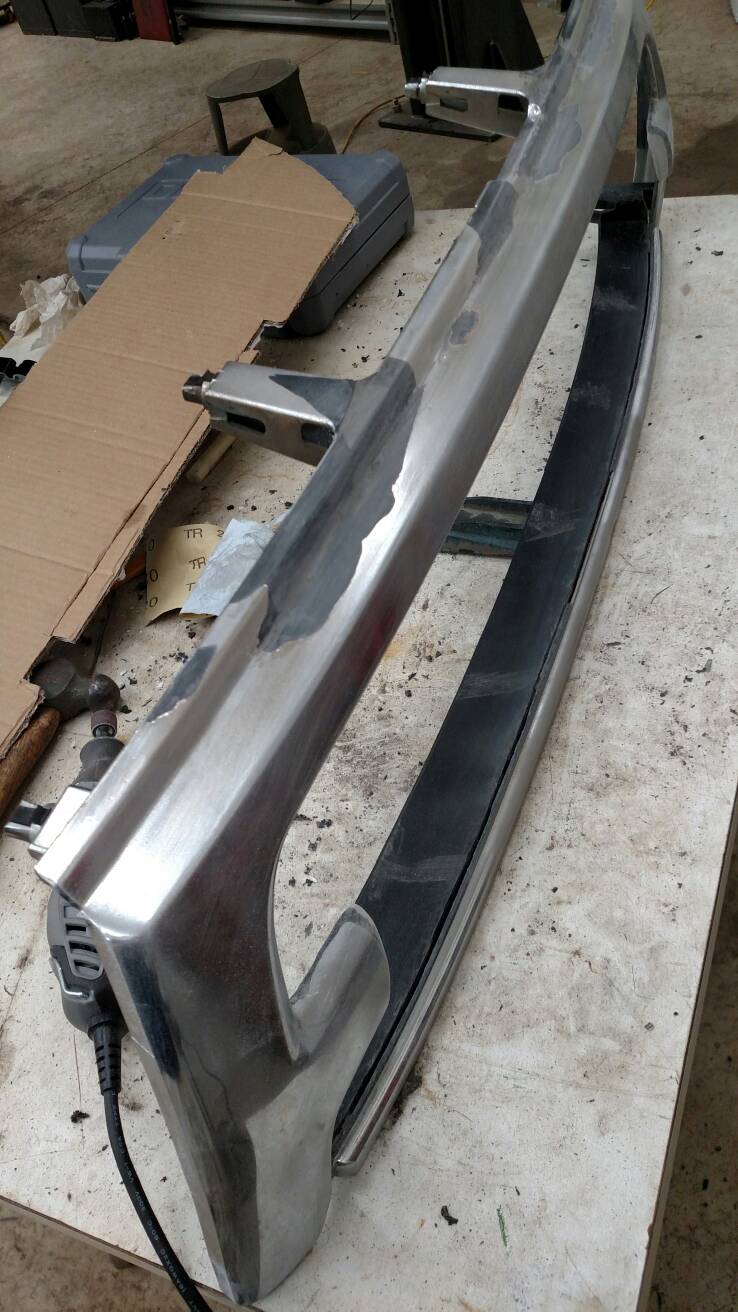
Here is the fun part. We need to make the knobs look factory and not just cut off, and the easiest way I thought of doing that is to fill it with epoxy so I can machine a tapered surface on the ends. Use the blue painters tape and make a well with the end of the knob.
deda491e61c1b63bdb720d36dc519454.jpg

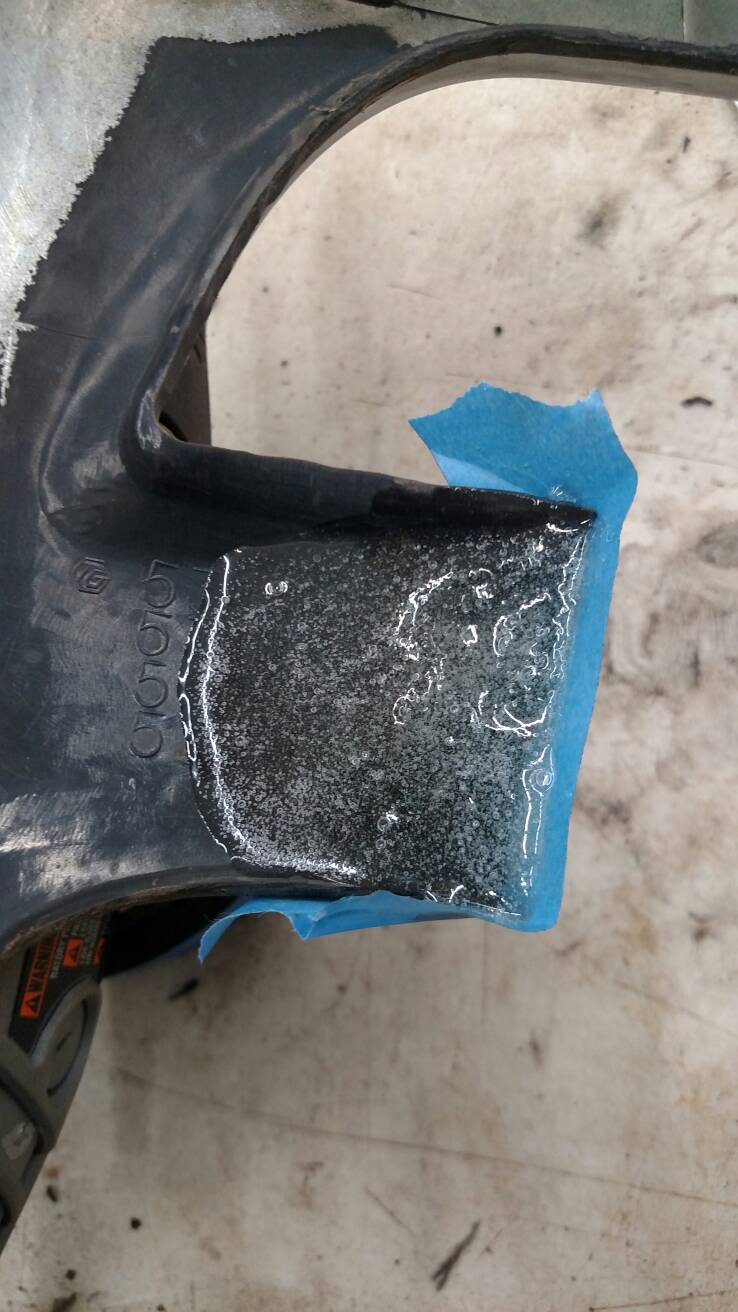
Then, making sure the grille is on a flat surface, mix up half of the container of two part JB clear weld to fill up the well. Repeat on the other side. This epoxy sets fast, but to speed it along and make sure it doesn't spread out, I pushed it into a pile while it was curing so it looked like this.
e915ecd598eb9eb2824010dad6b55a8d.jpg

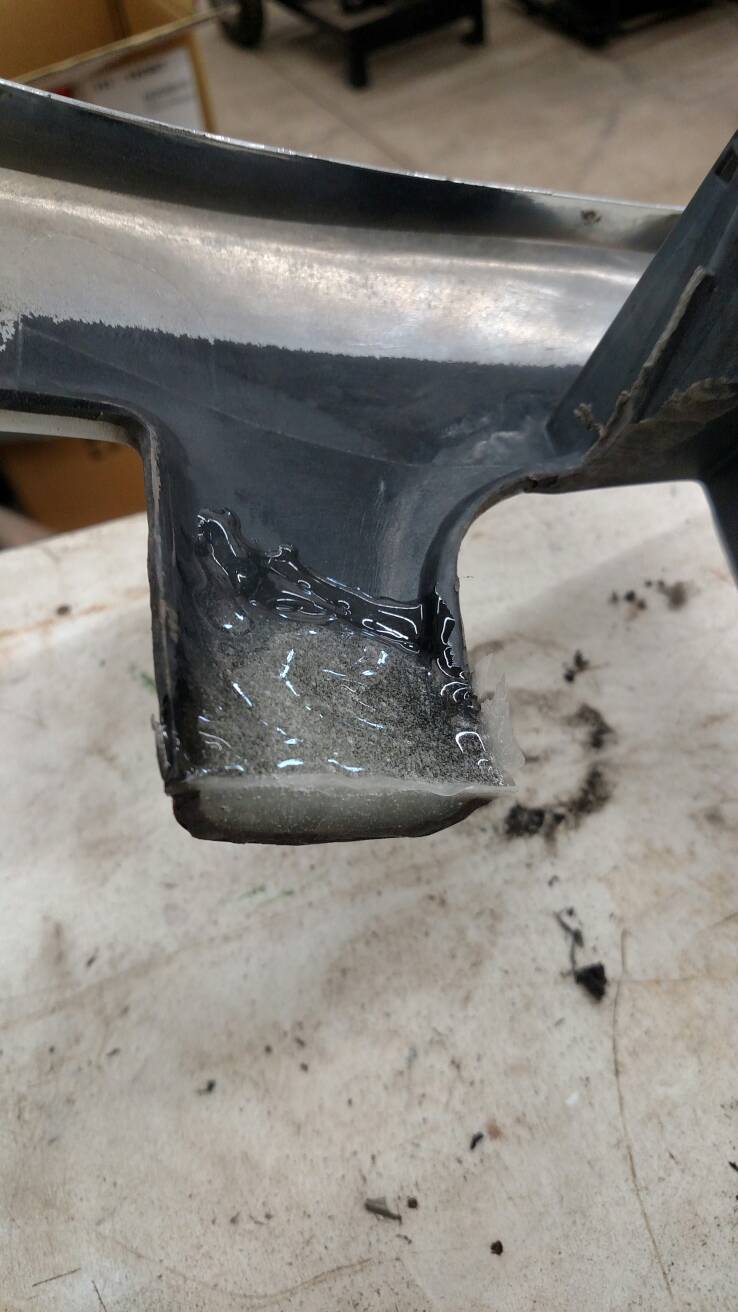
After a couple hours (hard to the touch), remove the tape, and you should have something like this.
731909440b4346edaf020dcbdd7e3f8d.jpg

STEP 6:
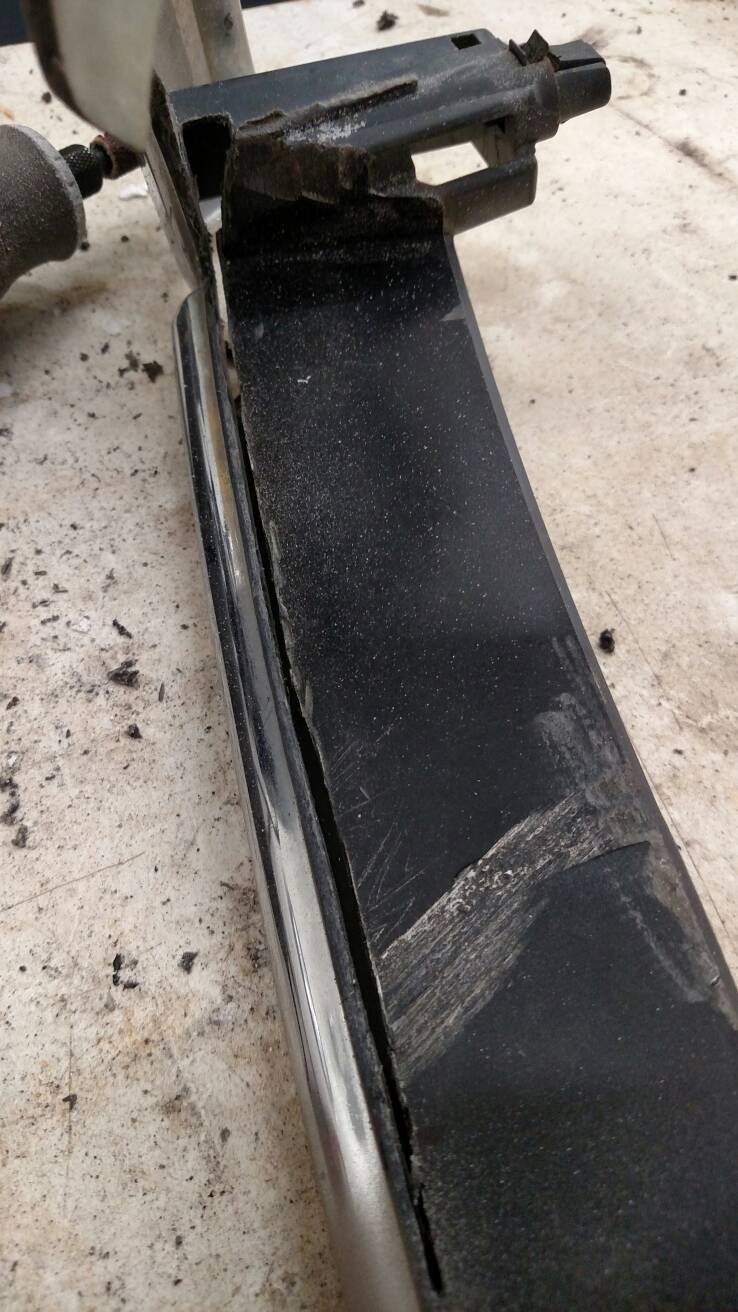
Lots of sanding. Create a chamfered edge using your newly formed substrate, about a half inch long.
f1f10c1ee5bb887f0a2fef861a1f7082.jpg

Sand a few of the edges with the dremel on low to prep for fitting the mesh while the epoxy dust is flying anyways.
2cdfccc18c3ee4bbcd175db13ad376fe.jpg
 
Last edited:
STEP 7:
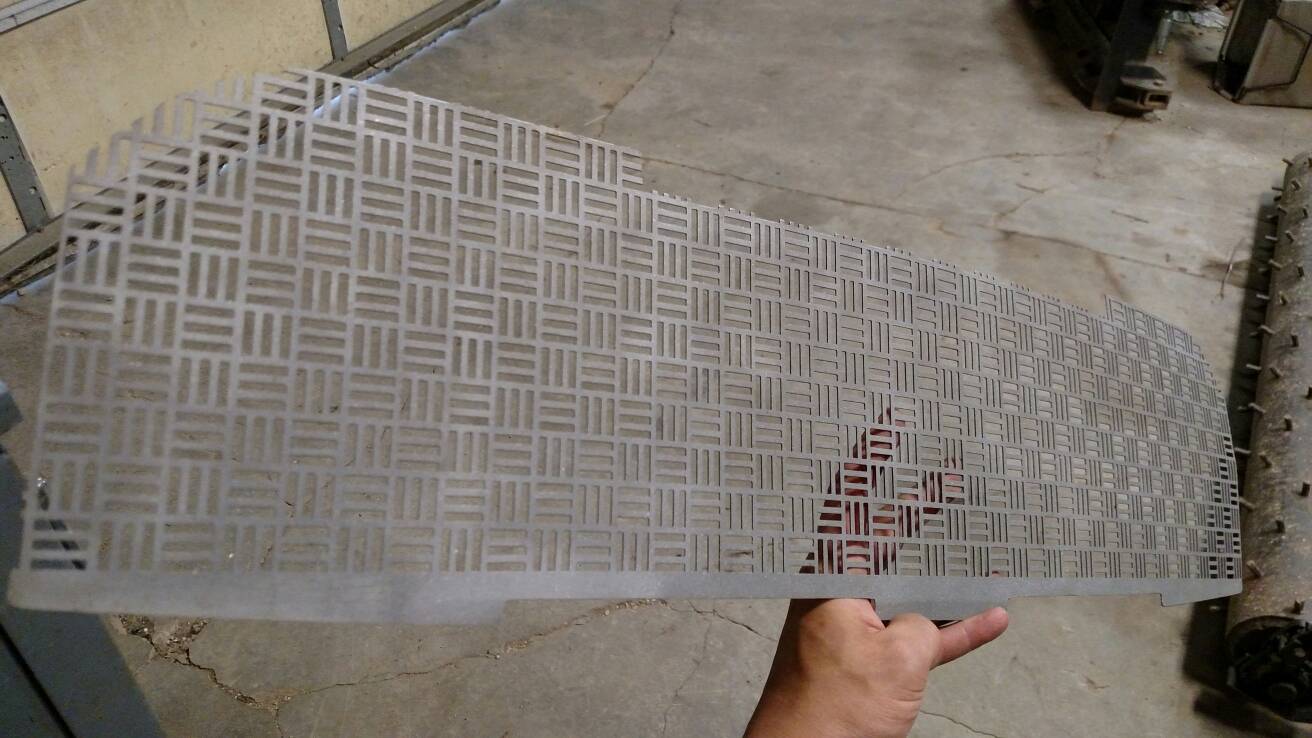
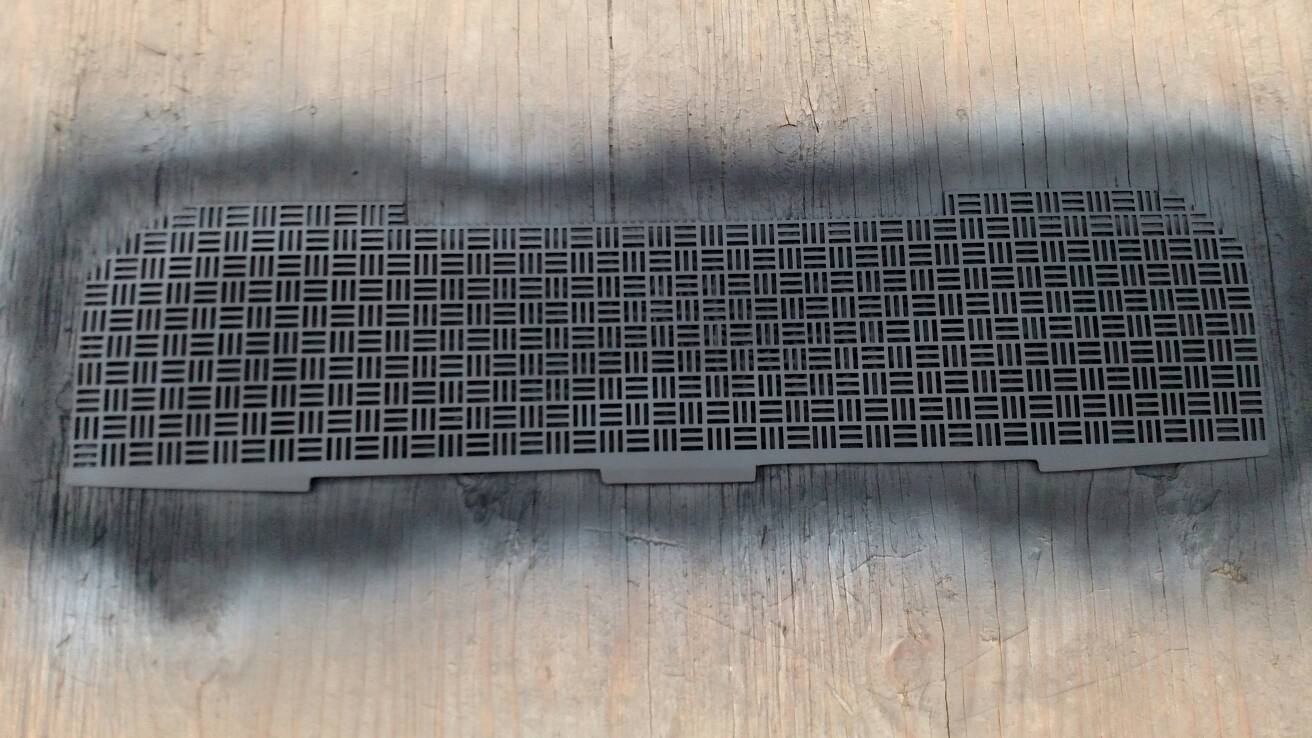
Decide how you want to attach your mesh. This varies completely on what type of mesh you use. I made this way harder in myself since I used a very stiff piece of steel sift grating, because I liked the pattern.
2894825c6b6bc959359524c9d90220c9.jpg

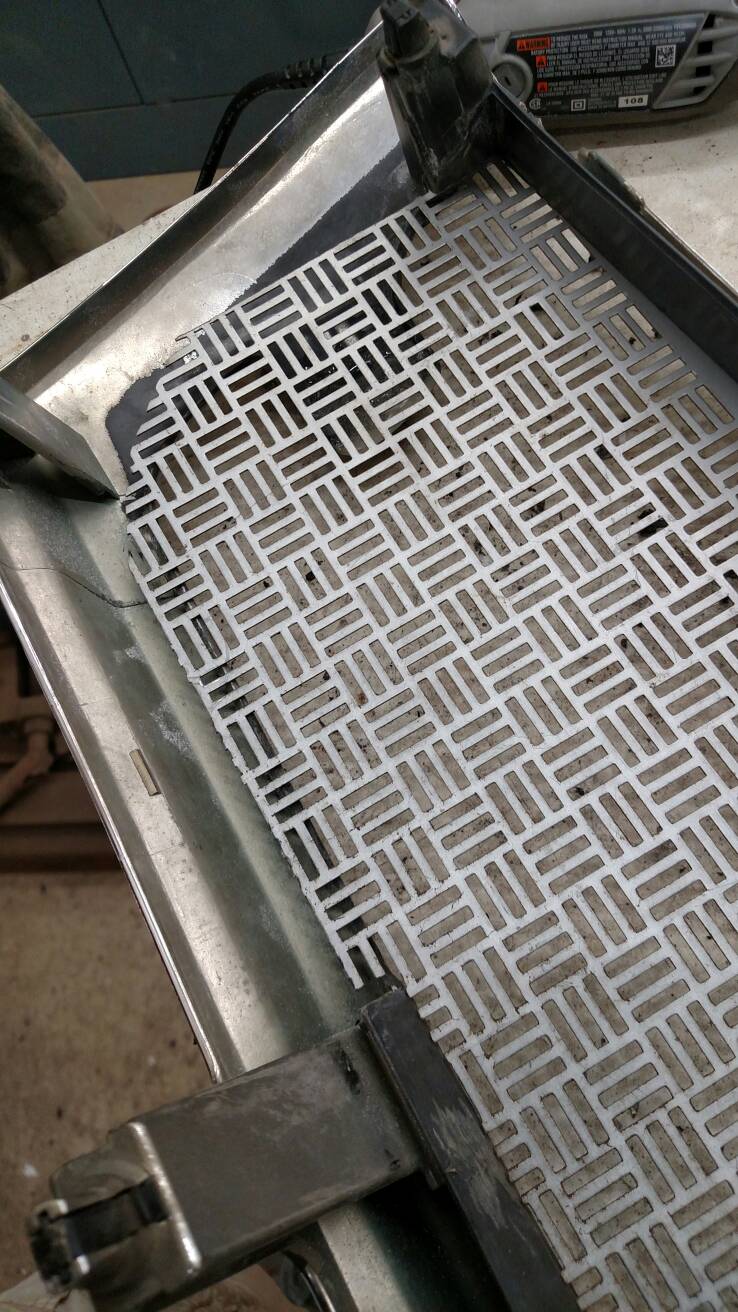
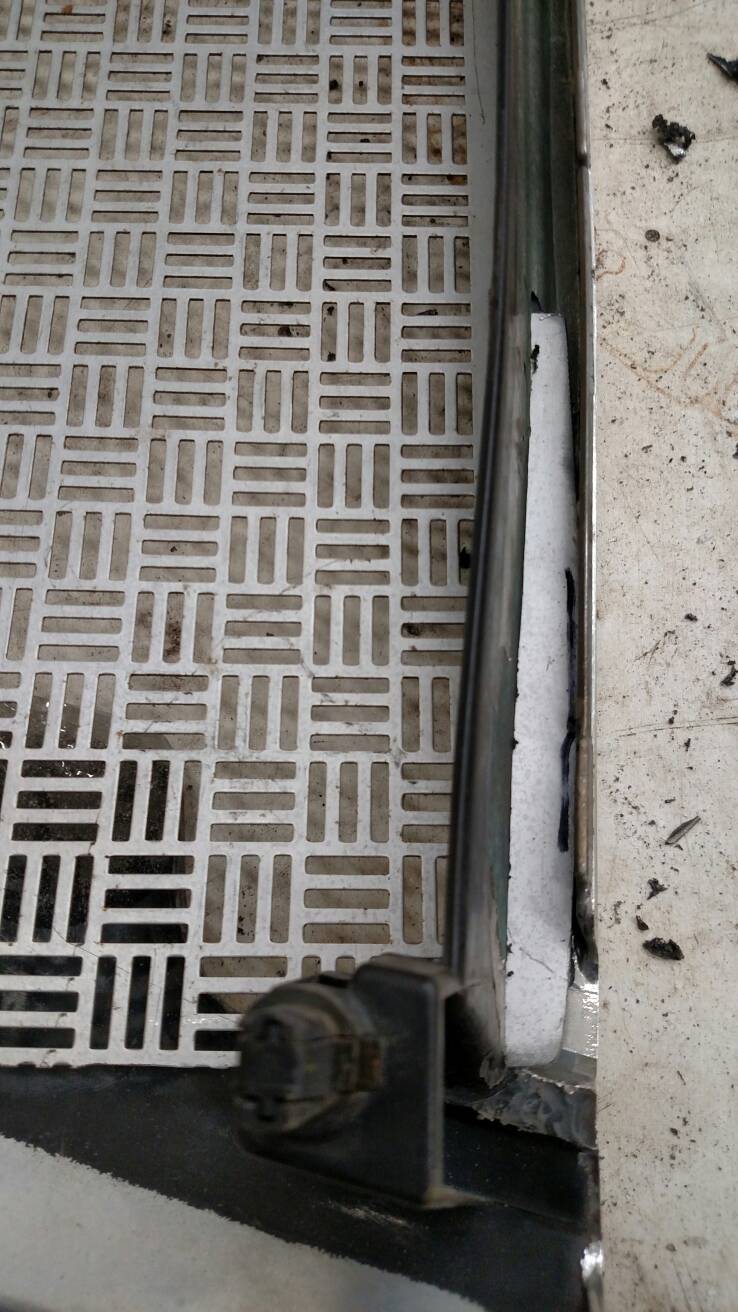
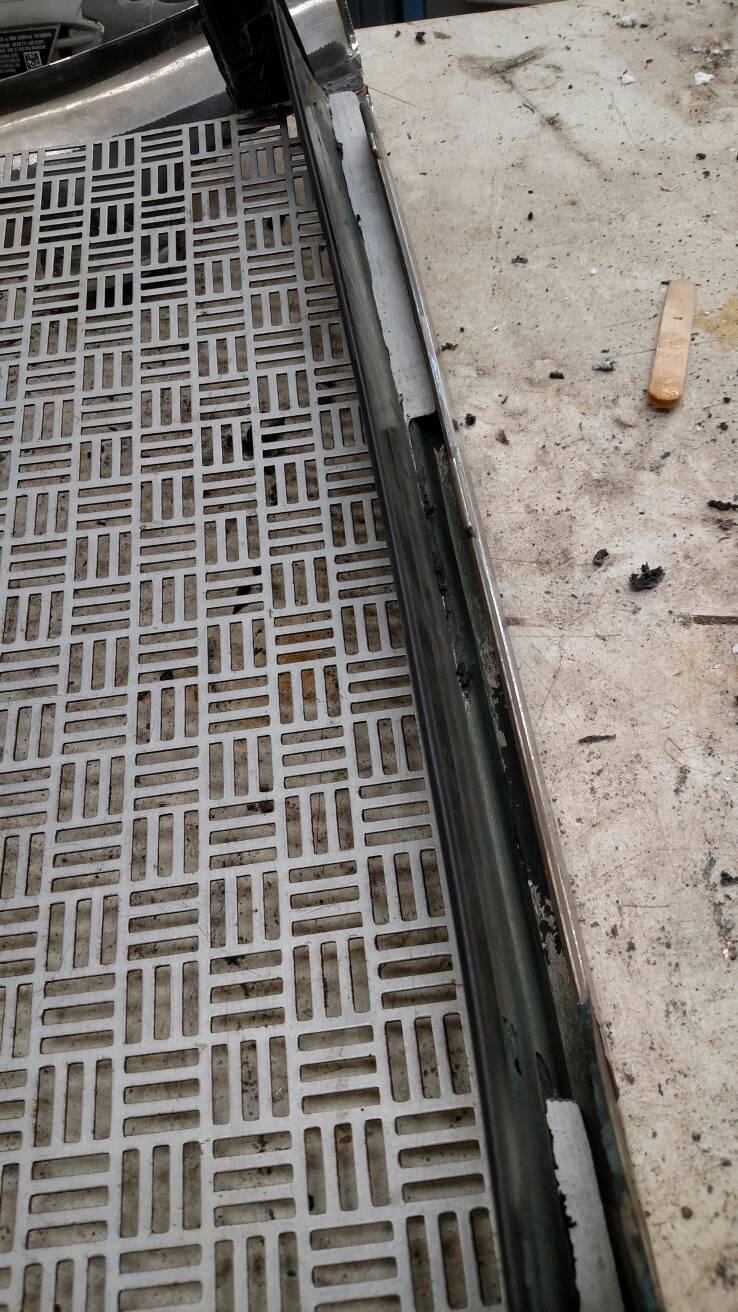
Because of this, to get it to contour to the radii of the grille, I implemented a slot-based notch system to affix the mesh into the grille. With any sort of flexible mesh, you can skip this step. I likely had to test fit the metal two dozen times, each time trimming it with the Makita.
65ec9cec98eb7e2062f00f32311a6a88.jpg
926ec30ef03d2373c303cee979d6ec55.jpg
8b094159b205c25aca44022da2d0fcc1.jpg
43d9b18866c8196471cc33633590aeb8.jpg

Eventually, I got it to sit nicely. Make sure that the bottom end of the grille frame is not bulging like it is in this picture-I still had a lot of trimming to go when I took this.
3f9c83ace6400ef808382cefb4a923ff.jpg

STEP 8:
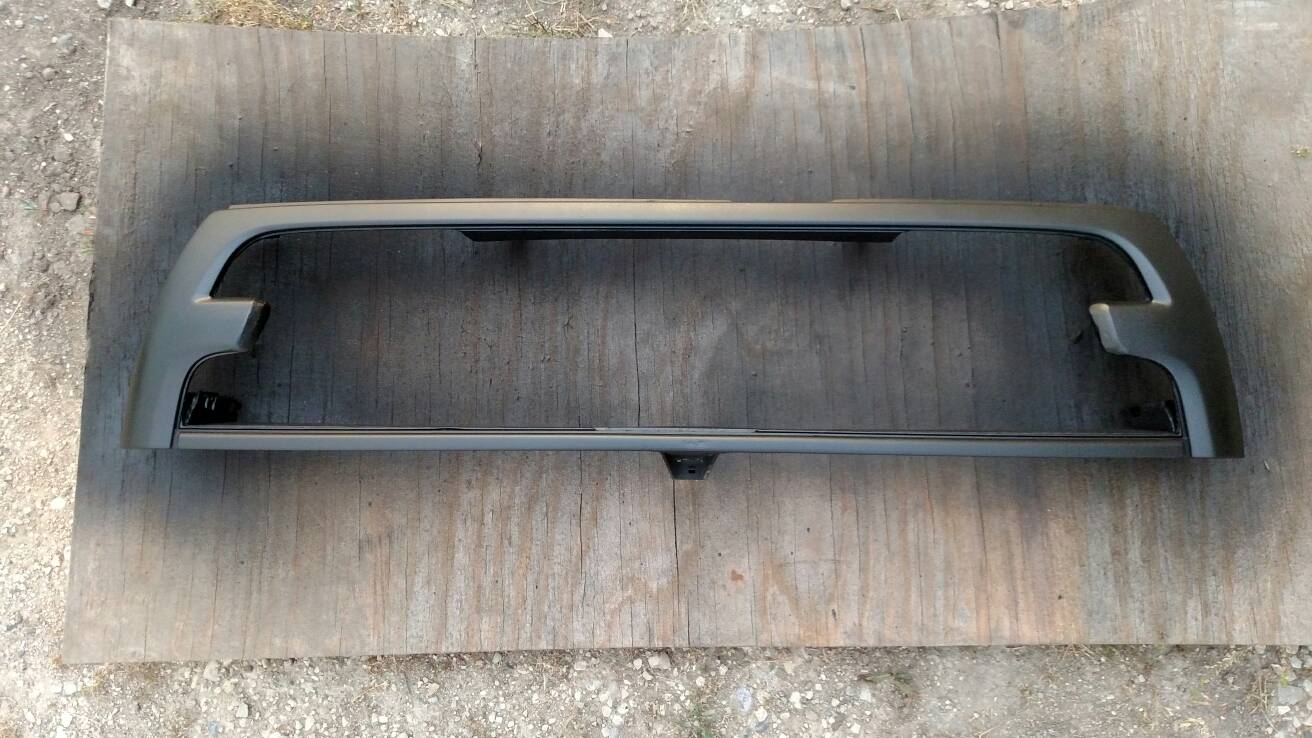
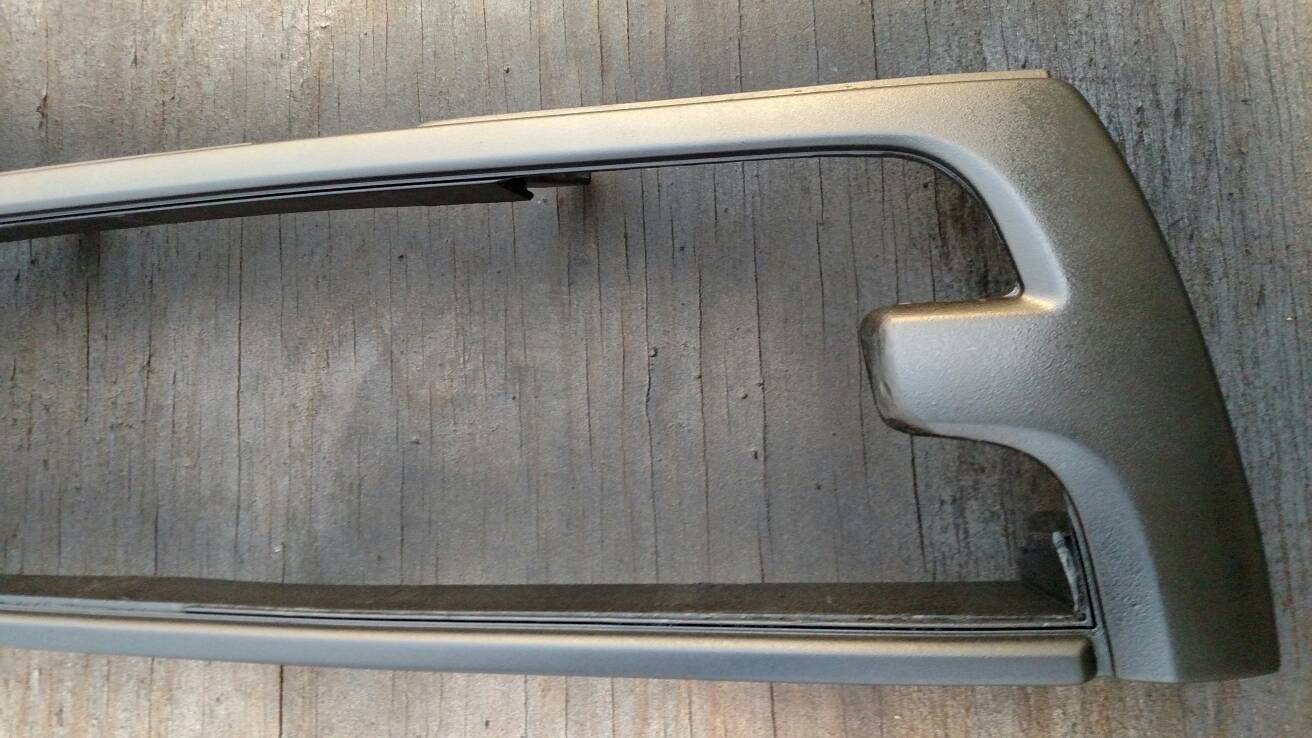
Once you are satisfied with fitment, it's time for refinishing. Since I had access to a sandblast cabinet, I went ahead and took off some of the peeling chrome on the frame, and roughed up the thick layer of chrome on the rest of the grille. Since I used a self-etching primer, I wasn't worried about removing all of the chrome.
f9ec2f3697b850228fce1991604da838.jpg
 
Last edited:
STEP 9:
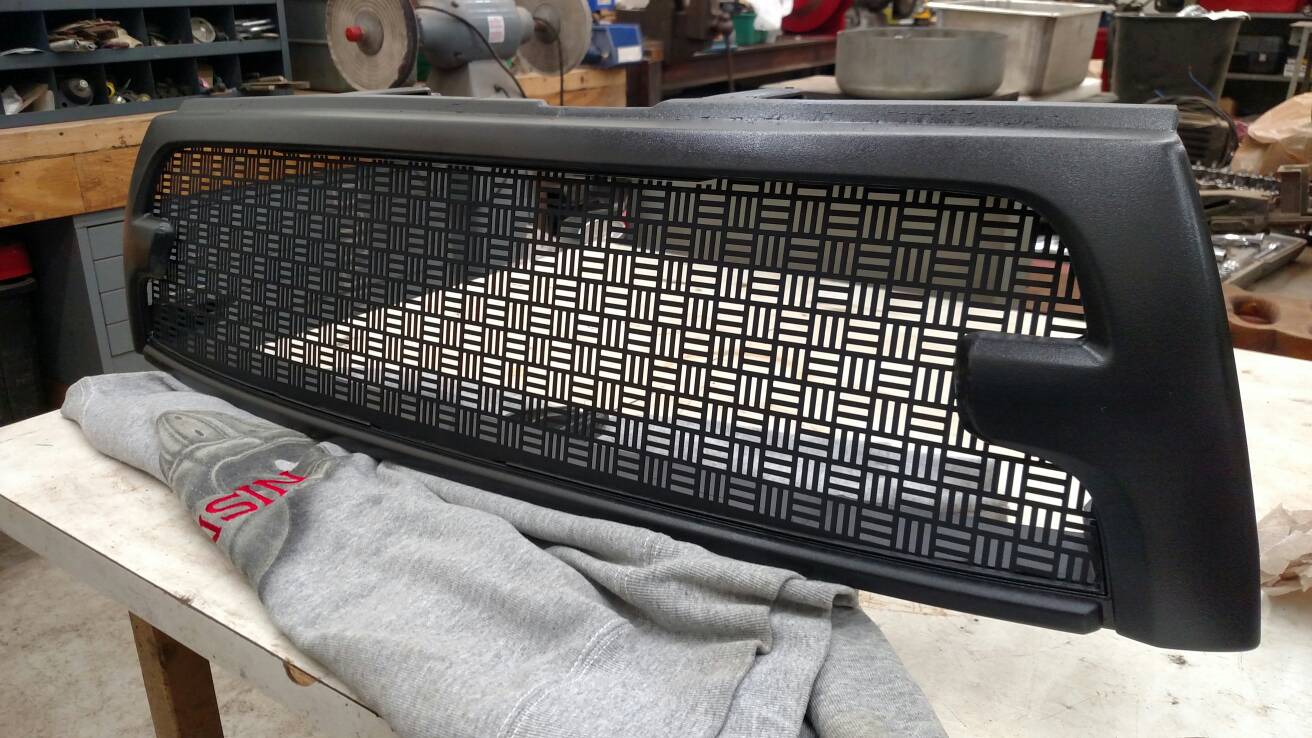
Prime and paint both the mesh and the grille frame. I used a satin black Rustoleum for the frame and a flat black Rustoleum for the mesh. Let both parts dry overnight to cure before final assembly.
d15408a5cd0d219de91073b3ce9dc08e.jpg
4b0a18634a94cf892a07ad7dac115824.jpg
06325855de88c841955fcfdb78fc518b.jpg
fbb951ede68f05902d1d394e465c12c6.jpg

(Note that at this stage, I also painted the emblem)
STEP 10:
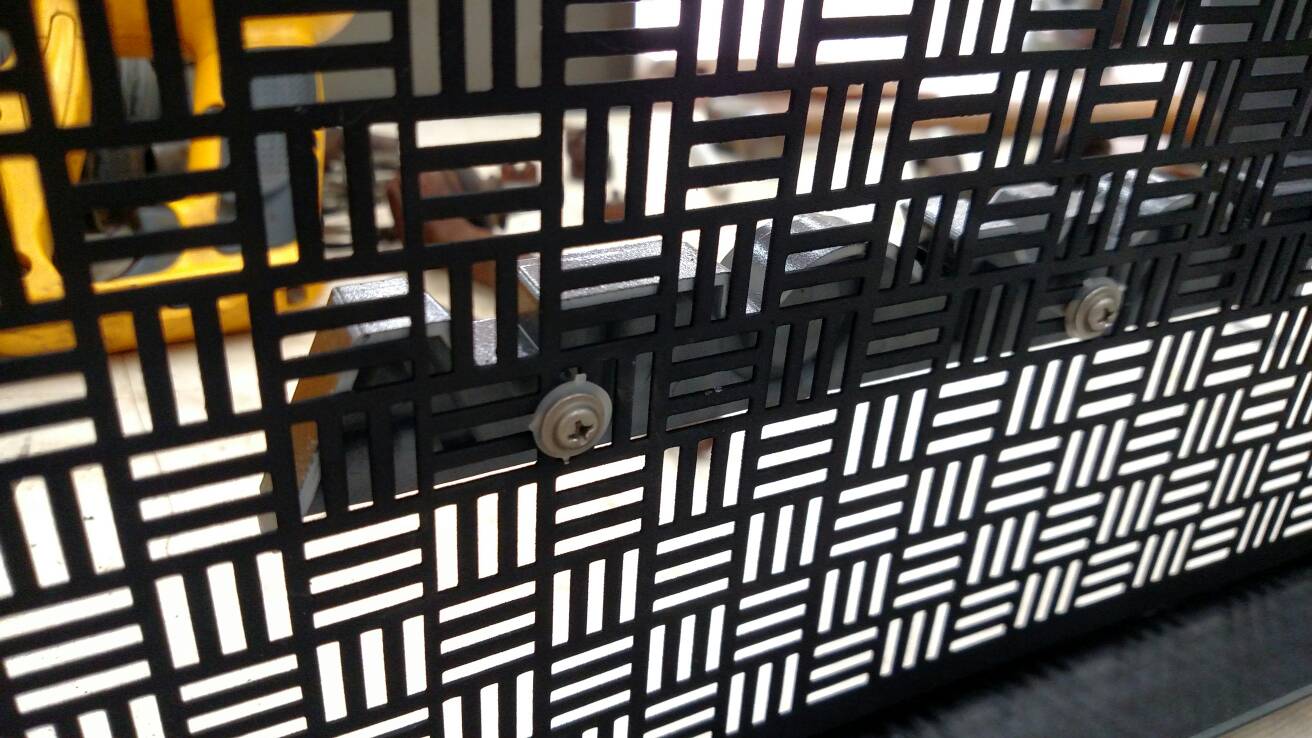
Assemble the grille one last time the way you want it to look. I must have completely spaced taking pictures of the gluing process, but it is self explanatory. Once it is together, place the grille facedown on a soft surface and use the Automotive goop to adhere the mesh to the frame in a inconspicuous fashion. The Goop will take a day to dry, but be a slightly flexible, high build adhesive so don't be afraid to gob it on back there.
fd7c620b80a6792a315c46b9c96a3b67.jpg

Done right, this will reinforce the mesh in all areas so it is solid - you don't want a rock or a bird caving in your new custom grille.

STEP 11:

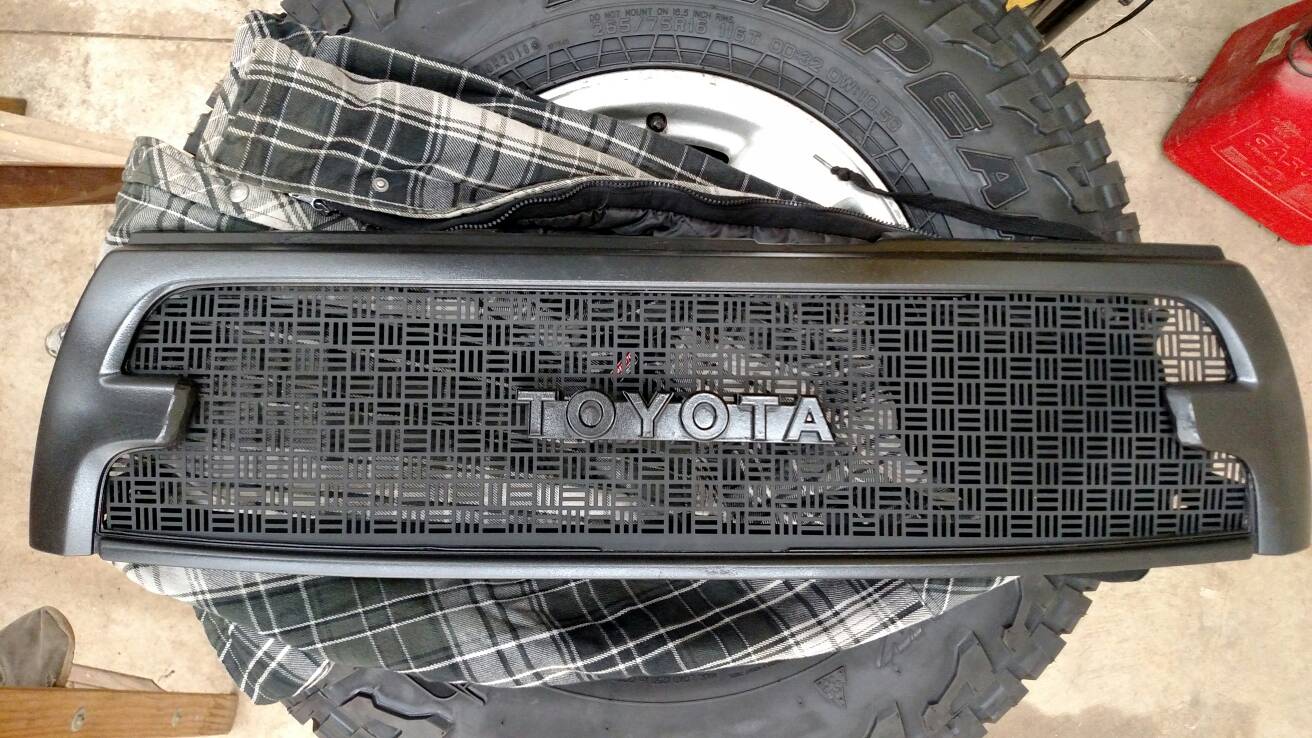
Figure out where you want your newly painted emblem and screw it on! I used a nylon washer to give it a bit more to hold on to.
64c85be0d59b510fa75fb7005f3bac40.jpg
12b82941cb90760c3c9d8d9782dc5fae.jpg


That's all, folks! Let me know if you have any questions or want more pics.
 
Last edited:
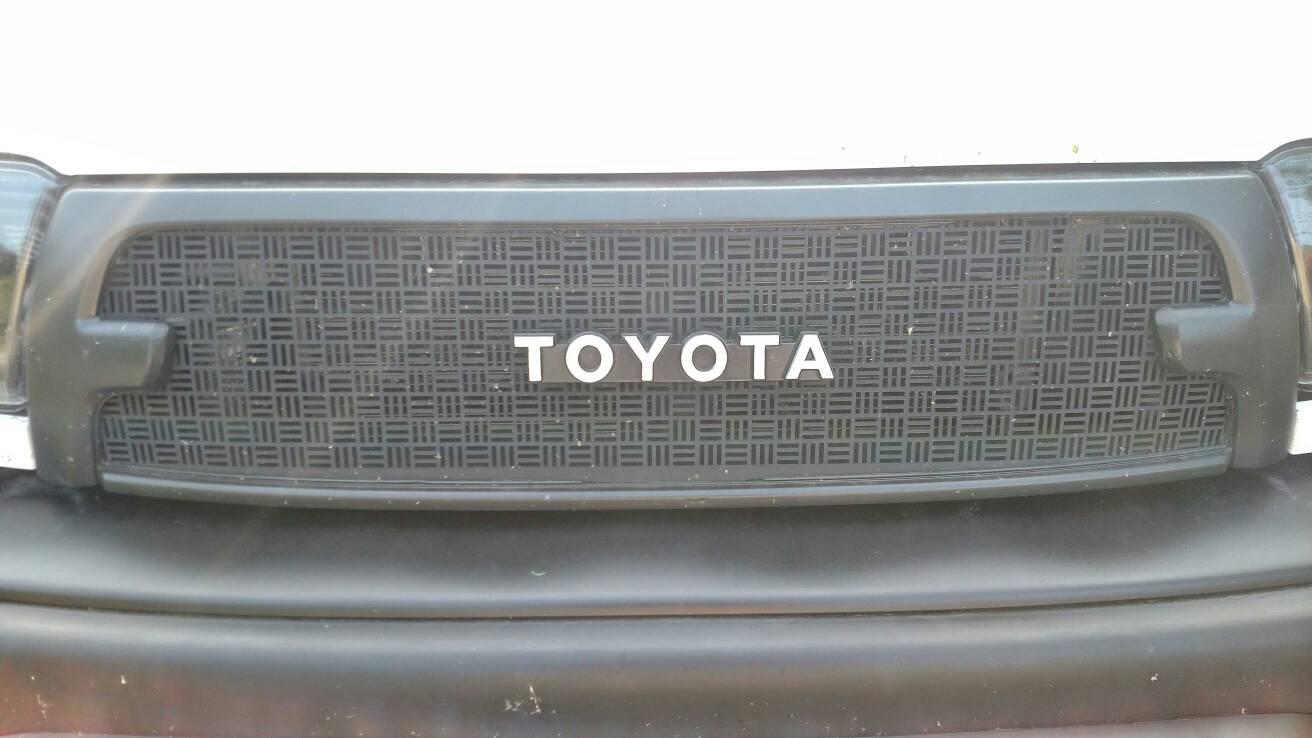
One last finishing touch- paint pen and a careful hand makes the yota lettering pop. Wasn't sure I wanted to do this or not, but I'm glad I did.

BTW, that's what 200 miles of backcountry bug splatters looks like :cheers:
44ea30ce9a5efbd649389e1ecd60ad2d.jpg
6417689c9a338385d570e35385168f2c.jpg


Sent from my XT1254 using Tapatalk
 
OP,
Must confess, I thought you have blown it when I saw the second picture!!
That actually turned out really nice.
Props to you.
 
OP,
Must confess, I thought you have blown it when I saw the second picture!!
That actually turned out really nice.
Props to you.
Thanks. I assume you figured I was going to leave the logo in the middle and simply have mesh in the two slots?
I originally thought about it, but I wanted more mesh to show!

Sent from my XT1254 using Tapatalk
 
I like it but I feel like the Toyota emblem you used is too small. Would look better with the bigger emblem IMO
I getcha. I picked it off of one of the only other trucks in the junk yard with that kind of emblem, so it was either a couple bucks for this, or 30 for a big one. Nice thing is, if I ever want to change, two screws and it's out. Thanks for the feedback!

Sent from my XT1254 using Tapatalk
 
I just wanted to give you props for the mod and write up.
This is the first time i see someone chop the middle portion on the 99-00 grill(rather than just putting mesh around the center). Came out real clean :thumb3:
I may or may not do this.. if i decide to do it ill def come back to your write up.

ill second the toyota logo size comment
 
I just wanted to give you props for the mod and write up.
This is the first time i see someone chop the middle portion on the 99-00 grill(rather than just putting mesh around the center). Came out real clean :thumb3:
I may or may not do this.. if i decide to do it ill def come back to your write up.

ill second the toyota logo size comment

Thanks!! Again, I really don't have as many pictures as I should-- if it gets to that point where you want to know moreand this thread lacks the details, just say so and I'd be glad to help.

Good to know though. Maybe if there are enough people that feel like it should be bigger, I'll bite the bullet and order up a big emblem and see what it looks like... Haha

Sent from my XT1254 using Tapatalk
 
[MENTION=135134]pauldub[/MENTION] I'd like to give you some insight on this...

On the stock OEM grille, there are four openings, roughly 26.25" long and a high average of 0.75" wide. Multiply these together for a overly conservative 20 square inches per opening. Times four, this is 80 square inches of airflow that gets to the radiator.
7dccc62f4dd06721188507a05ffa074b.jpg

Move into my mesh grille. Each slot is 0.5625" x 0.125". Counting these, I net a total of 42 columns and 9 rows per block of three slots, so a total of 1,134 slots. Multiply this by the size of each opening and I get 79.74 square inches of airflow. Subtract the size of the emblem (10 square inches), so figure I have 70 square inches of airflow on this grille.
bf78f5f25e5cae53d48c3e20fe58fbf7.jpg

Take the difference (10), and divide it by the stock grille (80) and you get about a 13% reduction in airflow. It's there, but does it make a difference? I'm going to vote not.

Sent from my XT1254 using Tapatalk
 
Last edited:
It's not that simple because it's not just about square inches. The turbulance your grill creates will make any hope for laminar airflow impossible.
 
It's not that simple because it's not just about square inches. The turbulance your grill creates will make any hope for laminar airflow impossible.
Good to know- thanks for your opinion. I look at it this way-- so many guys run big pod lights in front of their grille, light bars both inside and out, etc. and it isn't a problem. Others with the satoshi and a scangauge can confirm that the trans temps don't run significantly hotter due to the restricted airflow and flatter design. This is just what I chose to do man!

Sent from my XT1254 using Tapatalk
 
I have looked everywhere for a "steel sift" mesh that is similar to this and tried to use the pic in google images.

Could you tell me where to find something similar, possibly?

Thanks!
 
It is "slot hole perforated metal", never seen that particular design pattern, it's not common, but if you have a metal supplier you should be able to go through the perforated slot hole metal sheets available to that company, if they don't have it stock then you will have to buy a 4'x8' sheet most likely. More than likely used for custom truck application, safety guards, and maybe food/agriculture/aggregate separation?. We used similar stuff in 1/8" and 3/16" for safety guards on highway sanders/salters and for safety guards on shop tools and equipment to meet occupational safety standards
 
Last edited:
[MENTION=2188]Malcolm[/MENTION]- Thanks, it looks familiar like I have seen it somewhere in past years. I looked through alot of metal but couldn't find that design. I have a call into a metal distributor too.
I would probably buy a sheet and use for other applications if I just find it lol.
 

Members online

Forum statistics

Threads
278,315
Messages
3,554,104
Members
248,016
Latest member
Advally Service

Trending content

Back
Top