
This is a how-to for replacing an exploded/broken rear window on a 2005 T4R. I think 2003-2008 are the same but YMMV.
If you find inaccuracies, please let me know and I will make the correction.
WARNING: THERE ARE ZILLIONS OF SMALL SLIVERS, SHARDS AND PIECES OF GLASS EVERYWHERE. DO NOT PROCEED WITHOUT SAFETY GLASSES AND THE APPROPRIATE HAND PROTECTION. I learned the hard way and bled at least three times during this project. You do NOT want to get any of this in your eyes as that would mean a guaranteed trip to the ER.
This is a easy-medium DIY, about a 4 on a scale of 1 to 10 where 1 is checking the air in your tires and a 10 is rebuilding your engine. It should take a competent DIYer about 2 hours to complete this repair.
Why am I doing this? My window exploded and vaporized itself one cold morning. I think the defroster had just turned off but it was on to clear the mirrors. There was little to no snow/ice on the rear window. Then BOOM, window vaporized. A sad state of affairs.
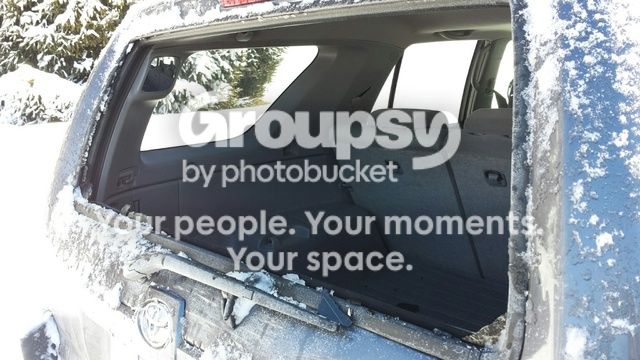
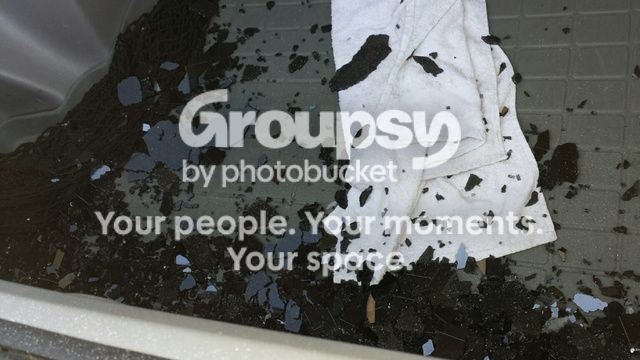
This is how I went about fixing it.
Here are the tools I used.
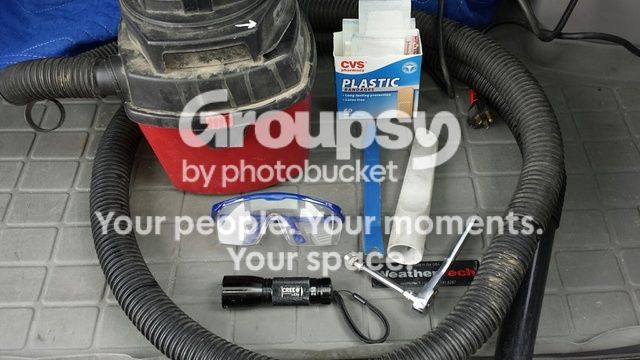
First I cleaned up the mess. This meant vacuuming up the glass from the weathertech mat and from the carpet, from all the plastic trim in the back (amazing where it goes), in the rubber seals, and also picking the glass out of the weather seal around the door where the glass fit before it broke. I used the shop-vac to suck the glass up as I picked it out of the seal.
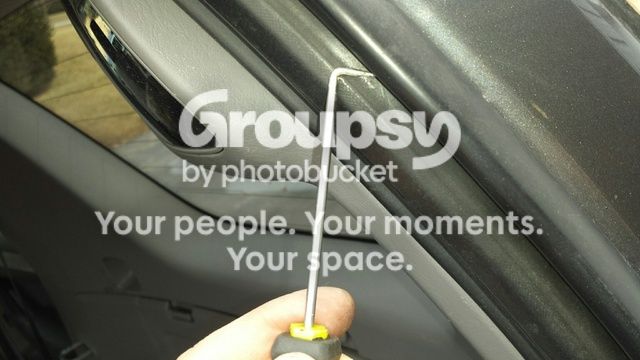
I removed the window seal and cut a piece of sheet plastic to keep the weather out. I replaced the seal and used some packing tape to pinch the plastic in place. Worked fine for a couple of days until the new glass arrived. Keep in mind that the vehicle is NOT SECURE with a sheet plastic window in the back so don’t leave your gold bullion and jewelry in the car until you get the window fixed.
Once all the cleanup was done, I ordered the glass from an eBay seller. $140 shipped to my door. It looks like there are several sellers out there for the $135-145ish price range right now. Pick your poison.
I then went after the shards of glass in the door. Tons of it falls into the bottom of the door, into the raise/lower mechanism, and hangs up in the door frame. So you need to carefully remove the plastic door card to get to the inside of the door. To do this:
Remove the little cover plug and remove the 10mm bolt that holds the door pull strap to the door frame.
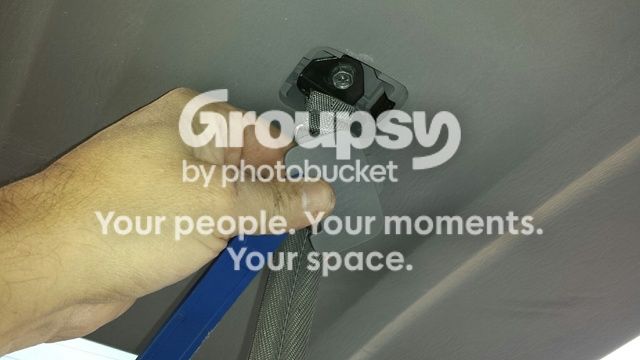
Pop the plastic door pins out with a trim tool. Then carefully pull the bottom edge of the card out and push it upward to remove it. Keep in mind there is a seal on the top edge of the door card that hooks into the top edge of the tailgate that you do not want to damage. BE SURE YOU’VE CLEANED THE GLASS OFF THE TOP EDGE OF THE DOOR CARD AND DOWN IN THE SEAL or you’ll get a face full of glass shards.
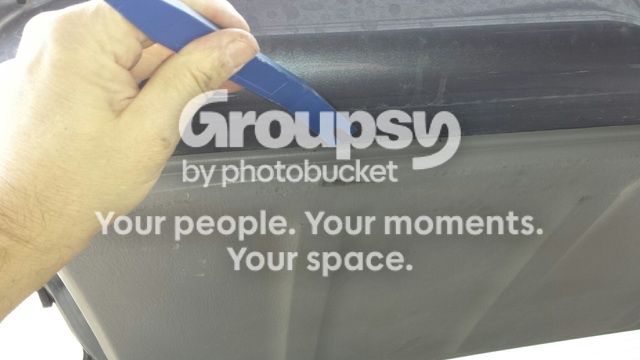
Once you have the door card off, carefully remove the sealing plastic from the door frame. Preserve the bead of adhesive stuck to the plastic so you can re-stick it later.
Remove the sheet metal screws that hold the controller box panel in place so you can get behind it. The control box is the little black 6x6 black box on the driver’s side with all the wires that’s attached to a piece of black stamped steel. The screws you remove hold the black panel to the door (not the box to the panel)
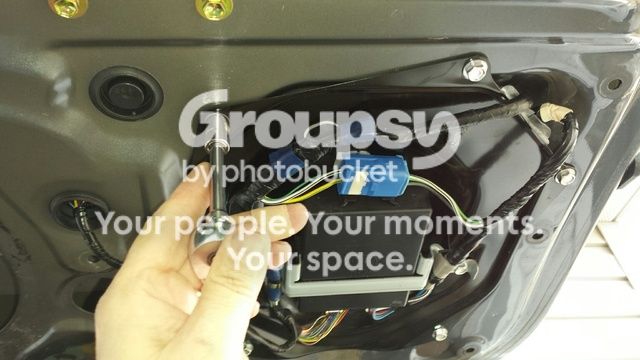
Remove the rubber plug for the access hole. Now you can get to the innards of the door.
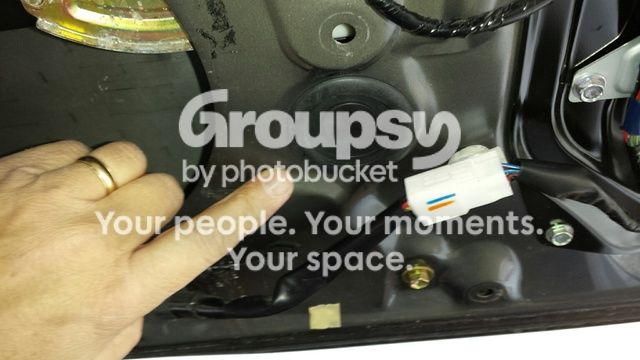
Hopefully the window was all the way up when it broke. If so, the lift mechanism should be out of the way. If so take your shop-vac and carefully work around the bottom edge of the door to remove all the broken glass. It may take a while because there are a couple of places that are hard to reach. Use the flashlight, the shop vac and the trim tool to poke around and vacuum up the glass from inside the door. I drove around a little and all the shards seemed to bounce around then settle in the back edge of the door where I could get at them. A pain, yes. But worth it (no sound like ball bearings rolling around the back of the car later.)
Close the door but do not latch it.
So now you have to remove what remains of the glass from the mounts. Get in the driver’s seat, look in the rear-view mirror and look for the mechanism in the door. Carefully (do NOT engage the auto-up or auto-down feature) move the mechanism until the BOLTS ON THE DRIVER’S SIDE MOUNTS LINE UP WITH THE ACCESS PORT from which you removed the little rubber plug. It might take a little coaxing or a couple of tries.
Once you have the mounts lined up, use a 10mm socket to break loose each of the 4 the mounting bolts and remove them. Be careful! They are held in with loc-tite so it takes a bit of force to get them to move. Best thing I found was to reach in with my other hand and hold the mount to keep it from twisting on the track. You do NOT want to be replacing the window regulator too because you break off one of the mounts or tracks.
You will find the passenger side bolts are easy to access. No problem there. The rightmost driver’s side bolt is accessible through the access port.
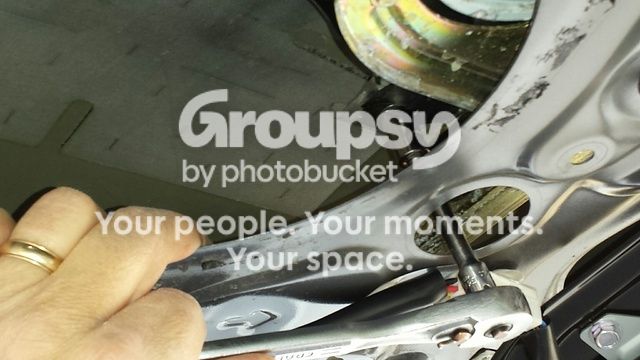
The hardest bolt to reach is the one behind the controller box panel. But if you gently move the black metal panel that the control box is attached to out of the way, you should be able to reach it with a shortie socket or box-end wrench.
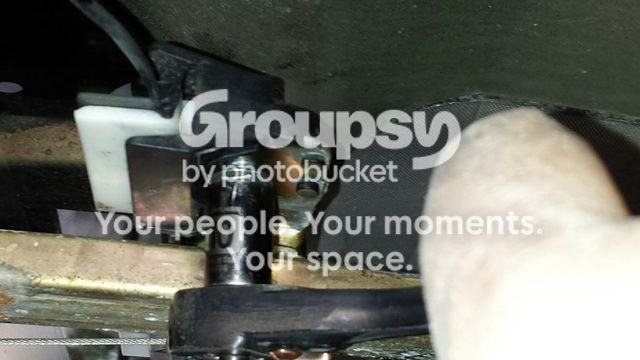
Once you break all 4 mounting bolts loose, they will come out easily. Carefully remove little stub of window glass from each mount.
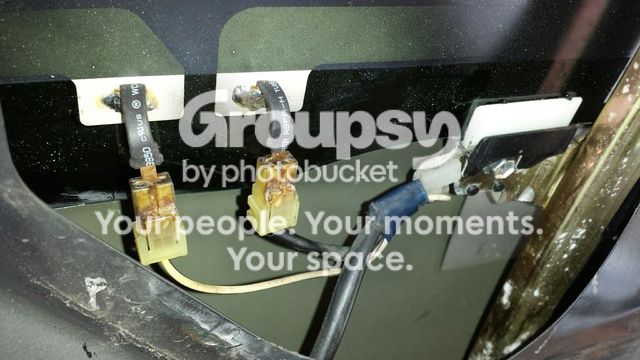
Lastly, remove the reason for all this carnage – the electrical connections for the defroster should be hanging from the passenger side mount. They’re simple bayonet connectors. Remove what’s left of the glass from the connectors. Wear your gloves as they may be stubborn and there is glass involved.
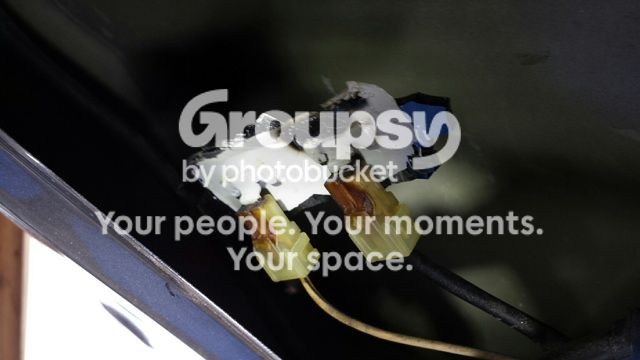
Once everything is cleaned up (there’s more glass in the door, vacuum it out), you are ready to install the new glass.
Note: Before proceeding, you might want to put some protective tape on the driver’s side edge of the door opening to protect your paint when the glass is inserted.
C-A-R-E-F-U-L-L-Y N-O-W
Make sure you have on your Safety glasses and gloves.
Close but do not latch the door.
Remove the plastic and the door seal that you installed to keep the weather out. Make sure there is nothing in the door opening other than the outer seal on the lower door frame by the wiper.
Insert the glass into the opening from the outside. PUT THE BOTTOM RIGHT PASSENGER SIDE IN FIRST. Then angle the glass to about 25 degrees down on the passenger side. Slide the glass down into the door. Then carefully slide the driver’s side into the opening. Once you have the Driver’s side in you can straighten the glass and settle the glass into the mounts in the lift mechanism.
It is very helpful to have someone sitting inside to car to be sure you don’t miss the mounts in the lift. What you’ll find is that the glass **just** fits into the opening when you angle it properly and the lift (if adjusted as recommended before) will be in the proper spot to receive the mounts for the new glass once you straighten it out.
Do not drop the glass down into the door. You will break it.
Do not force the glass into the opening. It will fit if you do it right. Otherwise, you will break it.
Reinstall the 4 10mm mounting bolts. Put a drop of lock-tite on the tip of the threads and start them into the mounts for the new glass. I don’t know the torque settings but you DO NOT HAVE TO KILL THEM to get them to properly hold the glass. That’s why you’re using lock-tite. Just reasonably “snug” should work fine.
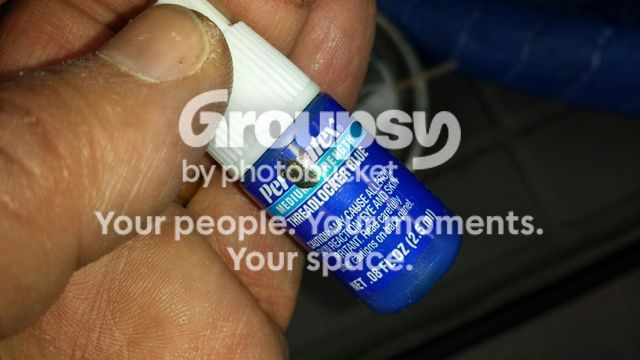
Replace the 10mm sheet metal screws for the Control box panel. If you removed the panel, be sure to get the triangular rubber grommet at 1 o’clock into the slot properly.
Attach the defroster leads if you want. Note: I think my leads were attached to the glass upside-down. There seemed to be enough slack so I hooked them up anyway. Have to live on the edge sometimes I guess.
Replace the protective plastic. Clean the mounting surface with a little alcohol and you can reuse the original bead of sticky black stuff.
Replace the door card. Hook the card over the top edge of the door and press down. Then pop the pins into their respective holes with a blow with your open hand. Again, you don’t have to kill it, they will pop in with a little force.
Replace the door pull. 10mm bolt/screw. Replace the plastic plug for it.
Replace the seal around the main part of the door. Insert the left and right bottom “tails” first, then work from the top center around the window frame until you get the seal settled into the door.
Check you work.
Test the window by CAREFULLY using the up-down switch on the dash. Again, do not engage the auto-up or auto-down feature until you’re CERTAIN that the window moves freely all the way up and down in the track.
To reset the auto-up and auto-down, lower the window all the way. Then press and hold the up button until the window goes all the way up, stops, then hold for three more seconds. The auto-up/down feature will then be set.
Sorry you had to suffer through all this but hopefully you’ll be able to enjoy your new window for many years to come! Ta-da

P.S. You might want to avoid using the defroster, Har.
If you find inaccuracies, please let me know and I will make the correction.
WARNING: THERE ARE ZILLIONS OF SMALL SLIVERS, SHARDS AND PIECES OF GLASS EVERYWHERE. DO NOT PROCEED WITHOUT SAFETY GLASSES AND THE APPROPRIATE HAND PROTECTION. I learned the hard way and bled at least three times during this project. You do NOT want to get any of this in your eyes as that would mean a guaranteed trip to the ER.
This is a easy-medium DIY, about a 4 on a scale of 1 to 10 where 1 is checking the air in your tires and a 10 is rebuilding your engine. It should take a competent DIYer about 2 hours to complete this repair.
Why am I doing this? My window exploded and vaporized itself one cold morning. I think the defroster had just turned off but it was on to clear the mirrors. There was little to no snow/ice on the rear window. Then BOOM, window vaporized. A sad state of affairs.


This is how I went about fixing it.
Here are the tools I used.

First I cleaned up the mess. This meant vacuuming up the glass from the weathertech mat and from the carpet, from all the plastic trim in the back (amazing where it goes), in the rubber seals, and also picking the glass out of the weather seal around the door where the glass fit before it broke. I used the shop-vac to suck the glass up as I picked it out of the seal.

I removed the window seal and cut a piece of sheet plastic to keep the weather out. I replaced the seal and used some packing tape to pinch the plastic in place. Worked fine for a couple of days until the new glass arrived. Keep in mind that the vehicle is NOT SECURE with a sheet plastic window in the back so don’t leave your gold bullion and jewelry in the car until you get the window fixed.
Once all the cleanup was done, I ordered the glass from an eBay seller. $140 shipped to my door. It looks like there are several sellers out there for the $135-145ish price range right now. Pick your poison.
I then went after the shards of glass in the door. Tons of it falls into the bottom of the door, into the raise/lower mechanism, and hangs up in the door frame. So you need to carefully remove the plastic door card to get to the inside of the door. To do this:
Remove the little cover plug and remove the 10mm bolt that holds the door pull strap to the door frame.

Pop the plastic door pins out with a trim tool. Then carefully pull the bottom edge of the card out and push it upward to remove it. Keep in mind there is a seal on the top edge of the door card that hooks into the top edge of the tailgate that you do not want to damage. BE SURE YOU’VE CLEANED THE GLASS OFF THE TOP EDGE OF THE DOOR CARD AND DOWN IN THE SEAL or you’ll get a face full of glass shards.

Once you have the door card off, carefully remove the sealing plastic from the door frame. Preserve the bead of adhesive stuck to the plastic so you can re-stick it later.
Remove the sheet metal screws that hold the controller box panel in place so you can get behind it. The control box is the little black 6x6 black box on the driver’s side with all the wires that’s attached to a piece of black stamped steel. The screws you remove hold the black panel to the door (not the box to the panel)

Remove the rubber plug for the access hole. Now you can get to the innards of the door.

Hopefully the window was all the way up when it broke. If so, the lift mechanism should be out of the way. If so take your shop-vac and carefully work around the bottom edge of the door to remove all the broken glass. It may take a while because there are a couple of places that are hard to reach. Use the flashlight, the shop vac and the trim tool to poke around and vacuum up the glass from inside the door. I drove around a little and all the shards seemed to bounce around then settle in the back edge of the door where I could get at them. A pain, yes. But worth it (no sound like ball bearings rolling around the back of the car later.)
Close the door but do not latch it.
So now you have to remove what remains of the glass from the mounts. Get in the driver’s seat, look in the rear-view mirror and look for the mechanism in the door. Carefully (do NOT engage the auto-up or auto-down feature) move the mechanism until the BOLTS ON THE DRIVER’S SIDE MOUNTS LINE UP WITH THE ACCESS PORT from which you removed the little rubber plug. It might take a little coaxing or a couple of tries.
Once you have the mounts lined up, use a 10mm socket to break loose each of the 4 the mounting bolts and remove them. Be careful! They are held in with loc-tite so it takes a bit of force to get them to move. Best thing I found was to reach in with my other hand and hold the mount to keep it from twisting on the track. You do NOT want to be replacing the window regulator too because you break off one of the mounts or tracks.
You will find the passenger side bolts are easy to access. No problem there. The rightmost driver’s side bolt is accessible through the access port.

The hardest bolt to reach is the one behind the controller box panel. But if you gently move the black metal panel that the control box is attached to out of the way, you should be able to reach it with a shortie socket or box-end wrench.

Once you break all 4 mounting bolts loose, they will come out easily. Carefully remove little stub of window glass from each mount.
Lastly, remove the reason for all this carnage – the electrical connections for the defroster should be hanging from the passenger side mount. They’re simple bayonet connectors. Remove what’s left of the glass from the connectors. Wear your gloves as they may be stubborn and there is glass involved.

Once everything is cleaned up (there’s more glass in the door, vacuum it out), you are ready to install the new glass.
Note: Before proceeding, you might want to put some protective tape on the driver’s side edge of the door opening to protect your paint when the glass is inserted.
C-A-R-E-F-U-L-L-Y N-O-W
Make sure you have on your Safety glasses and gloves.
Close but do not latch the door.
Remove the plastic and the door seal that you installed to keep the weather out. Make sure there is nothing in the door opening other than the outer seal on the lower door frame by the wiper.
Insert the glass into the opening from the outside. PUT THE BOTTOM RIGHT PASSENGER SIDE IN FIRST. Then angle the glass to about 25 degrees down on the passenger side. Slide the glass down into the door. Then carefully slide the driver’s side into the opening. Once you have the Driver’s side in you can straighten the glass and settle the glass into the mounts in the lift mechanism.
It is very helpful to have someone sitting inside to car to be sure you don’t miss the mounts in the lift. What you’ll find is that the glass **just** fits into the opening when you angle it properly and the lift (if adjusted as recommended before) will be in the proper spot to receive the mounts for the new glass once you straighten it out.
Do not drop the glass down into the door. You will break it.
Do not force the glass into the opening. It will fit if you do it right. Otherwise, you will break it.
Reinstall the 4 10mm mounting bolts. Put a drop of lock-tite on the tip of the threads and start them into the mounts for the new glass. I don’t know the torque settings but you DO NOT HAVE TO KILL THEM to get them to properly hold the glass. That’s why you’re using lock-tite. Just reasonably “snug” should work fine.

Replace the 10mm sheet metal screws for the Control box panel. If you removed the panel, be sure to get the triangular rubber grommet at 1 o’clock into the slot properly.
Attach the defroster leads if you want. Note: I think my leads were attached to the glass upside-down. There seemed to be enough slack so I hooked them up anyway. Have to live on the edge sometimes I guess.

Replace the protective plastic. Clean the mounting surface with a little alcohol and you can reuse the original bead of sticky black stuff.
Replace the door card. Hook the card over the top edge of the door and press down. Then pop the pins into their respective holes with a blow with your open hand. Again, you don’t have to kill it, they will pop in with a little force.
Replace the door pull. 10mm bolt/screw. Replace the plastic plug for it.
Replace the seal around the main part of the door. Insert the left and right bottom “tails” first, then work from the top center around the window frame until you get the seal settled into the door.
Check you work.
Test the window by CAREFULLY using the up-down switch on the dash. Again, do not engage the auto-up or auto-down feature until you’re CERTAIN that the window moves freely all the way up and down in the track.
To reset the auto-up and auto-down, lower the window all the way. Then press and hold the up button until the window goes all the way up, stops, then hold for three more seconds. The auto-up/down feature will then be set.
Sorry you had to suffer through all this but hopefully you’ll be able to enjoy your new window for many years to come! Ta-da

P.S. You might want to avoid using the defroster, Har.
Last edited:


