

Agent_Outside
New member
After upgrading from a Prinsu rack to the SSO full-length rack I started on working on my camping light setup.

The side rails on the rack are pre cut and drilled for Baja S2 flush mount lights and Rigid 98001 flush mounts lights. I personally don't see the value in paying $500-$600 for a top of the line light for this particular application. After seeing them listed as interchangeable with Rigid 98001 lights I opted to go with Aurora LED ALO-EL-2-E13T flush mounted scene lights. They are a compact light with 20 watt, 900 lumen, 120 degree beam pattern output per housing using CREE LEDs, plus they're IP69 waterproof and very affordable, especially buying via group purchase [MENTION=144378]diodia[/MENTION] setup. The harnesses are relatively inexpensive so I bought them not knowing what in particular I was going in to use from them but I planned to cannibalize them.

They are not, in fact, a direct replacement for the Rigids, the bolt pattern was slightly narrower so they won't be a direct bolt-on for the SSO rack. I used a ziptie to hold them up in place so I could plan and visualize my wiring and start taking measurements.

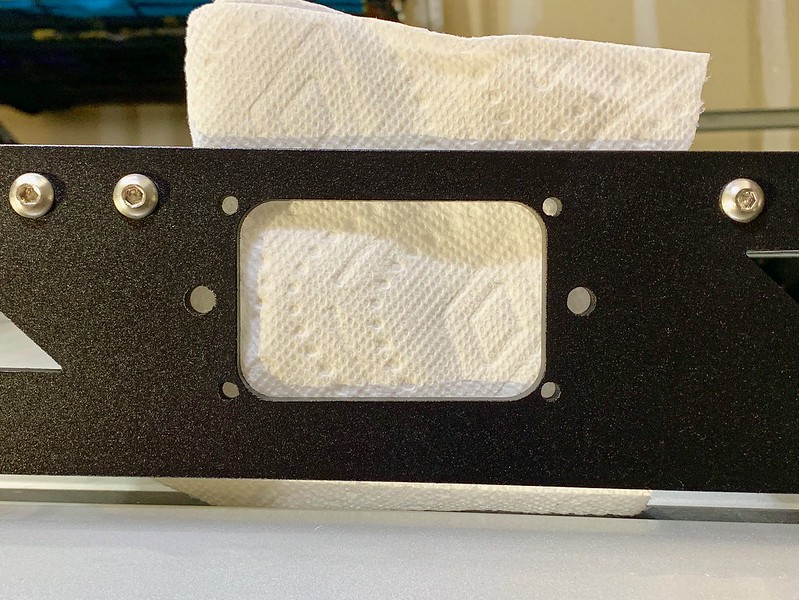
Once I got my wiring planned out I worked on fitting the lights. I used a file and slotted the mounting holes on the rack inwards to fit the new lights and then painted the inside of the slots. Before and after, the paint was freshly applied and still wet in the after picture.

The lights mounted.

I feel like most roof rack light setups I see are messy and covered in zip ties, I'm all about details so I made sure to really focus on making this as clean and hidden as possible. When the harness was done this was my mounting/routing.
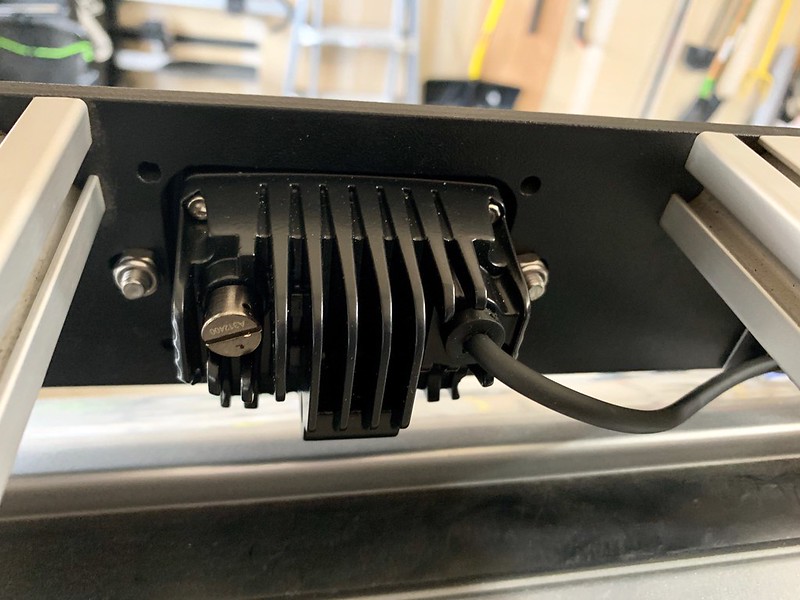


From the outside, there's no visible zip ties or wiring.

Wiring from the power distribution module under the hood comes up along the edge of the cowl and I heat shrank the whole run of harness and ran is almost invisibly right up to the side of the windshield molding and RTV'd it into place. I made sure to route the wiring with the ground wire on the outside to minimize the chance of something hitting the truck and exposing a power source. Realistically it doesn't matter, but why not.


Wiring completed and 100% functional. It came out really clean, everything is hidden behind the lower solid portion of the rack.


The main use for my roof rack is to carry an iKamper Skycamp rooftop tent. One of the goals with the electrical is to have a plug and play electrical box that will go inside the tent, one of its functions will be to control the left and right side lights independently from inside the tent. So right here at the front of the rack, I added waterproof connectors. Right here is where I can disconnect that connection, hook up the wiring from the box which will have a second switch wired in series controlling the side lights. Plug the box in, leave the main switch activated and then the switch in the tent takes over control of the system.
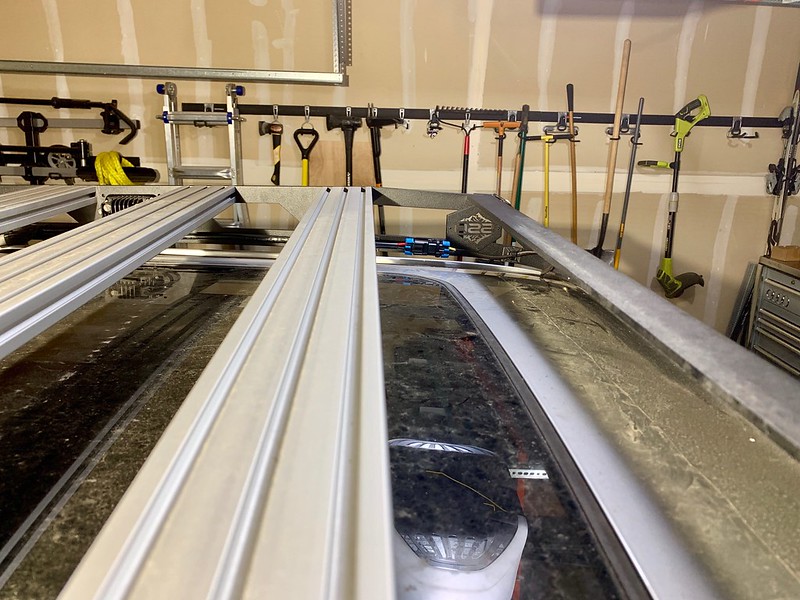
More of the completed wiring.


The interior has a switch for each side.

The lights work.
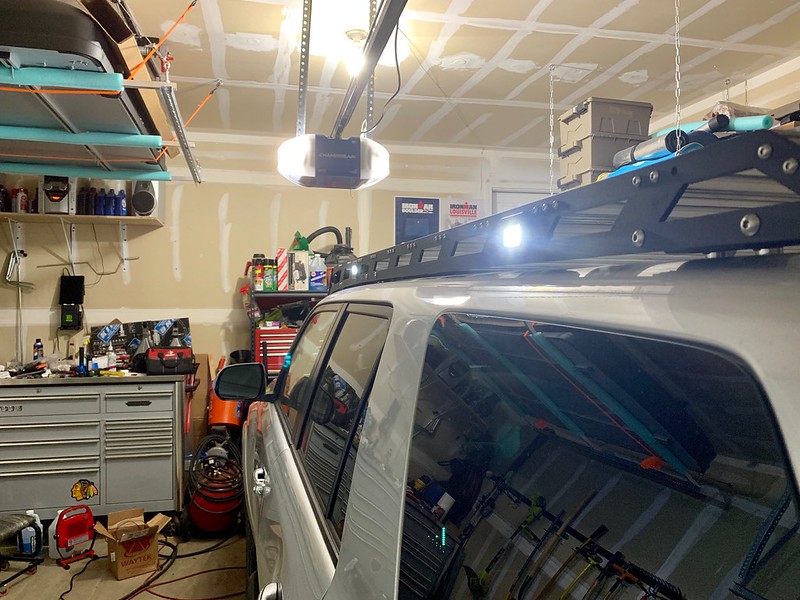
I did it all the exact same way for the opposite side. I'm really happy with the end result.
I'm keeping this about the roof rack wiring but If you're interested in the power distribution module and switch panel info it's in my build thread starting around post 130 or so. https://www.toyota-4runner.org/5th-gen-t4rs/259941-agent_outside-adventures-4runner-limited.html
The side rails on the rack are pre cut and drilled for Baja S2 flush mount lights and Rigid 98001 flush mounts lights. I personally don't see the value in paying $500-$600 for a top of the line light for this particular application. After seeing them listed as interchangeable with Rigid 98001 lights I opted to go with Aurora LED ALO-EL-2-E13T flush mounted scene lights. They are a compact light with 20 watt, 900 lumen, 120 degree beam pattern output per housing using CREE LEDs, plus they're IP69 waterproof and very affordable, especially buying via group purchase [MENTION=144378]diodia[/MENTION] setup. The harnesses are relatively inexpensive so I bought them not knowing what in particular I was going in to use from them but I planned to cannibalize them.
They are not, in fact, a direct replacement for the Rigids, the bolt pattern was slightly narrower so they won't be a direct bolt-on for the SSO rack. I used a ziptie to hold them up in place so I could plan and visualize my wiring and start taking measurements.
Once I got my wiring planned out I worked on fitting the lights. I used a file and slotted the mounting holes on the rack inwards to fit the new lights and then painted the inside of the slots. Before and after, the paint was freshly applied and still wet in the after picture.
The lights mounted.
I feel like most roof rack light setups I see are messy and covered in zip ties, I'm all about details so I made sure to really focus on making this as clean and hidden as possible. When the harness was done this was my mounting/routing.
From the outside, there's no visible zip ties or wiring.
Wiring from the power distribution module under the hood comes up along the edge of the cowl and I heat shrank the whole run of harness and ran is almost invisibly right up to the side of the windshield molding and RTV'd it into place. I made sure to route the wiring with the ground wire on the outside to minimize the chance of something hitting the truck and exposing a power source. Realistically it doesn't matter, but why not.
Wiring completed and 100% functional. It came out really clean, everything is hidden behind the lower solid portion of the rack.
The main use for my roof rack is to carry an iKamper Skycamp rooftop tent. One of the goals with the electrical is to have a plug and play electrical box that will go inside the tent, one of its functions will be to control the left and right side lights independently from inside the tent. So right here at the front of the rack, I added waterproof connectors. Right here is where I can disconnect that connection, hook up the wiring from the box which will have a second switch wired in series controlling the side lights. Plug the box in, leave the main switch activated and then the switch in the tent takes over control of the system.
More of the completed wiring.
The interior has a switch for each side.
The lights work.
I did it all the exact same way for the opposite side. I'm really happy with the end result.
I'm keeping this about the roof rack wiring but If you're interested in the power distribution module and switch panel info it's in my build thread starting around post 130 or so. https://www.toyota-4runner.org/5th-gen-t4rs/259941-agent_outside-adventures-4runner-limited.html


