Installing a lighted whip mount / dune safety flag on 2014

GiGi's 1996

New member
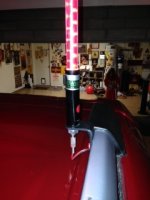
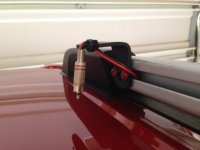
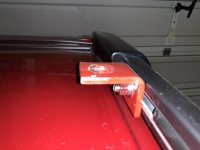
Ok, so I searched for some ideas of how to add a whip mount to the top of my 2014 5th generation SR5 and came up empty. This is my solution to a whip mount when a Gobi rack or any type of aftermarket roof rack is not in your plans.

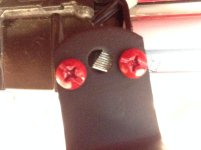
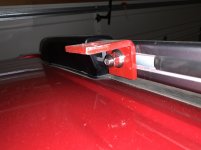
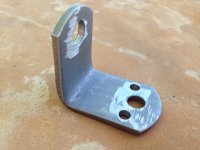
Started with a bracket we had and bent it to a 90 degree angle.
On the one side, drilled out the existing hole to a bigger diameter to accommodate the whip base. One the other side, drilled holes for the simple screws and rectangular nut back plates.
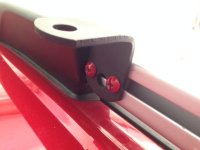
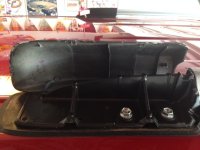
Then, took off the end cap of the roof rail. Nut plates slide in the channel of the roof rail perfect after bending up the edge a tiny bit. Screws I used are 3/4" long, any longer and they will be too long and not tighten.

Ok, that was step 1. That was the easy part! Step 2 is the routing of the wiring and installing the switches. Coming soon......

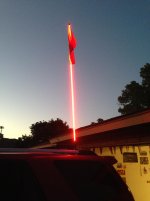
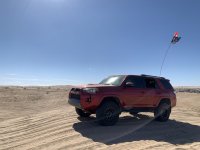
Sidenote: I don't necessarily dune in my 4Runner at the sand dunes (or don't plan to!), but a whip is required by law to drive your vehicle around camp, drive to the drags, or be on sand highway. That is mainly the reason for my whip on 4R. The lighted whip is bonus and just looks BAAA (our family code word for BAD A$$ when we can't say it in front of the kids.) Love love love it!
 

Attachments

  • photo 1.JPG
    photo 1.JPG
    121.7 KB · Views: 4,170
  • photo 2.jpg
    photo 2.jpg
    51.8 KB · Views: 3,996
  • photo 3.jpg
    photo 3.jpg
    113.7 KB · Views: 3,882
  • photo 4.jpg
    photo 4.jpg
    101.5 KB · Views: 3,729
  • photo 5.JPG
    photo 5.JPG
    82.3 KB · Views: 3,898
Register to hide this ad
Next: The wiring.
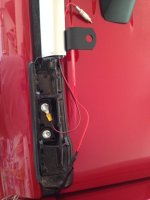
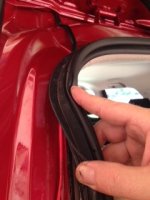
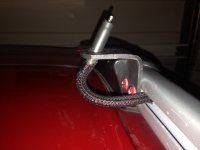
Pics show a top view of the RCA plug routed in the channel of the roof rail, grounded to the roof rail bolt and power (red wire) on it's way down to be hidden behind molding seal of rear hatch. Then.....a lot of steps skipped, but to be covered in next post.....the wiring and switch work. Finally, my lighted whip! Ready to go.
Truth: Wiring needs to be cleaned up and secured for long term. We got the whip to work, but ran out of daylight.:whistle:
 

Attachments

  • photo 1.jpg
    photo 1.jpg
    100.5 KB · Views: 3,998
  • photo 2.jpg
    photo 2.jpg
    95.2 KB · Views: 3,614
  • photo 3.JPG
    photo 3.JPG
    42.7 KB · Views: 3,545
  • photo 5.JPG
    photo 5.JPG
    40 KB · Views: 3,596
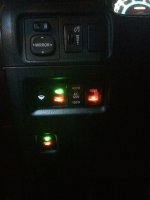
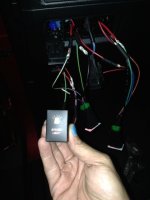
My whip is controlled by the "Strobe Light" switch. It should say "whip light" but that was not an option when I ordered switches.
Wired so the whip can be turned on at any time, no key or ignition on.
 

Attachments

  • IMG_2894.jpg
    IMG_2894.jpg
    106.7 KB · Views: 3,675
I see the possibility of a growing trend with your idea on the lighted whip install!


BTW > Thx for the kudos...glad you found something in my post that helped.
 
Last edited:
Ok. Backing up a few steps to cover a very important detail.

How to get the end caps off the roof rail. I received help here on the forum the first time I did it and advice saved me from being scared to break and/or scratch my new truck!

I now consider myself an expert at this ... :wink2:...since I have taken my end caps off multiple times now. This is what I found works for me the best:

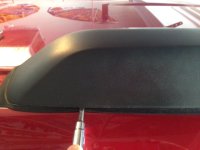
I just use a flathead screwdriver, the finer (skinnier) the head the better.
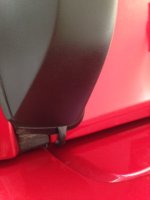
I gently push it under the cap and more on the rubber moulding at the position you see in picture. Then just lift up gently and the cap will pop up where the tab is on the one side.

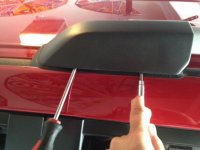
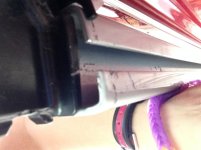
Then I get another screwdriver (the one I happen to find first was a phillips head) and place it where the flat head screwdriver was. Just to hold the place. If you don't do this, when you work on the other tab, this tab pops back into place.
Then use the flat head to do the same on the other end. Notice the positioning of the screwdriver because this is right where the tab is.

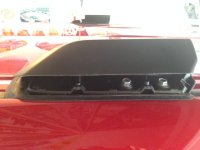
My caps are Plastidipped. It is holding up pretty well. Considering I run my 4R through automatic carwash regularly and have messed with caps so much. If you're careful, you will not mess up plastidip edge like I did (as you can see in picture) and the rubber moulding will hide that edge good too.

Please include any better tools or experiences you have had. :)
 

Attachments

  • photo 1.JPG
    photo 1.JPG
    94.5 KB · Views: 3,665
  • photo 2.JPG
    photo 2.JPG
    99.7 KB · Views: 3,753
  • photo 3.JPG
    photo 3.JPG
    92.8 KB · Views: 3,670
  • photo 4.JPG
    photo 4.JPG
    105 KB · Views: 3,636
Another important detail:

Securely zip tie your plug away from truck when not hooked up.

1. You will not blow a fuse if you accidentally hit the switch on.
2. The plug will not scratch and mess up your paint on the roof.

Still need to put a nice finishing wire loom on this exposed wire...........
 

Attachments

  • photo.JPG
    photo.JPG
    89.3 KB · Views: 3,843
I may make a mount like that to mount a cb antenna. I just am not sure there will be enough of a metal base to make it work properly. I was thinking I could remove one of the roof rack mount bolts and run the wire through there. I never use the roof rack for anything else.
 
Nice, but why not use a molex connector or plug with protection?

My whip has the RCA plug. Looking into make it more of a quick disconnect.....just takes $ for the quick disconnect and redoing the plug. It would be nice to not have to get 2 wrenches out to secure the whip.
 
Came across your thread and really interested in the set-up. Is there anything you would change after having it for some time? I'm in Phoenix and saw your from Tempe so I get stuck somewhere I'll just visit you haha.
 
Ok, so I searched for some ideas of how to add a whip mount to the top of my 2014 5th generation SR5 and came up empty. This is my solution to a whip mount when a Gobi rack or any type of aftermarket roof rack is not in your plans.

Started with a bracket we had and bent it to a 90 degree angle.
On the one side, drilled out the existing hole to a bigger diameter to accommodate the whip base. One the other side, drilled holes for the simple screws and rectangular nut back plates.
Then, took off the end cap of the roof rail. Nut plates slide in the channel of the roof rail perfect after bending up the edge a tiny bit. Screws I used are 3/4" long, any longer and they will be too long and not tighten.

Ok, that was step 1. That was the easy part! Step 2 is the routing of the wiring and installing the switches. Coming soon......

Sidenote: I don't necessarily dune in my 4Runner at the sand dunes (or don't plan to!), but a whip is required by law to drive your vehicle around camp, drive to the drags, or be on sand highway. That is mainly the reason for my whip on 4R. The lighted whip is bonus and just looks BAAA (our family code word for BAD A$$ when we can't say it in front of the kids.) Love love love it!

Would you be willing to make another one to sell to me?
 
Would you be willing to make another one to sell to me?

I would if I could. We do not have the material or tools anymore to do this job. It was so long ago, I had forgotten this thread! This was on my '14 SR5, I have a '16 Trail now. All we do now is attach a whip to a receiver hitch when at the dunes.
 
I would if I could. We do not have the material or tools anymore to do this job. It was so long ago, I had forgotten this thread! This was on my '14 SR5, I have a '16 Trail now. All we do now is attach a whip to a receiver hitch when at the dunes.
Fair enough. Thanks anyway! Haha, I definitely pulled this one back from the dead.
 
Fair enough. Thanks anyway! Haha, I definitely pulled this one back from the dead.

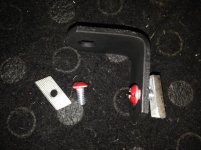
Okay, so I got to thinking and decided to try a new whip mount for our latest trip to Glamis. I found this angle bracket on the shelf at Lowe's.

Here is the link: https://www.lowes.com/pd/Superstrut-1-2-in-Angled-Strut-Bracket/3534516

It worked perfectly and a piece of cake to install and cheap. I used a carriage bolt, washer, lock washer and nut. I took the carriage bolt idea from another thread. The top of the carriage bolt fits just right in the channel of the roof rails. I think I used a 3/8" bolt. Also, spray-painted with primer and Rustoleum Regal Red (a very close match to Barcelona Red).

Not a fancy wired whip with light, but got the job done and put the whip at the highest point so we were very noticeable.
 

Attachments

  • IMG_6124.jpg
    IMG_6124.jpg
    117.6 KB · Views: 1,006
  • IMG_6125.jpg
    IMG_6125.jpg
    108 KB · Views: 961
  • IMG_5993.jpg
    IMG_5993.jpg
    126.2 KB · Views: 1,946
Okay, so I got to thinking and decided to try a new whip mount for our latest trip to Glamis. I found this angle bracket on the shelf at Lowe's.

Here is the link: https://www.lowes.com/pd/Superstrut-1-2-in-Angled-Strut-Bracket/3534516

It worked perfectly and a piece of cake to install and cheap. I used a carriage bolt, washer, lock washer and nut. I took the carriage bolt idea from another thread. The top of the carriage bolt fits just right in the channel of the roof rails. I think I used a 3/8" bolt. Also, spray-painted with primer and Rustoleum Regal Red (a very close match to Barcelona Red).

Not a fancy wired whip with light, but got the job done and put the whip at the highest point so we were very noticeable.


Thanks Christine, you are the real MVP!!! Made my day!
 

Members online

Forum statistics

Threads
278,312
Messages
3,554,085
Members
248,016
Latest member
Advally Service

Trending content

Back
Top