JerkyDrewster's 2001 4Runner Build V2

April 26, 2021

Finishing the Sound Deadening

Before the trip out to AZ, I wanted to finish up the last bit of sound deadening in the cab. The carpets were pretty dirty, but underneath didn't require too much cleaning. I did mostly the same as the cargo area, but used significantly less of the foam as I didn't want to buy anymore of it. Overall, I am very happy with the noise difference and now the music sounds SO much better! The main noise I hear now comes from the engine bay since I didn't add anything to the firewall.

Carpet before and after
]

That carpet looks great! Did you just use a regular carpet cleaner machine? This makes me want to pull mine and do the same. It doesn't look like too much work to pull the carpet.

Sound deadening looks good too!

July 16-19th, 2021

Shock Rebuild

Parts List:
- 4x FK COM 10T-F1 bearings
- 2x FK COM 12T-F1 bearings
- Some spiral internal retaining rings
- 4x Icon 2.5 remote resi shock service kit (IVD-252011)
- Gallon of Icon shock oil
- 700 lb/in 14" Icon coils (IVD-158508)

After putting around 35,000 miles on the shocks, I figured it was time to rebuild them. The oil in the rear was pretty brown and had a little metallic sheen to it, but nothing too bad. The actual rebuild is fairly straightforward, just replacing the old o-rings with the new ones. Hardest part was just keeping all the shims in the correct order after cleaning them. Everything else in the internals looked pretty good and the shafts had no sign of pitting either.

For the front coilovers, I decided to go up to a 700 lb/in spring based on the amount of weight I have in the truck. After a few months of driving, this was absolutely the wrong decision... The ride is super harsh and is not as enjoyable to drive anymore. I'm planning on going back to the stock 650 lb/in relatively soon.

Once everything was back together, I brought the shocks to a motorcycle shop to get 150 psi of Nitrogen into the reservoirs. Overall it was a pretty fun project!
]

Was that 35k hard miles or mostly street? Mine have probably 40k miles, but that is a lot of highway miles. Did you run into any issues doing the rebuild? Did the reservoirs complicate it at all?
 
That carpet looks great! Did you just use a regular carpet cleaner machine? This makes me want to pull mine and do the same. It doesn't look like too much work to pull the carpet.

Sound deadening looks good too!

Yea we have one of the Hoover carpet cleaners and it did a great job. I think I had to empty the container 3 times or so, and the water was absolutely disgusting. I could have probably got it even cleaner, but I was pretty happy with how it looked!

Was that 35k hard miles or mostly street? Mine have probably 40k miles, but that is a lot of highway miles. Did you run into any issues doing the rebuild? Did the reservoirs complicate it at all?

It was definitely mostly street and highway miles. There were some good trips in there, but the most abusive I was to the suspension was at KOH.

The rebuild was very straightforward and I think the reservoirs make it even easier since you don't have to set the height of the IFP in the main shaft. Basically just fill the shock body with oil, bleed the air out by cycling the resi, and you're good to go. I used some 1/4" all thread and an aluminum plate as a handle to help cycle the resi for bleeding that worked pretty well. I did not change out any of the seals in the tubes going to the resi. I could see those being more of a pain.
 
September, 2021

Re-gear and Air Locker

Parts List:
- Nitro front and rear gear package (GPTOY1-488)
- ARB Air Locker (RD132)
- Some cheap diff oil

The time has come to finally re-gear. I was tired of pressing the pedal to the floor and barely going anywhere. For the constant gear hunting on even the smallest of hills. I put in a quite a bit of research on which ratio I wanted, but finally ended up with 4.88:1. This seemed like the best given that this is mostly a daily driver, and I'm most likely going to stick with 33's. Even if I wanted to up to 35's these should still work pretty well and wouldn't lose too much power.

The next decision was to lock just the rear or also go with the front. I've honestly gone back and forth with this for the past few years and I just can't justify locking the front. With how I currently use this rig, if I end up on a trail where I need F&R lockers and a winch, I did something wrong. The rear locker should help me out a ton if I ever get to an obstacle that the skinny pedal just can't get me out of!

Front Diff
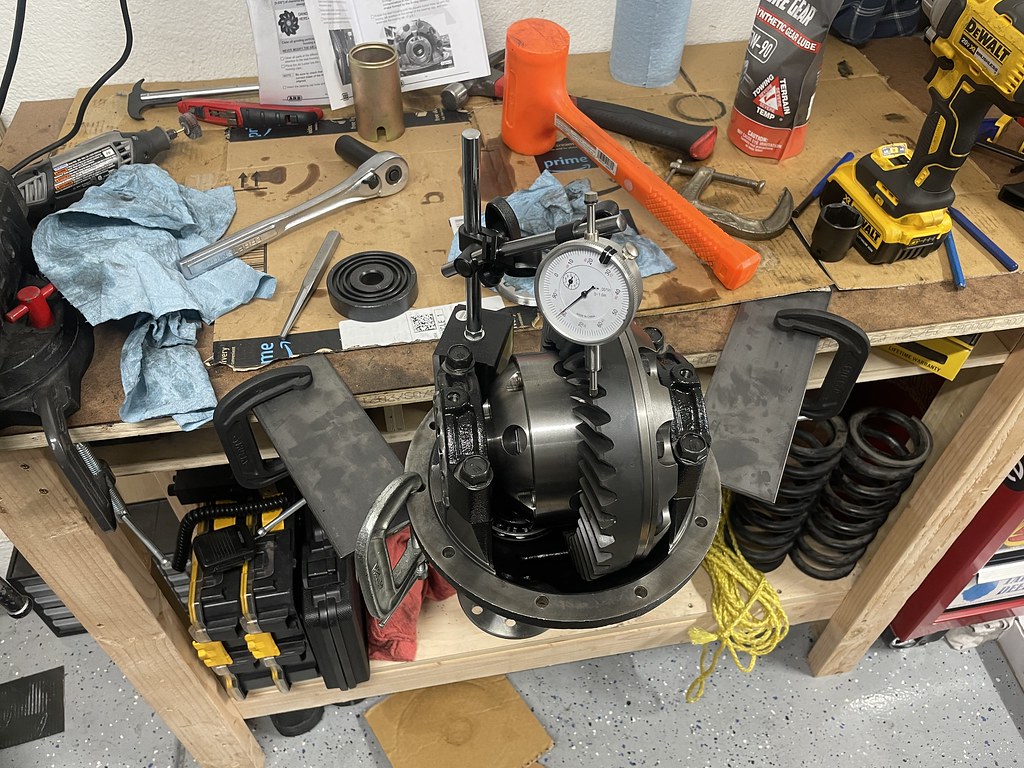
I wanted to start with the front so I could get over the hard part first. Pulling the diff was relatively straightforward, but I couldn't drain all of the fluid since the drain plug was seized. The deconstruction process was pretty easy and allowed me to do a deep clean of all of the parts. The only part that was a PITA was the drain plug. I tried welding a nut on, but couldn't get any penetration for some reason. I then took a 3/4" drill bit and bored a hole through the center. I was then able to cut a slot and use a chisel to back it out. The threads looked perfect, so I have absolutely no idea why it was stuck... The bearings and gears looked extremely good for how many miles were on them, which I guess makes sense due to it being the front.

Putting everything back together wasn't terrible, but it was very tedious. I had to pull the the assembly apart 5 or 6 times in order to check the pinion depth and the contact pattern. I also hoped for the best on ring gear backlash since I didn't receive any carrier bearing shims. Once I got a desirable pattern, I worked on the pinion preload. This took another 4 tries or so till I got an acceptable measurement. Once I was happy with the results, I started to put everything back together and mounted it back onto the frame.

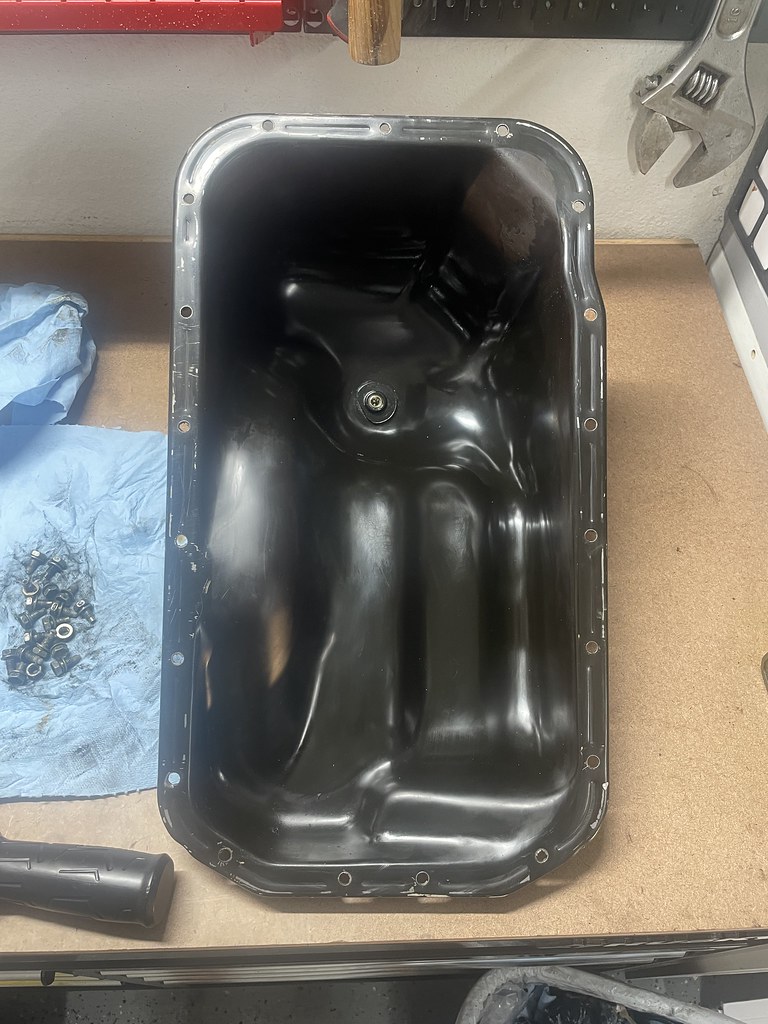
Before putting the diff back in, I decided to drop the oil pan and clean the gasket. It had been seeping for a couple years and figured this is the best time to do it. I cleaned off all the old gasket material and put some new RTV down. I somehow lost one of the bolts in the process, but so far it has been holding all of the oil.

Final measurements for the front are:
- Pinion Depth: .073"
- Pinion Preload Spacer: 2.194"
- Pinion Preload: ~13 in-lbf
- Ring-Side Carrier Spacer: .099"
- Pinion-Side Carrier Spacer: .089"

Rear Diff
A couple weeks later (last week) I tackled the rear. This one went so much smoother than the front minus the fact that Nitro sent me one of the wrong carrier bearings. Since I didn't want to be down, I decided to reuse the nicest looking one I took off. The installation was pretty straightforward again, but getting everything dialed in was quite tedious. The drive pattern took 6 times to get right and the pinion preload another 4 or so.

Once that was figured out, I just had to installed the sealing ring onto the end of the carrier and route the air line to the outside of the housing. From there, I coated the axle with some RTV and bolted the 3rd member back up. I routed the air line up the passenger side frame rail and followed the rear heater lines up the engine bay to meet with the air compressor.

Final measurements for the rear are:
- Pinion Depth: .075"
- Pinion Preload Spacer: 1.866"
- Pinion Preload: ~15 in-lbf
- Ring Gear Backlash: .006"

This was easily the most involved project I have done on any vehicle, and even though there were some challenging moments, I definitely had a blast doing it. As long as you take your time dialing everything in, anyone should be able to set up their own gears. I'm still in the break in period, but the truck finally feels normal when you step on the gas again. I can actually accelerate and I can't tell any noticeable difference in the noise coming from the front or rear diffs. So far I am very happy with the outcome!

Front diff
https://flic.kr/p/2mrArBT

https://flic.kr/p/2mrviM3

https://flic.kr/p/2mrAsee

https://flic.kr/p/2mrE4H6

https://flic.kr/p/2mrvjhB

https://flic.kr/p/2mrE4CB

Drive pattern
https://flic.kr/p/2mrArQJ

Coast pattern
https://flic.kr/p/2mrvj7g

https://flic.kr/p/2mrD1wh

Oil pan
https://flic.kr/p/2mrzkM1

https://flic.kr/p/2mrzkPL

Rear diff
https://flic.kr/p/2msKVLp

Checking backlash
https://flic.kr/p/2msPxcq

Drive pattern
https://flic.kr/p/2msEHQE

Coast pattern
https://flic.kr/p/2msKVw6

Before
https://flic.kr/p/2msNshG

After
https://flic.kr/p/2msNsid

The aftermath!
https://flic.kr/p/2msEHNW
 
Last edited:
October, 2021

Rock Lights

Parts List:
- Eagle Eye LEDs
- A bunch of wire and connectors

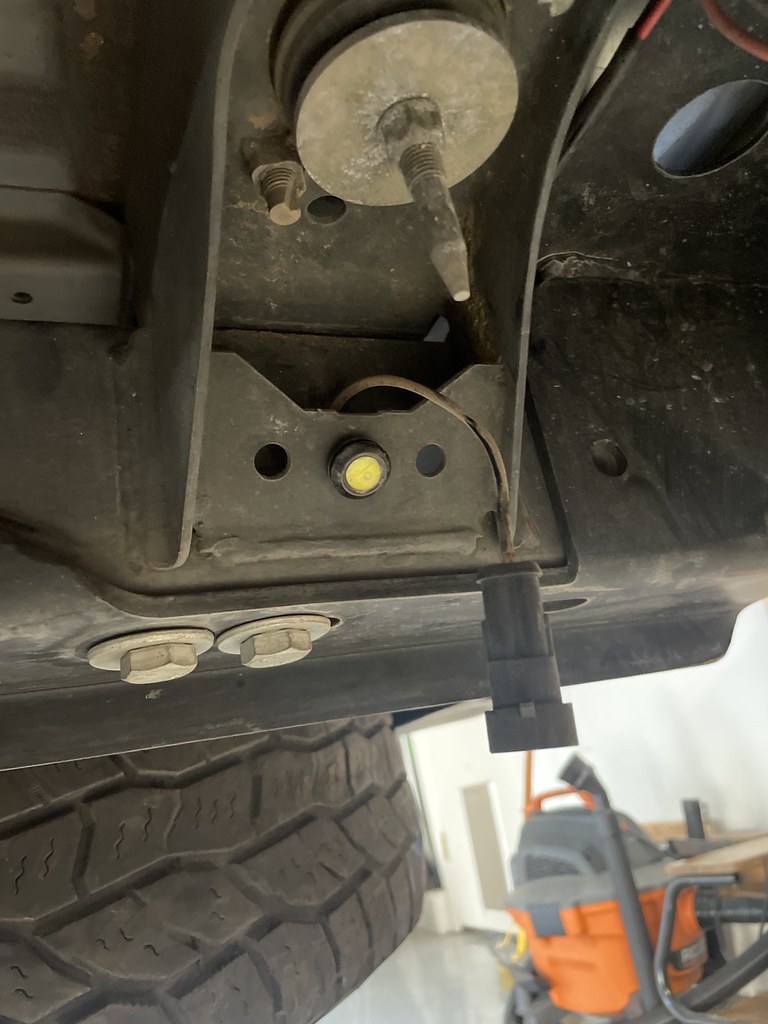
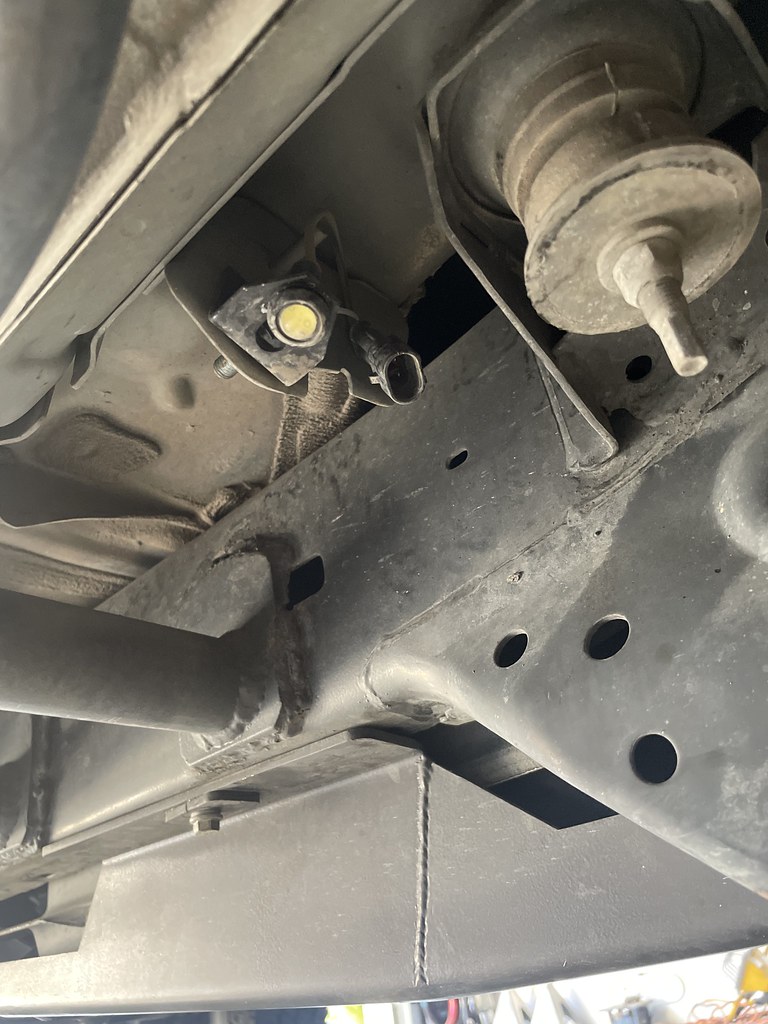
I've wanted rock lights for awhile, but never wanted to put the time into making the wiring harness. Finally just bit the bullet and went for it. I put 5 eagle eye LEDs on each side, 1 near each bumper and 3 above the sliders. Definitely an easy project, but super tedious. I am pretty happy with the end output, but will need to re-aim some of the lights.

https://flic.kr/p/2mZCe5u

https://flic.kr/p/2mZAxBN

https://flic.kr/p/2mZCe5V

https://flic.kr/p/2mZyUyd

https://flic.kr/p/2mZAxD1
 
Last edited:
....
 

Attachments

  • its-alive-gene-wilder.jpg
    its-alive-gene-wilder.jpg
    12.7 KB · Views: 206
October, 23 2021

Forestdale Road OHV

Went out to Markleeville to go snow camping and wheeling for a friend's birthday weekend. The trail was pretty laid back overall, but there were some harder sections due to the snow. I played around with the tire pressure for a bit and found 10-12 psi was perfect to get through those parts. The new locker definitely got its use too! The trail was around 23 miles from our campsite to Lower Sunset Lake and had a pretty cool transition from the snow to standard dirt roads. I'll definitely want to check this place out again when the snow melts.

Video of the top of the pass.

https://flic.kr/p/2mZQgaU

https://flic.kr/p/2mZTBuK

https://flic.kr/p/2mZTBpV

https://flic.kr/p/2mZQB2z
 
Last edited:
November 20, 2021

Strut Tower Reinforcement

Parts List:
- Eimkeith Strut Tower Reinforcements

I've had these parts for a couple of years now, and wanted to finally get them installed. I borrowed my friends tig welder, and after practicing with it for a few weeks, I decided to go to town. I didn't fill in the big holes since I was worried about blowing holes through the mount, but I am pretty happy with how this turned out! The hardest part was burning in the left side since I was doing it mostly blind. Not the best welds I've done, but it is definitely strong enough! I forgot how much I liked welding, and this definitely won't be the last welding project I do... :)

https://flic.kr/p/2mZCeF9

https://flic.kr/p/2mZyVdp

Welding the backside through the engine bay
https://flic.kr/p/2mZzdNB
 
Last edited:
hey, thanks for the order!

BTW, that second set of holes is set up for the Tacoma pattern - useful when running upper strut tops designed for that platform, so they are oriented correctly. :)

I can't see from your photos, but the curved slot in the rear is a weld slot also - since it is difficult to get to the rear edge of the plate.
 
hey, thanks for the order!

BTW, that second set of holes is set up for the Tacoma pattern - useful when running upper strut tops designed for that platform, so they are oriented correctly. :)

I can't see from your photos, but the curved slot in the rear is a weld slot also - since it is difficult to get to the rear edge of the plate.

Thanks for making great stuff! That's pretty cool about the curved slot. If I had a lower profile hood, I think I would have gone for it instead of the rear, but I couldn't get a good angle to see it.
 
this is all so well done! I'm jealous of your knowledge and attention to detail with everything. Just got myself a 2001 and as someone with no mechanical ability this was great to see.
 
this is all so well done! I'm jealous of your knowledge and attention to detail with everything. Just got myself a 2001 and as someone with no mechanical ability this was great to see.

Thanks for the kind words! I started out not knowing much and just learned as I went. This forum and others have a ton of useful information to get you going!
 
November & December, 2021

Hood Struts and New Fuse Block Bracket

Parts List:
- Spiker Engineering Hood Struts
- Modified Ripcord's Fuse Block Bracket

A couple of small projects I finished at the end of the year. The hood struts have been on my list of nice to have things, and saw that they went on sale! Ended up snagging them for a little bit of a discount with some other things that are waiting to be installed. Installing the struts was a breeze, just requiring a couple of rivets and putting the ball studs into the stock nutserts. It's definitely a minor thing, but it is super nice to not have to use the hood prop and have the hood lift another 6" or so.

I also replaced my plastic fuse block bracket with a modified one made from steel. I wanted to move the bus bar from the fender to the bracket, so needed to make a few changes to the design I originally got from Ripcord. I used Send Cut Send to make the bracket and thought it was super reasonable. I'll definitely be using them for any future projects that I have!

https://flic.kr/p/2mZAz1z

https://flic.kr/p/2mZyVYT

https://flic.kr/p/2mZCfd6

https://flic.kr/p/2mZAyHR

https://flic.kr/p/2mZtWnQ
 
January, 2022

35's and Firewall Tub!

Parts List:
- 315/75r16 Falken Wildpeak AT3W
- 2'x2' 20ga steel sheet
- 2x 4' L x 1/8" D steel rod
- Seam sealer
- 3M Rubber Undercoating
- Some sound deadening

Tools List:
- MIG Welder
- Sheet Metal Nibbler
- A bunch of cutting tools
- Angle grinder with cut-off wheels, grinding wheels, flap discs, and quick strip discs
- Sawzall
- A normal hammer
- A BFH
- Fireproof blanket
- A lot of hand tools. Way too many to count

Well...I finally decided to go for the big one. My tires were on their last leg and I had been tossing around the idea of 35's for a few months. I had been checking a bunch of tire dealers since everything was out of stock with many months of lead time. I was initially looking to get another set of the Cooper ST Maxx, but had been doing a lot of research into the Falken Wildpeak AT3Ws. I was definitely interested in have only 2-ply sidewalls since the Coopers could be a bit harsh on the road. With this still being my daily driver, I figured I could sacrifice a little off-road to help me during everyday driving. After weeks of looking, I finally found a set of Falkens in stock, so I pulled the trigger. They arrived in a few days and I got them mounted up at the end of December.

These tires are night and day compared to the ST Maxx. They are WAY more comfortable on road and resolved pretty much all of the drivability issues I have been having. Since I did put a 1" body lift on, I had a little bit of clearance, but I was not able to get into the driveway without rubbing a ton. Since this is my daily and a firewall tub will make it hard to drive, I had to plan for the right weekend. My goal was to finish the tub before King of the Hammers and not have to cancel the snowboarding trips I had planned.

This thread was a huge help in getting this project started and completed.

I started the project early afternoon on Friday, January 14th. I removed as much of the electronics that I could, took out the interior trim panels, and pulled the carpet back. I removed the coilovers as well as both bump stops to make sure I was getting all of the up-travel. Once I was confident everything was ready to go, I drew my first (of many) cut lines and drilled a few test holes. After that, I took the angle grinder and just went to town. My initial cuts were definitely too conservative and I ended up going back many times to take more out. The first side was slow, mostly from me re-installing the wheel to check the clearance at full lock. After removing what seemed like the entire fender firewall, I had full clearance! I pretty much repeated this process for the passenger side, but it was much quicker. I was more liberal with my cuts this time and had way fewer clearance checks.

At this point, I had 2 giant holes that needed to get filled. I was going to use the TIG welder, but after testing it on some pieces of scrap sheet metal, I learned that I am definitely not skilled enough to weld it. So instead, I borrowed a friend's MIG welder hoping it would be better. I haven't MIG welded since college, so the welds are absolutely not pretty, but should be plenty strong. I started by placing steel rods shaped to the tire's profile to add support to the sheet metal I was going to add. I then started cutting out various shapes of metal to fill the gaping holes. The nibbler is by far one of my favorite tools to use. It made cutting the sheet metal a breeze.

Overall, the welding wasn't too bad. I was fairly slow in getting the pieces burned in, but I thought it was decent for my first time in 5 or 6 years. Apparently I wasn't careful enough on the passenger's side and caught a piece of plastic on fire. This caused the passenger side cowl connector to melt and become unusable...I ended up getting a donor connector from pick n pull and had to re-pin the whole thing.

Minus the one incident, everything went back together fairly well, especially with some massaging from the BFH. There were only a couple pin holes I had to fill in, so I was pretty happy with that. I put some seam sealer on all of the joints to further prevent any water intrusion through my lovely welds, and then topped everything off with some rubber undercoating. I also put a bit of the seam sealer on the inside of the firewall and then covered that with some butyl rubber and closed cell foam to help reduce road noise.

Now that everything was back on, I did one last clearance check to make sure I didn't mess anything up. I have full clearance from lock to lock at full stuff! I do rub the frame, but I'm just going to deal with that. I will also need to relocate the washer fluid bottle which is on order now.

This project was super ambitious and freaked me out from the beginning. There were a few times when I wanted to throw in the towel, but kept pushing on. After nearly 4.5 days straight in the garage, I had finished the hardest project I have tackled so far. I'm happy I stuck with it and now I won't need to worry about shredding these tires from clearance issues. Onto the pictures!

33 vs. 35
https://flic.kr/p/2mZtXJC

35's mounted
https://flic.kr/p/2mZCgEK

https://flic.kr/p/2mZAzFn

Initial rubbing
https://flic.kr/p/2mZCgca

https://flic.kr/p/2mZAzEA

https://flic.kr/p/2mZAzDZ

https://flic.kr/p/2mZAzDJ

https://flic.kr/p/2mZzfdL

https://flic.kr/p/2mZAzCm

https://flic.kr/p/2mZAzBE

https://flic.kr/p/2mZtXgo

https://flic.kr/p/2mZtXfG

Time to repeat for the passenger side
https://flic.kr/p/2mZtXf6

https://flic.kr/p/2mZtXeu

Welding the support rods
https://flic.kr/p/2mZtXee

https://flic.kr/p/2mZAzyU

https://flic.kr/p/2mZtXdx

https://flic.kr/p/2mZCg4z

https://flic.kr/p/2mZzf8v

https://flic.kr/p/2mZAzx6
 
Last edited:
Nice updates! I have one of those plastic fuse block mounts from Ripcord that's been sitting in the garage for years. Maybe it's time to actually install it in place of the lexan one I made with some hand tools many years ago.

On your big 3 wiring did you remove the factory cable that goes from the alternator to the fuse block? It's a tan color cable. I believe it isn't needed when you do the big 3, and mine has some corrosion/melting on it. I think it's probably from the previous owner and some subs they had installed.


And the 35s and tubbing looks great. I never took welding in college so I'm signed up for a welding class here in a few weeks to see if I can start doing welding like that, or a panhard lift/drop.

Is the ride that much better with the Falkens vs the ST Maxx? I love the wear and performance of the ST Maxx. Almost 85k miles on mine and they still have 7/32 tread and never had a flat. But I do feel like they ride a bit harsh with the 3 ply super stuff sidewalls.
 
Nice updates! I have one of those plastic fuse block mounts from Ripcord that's been sitting in the garage for years. Maybe it's time to actually install it in place of the lexan one I made with some hand tools many years ago.

On your big 3 wiring did you remove the factory cable that goes from the alternator to the fuse block? It's a tan color cable. I believe it isn't needed when you do the big 3, and mine has some corrosion/melting on it. I think it's probably from the previous owner and some subs they had installed.

Thanks man! I left that one still connected mostly because it was a pain to remove. I'm sure some current flows through that cable still, but the 4ga wire would have less resistance than the stock wiring. So far it hasn't been an issue!

And the 35s and tubbing looks great. I never took welding in college so I'm signed up for a welding class here in a few weeks to see if I can start doing welding like that, or a panhard lift/drop.

Is the ride that much better with the Falkens vs the ST Maxx? I love the wear and performance of the ST Maxx. Almost 85k miles on mine and they still have 7/32 tread and never had a flat. But I do feel like they ride a bit harsh with the 3 ply super stuff sidewalls.

That's an impressive amount of miles on those tires. I made it to about 45,000 and had 2 or 3/32 of tread left even with rotating every 5K or so. I wonder how much of my harsh ride was due to the tire pressure. I didn't play around with it too much for highway driving, but did notice I had to go quite low when off-roading in order to get the tire to spread out enough. I always thought my harsh ride was due to the suspension, but since switching to the Falkens, it has been lovely. Hopefully these tires survive off-road like the Coopers. I already sheared a few of the outer lugs at KOH so time will tell!
 
Fender Clearance

Needed to trim the fenders back quite a bit since they were rubbing at the side closest to the doors. Instead of cutting exactly what I needed, I figured a mostly even cut all the way around would look better. Overall, pretty happy with the results, but still not sure what to do about the holes for the flares. I could try and trim the flares to get them in place, but they would only be held in by the plastic clips. I could also just full the holes with Bondo and paint it to match. For now, it's good enough haha.

Now the front should be fairly clearanced and I just need to work on the rears.

Trimming the fenders
https://flic.kr/p/2n56rF4

https://flic.kr/p/2n51wJw

https://flic.kr/p/2n56VvV

Finished with edge trim
https://flic.kr/p/2n59MFn
 
I like how you find solutions to problems. I would probably be too lazy to collect parts from different places. Although I understand that it will most likely be cheaper, and it is unlikely that much more time will be spent. But I just didn't have the imagination.
 

Members online

No members online now.

Forum statistics

Threads
278,312
Messages
3,554,083
Members
248,016
Latest member
Advally Service

Trending content

Back
Top