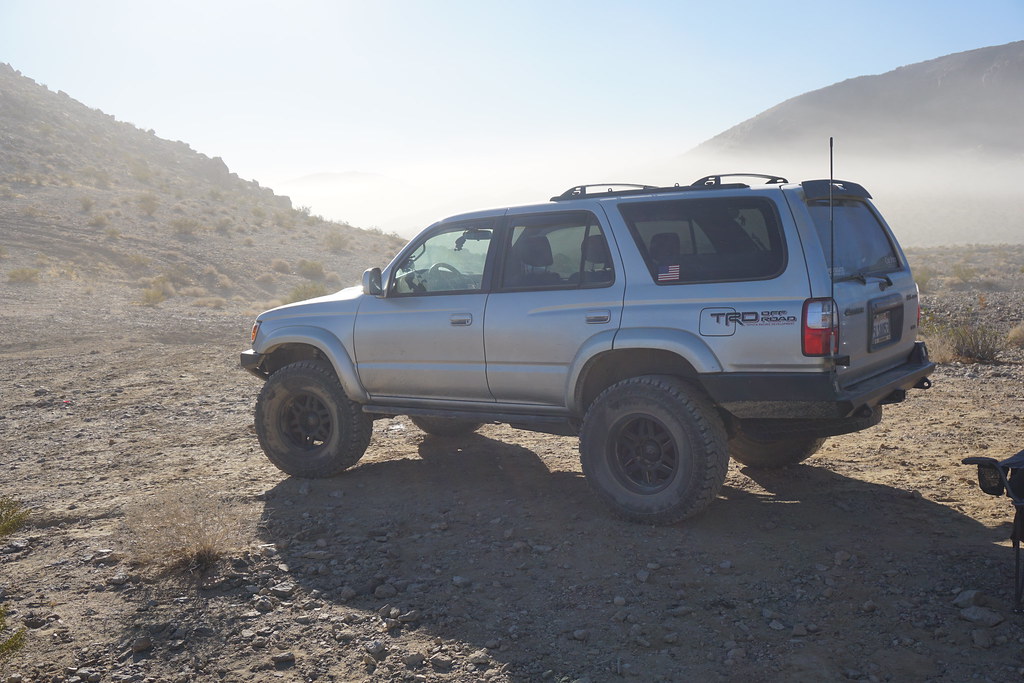
JerkyDrewster's 2001 4Runner Build V2

March 24th, 2020

CV Reboot, LCA Bushings and Bumps, and Differential Bearing

Parts List:
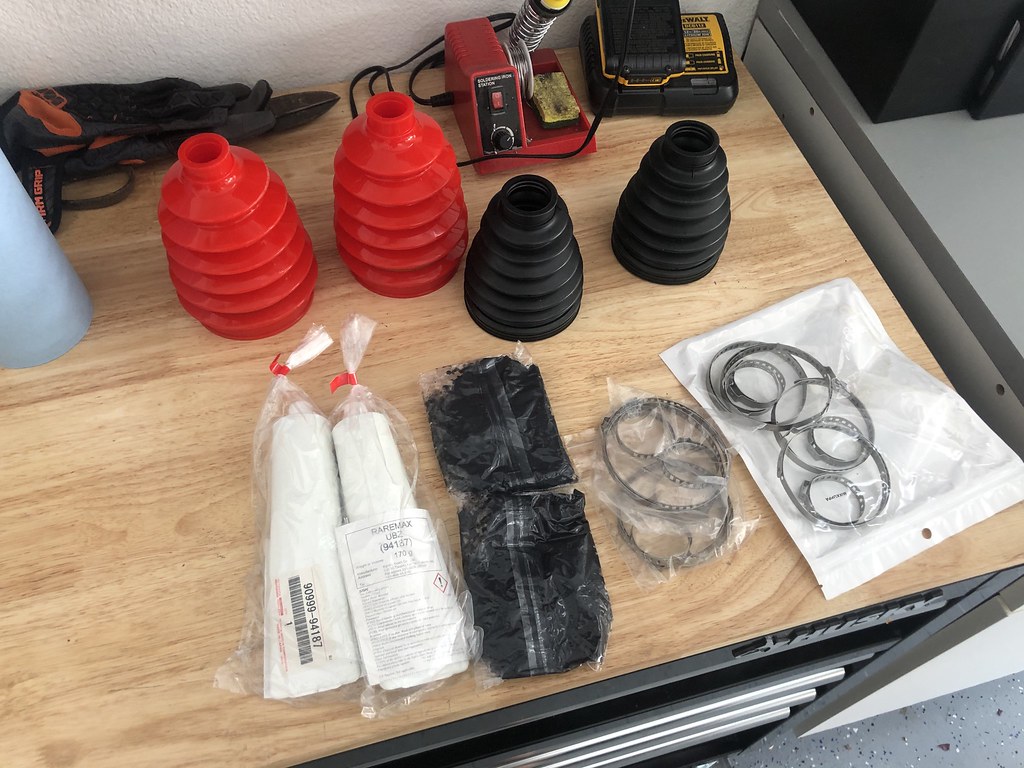
- Offroad Solutions CV Reboot High Angle Inner CV Boot and Outer Boot [link]
- Strongflex LCA Bushings
- ECGS Sintered PTFE Bushing [link]
- Durobump Front LCA Bumpstop [link]

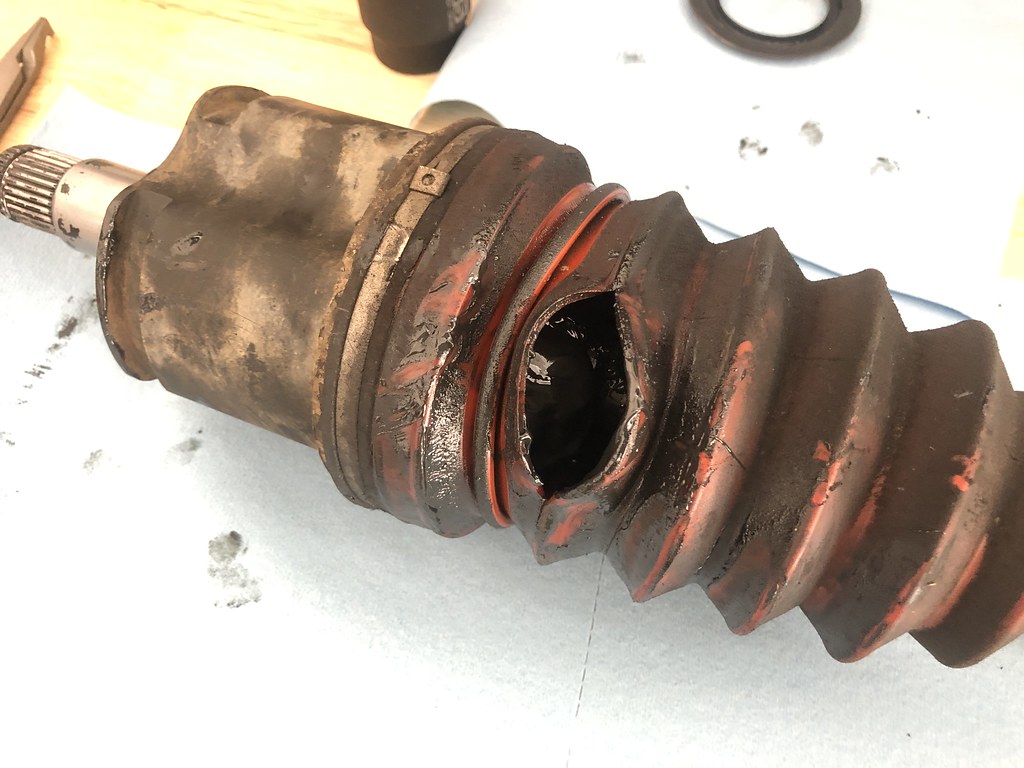
I noticed some grease around the lower control arm and knew it was from the CV axle. After crawling under the car, I saw a nice tear on the inner boot that was letting grease get everywhere! I checked the driver's side, and while there wasn't grease all over, there was a small tear on the boot. These CVs came from my original rig, so I'm not too surprised to see the rips.

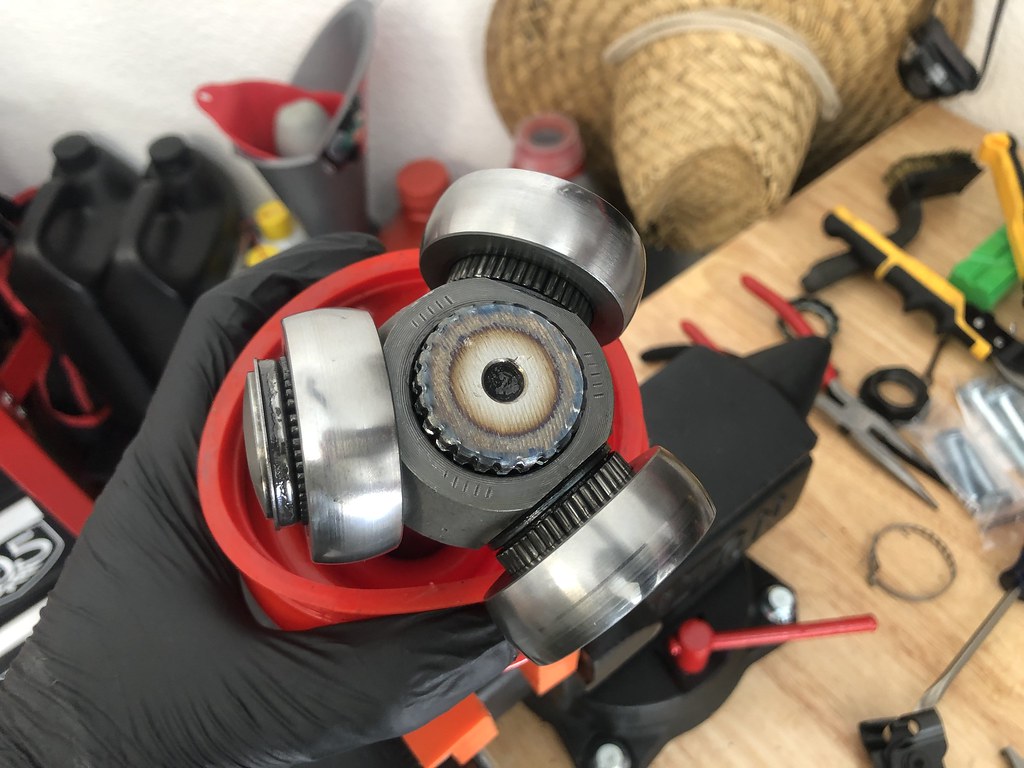
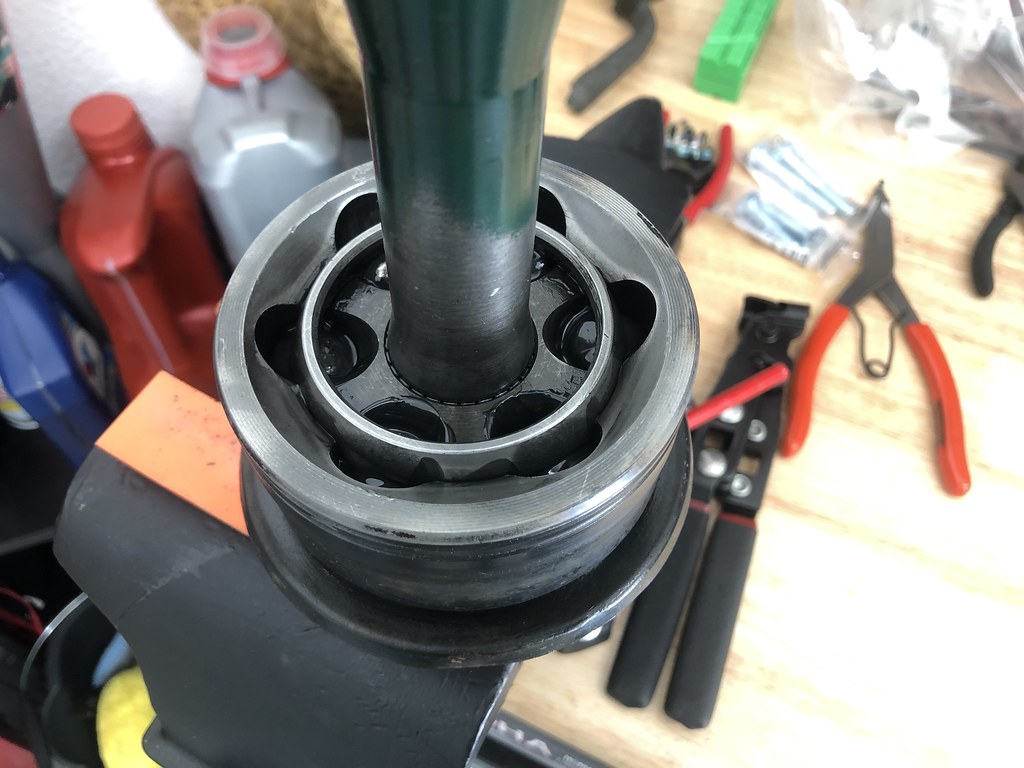
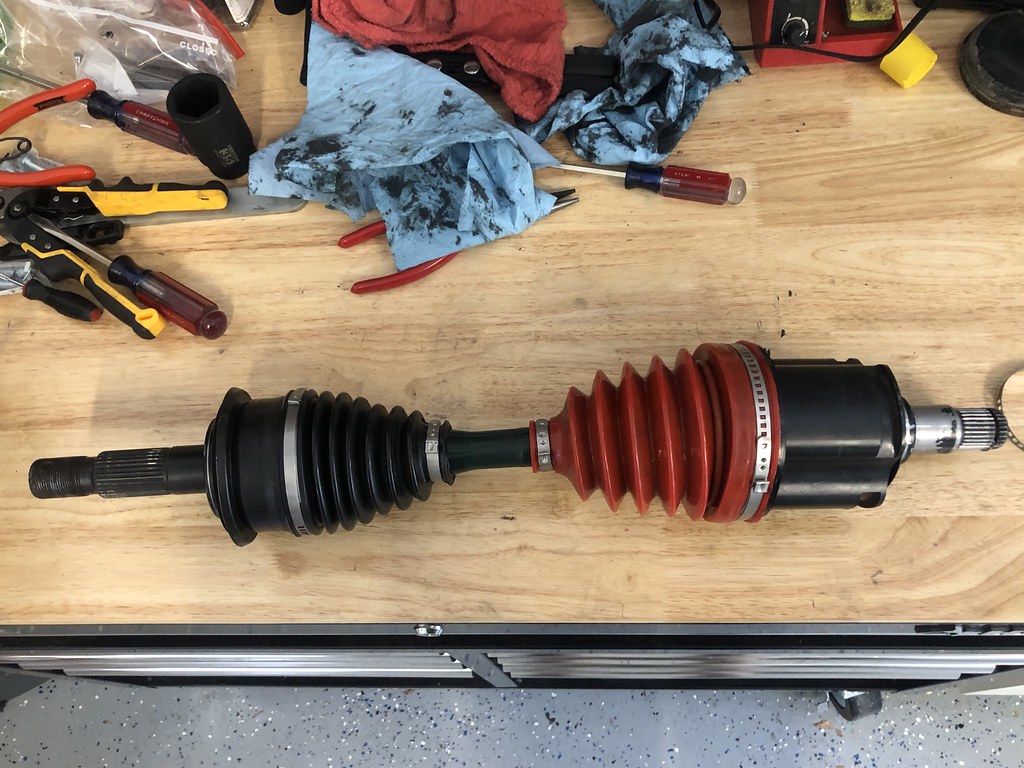
Instead of replacing them, I decided to reboot them with the boots from Offroad Solutions. While I did learn something new, I'm not sure I would ever do that again. Not only did the boot kit cost more than new NAPA-branded CVs, it's also just a mess. Getting all of the old grease out and trying to seal the boots over the tulip is such a PITA that I would rather buy new axles.

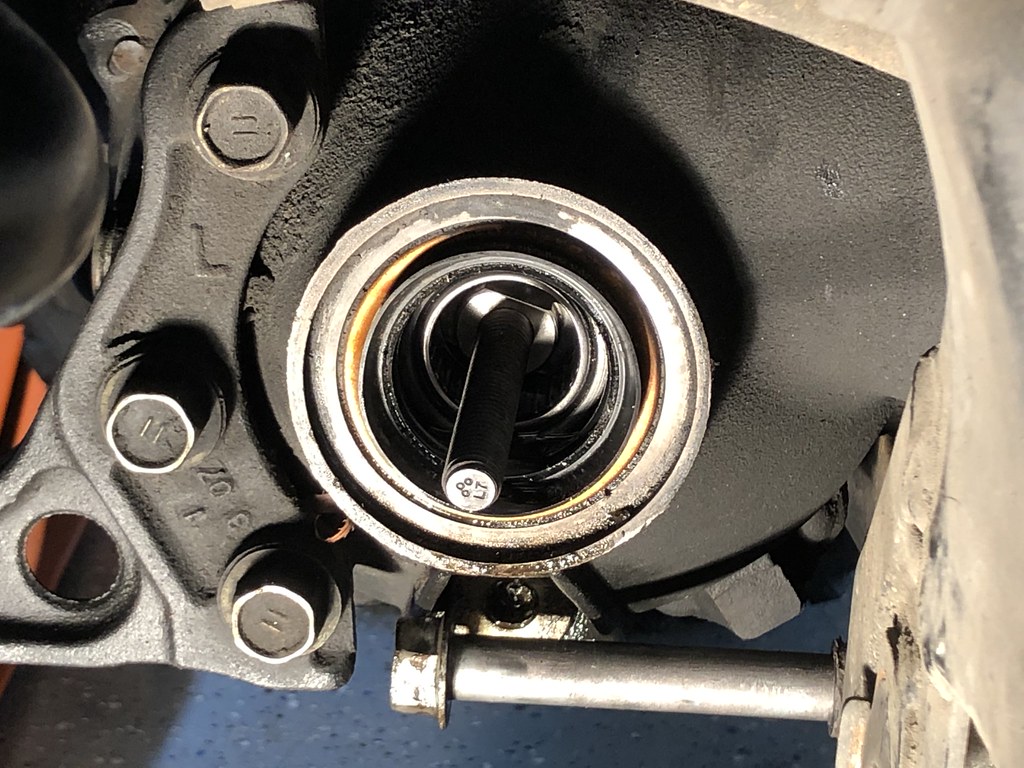
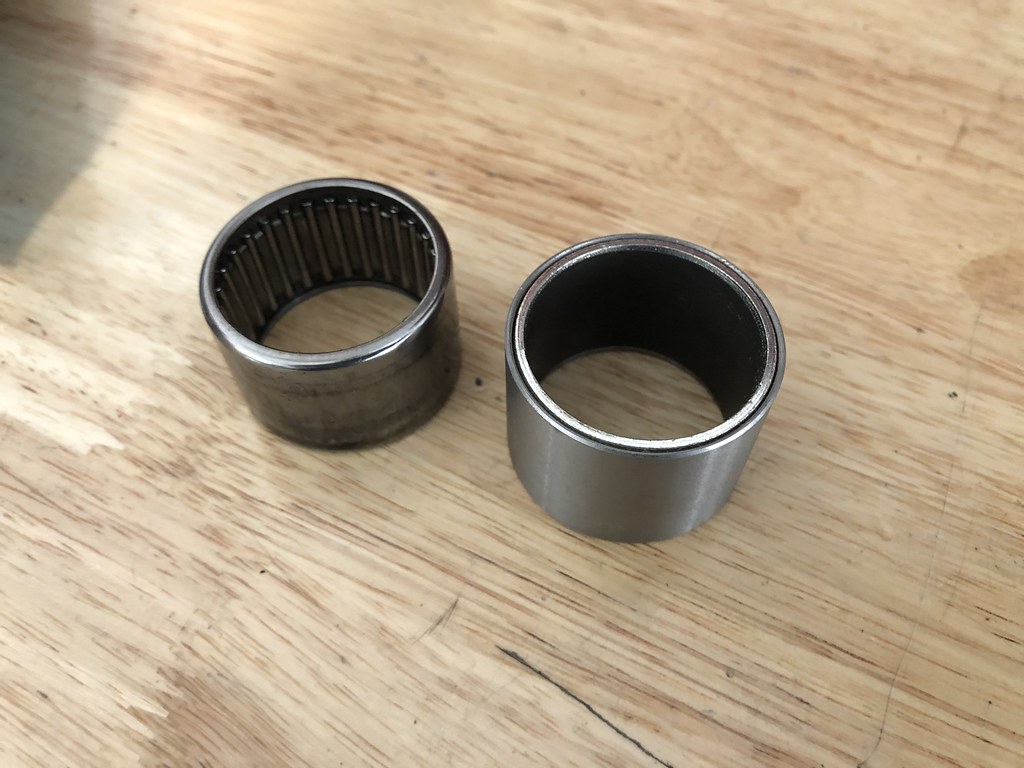
While I had the driver-side CV removed, I decided to replace the differential needle bearing with the ECGS sintered bushing. I had a noise coming from what I thought was that bearing, so I wanted to replace it while the axle was out. Removing the bearing was a cinch with the ECGS puller tool. It's basically a specialized t nut to fit the inside of the differential tube. Part of the t grabs on to the backside of the bushing and you pull it out with a threaded rod and nut. Pressing the new bushing in was pretty straightforward. I put it in the freezer overnight to help shrink it slightly and used a standard seal driver to beat it into place. Since the replacement, I have not heard the clunking!

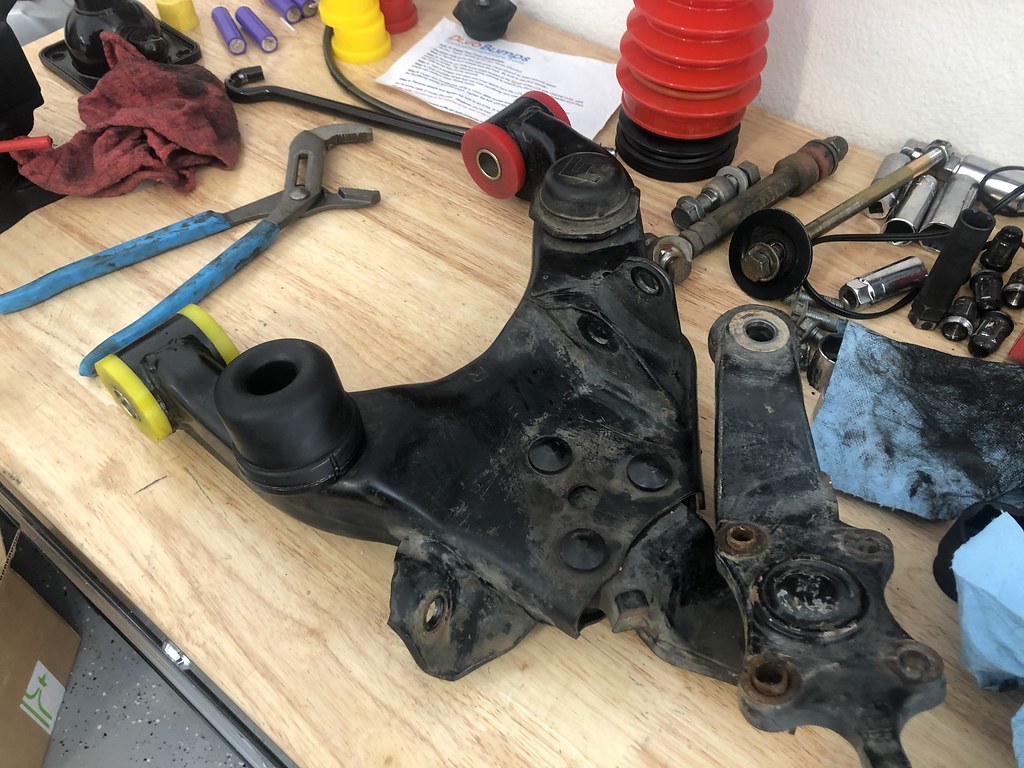
While I had everything accessible, I was able to install the Durobump LCA bump stops that I had bought a while ago. I used a large pair of pliers to remove the original bump stop, and the Durobump went right in. I've had a couple of trips with them installed and I think it does make a difference. When going fast through the desert, it feels more like a progressive bump instead of extremely harsh like the stock bumps. At least that's what I'll tell myself :rofl:

I also removed the Whiteline LCA bushings and installed some Strongflex bushings. I'm honestly not sure why I decided to switch it up, but they have been working pretty great so far and have been making no noise whatsoever.

Torn CV Boot
https://flic.kr/p/2kGagVE

ORS Boot Kit
https://flic.kr/p/2kGaeR4

Cleaned Outboard Joint and Tripod
https://flic.kr/p/2kGaPgg

https://flic.kr/p/2kG6FQy

Finished Axle
https://flic.kr/p/2kGaPfe

Differential Bearing Removal Tool
https://flic.kr/p/2kG6DML

Old Bearing vs. New Bushing
https://flic.kr/p/2kGaQLA

LCA with Durobump and Strongflex Bushings
https://flic.kr/p/2kGaPbG
 
August 15th, 2020

Eimkeith PCK

Parts List:
- Eimkeith Panhard Correction Kit [link]

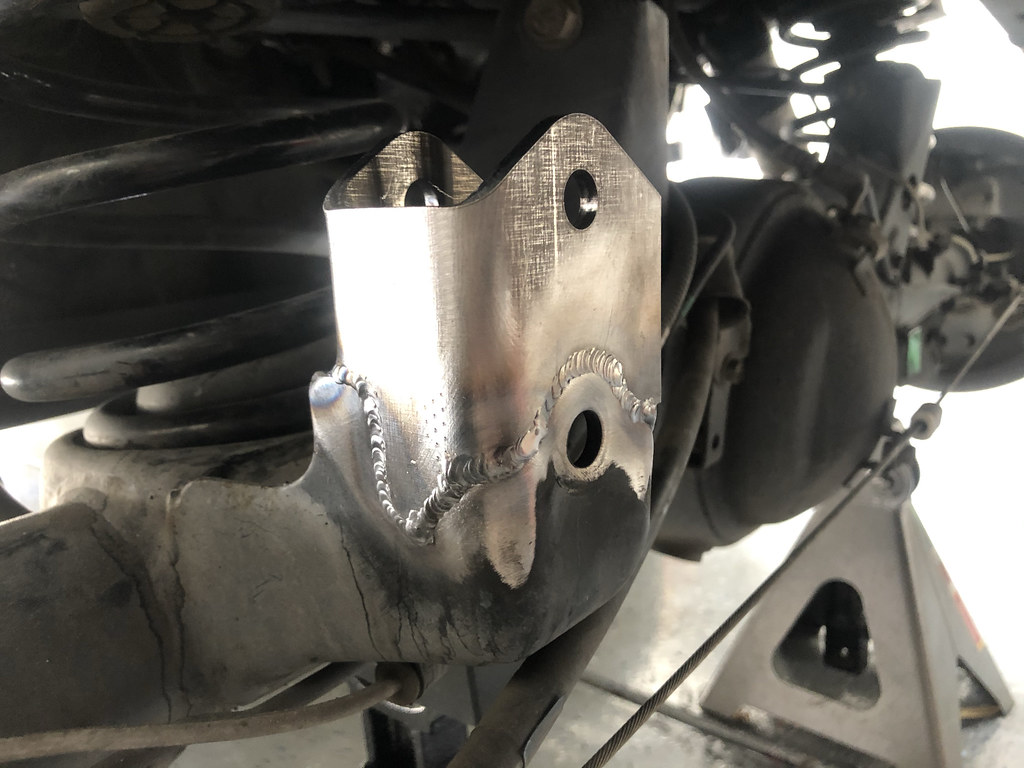
I've been having issues with a rear shimmy over bumps so started looking around at what I can do to fix it. I already had the panhard drop bracket from Toytec, but knew it wasn't perfect. I had been following this thread from the beginning and was definitely interested in what Keith had put together. After reading the success of others and waiting a couple years, I finally pulled the trigger.

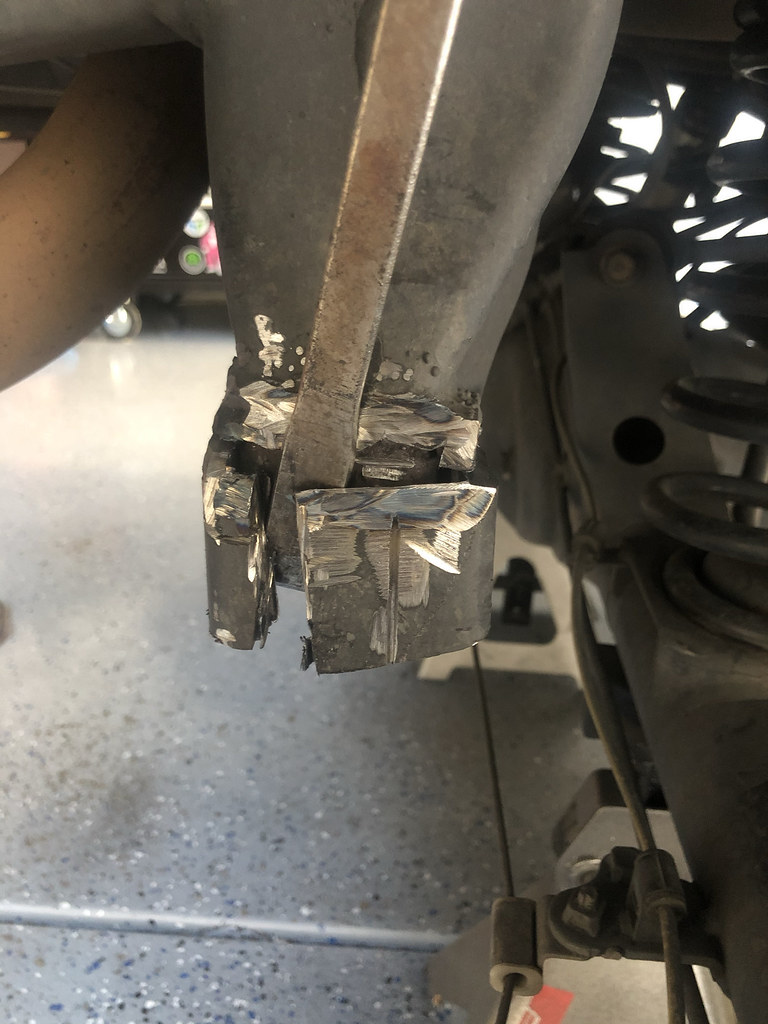
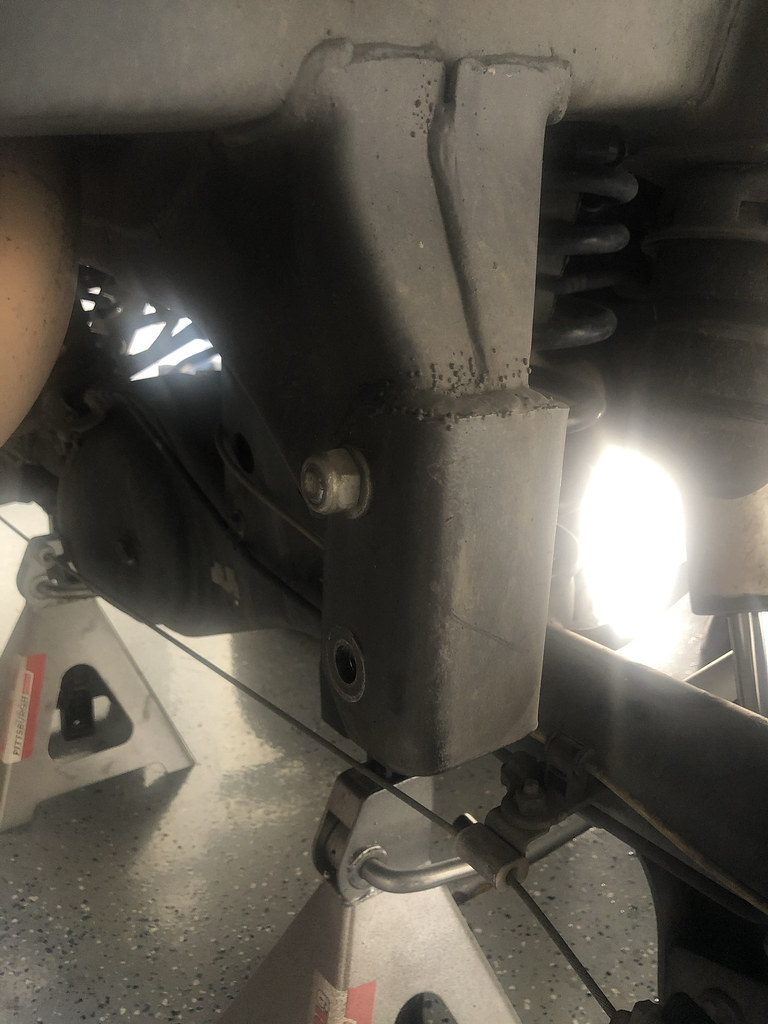
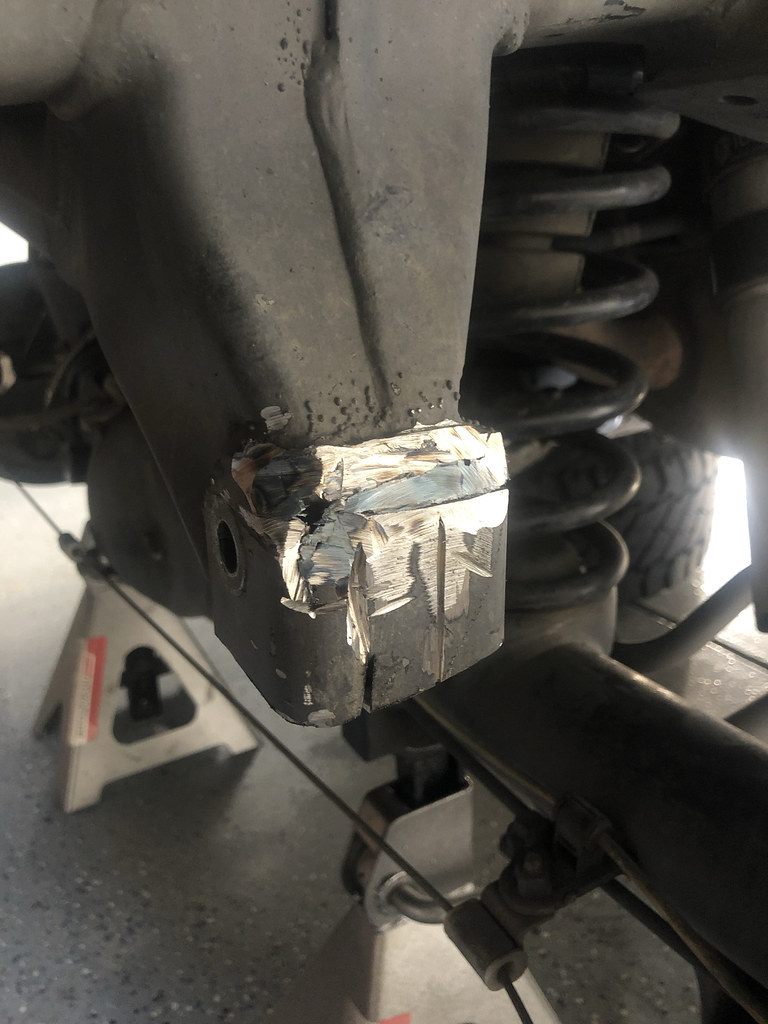
Since the original bracket was welded on, I had to cut it off and smooth the original surface down as best I could. This was a major pain from the amount of material that was initially laid down. After a long time of cutting, grinding, and prying, I finally got the old bracket out and the surface ready to weld.

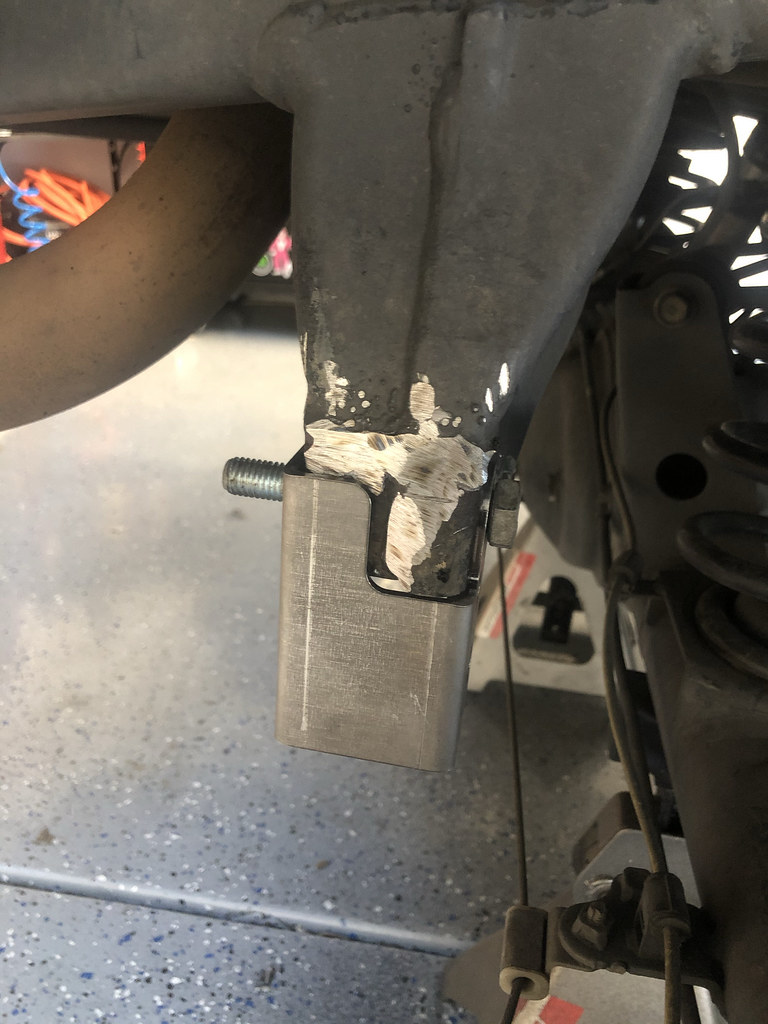
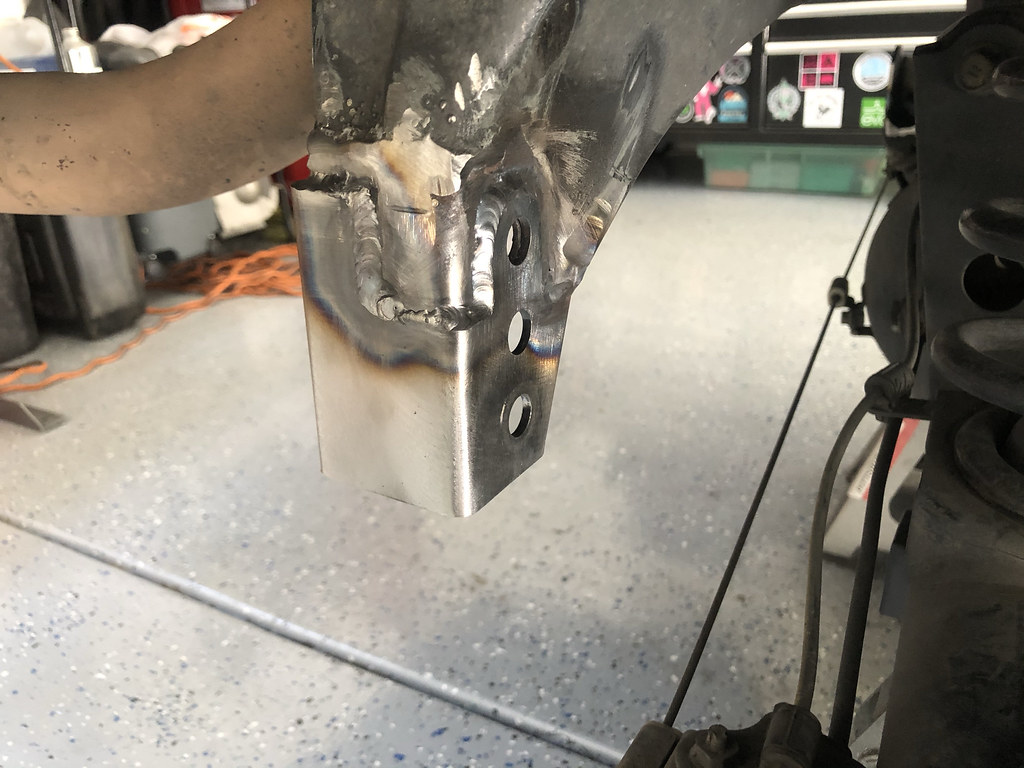
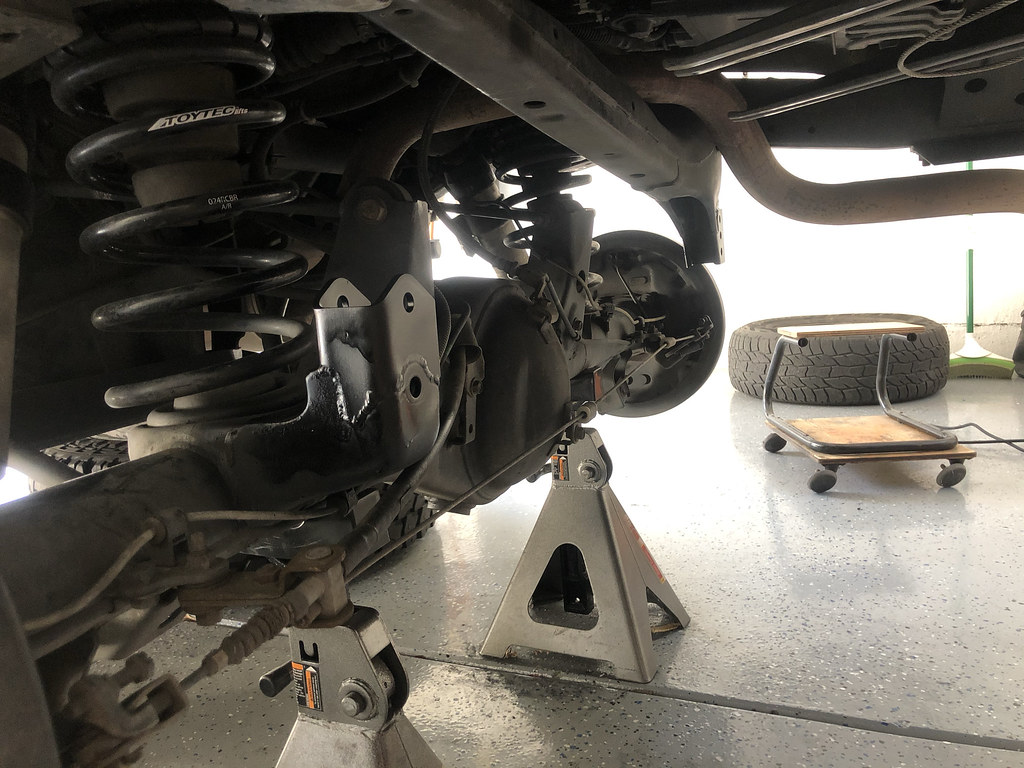
Since I'm no welder, my buddy came over and helped me out. We got the brackets lined up and tacked in place before he finished up the welds. Once everything cooled down, I shot the bare metal with some paint and re-attached the bar.

There's one area on the highway that is notorious for tossing the car around since the road is in bad shape. Instead of avoiding it, I went straight through it and was shocked at how different the rear felt. The rear seemed to just stay straight as opposed to swing out on bumps. Thanks Keith!

Toytec Bracket
https://flic.kr/p/2kGaNTC

Cutting it off
https://flic.kr/p/2kGaNPK

https://flic.kr/p/2kGaNML

Mocking the Frame-Side
https://flic.kr/p/2kGaei5

The Welds
https://flic.kr/p/2kG6Dgq

https://flic.kr/p/2kG6DbL

https://flic.kr/p/2kG6D4w
 
October 2020 to January 2021

Sound Deadening Project!

Parts List:
- Noico 80 mil Sound Deadening Butyl Rubber [link]
- Second Skin Overkill CCF [link]
- Second Skin Luxury Liner MLV [link]
- HH-66 Contact Cement

Tools Needed:
- Barrel Hand Rollers
- Xacto Knives
- Paint Brush
- Screwdrivers

After years of thinking about it (all the way back to my old rig), I decided to finally pull the trigger and tackle the sound deadening project. I've never liked the overall noise coming from everywhere during a drive, so I wanted to change that. I read up on a bunch of threads and got most of my inspiration from this thread and this thread.

I wanted to use RAAMAudio's products, but the owner wasn't able to get new product. Instead, I decided to go with a Noico deadener, and Second Skin Audio's closed cell foam and mass loaded vinyl.

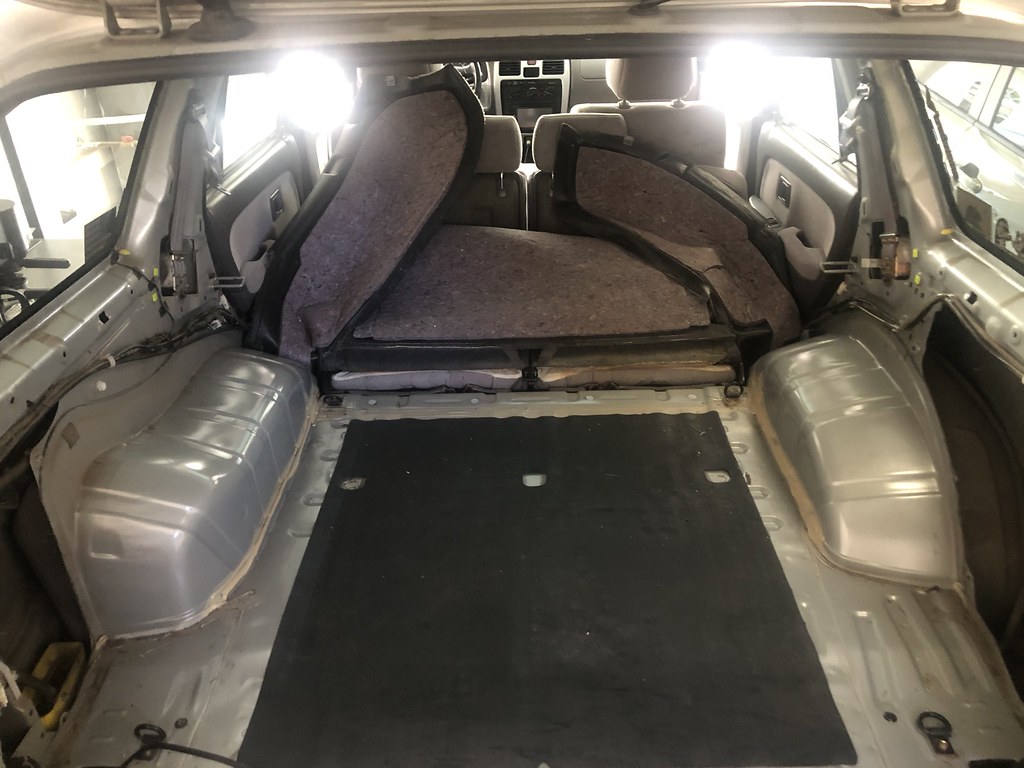
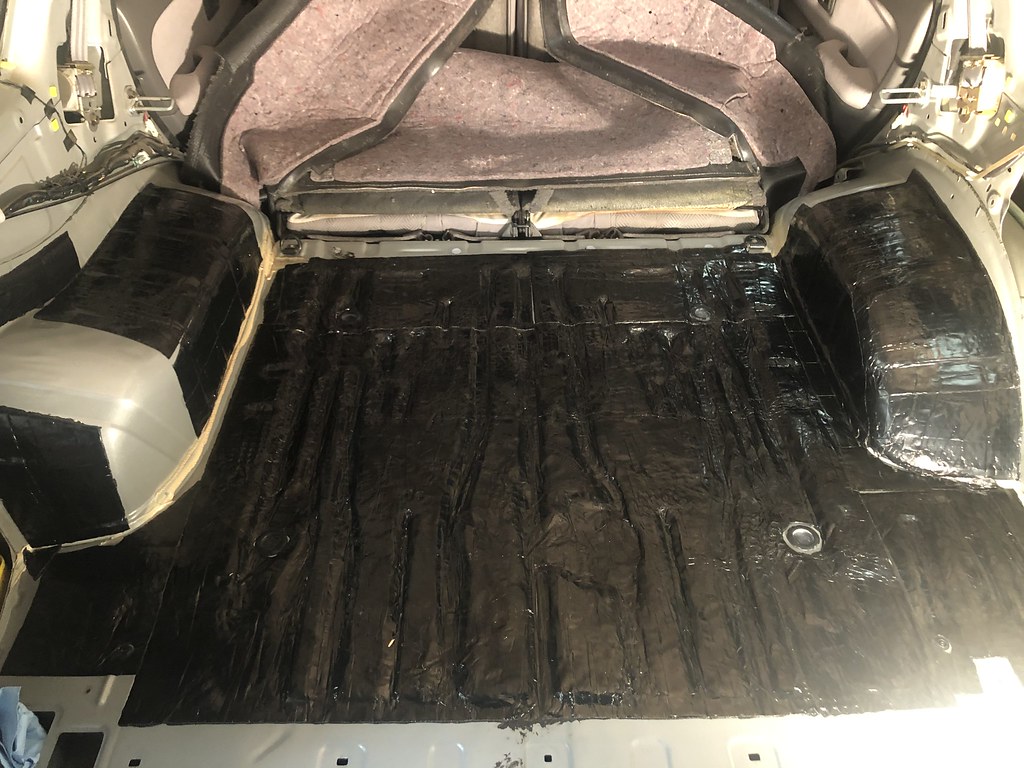
In order to not get burned out on deadening everything, I decided to do it in stages across a couple of months. Since I wanted to start work on making a new cargo box, I went with the rear area first. Overall, this was definitely the easiest to start with since it is a large and somewhat flat area. I had never worked with sound deadening material before, but I honestly didn't think it was too bad.

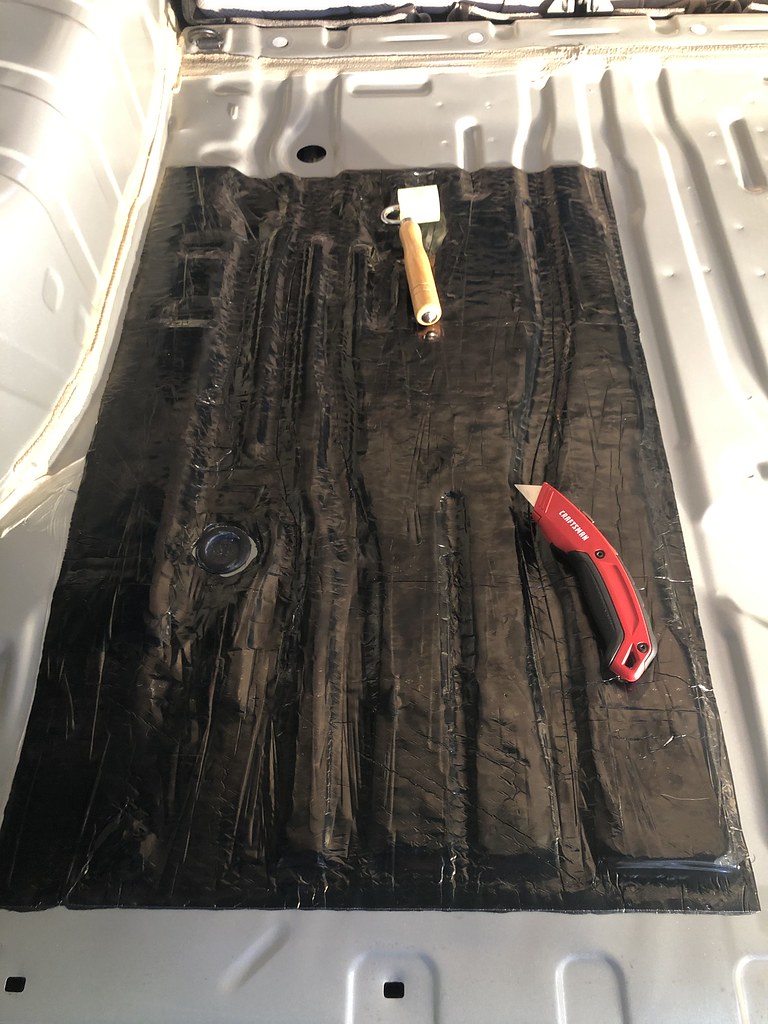
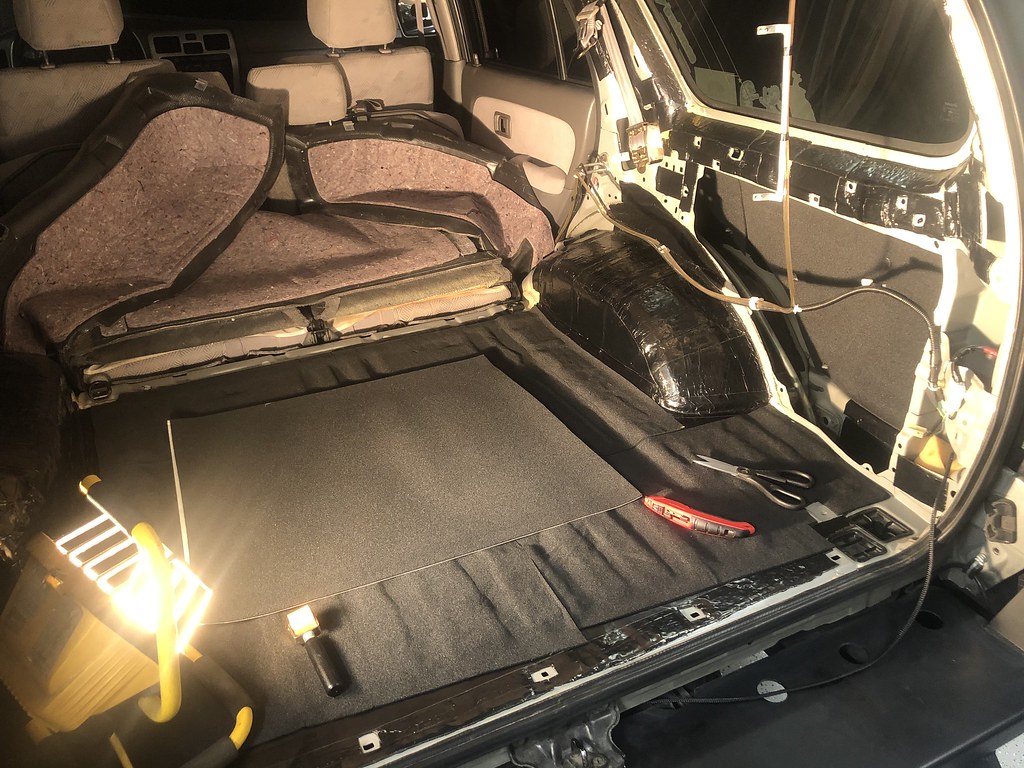
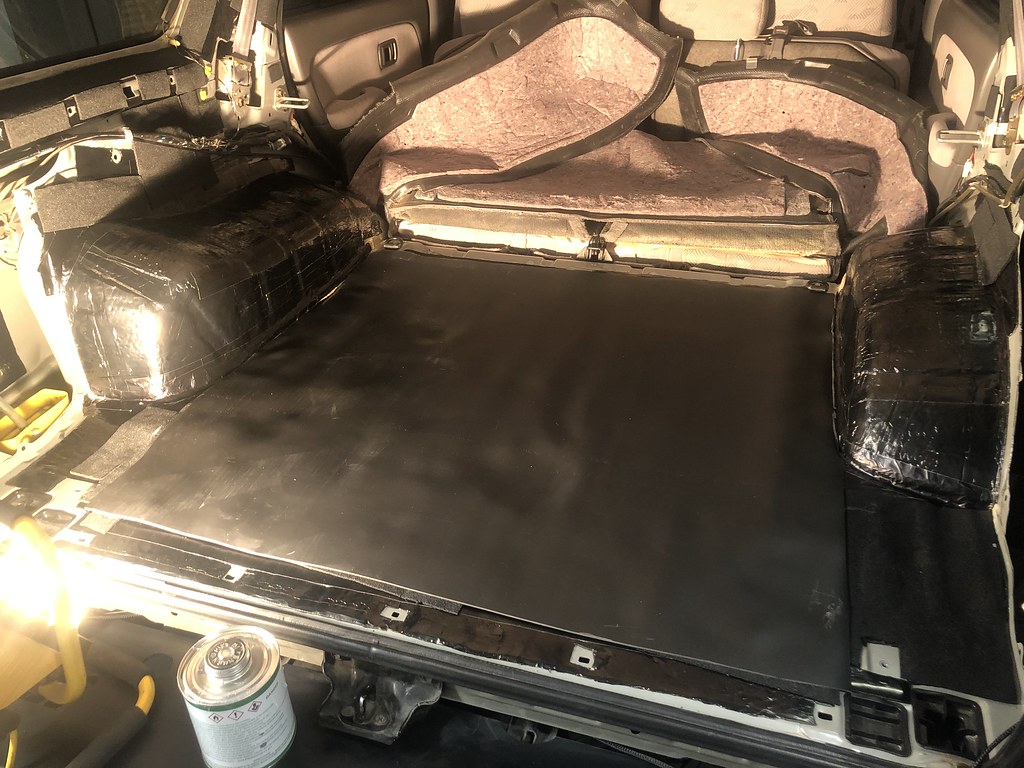
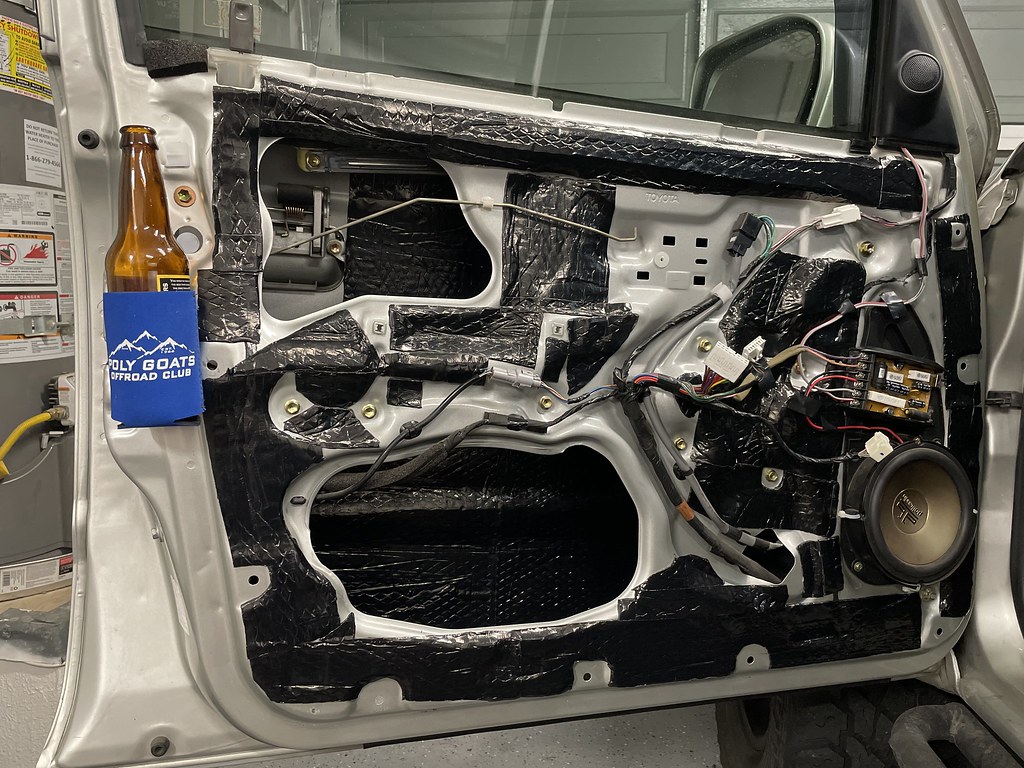
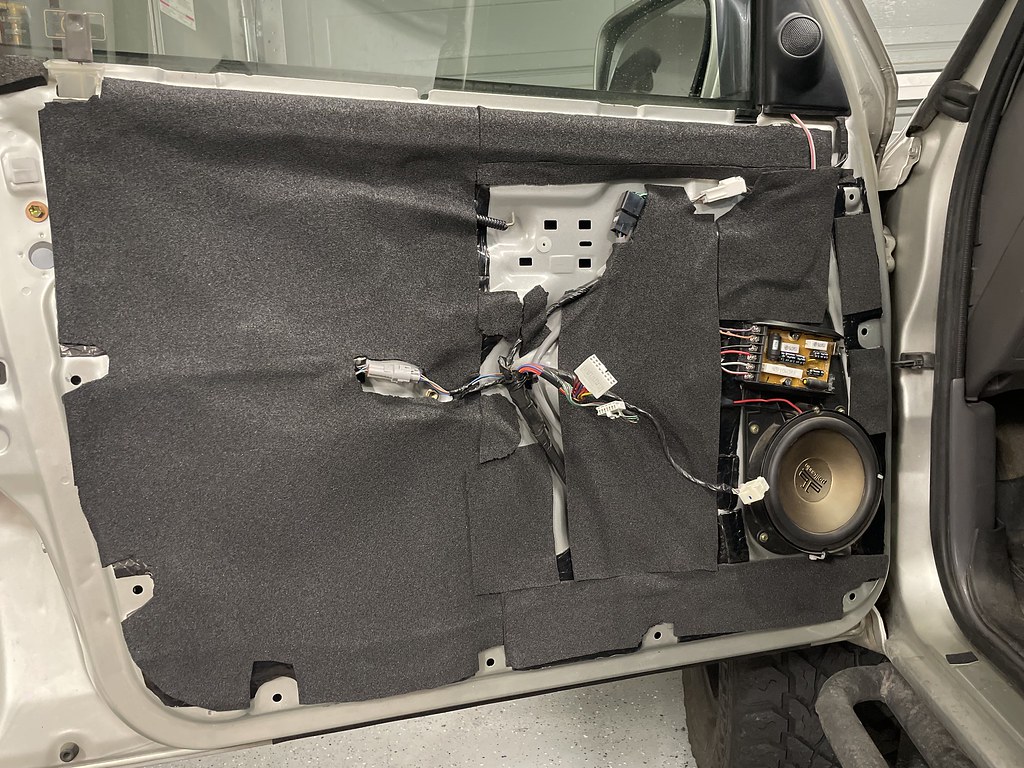
For the cargo area, I went with all 3 layers. I started laying down the butyl rubber, then put the closed cell foam, and finally glued the mass loaded vinyl to the top. I repeated this until l covered the floor pan and the wheel well areas. For the sides, I put the rubber and the foam in place. I didn't take a ton of photos during this process, but I'll show what I did do.

Most guides say to cover some percentage of the panel, but I was extremely liberal in my placement and probably used way more than I needed to. In any case, after finishing up the rear, I could easily tell the difference. Instead of hearing road noise throughout the vehicle, it was now only coming from the doors and beneath my feet! I was over the moon with how much of a difference it made and was honestly shocked.

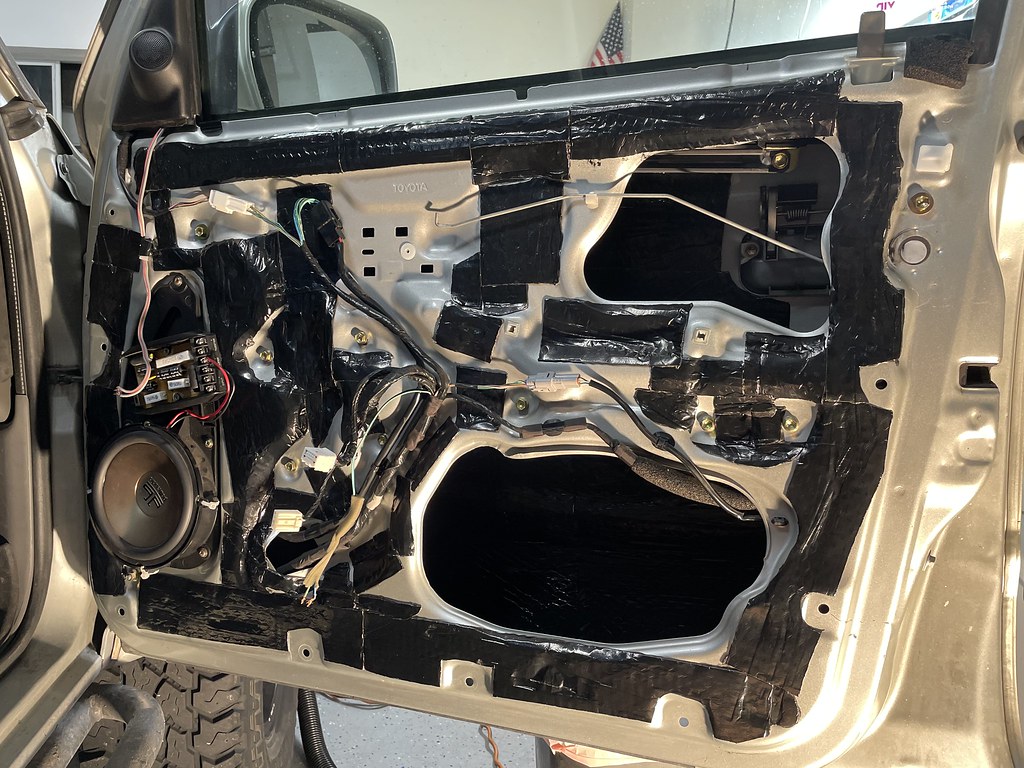
At this point, I waited a few months before continuing on with the doors. I started with the front doors and very quickly learned why so many others had complained about this project. The doors are such a pain in the ass I almost called it quits. Trying to press in the rubber on the inside of the door panel is very hard with larger hands and no way to see what you're doing. Even with the adversities, I prevailed and finished all 4 doors over a couple of weekends in January. The outer door panel is covered in as much rubber as possible with a small 8x8" square of foam right behind the speaker. The inner door panel is also covered in as much rubber, and almost entirely covered in foam to prevent rattles.

My first drive with all the panels in place was even more shocking than before. I could still hear some road noise, but it is now mostly coming from my feet. The sound quality of the speakers also improved since more of the sound is trapped inside (at least I think so). After all the bloody knuckles and late nights, I can definitely say this project has 100% been worth it. I still have enough material to finish the floor pan once I get enough time to pull all the seats and trim out again. I can't wait!

Finished Locations:
- Cargo Area and Wheel Wells
- Cargo Sides
- All Doors
- Rear Hatch

OEM Deadener
https://flic.kr/p/2kGaNdp

Humble Beginnings
https://flic.kr/p/2kGadNc

Butyl Rubber Down
https://flic.kr/p/2kGadLy

Closed Cell Foam
https://flic.kr/p/2kG6CNw

Mass Loaded Vinyl
https://flic.kr/p/2kGadF3

The Doors
https://flic.kr/p/2kG6BxA

https://flic.kr/p/2kGaLAG

https://flic.kr/p/2kGaQ9U
 
Last edited:
Wow, the sound deadening project of yours is very ambitious. I respect your dedication to the cause. I too, would love a quieter driving experience. Making these trucks more modern and "easier" to drive but keeping the character that we love about driving them, is a tedious and difficult task. Bookmarked for when my knuckles and ambition are ready. cheers
 
August 15th, 2020

Eimkeith PCK

Parts List:
- Eimkeith Panhard Correction Kit [link]

I've been having issues with a rear shimmy over bumps so started looking around at what I can do to fix it. I already had the panhard drop bracket from Toytec, but knew it wasn't perfect. I had been following this thread from the beginning and was definitely interested in what Keith had put together. After reading the success of others and waiting a couple years, I finally pulled the trigger.

Since the original bracket was welded on, I had to cut it off and smooth the original surface down as best I could. This was a major pain from the amount of material that was initially laid down. After a long time of cutting, grinding, and prying, I finally got the old bracket out and the surface ready to weld.

Since I'm no welder, my buddy came over and helped me out. We got the brackets lined up and tacked in place before he finished up the welds. Once everything cooled down, I shot the bare metal with some paint and re-attached the bar.

There's one area on the highway that is notorious for tossing the car around since the road is in bad shape. Instead of avoiding it, I went straight through it and was shocked at how different the rear felt. The rear seemed to just stay straight as opposed to swing out on bumps. Thanks Keith!

Toytec Bracket
https://flic.kr/p/2kGaNTC

Cutting it off
https://flic.kr/p/2kGaNPK

https://flic.kr/p/2kGaNML

Mocking the Frame-Side
https://flic.kr/p/2kGaei5

The Welds
https://flic.kr/p/2kG6Dgq

https://flic.kr/p/2kG6DbL

https://flic.kr/p/2kG6D4w

Man, that looks great!
 
Wow, the sound deadening project of yours is very ambitious. I respect your dedication to the cause. I too, would love a quieter driving experience. Making these trucks more modern and "easier" to drive but keeping the character that we love about driving them, is a tedious and difficult task. Bookmarked for when my knuckles and ambition are ready. cheers

Easily one of the most ambitious projects I've done. Even though it was tedious and time consuming, it was definitely worth it and I'm sure you'll be happy with the results too! Can't wait to finish this up with the floor pan.


Man, that looks great!

Thanks Keith! I can honestly say it's finally enjoyable going around a turn at faster than a snail's pace with your bracket.
 
October to November, 2020

Cargo Box V2

Parts List:
- Sheet of 1/2" Baltic Birch Ply
- Sheet of 3/4" Baltic Birch Ply
- Kreg Screws
- Wood Glue
- Danish Oil
- Wipe on Poly
- Some Piano Hinge
- 1' Angle Aluminum
- Some Brackets from McMaster
- Swivel Feet
- Folding Table Leg Brackets

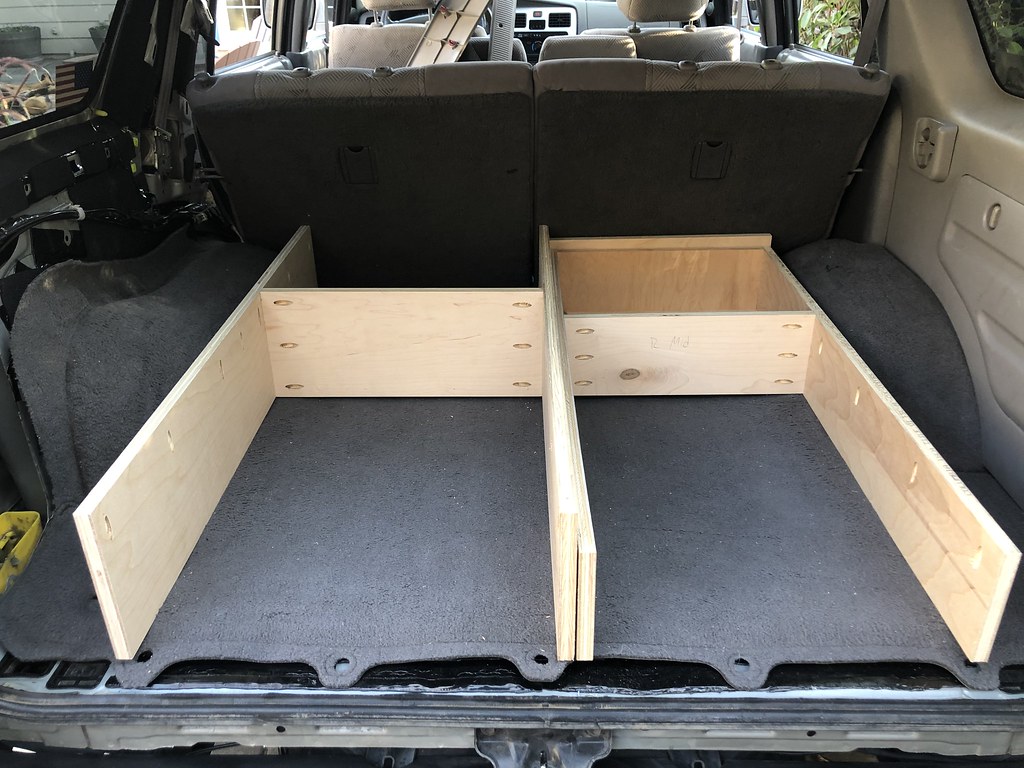
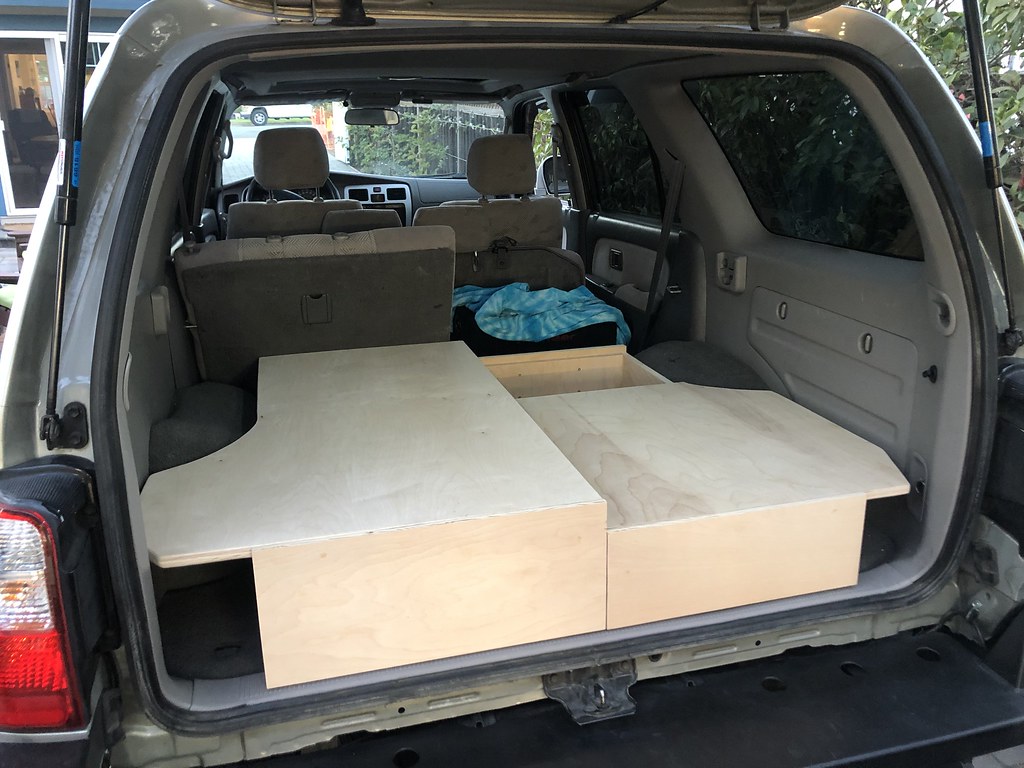
I finished up sound deadening the cargo area mainly to start work on the new cargo box. I figured once the new box was in place, I wouldn't want to pull it out again. My first go around with the cargo box from the original 4runner was when I was still very new to woodworking. It worked just fine, but it wasn't pretty. This time around I wanted to focus more on the design and how I intended on using it. I took a lot of inspiration from other boxes on the forum to narrow down exactly what I wanted (especially from Rickashay's build). I started modeling up the box in CAD at the beginning of COVID and made little tweaks here and there throughout the year until I was ready to make it.

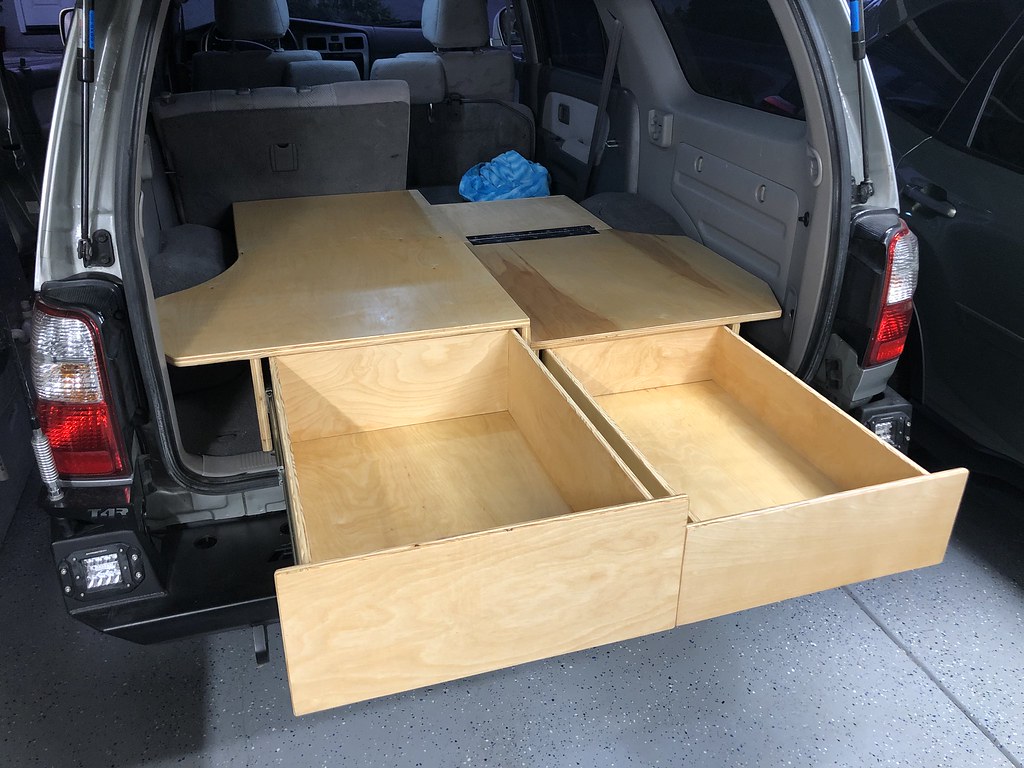
My build criteria was:
  • 2 full size 24" drawers
  • A space for the narrow 10" subwoofer
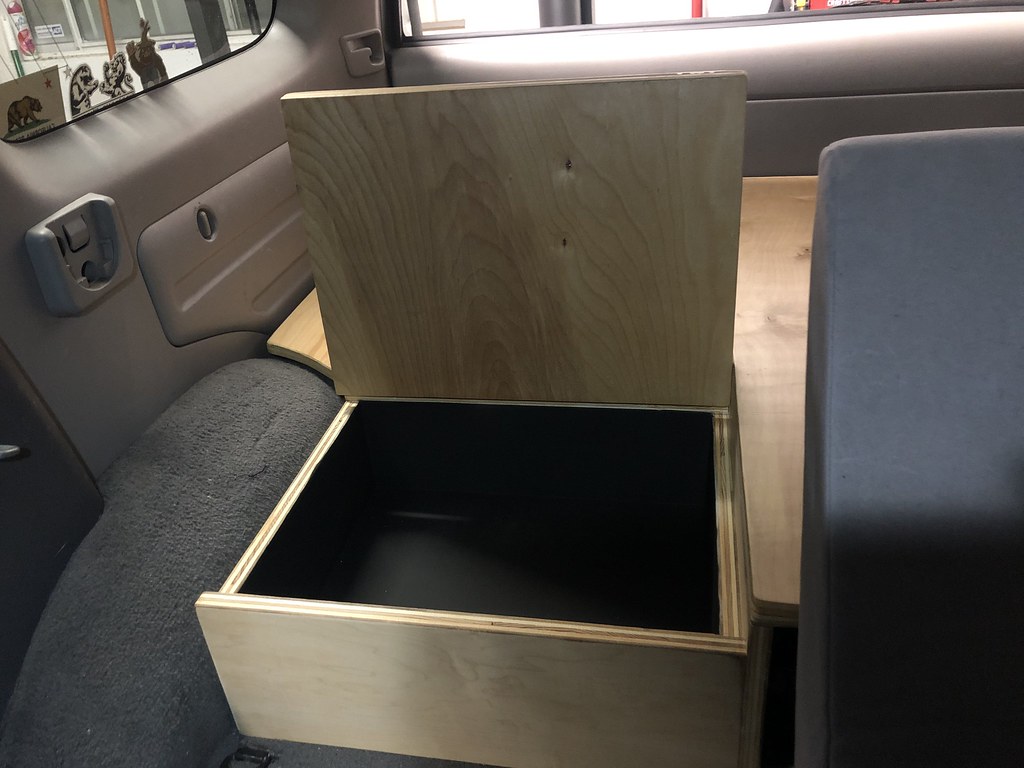
  • Additional storage for low-use items
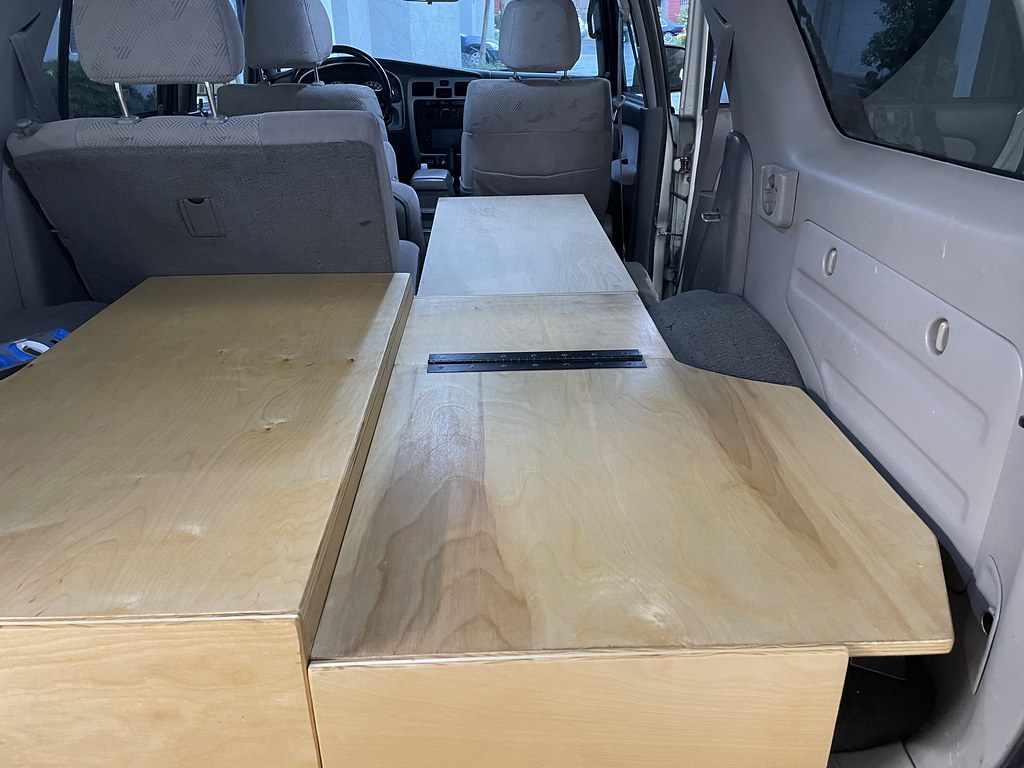
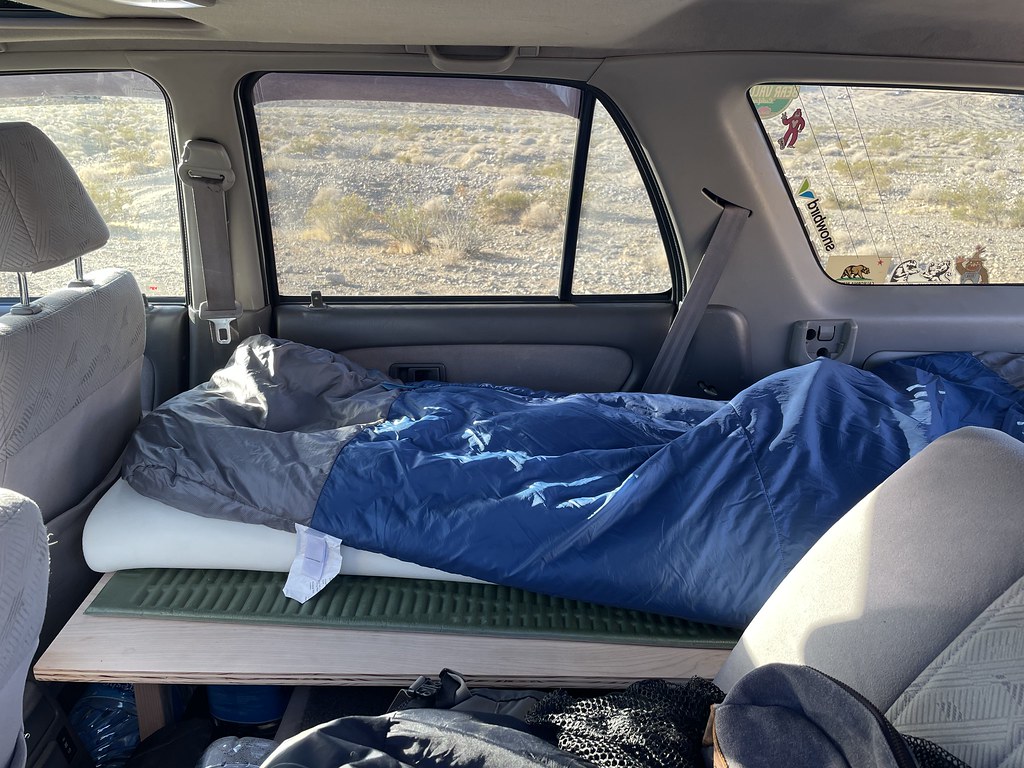
  • Easy to install sleeping extension to allow for 6.5' of space laying down
  • Use the factory tie down to secure the box
  • Be low profile
  • Look good!

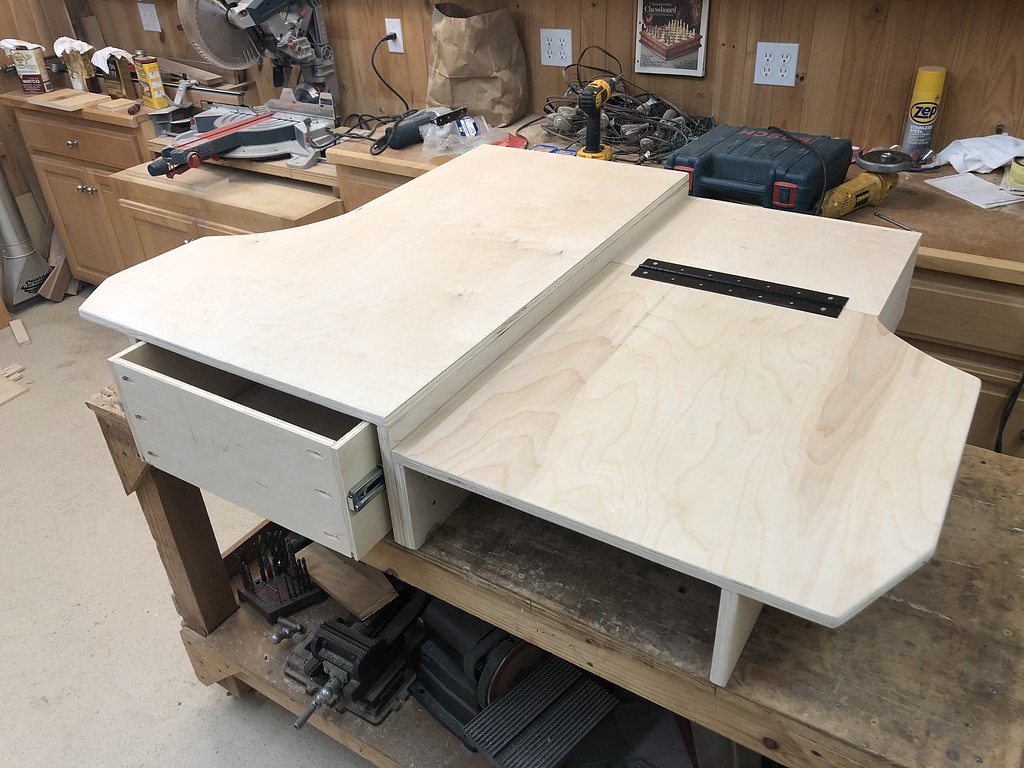
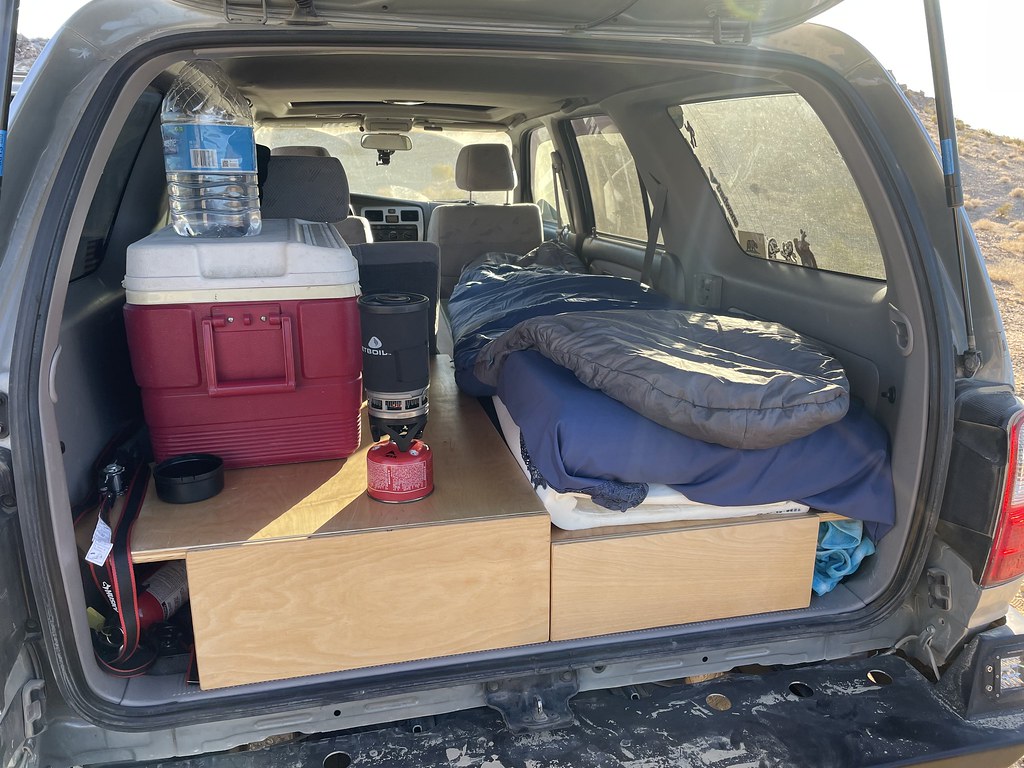
I never liked the look of the tall and chunky boxes some people put together, so I wanted to keep mine as low profile as possible, but still functional. Since I wanted to be able to sleep on one side of the box, I made it 2" lower than the opposite side for around 6" of usable height. The other side of the box is limited by the sub, so I made that as low as possible while still allowing enough room to get it in place. My last box also used 24" drawer slides and they worked great, so no reason to change that up.

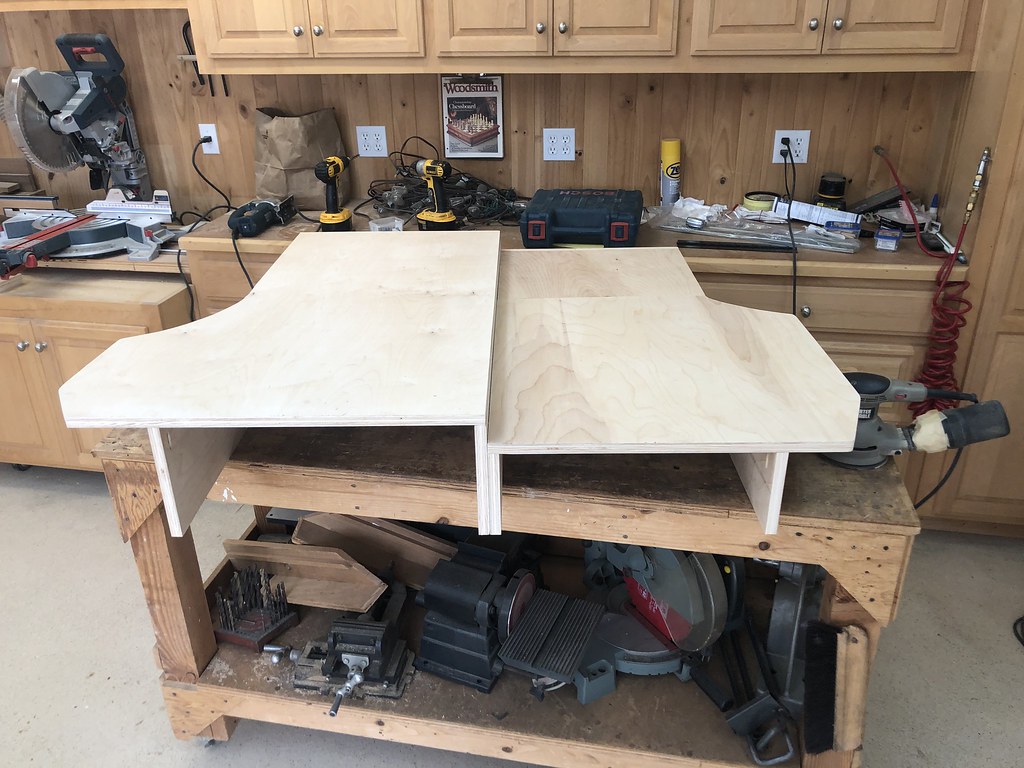
Unlike the last one, I wanted this box to look somewhat presentable to others. I designed the tops to match the contour of the trim panels and the wheel wells instead of just a big rectangle. This part was roughly mocked up in the model, but it took some fine tuning with a jigsaw and the sander to get it just right. For the finish, I went with a few coats of Danish Oil and waited a few days for it to fully dry out. I then put a few coats of Wipe On Poly to full seal and protect the wood. For the small hinged compartment, I put in a rubberized coating just in case some oils spilled in it.

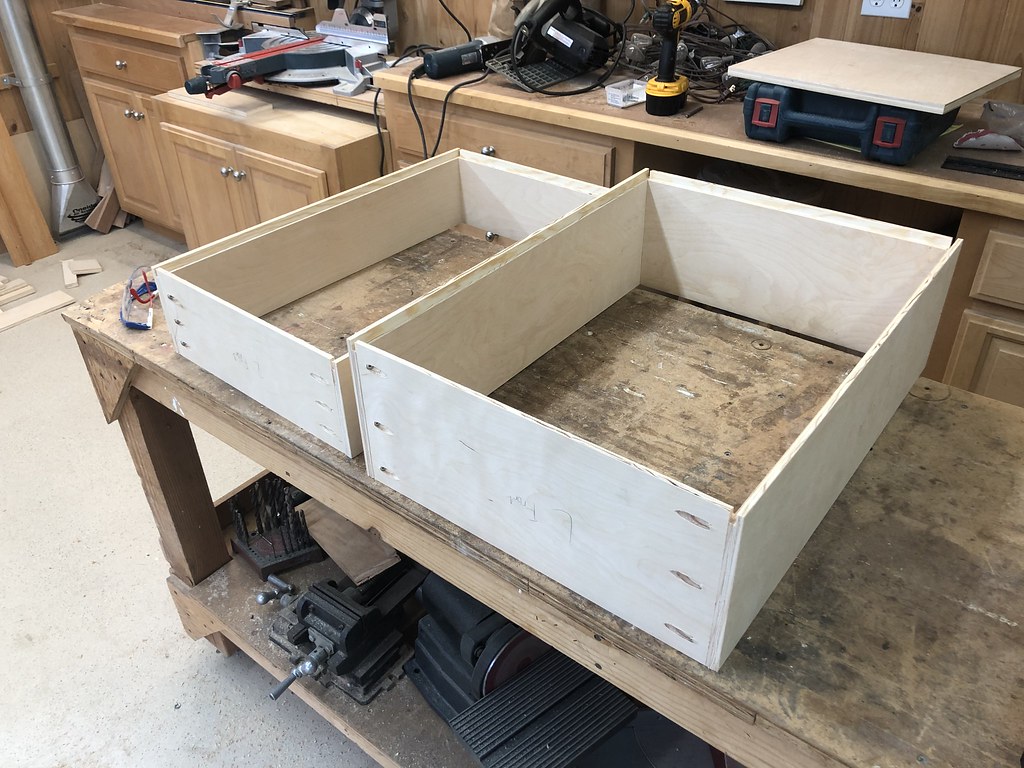
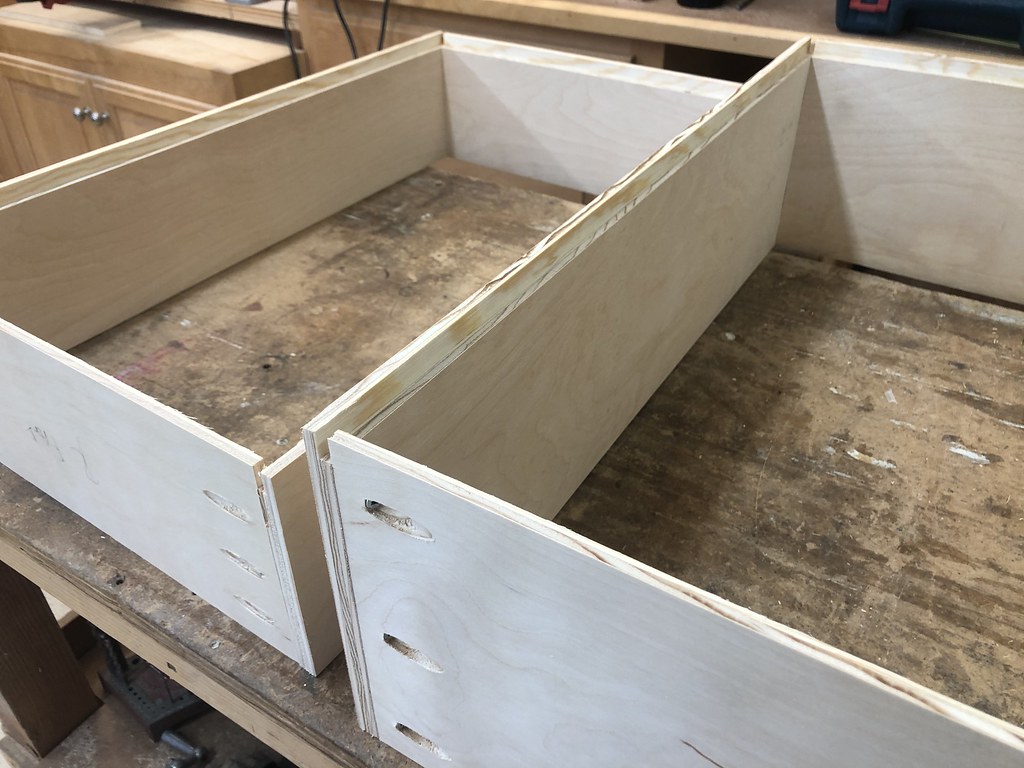
I went with a different design for the drawers this time. These were made out of 1/2" ply with pocket screws for the majority of the structure. I also worked on making some rabbet joints to secure the base of the drawer to the sides. This type of joint helped reduce the overall height of unusable space, and I'm a big fan of how secure it is.

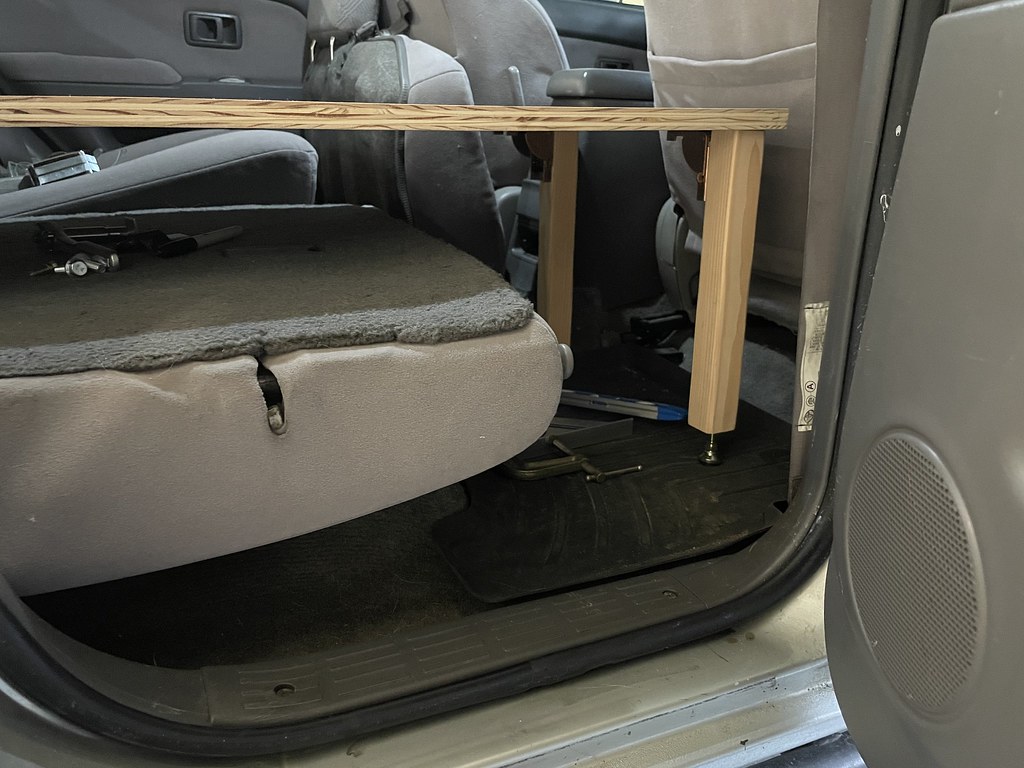
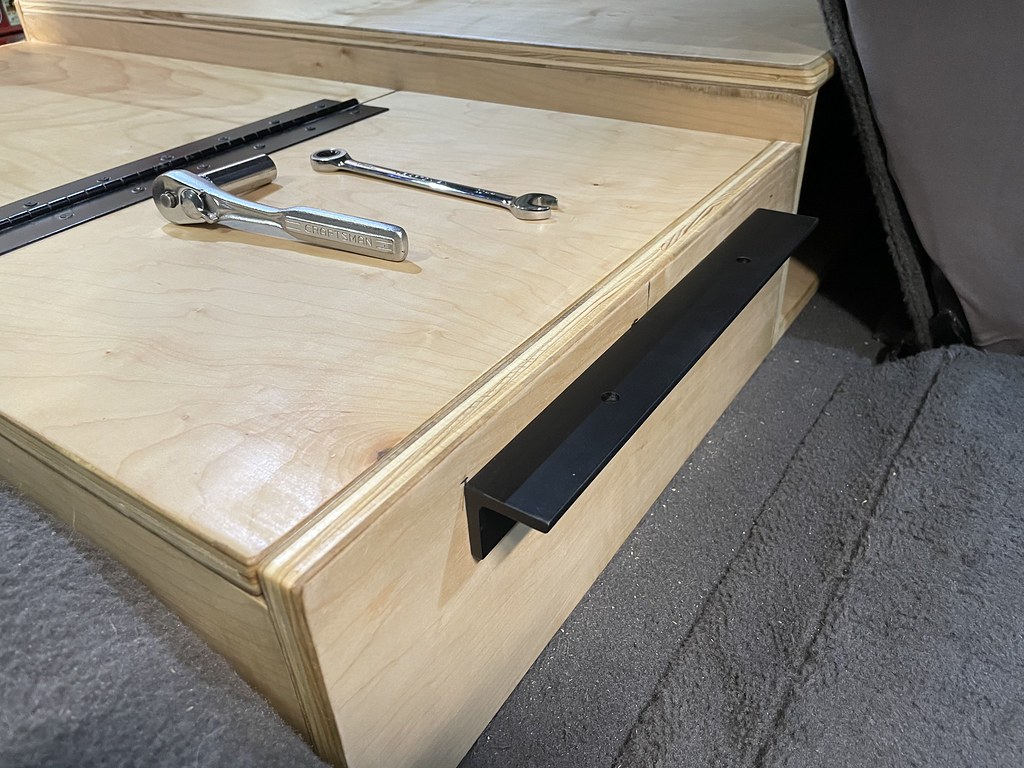
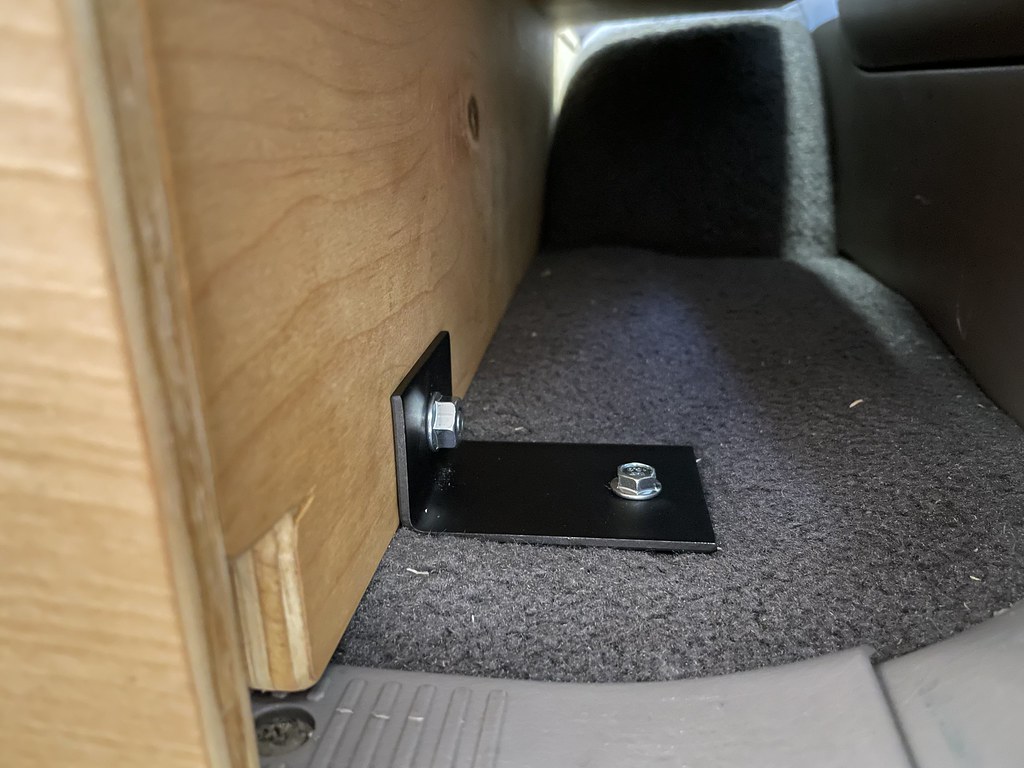
The last part of the design was the sleeping extension. I never finished this part of the last build since I never found a good way to implement it. With this build, I was able to attach a piece of angle aluminum to it. I drilled it out to secure it to the box and drilled a couple of holes in the top to secure the extension with some bolts. I used some 2x2 boards as the lefts and put them onto a pair of small folding table legs to keep them out of the way when not in use. Since the floor has various heights, I went with some adjustable swivel feet to make sure the feet were fully touching the ground. I'm not fully set on how I made the extension, but it definitely gets the job done.

It's hard to fit full sheets in the car...
https://flic.kr/p/2kG6CHM

Mocking up the base
https://flic.kr/p/2kGadz6

Tops cut out and installed
https://flic.kr/p/2kGadxs

Drawer frames and rabbet joints
https://flic.kr/p/2kGaMVR

https://flic.kr/p/2kGaMUP

Test fitting drawers and box
https://flic.kr/p/2kGadrL

https://flic.kr/p/2kGado4

All finished and installed
https://flic.kr/p/2kGadgF

https://flic.kr/p/2kGaMEv

Sleeping Extension
https://flic.kr/p/2kG6Exo

https://flic.kr/p/2kG6Eve

https://flic.kr/p/2kG6EkV

Bracket securing it
https://flic.kr/p/2kG6Eof

In use at KOH!
https://flic.kr/p/2kGaLJY

https://flic.kr/p/2kGaPj2
 
Last edited:
Your sleeping/cargo box looking familiar. I like what you did with the double hinge on the lower side to gain access to the front of the box. Well done!
 
Your sleeping/cargo box looking familiar. I like what you did with the double hinge on the lower side to gain access to the front of the box. Well done!

I thought it might :) I definitely took some heavy inspiration from yours and tried to spin it for my use case. I especially liked the idea of having the 2 different heights to just have more room on the sleeping side. Those extra 2" make a surprising amount of difference.
 
I thought it might :) I definitely took some heavy inspiration from yours and tried to spin it for my use case. I especially liked the idea of having the 2 different heights to just have more room on the sleeping side. Those extra 2" make a surprising amount of difference.

Absolutely! How many nights have you spent in yours? I'm at about 30+. Definitely a few changes I'd like to make but very very minor. I've been pretty stoked on the 2 different heights.

EDIT - any chance you weighed yours?
 
Absolutely! How many nights have you spent in yours? I'm at about 30+. Definitely a few changes I'd like to make but very very minor. I've been pretty stoked on the 2 different heights.

EDIT - any chance you weighed yours?

So far it's just been the 3 nights last month at King of the Hammers. I finished the extension right before I left! One thing I might want to adjust is the width of the extension. Having it go all the way to the door might make it a little more comfortable and prevent my feet from going down the side during the night. The only other change I would make now is the mattress topper. 2" was definitely not thick enough, but I hadn't made my final cuts on it so I just folded it over. Hoping to get some more nights this spring and summer to really feel it out.

I didn't weigh it, but it was pretty easy to place in the back by myself once the drawers were removed. Hardest part was getting it angled correctly to fit through the opening with the way the top is designed.
 
Last edited:
December 13, 2020

ARB Air Compressor

Parts List:
- ARB High Output Air Compressor CKMA12 (link)
- Some sheet steel

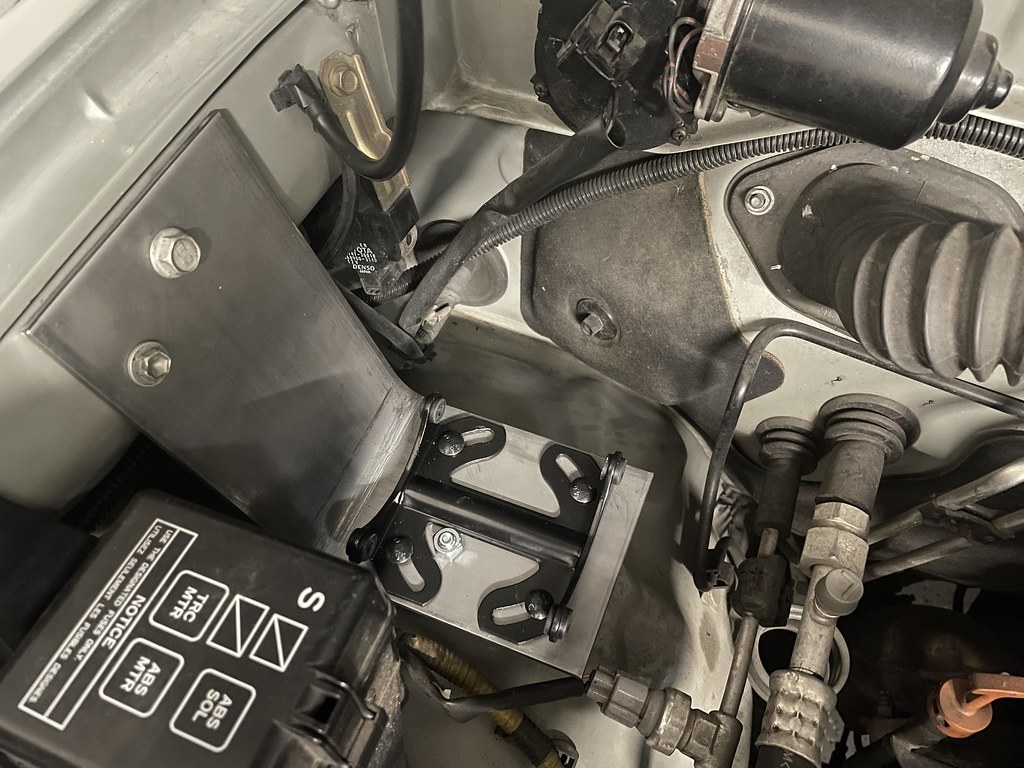
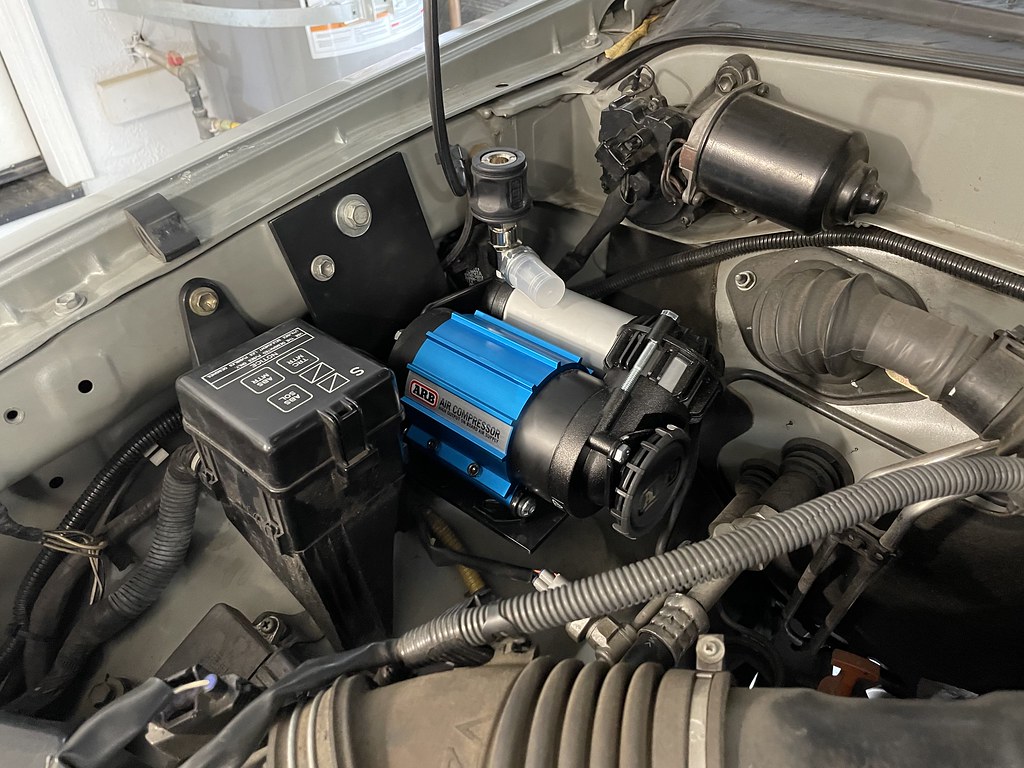
I've wanted to have a nicer air compressor than my dinky plug in one, but kept putting it off for such a long time. I saw an okay deal on the ARB compressor and finally decided to just go for it. Unlike the '99, the '01 has a very nice spot to put the compressor for on-board air in the engine bay. I made a bracket that is definitely overkill for the application, but at least I know it won't be going anywhere.

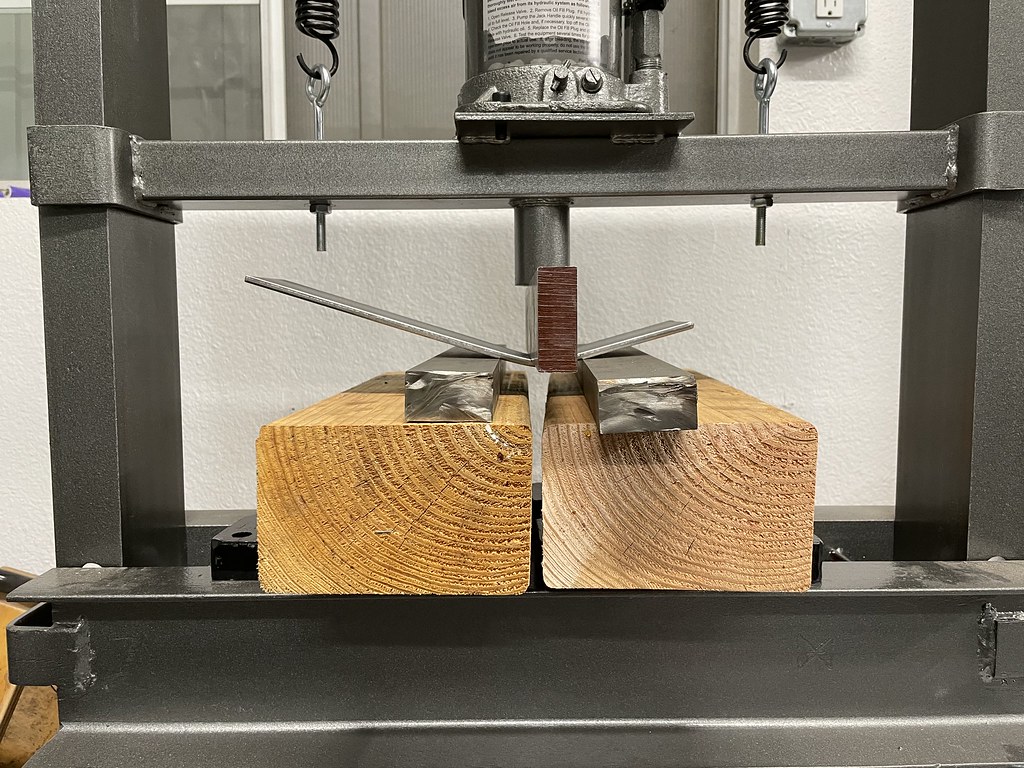
I don't have a press brake, so I wouldn't recommend this method, but I was able to get the bend I wanted out of the steel by pressing it on the HF press. I drilled out the holes to match the threaded inserts on the flares and wheel wells and I was on my way. I used a small piece of aluminum tubing to hold up the bracket off the wheel well and prevent the compressor from vibrating due to it being unconstrained.

The wiring is pretty straightforward, especially with the harness that comes with the compressor. I cut everything to length and passed through all the wires I needed into the bulkhead connector at the firewall. Since the harness comes with the option of wiring 2 lockers in, I decided to just pass those through as well! I've been thinking of a locker the last 3 years, but never found the justification for needing it. Maybe this will be the year! In terms of mounting the switch, I ran out of room on the left side of the dash, so it's currently by the opening near the head unit. Depending on my decision with the locker, I might try and put a new switch panel where the garage door opener/sunglass holder is located.

Bending the bracket
https://flic.kr/p/2kGaggd

Test fitting the bracket
https://flic.kr/p/2kGaQAa

Mounted up
https://flic.kr/p/2kG6BA6
 
January, 2021

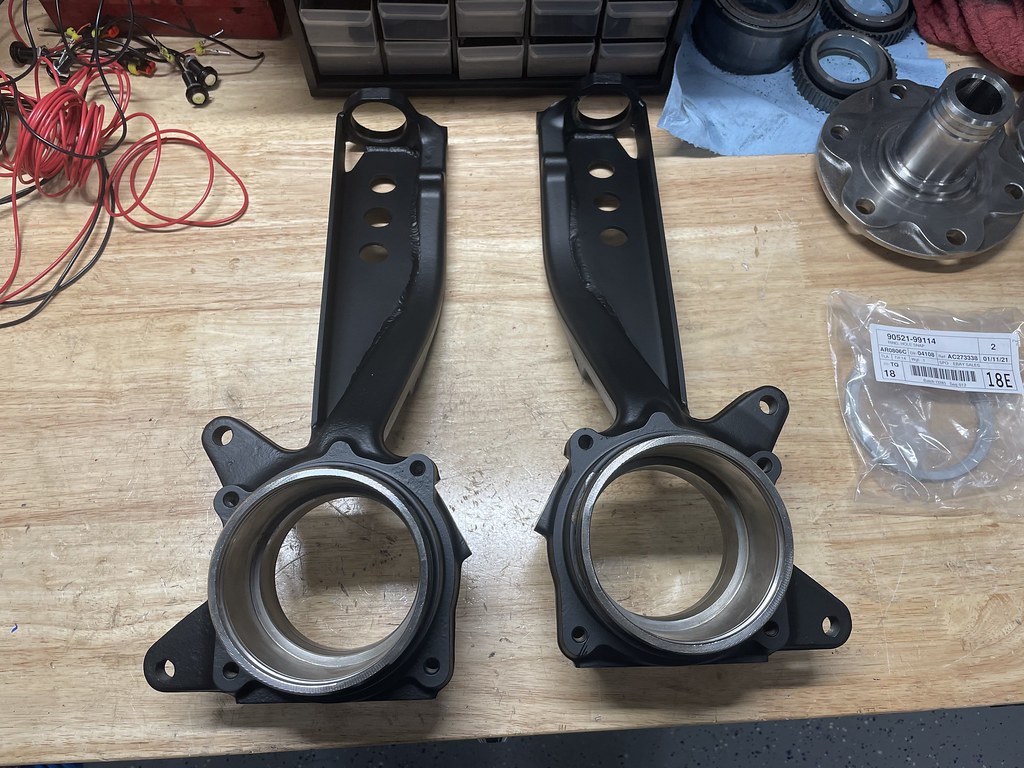
Total Chaos Spindle Gussets

Parts List:
- TC Weld-On Spindle Gussets (Part# 59697)
- Koyo Wheel Bearings (517011)
- Inner and Outer Seals
- Toyota Snap Rings (90521-99114)
- Junkyard OEM Spindles

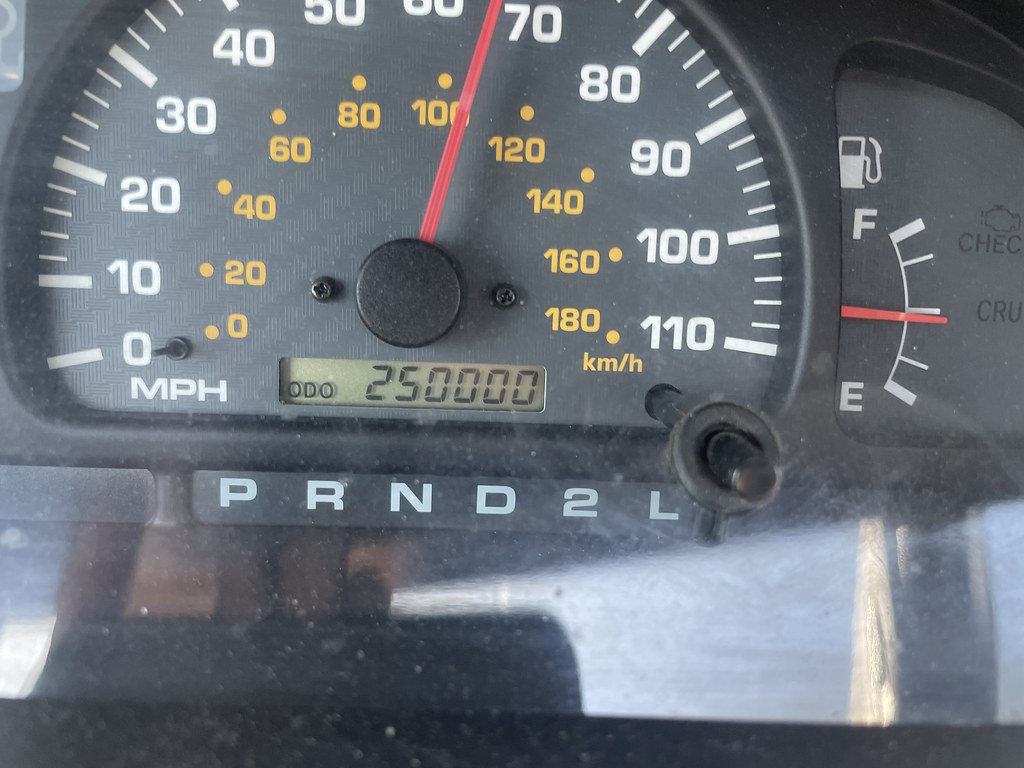
I bought these gussets initially for the first 4Runner, but never got around to installing them. With the trip down to KOH coming up, I figured might as well just go for it. Since I use my car for daily driving, I wanted to get a "new" set of spindles ready to swap over to limit the downtime. And while the wheel bearings were probably fine and didn't show any major sign of wear, I figured it was time after 245K miles.

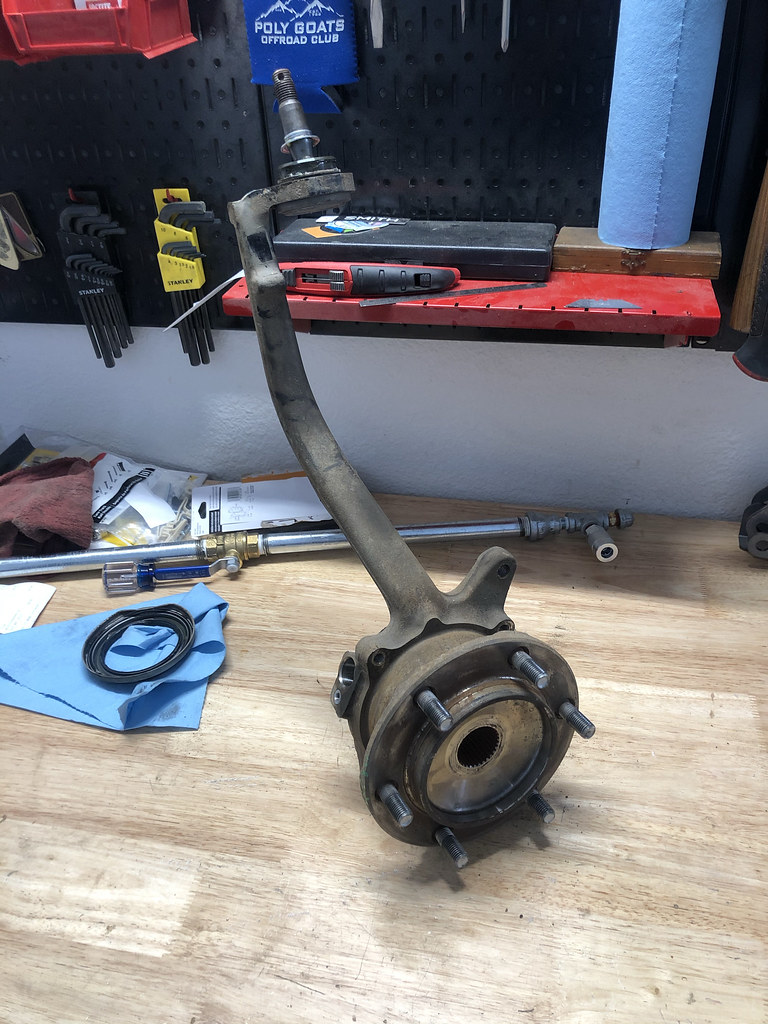
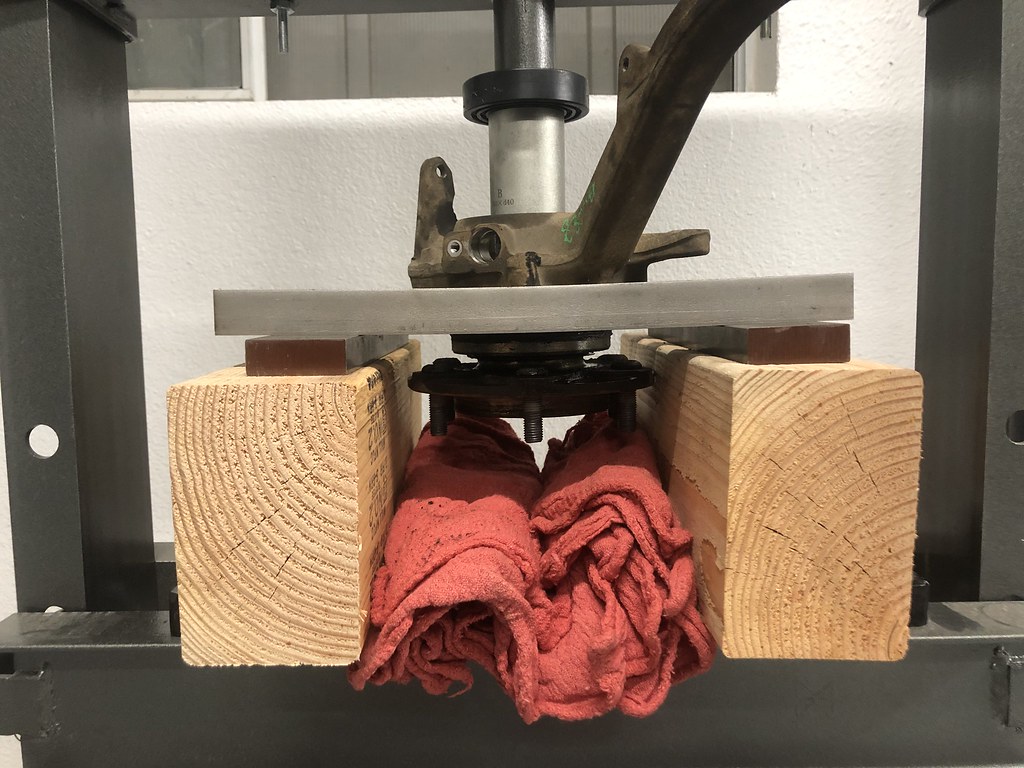
I pulled a set from 2 different junkers at the local pick n pull that looked pretty decent. They just had a bit of surface rust that could be cleaned off relatively easy. I started off by pressing out the wheel hubs. The first one was extremely easy, but the second one was rusted to the inner race of the bearing. Since the snap ring that holds the bearing in place is not accessible until the hub is out, I thought I was screwed. I tried using heat, hitting it with a hammer, letting it sit in PB Blaster, but nothing seemed to work.

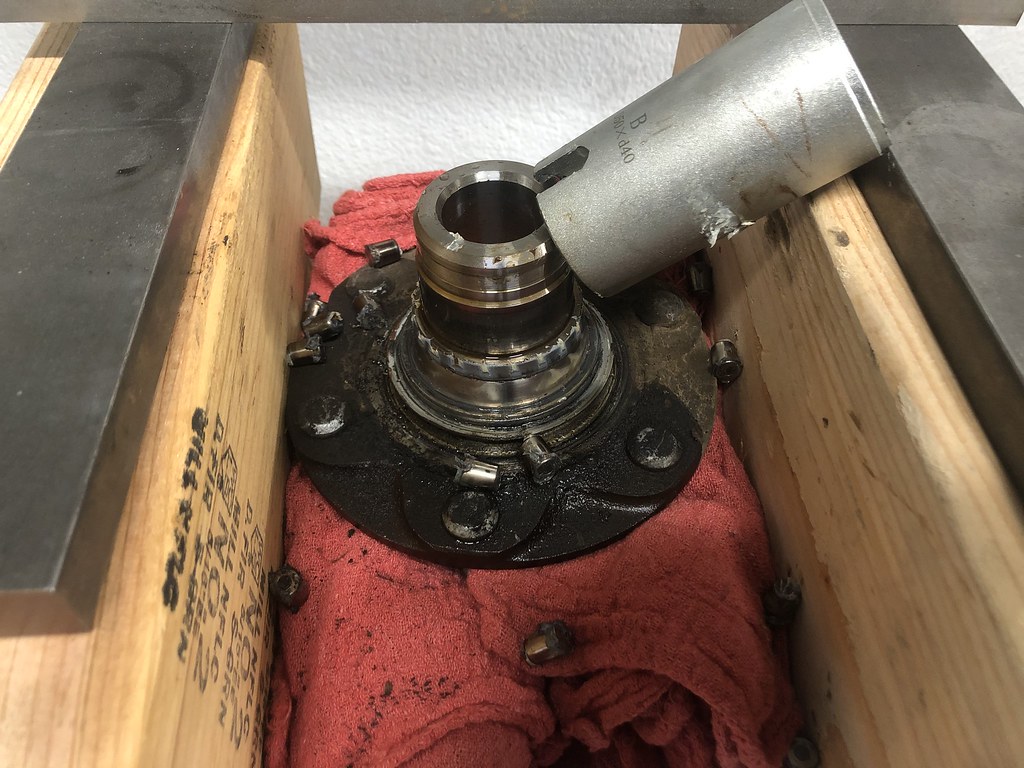
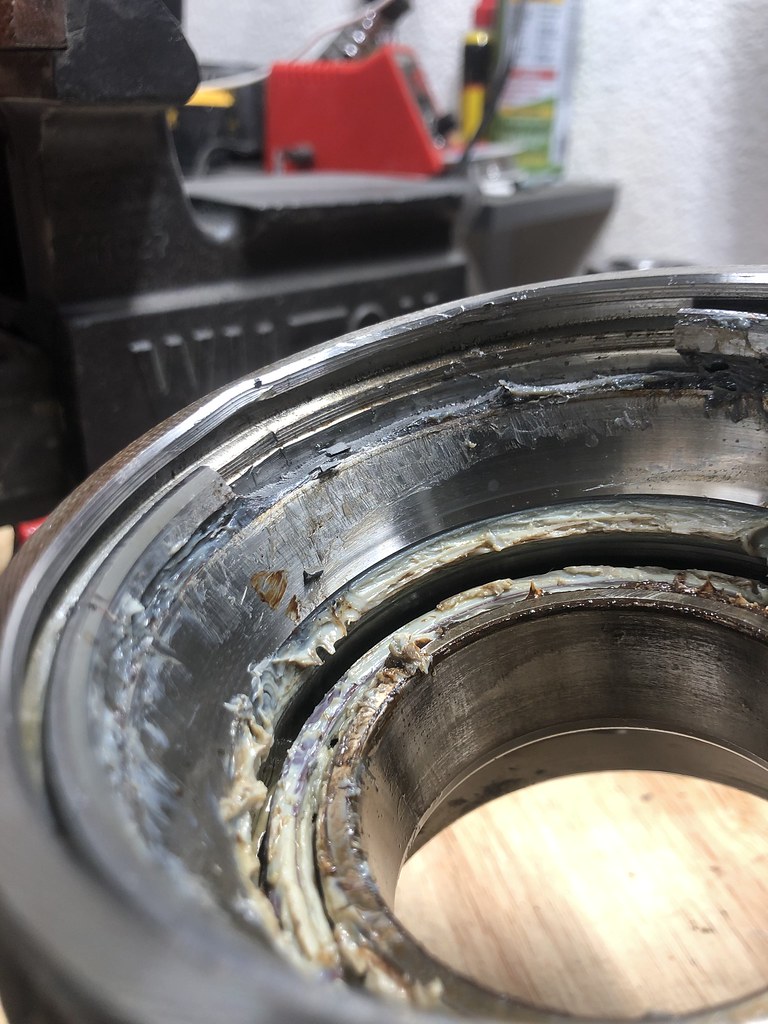
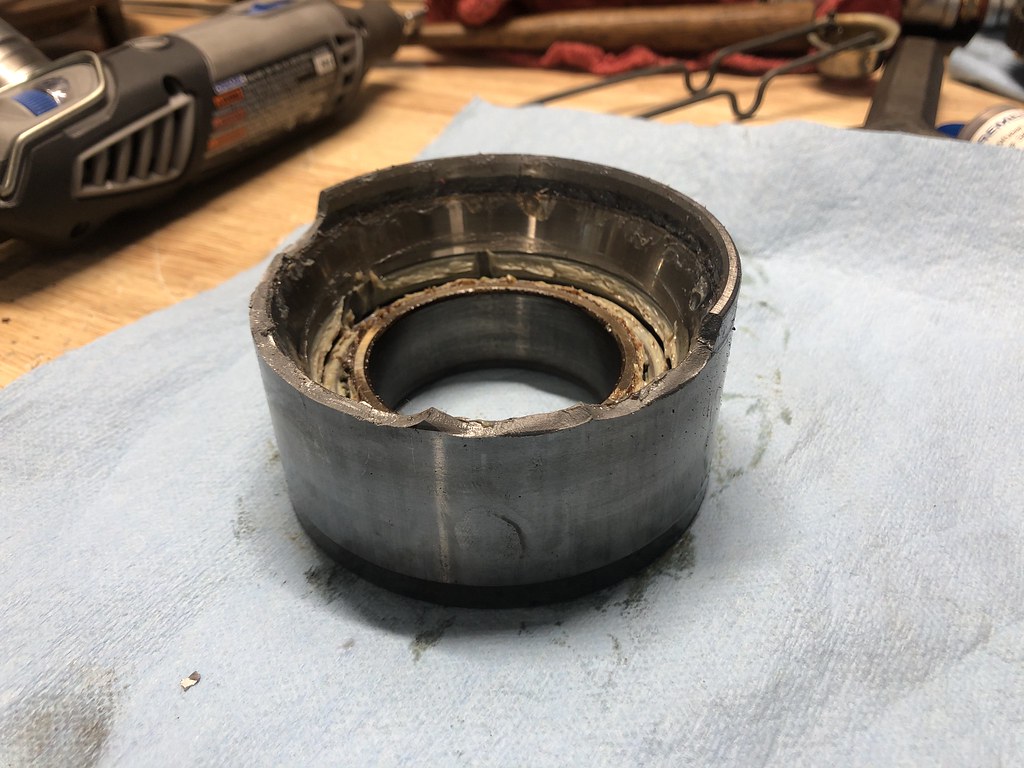
I finally decided to just press through it and hope for the best. With enough force, the bearing gave up and exploded. Luckily the only damage to the spindle was where the snap ring pushed against the outer edge of the slot. I had to use a dremel to cut off the inner race from the hub as it was still stuck. I slightly nicked the hub's shaft, but luckily it didn't go too deep. With all of the parts removed, I started removing all of the surface rust that I could. With a variety of wire wheel attachments, most of the rust was able to get off.

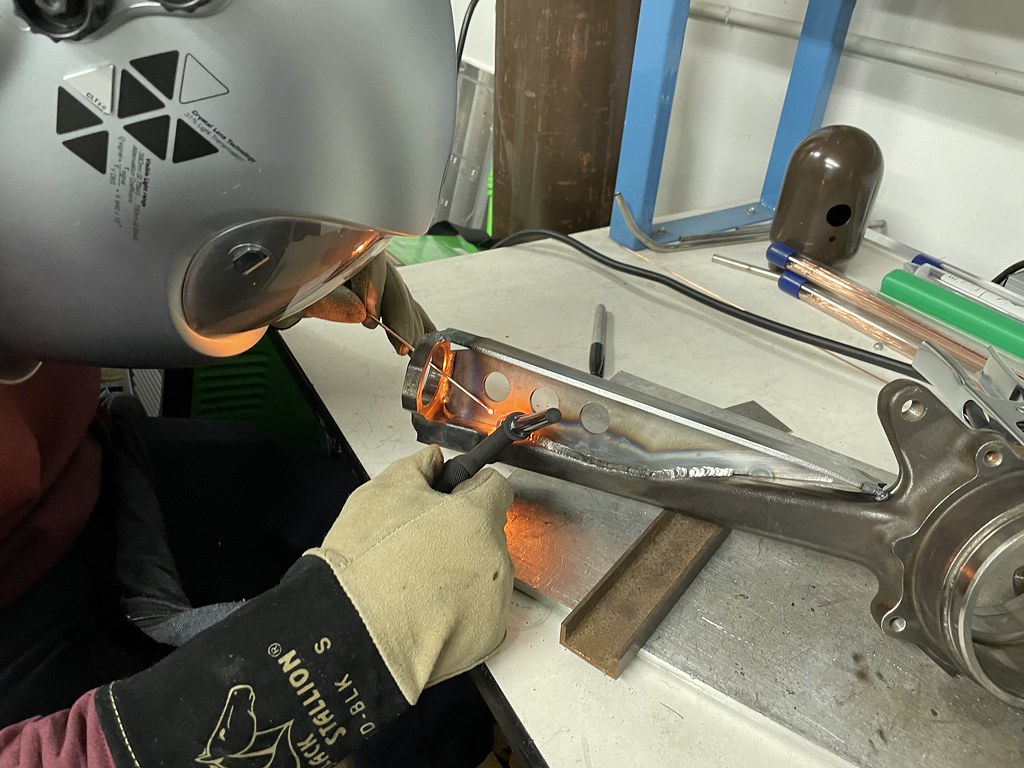
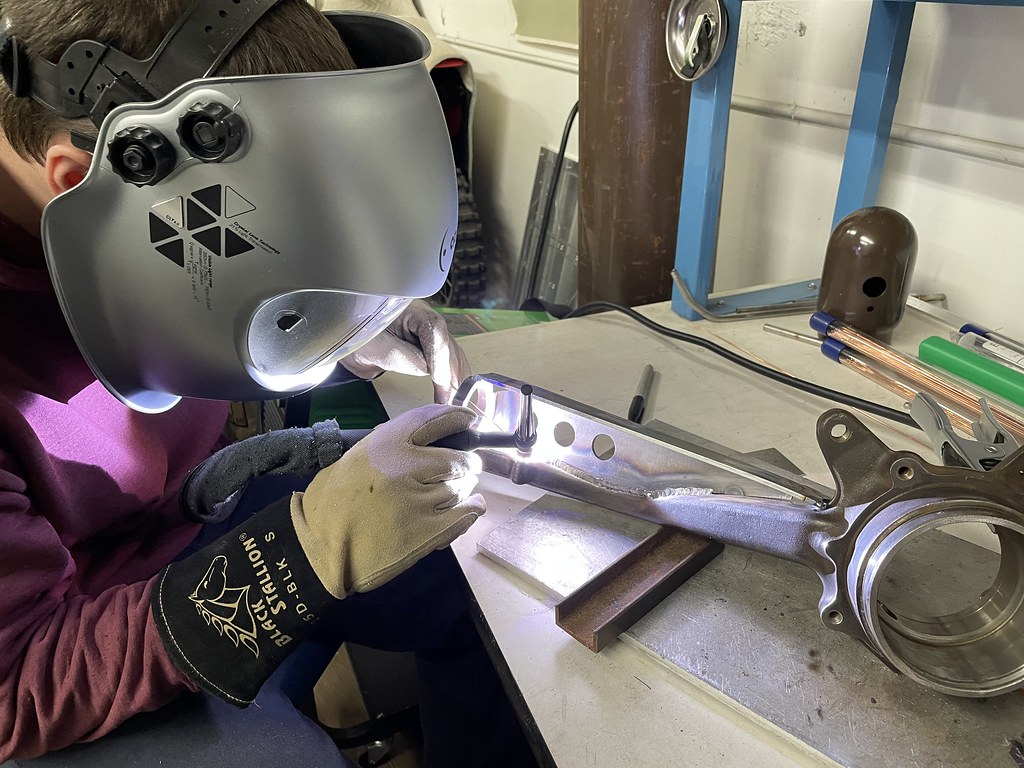
Next up was to actually weld the gussets in place. My buddy was there again to help me out with this. Maybe one of these days I'll pick up welding again, but a 6 pack and a couple hours is a pretty good deal. Welding went pretty quick after some grinding to get it to fit better. I masked off the important areas, and after a few coats of paint, these spindles were good as new!
Pressing in the new bearings went much smoother than removal. Because of the slight lip that was formed from the broken bearing, I wasn't able to fully seat the outer seal. I had to remove the seal and grind down the burr to get everything to seat properly. After that, everything else was pretty straightforward.

Way too much text, so onto pics.

Backing plate removed
https://flic.kr/p/2kGaP4s

The stuck hub and the carnage
https://flic.kr/p/2kGad2c

https://flic.kr/p/2kG6C2S

https://flic.kr/p/2kGaMpf

https://flic.kr/p/2kGaMnw

Prepped spindles
https://flic.kr/p/2kG6FbC

Welding
https://flic.kr/p/2kG6Boc

Painted
https://flic.kr/p/2kGaLFX

Fully installed
https://flic.kr/p/2kGaLvB
 
February 4th-6th, 2021

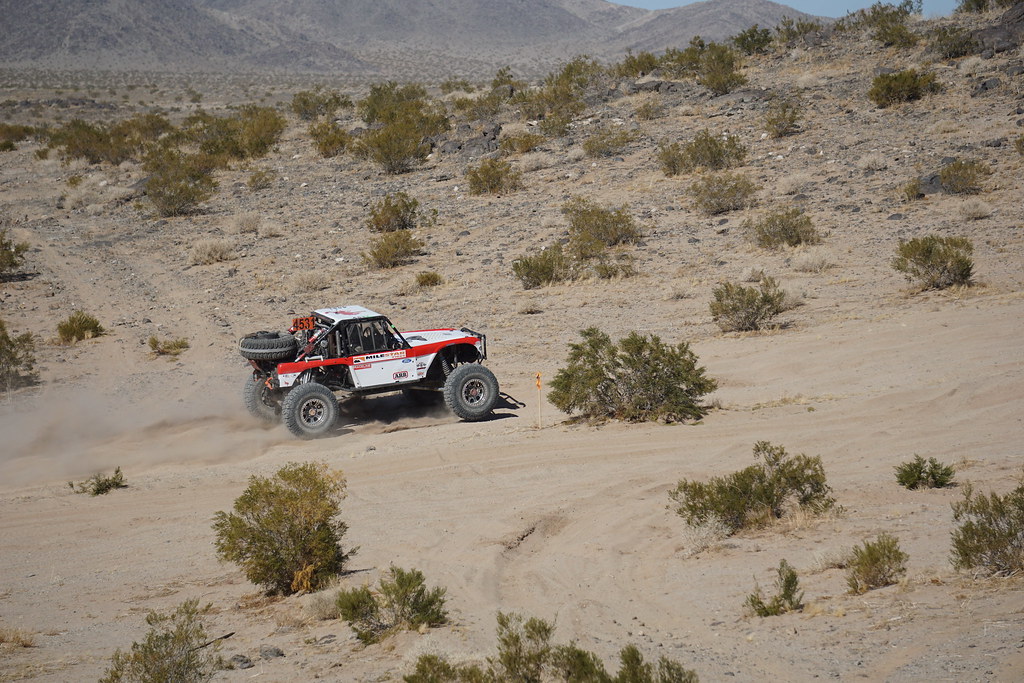
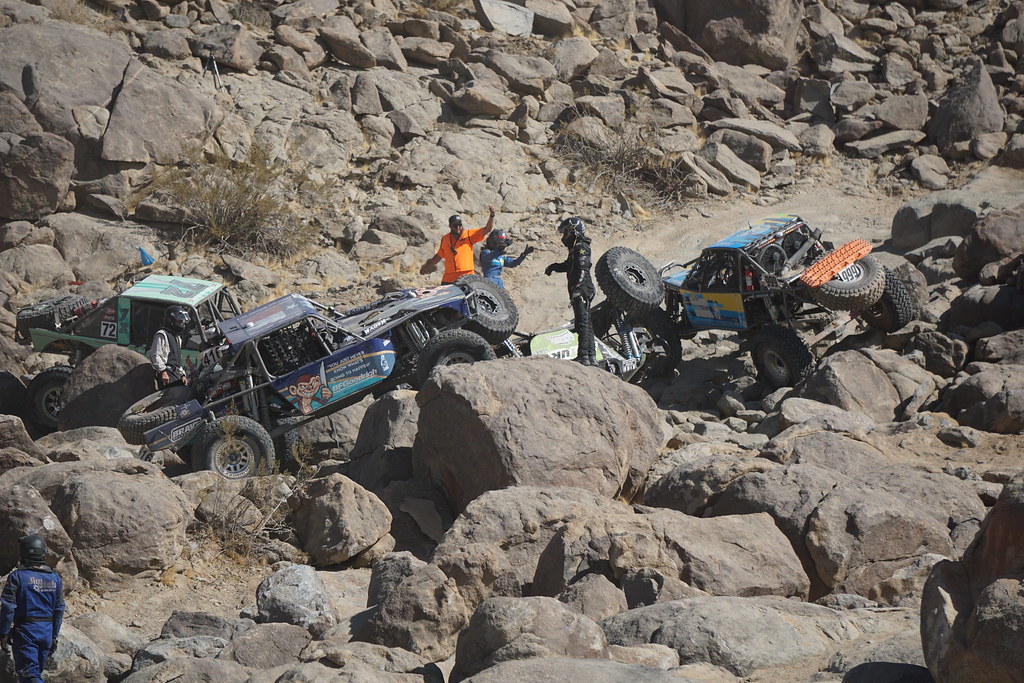
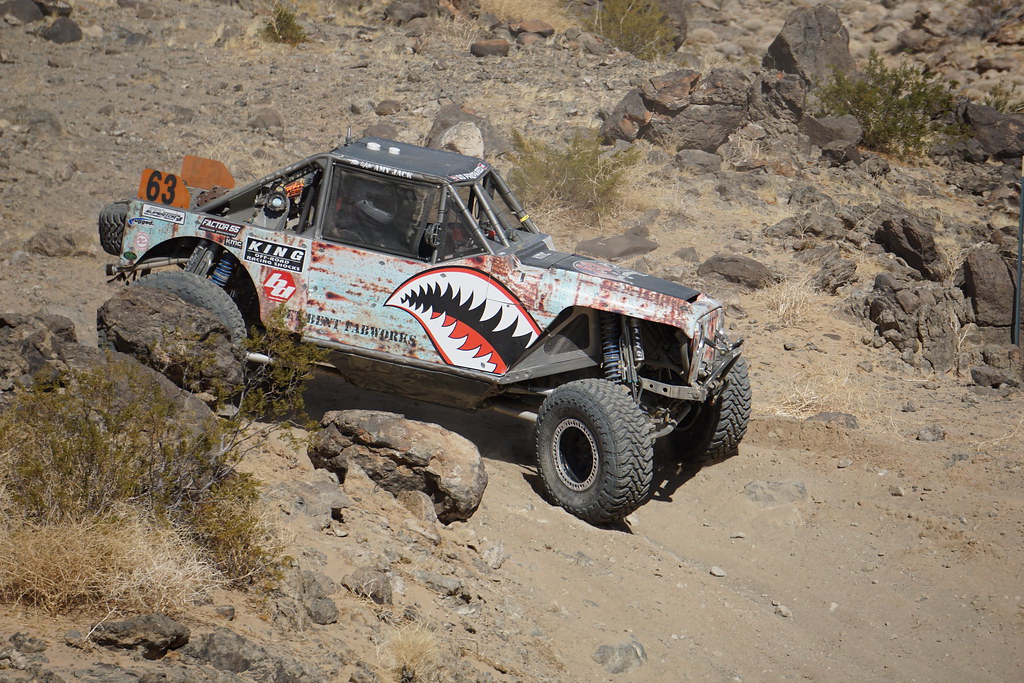
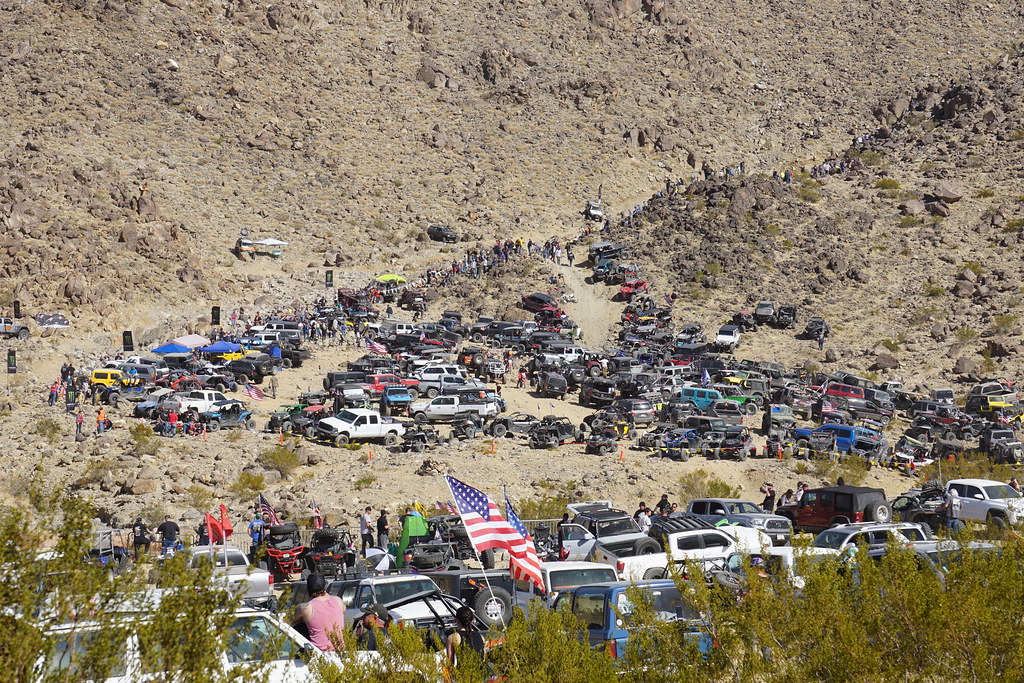
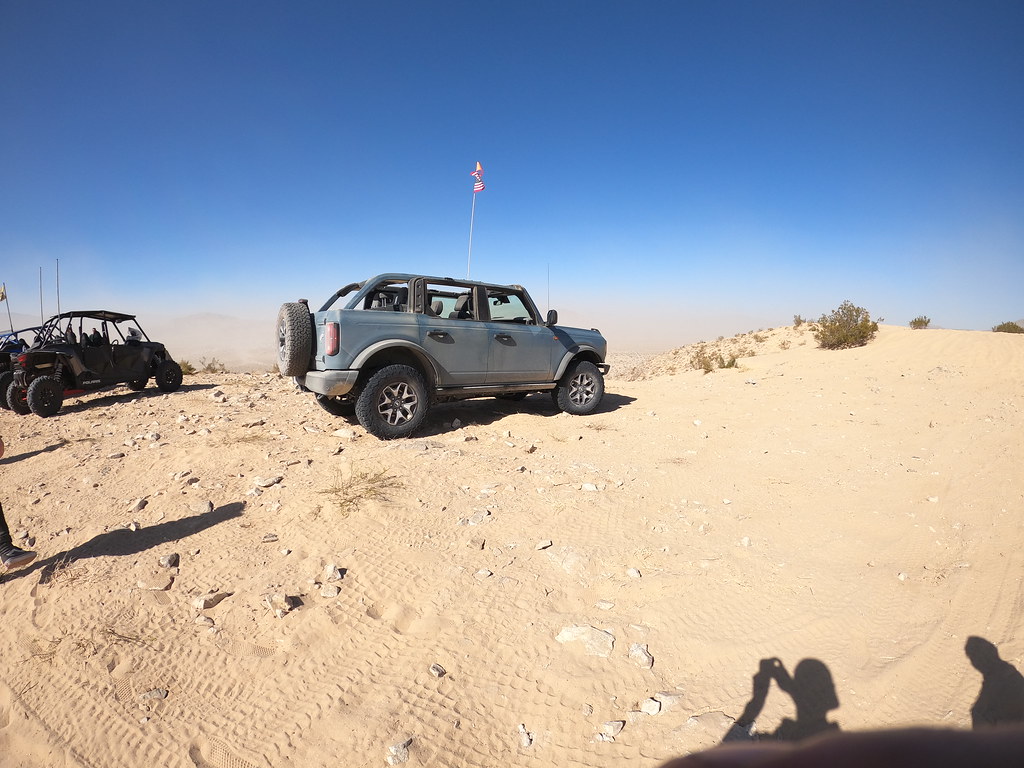
King of the Hammers

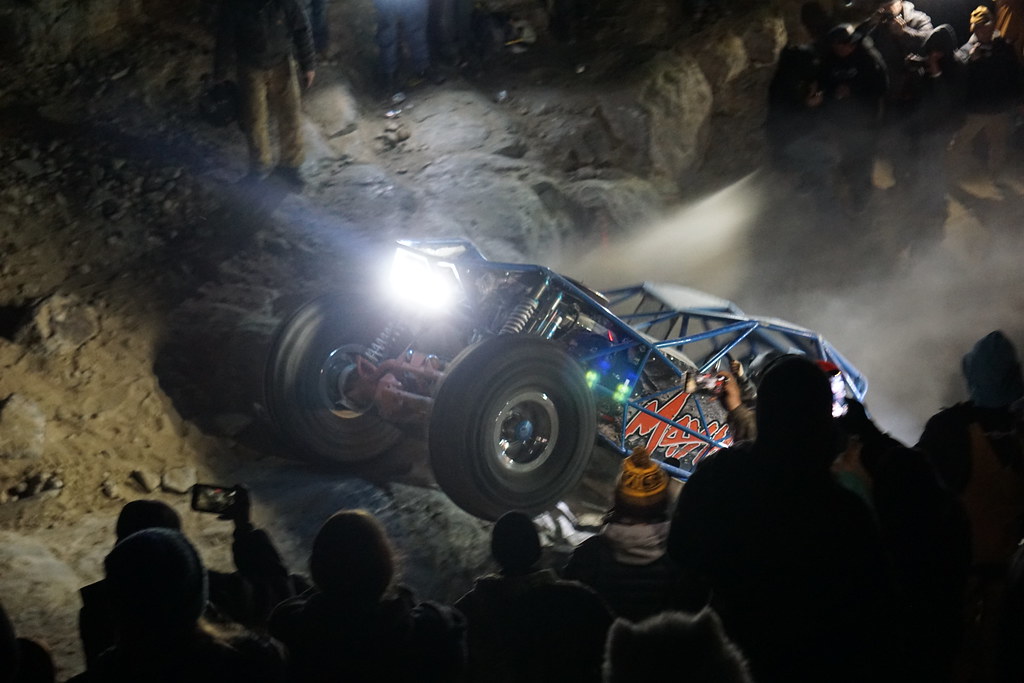
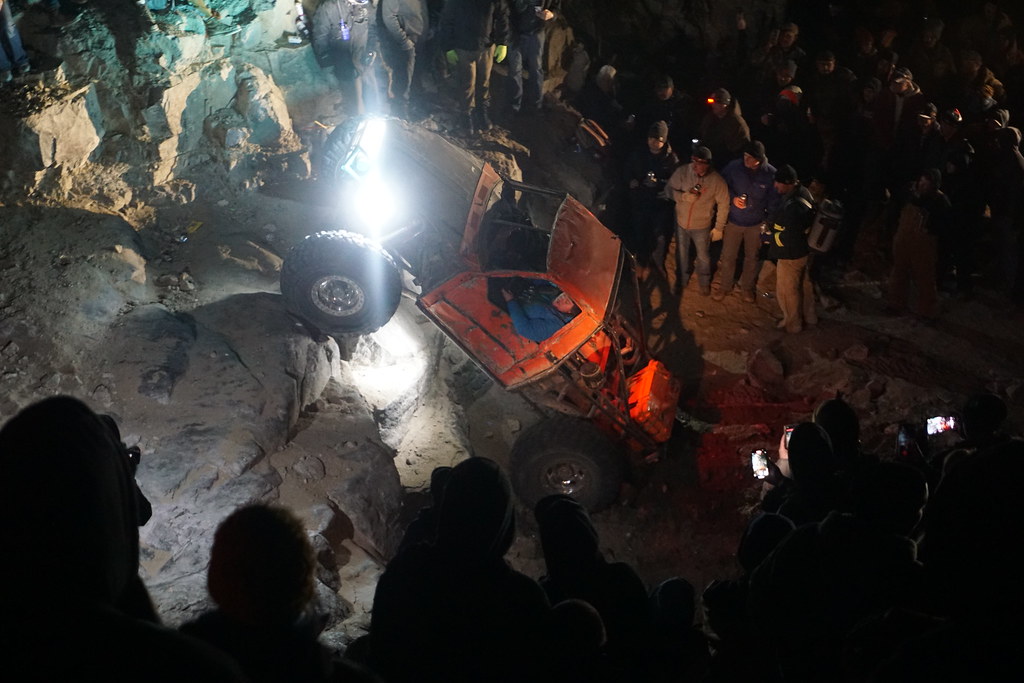
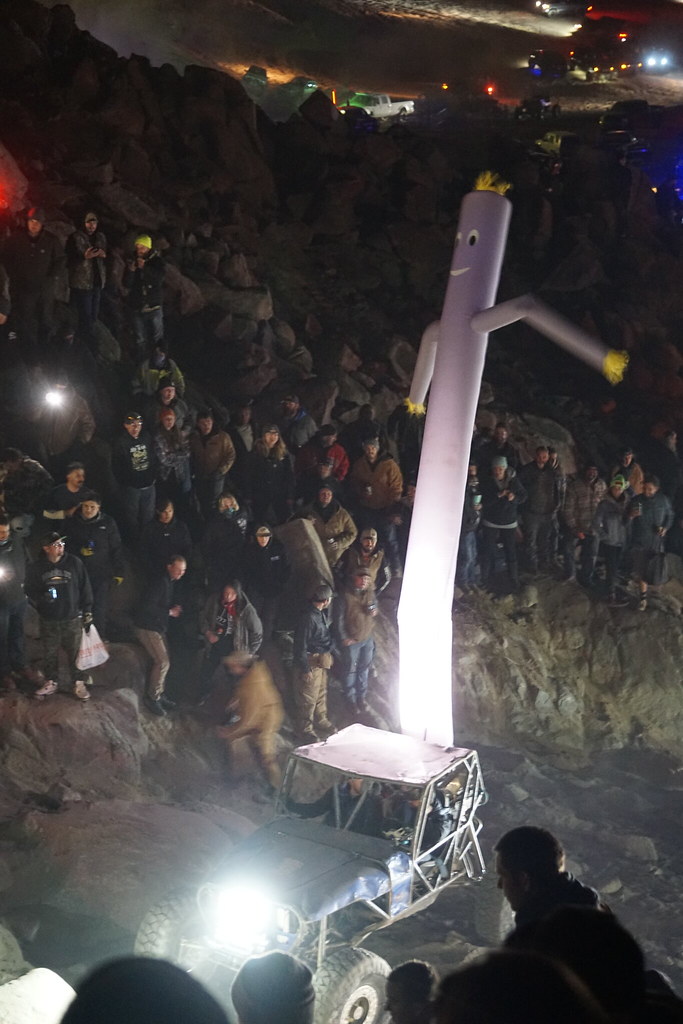
Was able to head back down to KOH earlier this year and had an absolute blast! This was the first time bringing my own car on the trip, so was definitely excited to rip around in the desert. The rig did great during the 8 hour drive and we went straight back out to explore the area. I was having some trouble in the deep sand dunes, but I think that was from not filling the transmission enough during the change I did right before the trip.

We didn't do any of the crazy trails, but did get some pretty good speed (for me) on the desert whoops. During one of those runs, the steering started to feel weird and make a popping noise whenever the suspension cycled. I figured it was the inner tie rod, so I jacked up the front to check for play and found there to be quite a bit side to side. I did have a spare but didn't really want to replace it, so I was just hoping it would make it all the way back home. I'm still not sure how it happened, but I'm guessing bottoming out the suspension multiple times didn't exactly help. Only real damage from the trip was the inner tie rod and the outer seal that must have been damage from the rack moving.
The race itself was fun to watch with lots of excitement, but I think I was more happy to be on a real trip again since covid. Here are some of the pictures, but I have a whole Google Photo album of stuff too here!

https://flic.kr/p/2m4JnVb

https://flic.kr/p/2m4ErPJ

https://flic.kr/p/2m4FuKJ

https://flic.kr/p/2m4FtJa

https://flic.kr/p/2m4KR4o

https://flic.kr/p/2m4Jny4

https://flic.kr/p/2m4JmHw

https://flic.kr/p/2m4KQpY

https://flic.kr/p/2m4FsQb

https://flic.kr/p/2m4EpY4

https://flic.kr/p/2m4KTsw

https://flic.kr/p/2m4Jqdh
 
April 26, 2021

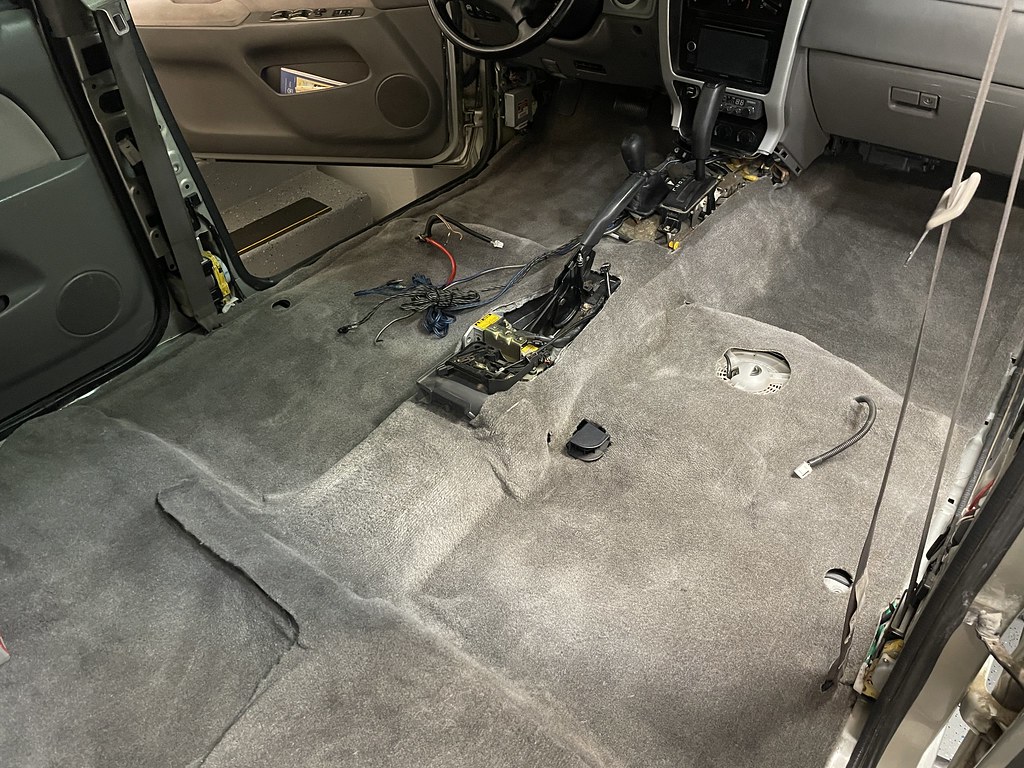
Finishing the Sound Deadening

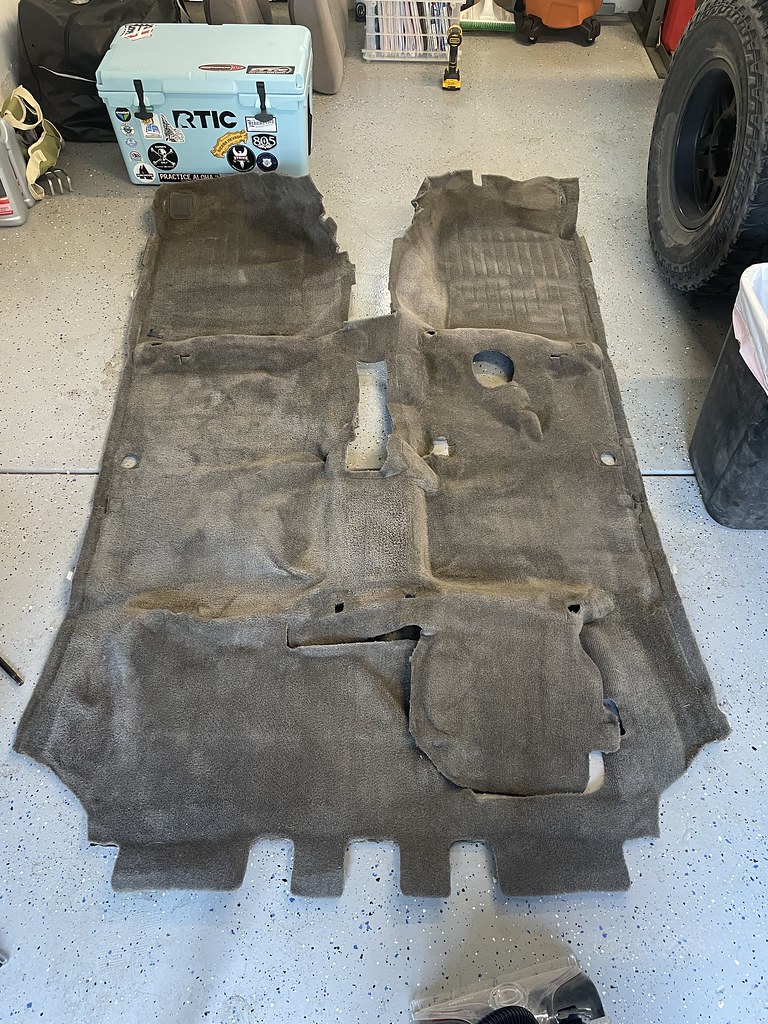
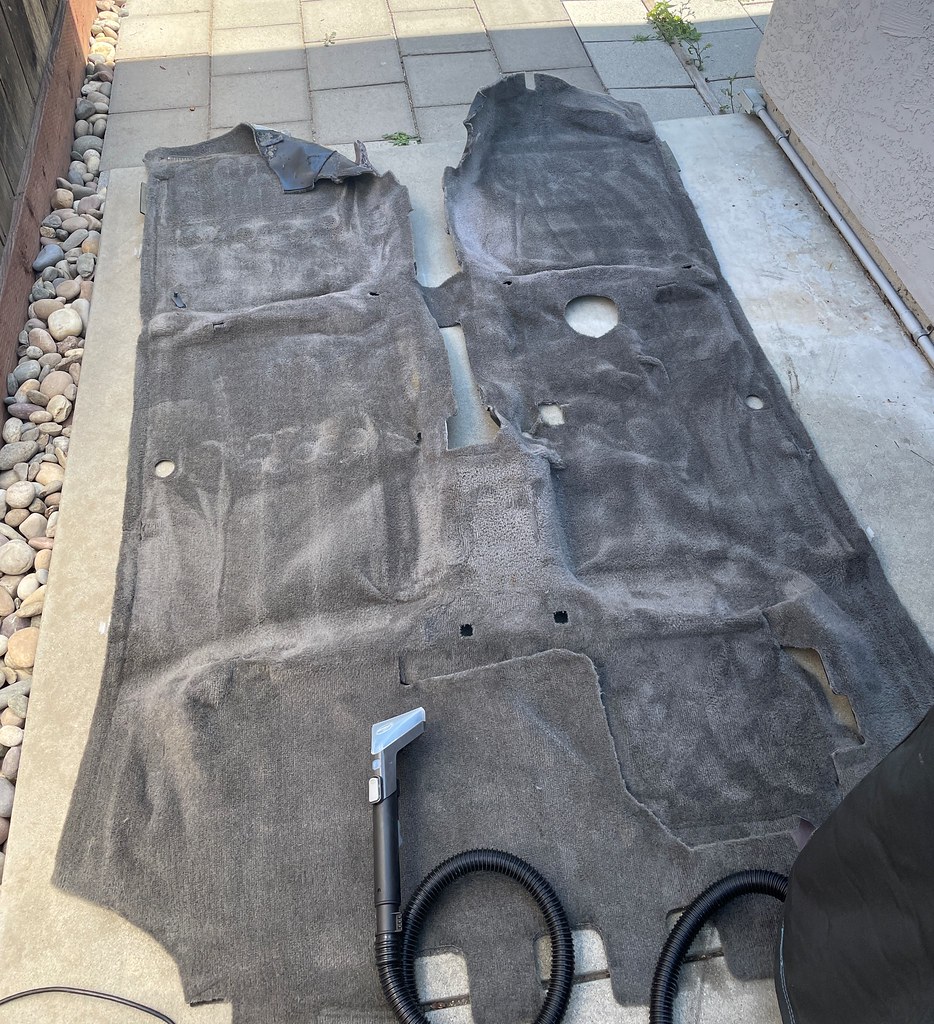
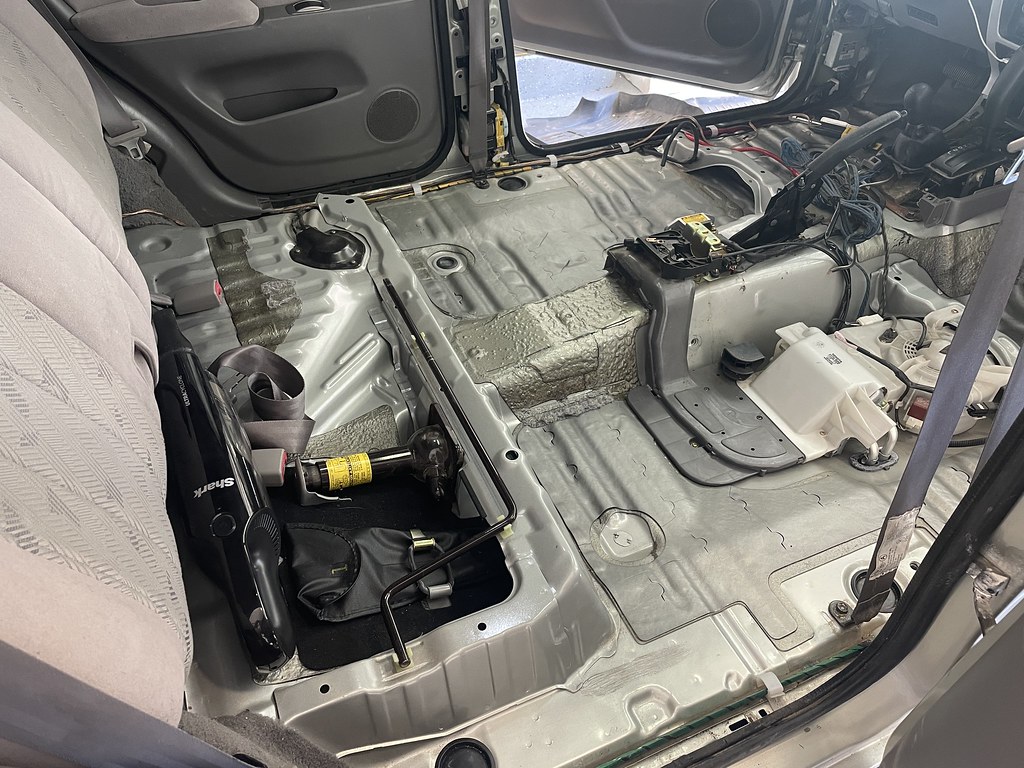
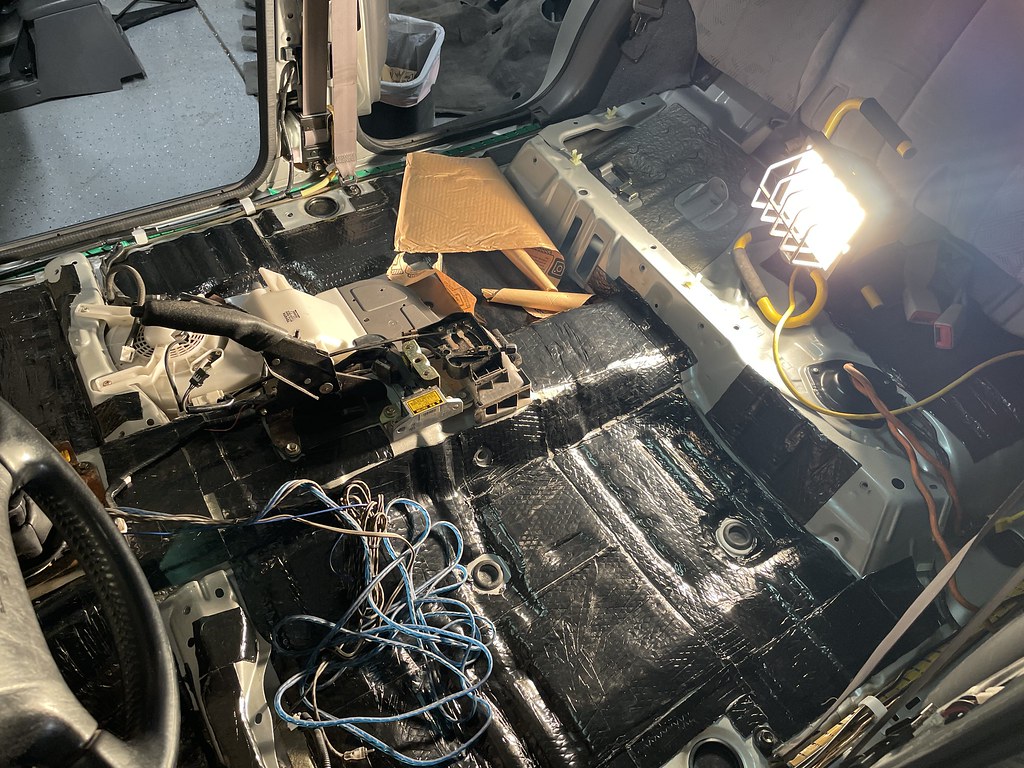
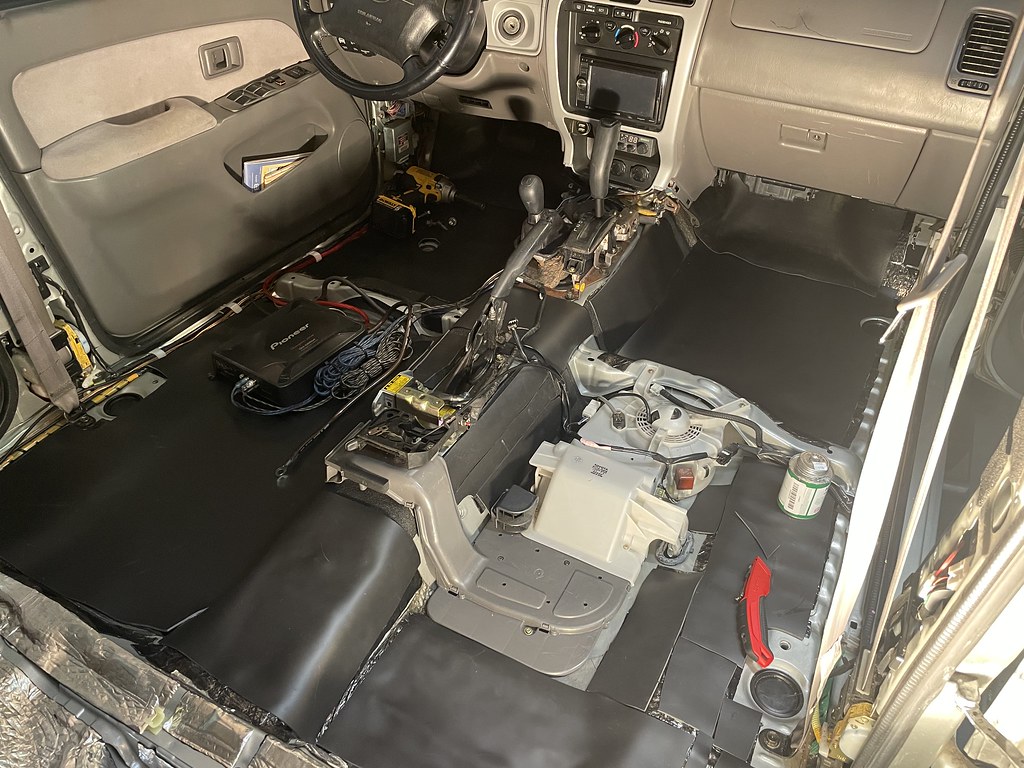
Before the trip out to AZ, I wanted to finish up the last bit of sound deadening in the cab. The carpets were pretty dirty, but underneath didn't require too much cleaning. I did mostly the same as the cargo area, but used significantly less of the foam as I didn't want to buy anymore of it. Overall, I am very happy with the noise difference and now the music sounds SO much better! The main noise I hear now comes from the engine bay since I didn't add anything to the firewall.

Carpet before and after
https://flic.kr/p/2m4dUGj

https://flic.kr/p/2mrvbSM

https://flic.kr/p/2mrzbDg

Butyl rubber down
https://flic.kr/p/2mrDU91

Foam and MLV
https://flic.kr/p/2m4dUYg

Clean carpet back in
https://flic.kr/p/2m4hw5G
 
July 16-19th, 2021

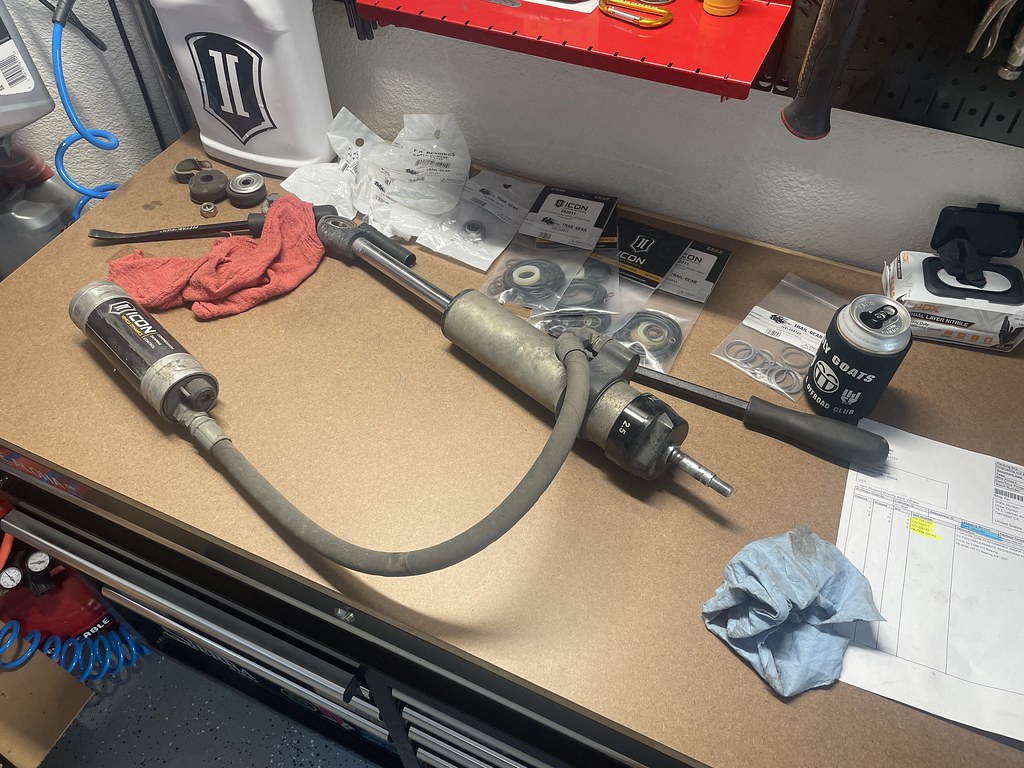
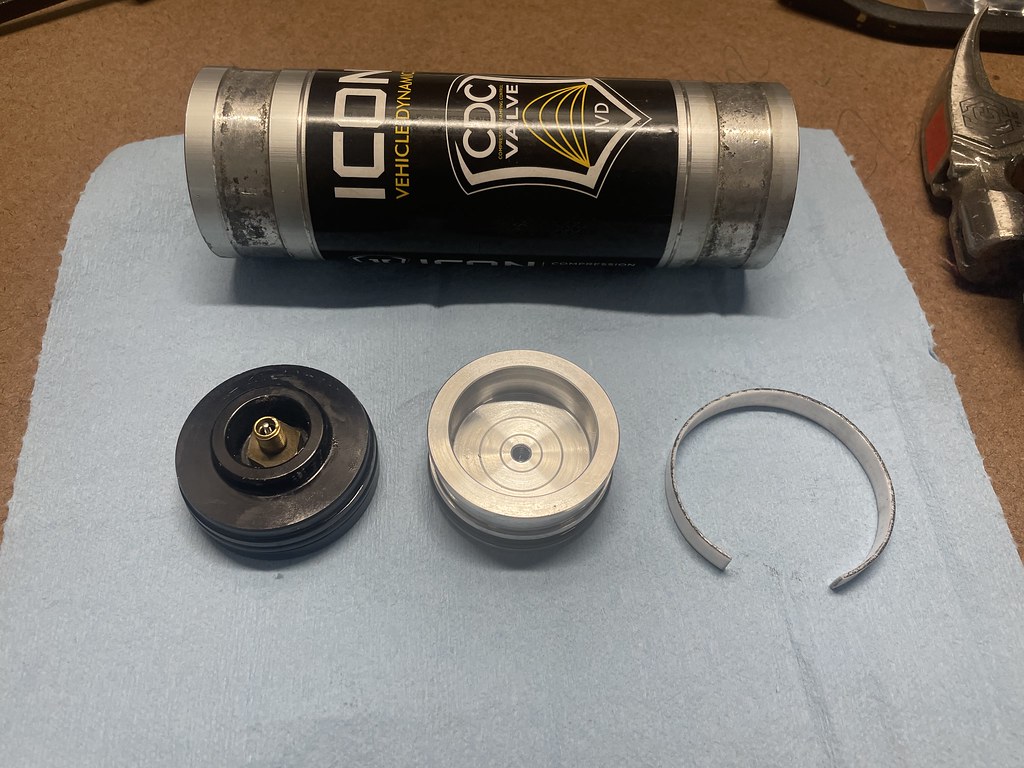
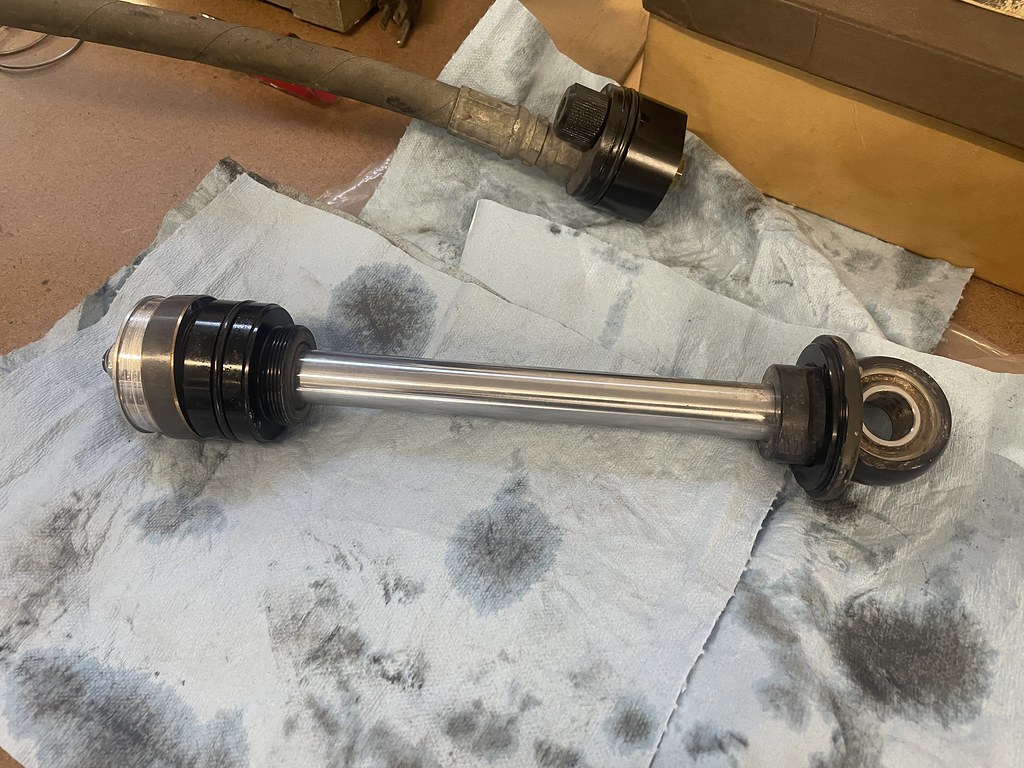
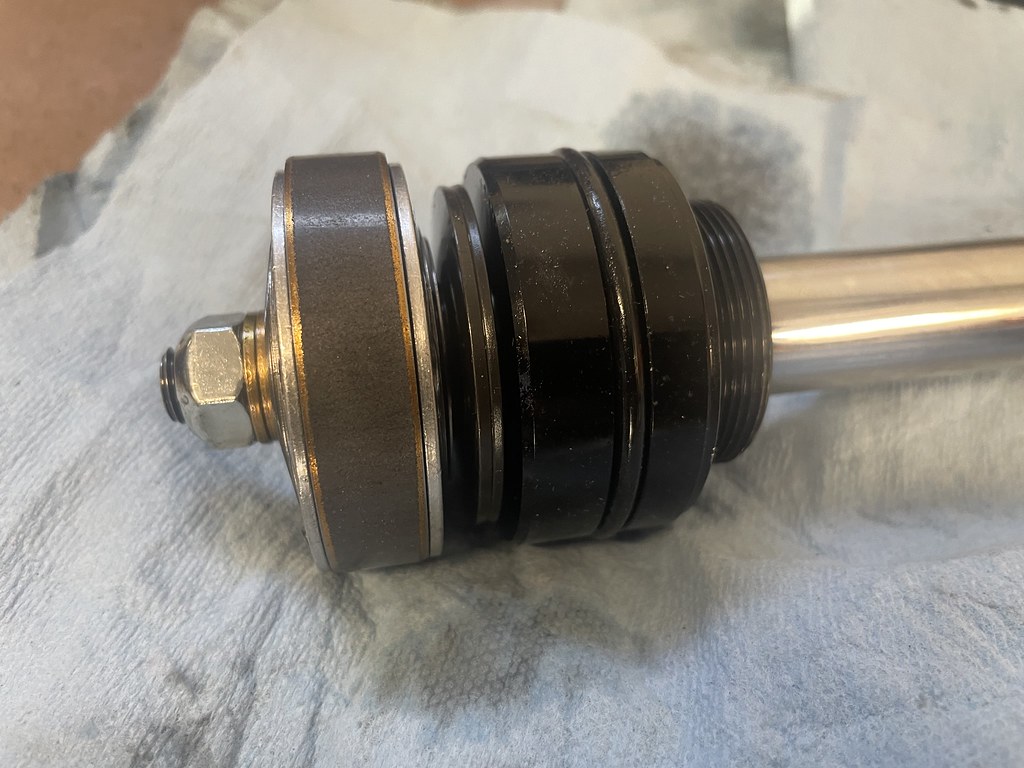
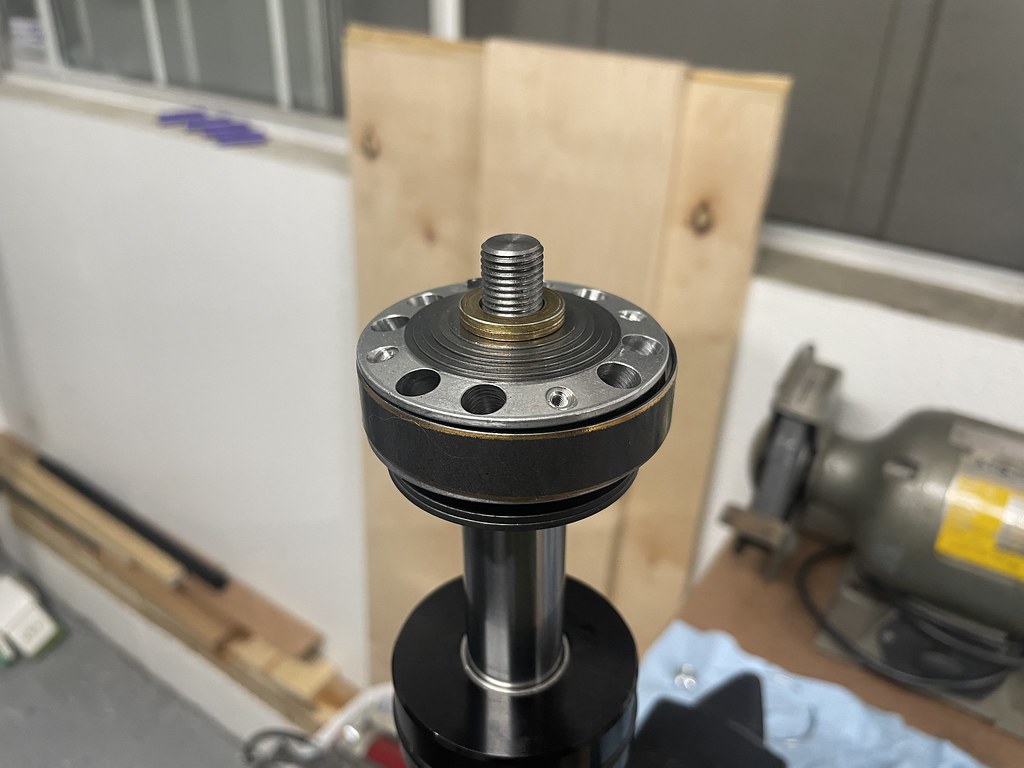
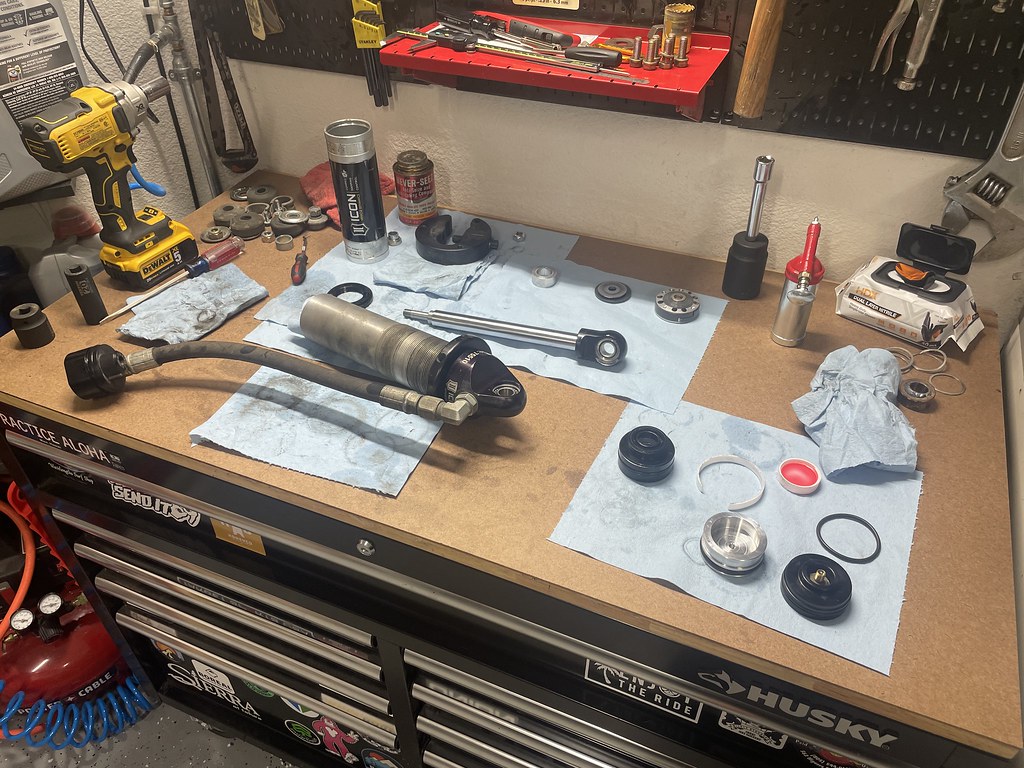
Shock Rebuild

Parts List:
- 4x FK COM 10T-F1 bearings
- 2x FK COM 12T-F1 bearings
- Some spiral internal retaining rings
- 4x Icon 2.5 remote resi shock service kit (IVD-252011)
- Gallon of Icon shock oil
- 700 lb/in 14" Icon coils (IVD-158508)

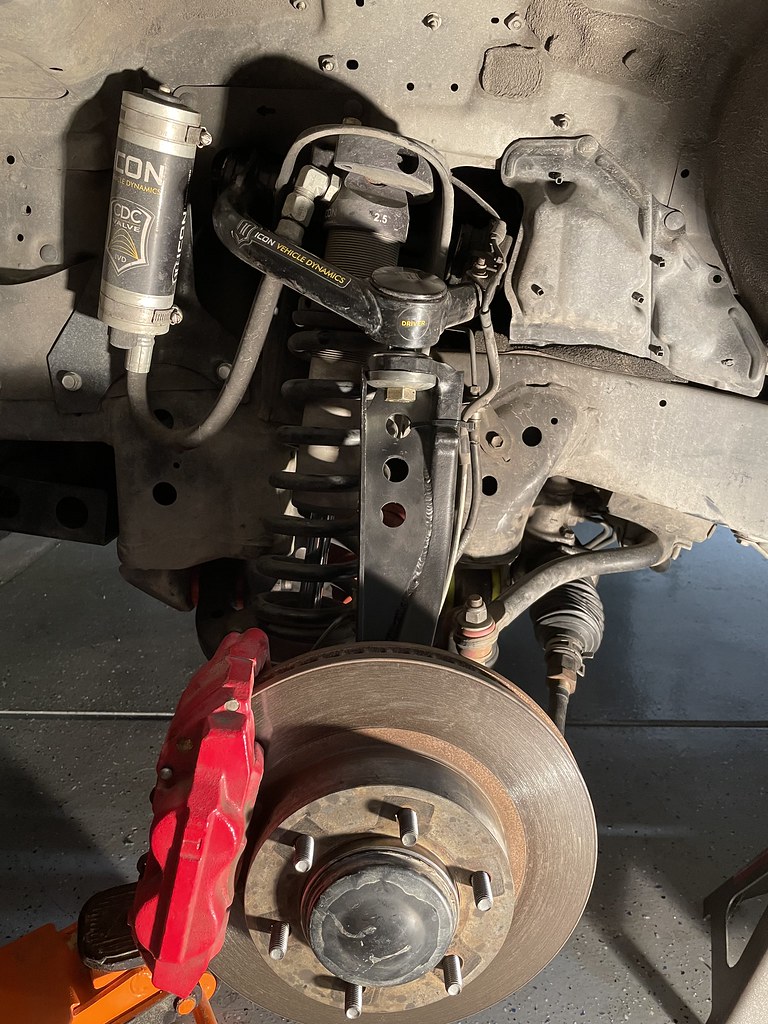
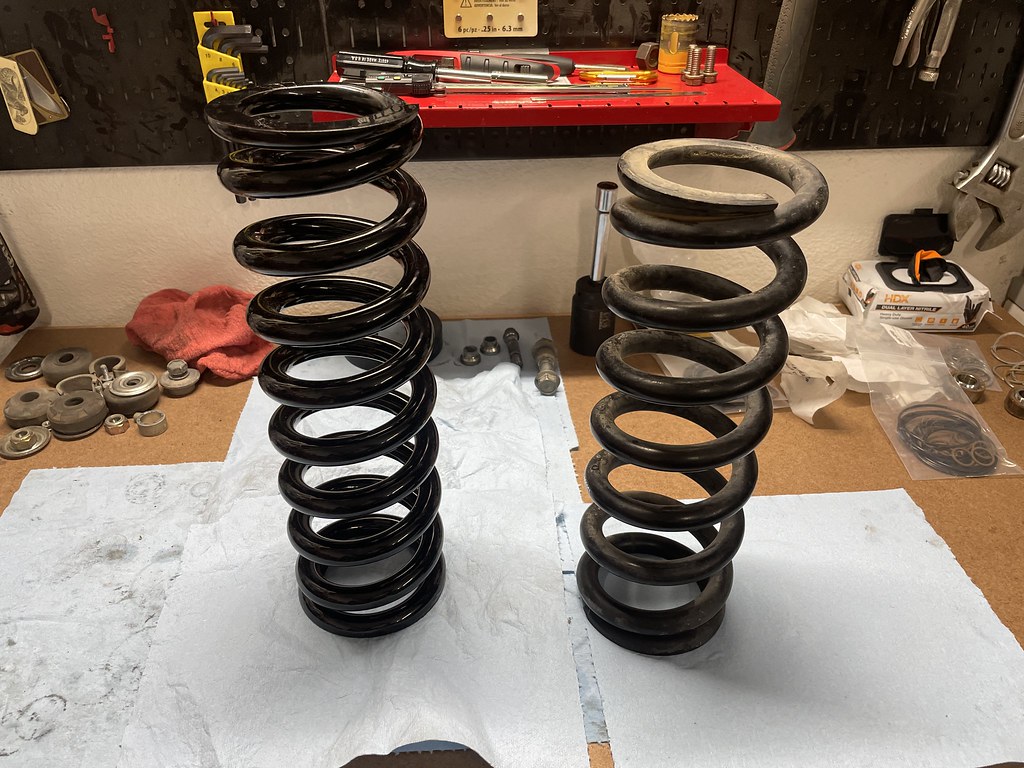
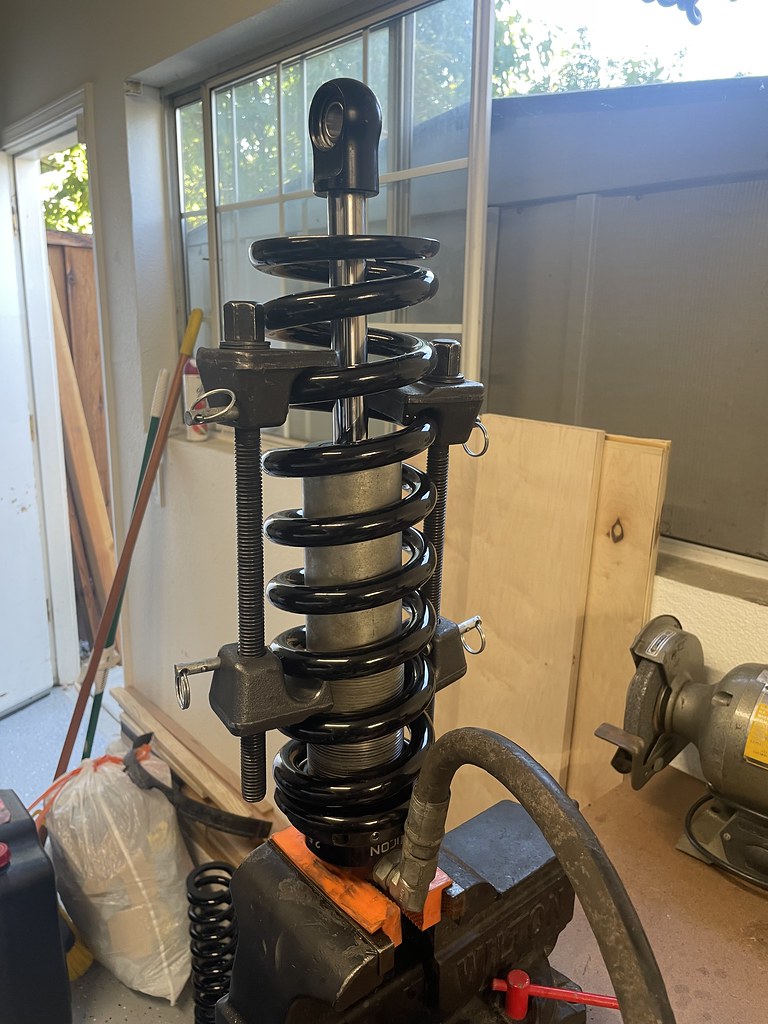
After putting around 35,000 miles on the shocks, I figured it was time to rebuild them. The oil in the rear was pretty brown and had a little metallic sheen to it, but nothing too bad. The actual rebuild is fairly straightforward, just replacing the old o-rings with the new ones. Hardest part was just keeping all the shims in the correct order after cleaning them. Everything else in the internals looked pretty good and the shafts had no sign of pitting either.

For the front coilovers, I decided to go up to a 700 lb/in spring based on the amount of weight I have in the truck. After a few months of driving, this was absolutely the wrong decision... The ride is super harsh and is not as enjoyable to drive anymore. I'm planning on going back to the stock 650 lb/in relatively soon.

Once everything was back together, I brought the shocks to a motorcycle shop to get 150 psi of Nitrogen into the reservoirs. Overall it was a pretty fun project!

https://flic.kr/p/2mrCZqK

https://flic.kr/p/2mrvhVd

https://flic.kr/p/2mrzjPK

https://flic.kr/p/2mrCZk4

https://flic.kr/p/2mrAqDR

https://flic.kr/p/2mrE34K

https://flic.kr/p/2mrvhH9

https://flic.kr/p/2mrE3pQ
 

Members online

Forum statistics

Threads
278,312
Messages
3,554,086
Members
248,016
Latest member
Advally Service

Trending content

Back
Top