
You are using an out of date browser. It may not display this or other websites correctly.
You should upgrade or use an alternative browser.
You should upgrade or use an alternative browser.
Jsmarine's 4runner build thread (lots of pics)
- Thread starter jsmarine
- Start date


Ron Helmuth
Senior Member
coming along most nicely!
If we had a category for most improved vehicle yours would certainly be right up there! Lots of custom touches.
You are the craigslist master sir! Gorgeous rack and fitment to the roof.:nicethread:
Subscribed for more!
If we had a category for most improved vehicle yours would certainly be right up there! Lots of custom touches.
You are the craigslist master sir! Gorgeous rack and fitment to the roof.:nicethread:
Subscribed for more!

jsmarine
New member
If we had a category for most improved vehicle yours would certainly be right up there! Lots of custom touches.
You are the craigslist master sir! Gorgeous rack and fitment to the roof.:nicethread:
Subscribed for more!
Thanks! Heres a craigslist tip for those that don't know, its not any kind of secret though! We all know searching craigslist can be tiresome, because its hard to search surrounding cities and towns. And if you are like me, driving 50 or 100 miles for a good deal can be worth it, its just depends on the deal. If you use searchtempest.com, you can search craigslist ads by distance from a certain zip code, which is much easier than clicking on every little town around yours. I also use Google advanced search, just type in the keyword, and then at the bottom you can type in the URL, which would be craigslist. org.
Just a little tip for everyone I guess, I spend a lot of time on craigslist and ebay!
Last edited:
jsmarine
New member
Well I haven't updated my 4runner lately with any new mods, but I will be doing some maintenance in the next week or so. Just bought a timing belt kit and will be installing that. Also will replace the fuel filter too.
As for mods, I will be adding a duel battery soon. I'm still working out how I want to do that. And I will also be upgrading my on board air to something with a little more output. I realized after my last trip out with Mr. Leary that my compressor is very slow! Felt like I was holding up the group airing up my tires! I ended up using his nicely mounted ARB compressor to finish up the last bit of air as it was so much faster!
Anyways, I will update this thread with pictures with these mods pretty soon hopefully!
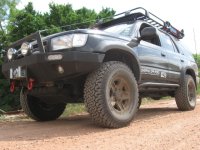
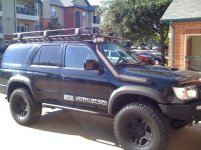
EDIT: I added my most recent pic (and my favorite to date), it was taken by a friend of mine on my last trip. Also thought I should add I am still in the process of designing a rear bumper too.
As for mods, I will be adding a duel battery soon. I'm still working out how I want to do that. And I will also be upgrading my on board air to something with a little more output. I realized after my last trip out with Mr. Leary that my compressor is very slow! Felt like I was holding up the group airing up my tires! I ended up using his nicely mounted ARB compressor to finish up the last bit of air as it was so much faster!
Anyways, I will update this thread with pictures with these mods pretty soon hopefully!
EDIT: I added my most recent pic (and my favorite to date), it was taken by a friend of mine on my last trip. Also thought I should add I am still in the process of designing a rear bumper too.
Attachments
Last edited:
jsmarine
New member
Battery Management System
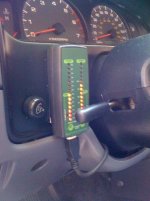
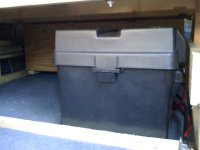
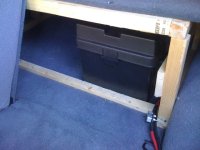
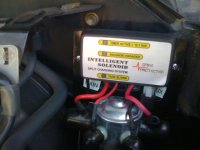
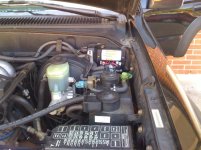
Ok, time for an update, I have been kind of busy lately with work and life in general, but I have recently added a few things to the 4runner. I got a Vortex Dual Battery Management system off eBay, it’s basically a knock off of the popular National Luna brand; but it seems to be of pretty good quality; and less than half the cost of a National Luna!
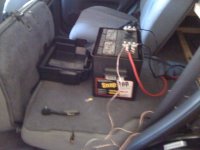
I installed the auxiliary battery in the cargo area, in between the rear seat and my cargo box. It fits pretty well, and I used a marine battery box to keep it all contained. The solenoid I mounted on the firewall on the drivers side, it seemed to be the best (and only) place I could find to mount it. On the inside, I mounted the voltage meter on the dash near the dash dimmer switch. I won’t get into the details of what the system will do, as it’s easier to read about it here: http://www.sierraexpeditions.com/index.php?l=product_detail&p=543
Again, I have the knock off, but it does the exact same thing, just doesn’t have the name brand on it.
Ok, time for an update, I have been kind of busy lately with work and life in general, but I have recently added a few things to the 4runner. I got a Vortex Dual Battery Management system off eBay, it’s basically a knock off of the popular National Luna brand; but it seems to be of pretty good quality; and less than half the cost of a National Luna!
I installed the auxiliary battery in the cargo area, in between the rear seat and my cargo box. It fits pretty well, and I used a marine battery box to keep it all contained. The solenoid I mounted on the firewall on the drivers side, it seemed to be the best (and only) place I could find to mount it. On the inside, I mounted the voltage meter on the dash near the dash dimmer switch. I won’t get into the details of what the system will do, as it’s easier to read about it here: http://www.sierraexpeditions.com/index.php?l=product_detail&p=543
Again, I have the knock off, but it does the exact same thing, just doesn’t have the name brand on it.
Attachments
jsmarine
New member
New Air Compressor
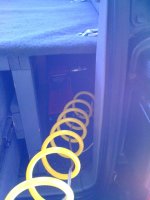
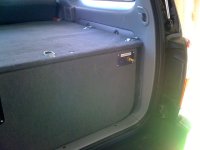
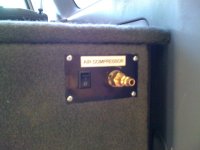
I also got a new compressor to replace my cigarette lighter one I’ve had for years. I got the MF 1050 Tsunami from Pep Boys, the first one was actually defective, but I was able to return it for another one. I mounted it under the cargo box on the passenger side; I did a little work to it, added some air fittings to the hose and attached it, with a switch to the drawer of my cargo box for ease of use from the tailgate area. It works really well, and is much faster than my old cigarette lighter compressor.
Sorry the pictures aren't the greatest, but you get the idea
I also got a new compressor to replace my cigarette lighter one I’ve had for years. I got the MF 1050 Tsunami from Pep Boys, the first one was actually defective, but I was able to return it for another one. I mounted it under the cargo box on the passenger side; I did a little work to it, added some air fittings to the hose and attached it, with a switch to the drawer of my cargo box for ease of use from the tailgate area. It works really well, and is much faster than my old cigarette lighter compressor.
Sorry the pictures aren't the greatest, but you get the idea
Attachments
Last edited:
jsmarine
New member
Donaldson Pre-Cleaner
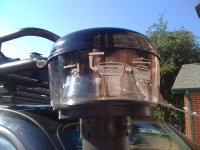
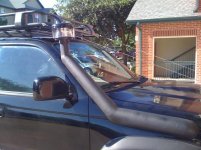
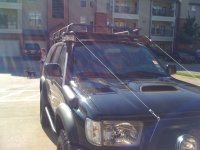
After my most recent outing in west Texas, my air filter was completely full of dirt after a full day of driving dusty back-roads. I noticed a Jeep in our group had a pre-cleaner on his snorkel, the old kind you see on tractors. It seemed to collect a lot of dust and dirt before it clogged up the filter, plus it looked pretty cool too IMO. This thing basically works similar to a vacuum cleaner, it traps the bigger stuff before it goes to the filter; when it gets full, you just pop the top and empty out the bowl. I was able to do a little research and got one from here: ER- H001249 Precleaner Bowl Assembly (3" I.D. inlet) - Elmer's Repair Inc Not a bad price from the research I’ve done.
EDIT: by they way, my girlfriend just told me this thing looks stupid on my car! hahaha. I disagree, but to each their own I guess. She likes the 'ram air' head that comes with the snorkel! I tried to explain what this thing does, but she still says it looks stupid!
After my most recent outing in west Texas, my air filter was completely full of dirt after a full day of driving dusty back-roads. I noticed a Jeep in our group had a pre-cleaner on his snorkel, the old kind you see on tractors. It seemed to collect a lot of dust and dirt before it clogged up the filter, plus it looked pretty cool too IMO. This thing basically works similar to a vacuum cleaner, it traps the bigger stuff before it goes to the filter; when it gets full, you just pop the top and empty out the bowl. I was able to do a little research and got one from here: ER- H001249 Precleaner Bowl Assembly (3" I.D. inlet) - Elmer's Repair Inc Not a bad price from the research I’ve done.
EDIT: by they way, my girlfriend just told me this thing looks stupid on my car! hahaha. I disagree, but to each their own I guess. She likes the 'ram air' head that comes with the snorkel! I tried to explain what this thing does, but she still says it looks stupid!
Attachments
Last edited:
jsmarine
New member
Scepter MFC's
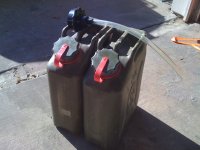
On a side note, I picked up a couple of Scepter Military fuel cans too, I am still planning on building a rear bumper and will incorporate a holder for these fuel cans, but as I’ve said before, my brother is a much better welder than me, (I really suck at it! But he does really quality work!) but unfortunately he hasn’t had time to help me with a rear bumper because of his work. Hopefully soon though.
On a side note, I picked up a couple of Scepter Military fuel cans too, I am still planning on building a rear bumper and will incorporate a holder for these fuel cans, but as I’ve said before, my brother is a much better welder than me, (I really suck at it! But he does really quality work!) but unfortunately he hasn’t had time to help me with a rear bumper because of his work. Hopefully soon though.
Attachments
Last edited:

jsmarine
New member
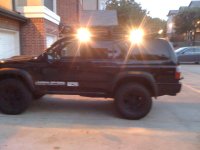
Camping Lights
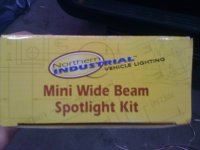
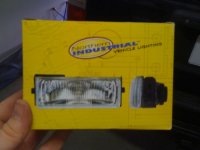
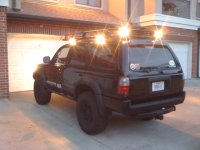
Well I have been wanting some more lighting on my 4runner for when I am camping, some lights on the sides and the back. And since I have my dual battery now, and the isolator, I can run them and hopefully some other accessories without draining the main battery! Saturday morning I went to Northern Tool and Equipment just to browse around really, and found these lights, a pair for $11.99! Seemed like a pretty good deal, especially for just some camping lights, I'm not trying to light up the whole campground, just around my vehicle!
Anyways, bought 3 packs (six lights) and related accessories (switches, wires, zip ties etc) and went home to start on the project.
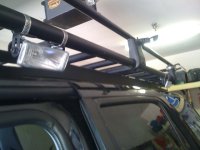
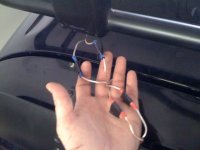
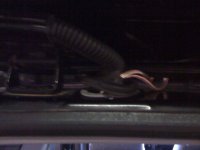
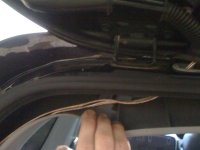
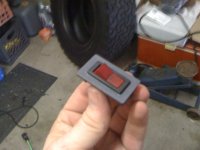
I mounted them on my roof rack with hose clamps, I wasn't really inclined to drill holes in my rack so this seemed to be the best route. I ran the wires down the inside channel of the mounts I made for my rack and then through the existing hole and grommet under the rear hatch. I just pulled the plastic back a bit and ran the wires down the rear pillars to my axillary battery, and then under the door sills to the front switches. I used my dremal to make the hole in the blank switch plates for the switches. I used the larger one for the driver and passenger lights, and the smaller one to the left for the rear lights. I already have a switch on the upper blank for my bumper lights, and the last one will be for my roof rack lights (forward facing driving lights, coming soon!)
These lights took a little more time than I thought, as I wired the lights separately (drivers side, passenger side, and rear) so three switches. And then hiding the wires and getting them nice and tidy always takes me a while. I had taken more pictures throughout the install, but some didn't turn out too good. And the ones I'm posting aren't great either (cell phone) Anyways, let me know what you think.
Well I have been wanting some more lighting on my 4runner for when I am camping, some lights on the sides and the back. And since I have my dual battery now, and the isolator, I can run them and hopefully some other accessories without draining the main battery! Saturday morning I went to Northern Tool and Equipment just to browse around really, and found these lights, a pair for $11.99! Seemed like a pretty good deal, especially for just some camping lights, I'm not trying to light up the whole campground, just around my vehicle!
Anyways, bought 3 packs (six lights) and related accessories (switches, wires, zip ties etc) and went home to start on the project.
I mounted them on my roof rack with hose clamps, I wasn't really inclined to drill holes in my rack so this seemed to be the best route. I ran the wires down the inside channel of the mounts I made for my rack and then through the existing hole and grommet under the rear hatch. I just pulled the plastic back a bit and ran the wires down the rear pillars to my axillary battery, and then under the door sills to the front switches. I used my dremal to make the hole in the blank switch plates for the switches. I used the larger one for the driver and passenger lights, and the smaller one to the left for the rear lights. I already have a switch on the upper blank for my bumper lights, and the last one will be for my roof rack lights (forward facing driving lights, coming soon!)
These lights took a little more time than I thought, as I wired the lights separately (drivers side, passenger side, and rear) so three switches. And then hiding the wires and getting them nice and tidy always takes me a while. I had taken more pictures throughout the install, but some didn't turn out too good. And the ones I'm posting aren't great either (cell phone) Anyways, let me know what you think.
Attachments
Last edited:
jsmarine
New member
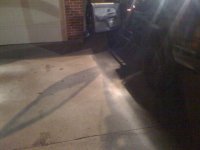
Just a few more pics. And now that it is getting dark, I think I may go out and get a few more pics showing the spread of light on the ground. Sorry for the crappy cell pics
Attachments

Last edited:

xskydivingdudex
Senior Member
looks good!

Stone5_T4R
New member
That looks great man! :thumb3:

jsmarine
New member
thanks everyone for the kind words.
And Mr. Leary, we will have to get together at your house soon to "play trucks"! I know you told me you have plenty to do to your truck!
.....and I still have my (less fun to install) maintenance issues to attend too!
EDIT: And I still have some seat covers on order I will be posting here as well! I will post as soon as I get them!
And Mr. Leary, we will have to get together at your house soon to "play trucks"! I know you told me you have plenty to do to your truck!
.....and I still have my (less fun to install) maintenance issues to attend too!
EDIT: And I still have some seat covers on order I will be posting here as well! I will post as soon as I get them!
Last edited:
jsmarine
New member
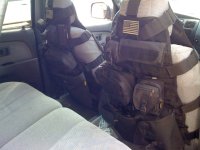
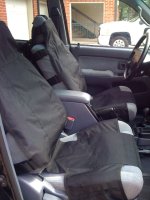
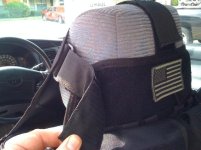
Just arrived today, new seat covers! I have been waiting for these, they took a while to ship them. They are Smitybilt GEAR seat covers; and they are really pretty neat seat covers, with many pockets to store things! They fit well, and have many velcro adjustments to get them how you like. I haven't filled up all the pouches yet, but I'm sure I will!
Heres the link if you want to read about them: G.E.A.R. Seat Covers - Smittybilt
EDIT: 1/30/2011 In case anyone is interested, today I just threw these in the washing machine (the front part, not the back - they can be separated) and they came out great. I also dried them in the dryer, no damage. It was time for them to be cleaned and I was a little worried if it would shrink them or mess them up somehow, but they came out clean and dry - good as new!
Heres the link if you want to read about them: G.E.A.R. Seat Covers - Smittybilt
EDIT: 1/30/2011 In case anyone is interested, today I just threw these in the washing machine (the front part, not the back - they can be separated) and they came out great. I also dried them in the dryer, no damage. It was time for them to be cleaned and I was a little worried if it would shrink them or mess them up somehow, but they came out clean and dry - good as new!
Attachments
Last edited:
Similar threads


- Replies
- 2
- Views
- 6K

- Replies
- 0
- Views
- 280
- Replies
- 2
- Views
- 10K


