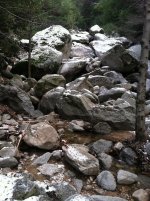
Just the beginning

there are a few days of work in this last post. I completed my ball joint task. And moved on to the next item diff drain and fill. And fresh undercoating before I hopefully make it up to the snow.
Ill keep it short and sweet.
Drain here
4DE32E01-176B-40D2-A468-BC76F8B51B11_zpskci2bczw.jpg~original

Fill here
DAA3009A-3F4E-4343-B790-DDBB28D42ABE_zpsrudyg2xs.jpg~original

I used a 15/16ths to remove it.
I am pointing at the lower drain bolt equipped with a magnet to collect any metal shavings. Mine had quite a bit on it and the fluid was pretty dark I think it had been a while.(the photo is after I had cleaned off the shavings)
2F369028-117E-4379-B077-F036CED5B1D2_zps58r4ccu9.jpg~original

While I was down there I also installed an extended breather on the rear diff. I used a 14mm to remove the factory one.
AF01543F-0DDA-49EB-A258-B85D2C23CEF4_zpscwmrs48x.jpg~original

021856FF-EBD3-4A0D-AA27-0F4E8B2B2ED3_zpswhubkzpy.jpg~original

I installed a Nissan breather with several feet of 5/32 vacuum hose.
This is how I routed the hose. Immediate right away from the exhaust.
1DC337C9-A6D5-4B46-A21B-9F77FD83DB1B_zpsyr71exrd.jpg~original

Zip tied at the T fitting on the axle for the rear brakes.
EA03351A-500C-4068-896E-E34E9AD11CAF_zpsugrwy3bw.jpg~original

then up to front of the spare tire with lots of slack for when I get my OME coils
844ED850-CE3A-4046-8F56-B762F18D94D4_zpsfw7j64du.jpg~original

then up to the rear bumper mount with the breather shoved into the hose.
6E87C1B9-1C49-441B-B9A8-69E23AF71C79_zpsehapzb1m.jpg~original

Then I broke out the pressure washer and the degreaser.
FC03B28C-FCBF-461F-B818-4994DCC4B4E3_zpsdiorihpz.jpg~original

6C95E7D7-191B-4703-97EB-2A36C4FF9E53_zpsqchrhqz1.jpg~original

CDFED630-4CE8-4C4E-A299-242E2002BD56_zpsa4rl3jdh.jpg~original

All cleaned for Rubberized under coating.
 
I finally got my brakes done ceramic pads and slotted drilled rotors from Rotorworks $85 +tax.
0489F5D7-A64A-46BB-83A7-D1FBF6089C18_zpsjfx6lw01.jpg~original

For now I think the basic stuff is complete. My posts from now on will continue to be upgrades. OME coming soon!
 
Finally got to take it out today.
3019F670-6E2D-4C08-9191-919D31D1414D_zpshfpmrqh3.jpg~original

Went to cleghorn first looking for a blanket of snow. I have never been there before and made an immediate right. Long story short we went up and down the steeeeeeep rollers. I was still unsure on the full capabilities of my runner so I had a nice adrenaline buzz going. We caught up with a couple of jeeps and they said that way was a dead end(we saw them from the 215 earlier). So we turned around and went up the mountain :doh:
5534AB05-5B61-4ADD-9F3B-23F3EA1A61D5_zpshf1xm3qu.jpg~original

eventually found a little snow
I took the path of least resistance the whole way. I didn't try any off chutes as I had no body for a rescue if needed. This was mostly a shake down run for my truck.
194D9BCB-0130-4D05-AB9C-EC536318B61E_zpsgz9w3hf7.jpg~original

more snow
C500FD62-D6BB-4276-A2ED-4B2DC5C17088_zpsgz80l5he.jpg~original

we went up the 138 towards the dark snowy lookng clouds
found some cool stuff water fall
F32D4A59-B781-48A8-9FA4-A22C36CB21EB_zpstsjyzfcc.jpg~original

A341CB15-27D7-43F1-BD9B-DAECD85A0DF7_zpsympqwsdv.jpg~original

9A3CBE52-2AF7-45A9-A9F1-9FDE4A6CA449_zpshoottsnz.jpg~original

And found this the horror the horror
37F93BE7-5FBF-4D51-BFAB-177C3747E877_zps6jpdnou6.jpg~original

5CA63382-3130-4EAB-9CD1-C697ECEE7CD0_zpsfhfegk2m.jpg~original

AC11B188-DAE2-454F-9F0A-97ACB2CADE53_zps5r0el2in.jpg~original

Then stopped for some jerky and drinks.
CCD25AD9-D021-4345-BA14-0FA328FCD724_zps9o3p8wbz.jpg~original

Then it was off to Lytle Creek
42F32852-3BEF-4BA3-9F1A-6F2640B36730_zpsj1spotr6.jpg~original

the snow was fresher but the gate was closed.
All and all I was surprised with what it could do. I drove it until I couldn't go any more, not sure if the snow was too deep or just too steep. I could really feel the slop in my tie rod end's and idler. I guess that will be next. Lots of fun though
more random pics
DF42A9F9-ACC8-4B89-9507-B182C5879B95_zpsvml84wil.jpg~original

ABEBF469-742A-479E-B8AC-0AC240B2F9CA_zps4gikddvz.jpg~original

68F500E6-CEE4-4287-9FA6-D186CCB8BC17_zpstzhituid.jpg~original
 
Last edited:
Hey man I have a 95 4runner and I live in ontario. Let me know when you go wheeling ill be glad to join. I just went up to big bear today!
 
I wanted to join the be big group that went on saturday but, I still was waiting on my rotors. I will let you know next time. Cleghorn was a blast.
 
I want to drive on this road.
 

Attachments

  • F32D4A59-B781-48A8-9FA4-A22C36CB21EB_zpstsjyzfcc.jpg
    F32D4A59-B781-48A8-9FA4-A22C36CB21EB_zpstsjyzfcc.jpg
    137.5 KB · Views: 458
waiting on my OME to arrive at Off Road Warehouse. So I figured I would keep inspecting looking for any potential problems. Today I took a look at my rear brakes and cleaned out the dust.

Tip put a tub or pan under the drum before you do anything. This will catch all the dust, this stuff is nasty stains everything. Glasses and gloves are a must. Don't blow the dust a bottle of brake clean are cheap when the dust is wet its much less hazardous. After I cleaned them up I inspected the shoes for thickness and cracks. Then I checked the wheel calenders for leaks. They were nice and dry.

This was also bugging me so I took it out.

 
here is a few more


My plan was to ride my MTB up to Majeska Peak but when I got to the parking area there were no other cars and there were some suspicious looking loiterers, at 7am. I was not interested in leaving my truck to have it messed with or broken into. So i decided to check the gate and luckily it was open! So I was snow bound. I had to get to work by 10am so I knew I didn't have much time. Nice run this morning always enjoy the beautiful views from the top of these mountains.
 
Last edited:
Back from the dead


Next step for wheeling this winter. I ordered Poly bushing all around form Energy Suspensions I swear Friday and I got them Saturday. I was planning on just doing the back half to day before going to work. I realized that I was one bushing short so I just did the track bar and the Upper control-arms. I called as soon as I noticed what was missing and they shipped out the missing bushing today. I plan on getting the front end taken care of next week when i have plenty of time to get into it.
 
Bushing install on rear lower control arm

Here is a full write up on how I swapped my stock rubber bushings to Energy Suspensions poly bushings.
(I haven't seen this posted anywhere so I am)
List of tools I used:
*Floor jack
*Jack stands
*Electric 1/2 impact
*Dead Blow Hammer
*3/8 ratchet with 12mm socket
*long 7/8 combo wrench
*22mm impact socket
*Flip socet 19mm/21mm
*Favorite Heavy glove
*Ear protection
*Propane torch
*Bench vise
*Hack saw
*Long punch
*Chisle 3/8
*Scrapper 1 in
*Wheel chocks


Procedure:
Chock the front wheels. Then jack up the rear end and put jack stands underneath. Remove the jack and tires to easier access the control arm mounting bolts.


Disconnect the E-brake mount from the control arm with 12mm socket

Simply unbolt both front and rear mounting bolts

I do not have access to a press to remove the old bushing so I use a propane torch to heat up the inner sleeve.(Propane tanks are cheap and I use them for camping stuff too)I placed it over this bucket because the melting rubber is a PIA to get off the concrete drive way, and its easier to extinguish the flames in the bucket. Focus the heat on the sleeve not the control arm.


It will start to slide out I used the long punch to push it out the remainder of the way
AA09A2E1-7563-41BB-BA6C-752A3D98B4B0_zpsgitjhbrn.jpg
[/URL]//i455.photobucket.com/albums/qq278/gigercreeper/8AAEC9D5-3EA3-4544-BCF5-0BE7C0E53598_zpsrktvja8k.jpg~original[/IMG][/URL]
Put arm in the vise and knock out the remaining rubber with the scrapeper


Now remove the blade from the hack saw and put it in the arm.

Then cut two notches in the outer sleeve.

Now use a flat chisel 3/8 wide to knock out the rest of the sleeve


Repeat this for all rear control arms and track bar.

I sanded the inside ends with scotch bright lightly to remove any debris. Then apply a thin layer of assemble grease from ES to the bushings

I only apply to one side and then roll them together to evenly coat.

Install the bushings into the arm buy hand then apply more grease to the inside of the bushings and install the sleeve. I used the bench vise to fully install it.

I like to apply a little grease to the bolts to prevent further corrosion
 
Last edited:
I install the rear bolt first because the front is easier accessible. Next line up the sleeve to the frame hole.


I used a ratchet strap to assist in the alignment.


Install the front bolt and tighten both bolts to 79ft pounds(accoring to Hayes repair manual). Then reattach the E-brake cable mounting bolt

Reinstall tire and remove the jack stands and your ready to hit the road or trail.
 
Last edited:
What a great thread !! Great pics and a kick a$$ ride !!! That hood lining you tore down, i have one in the same condition, i plan to try a facelift replacement soon, i'll post pics if it works out. !! Keep those pics coming, makes me wanna go get something done on mine !!
 

Members online

Forum statistics

Threads
278,307
Messages
3,554,053
Members
248,016
Latest member
Advally Service

Trending content

Back
Top