JVC8790's Daily Duty Cruiser "Build" Thread

JVC8790

New member
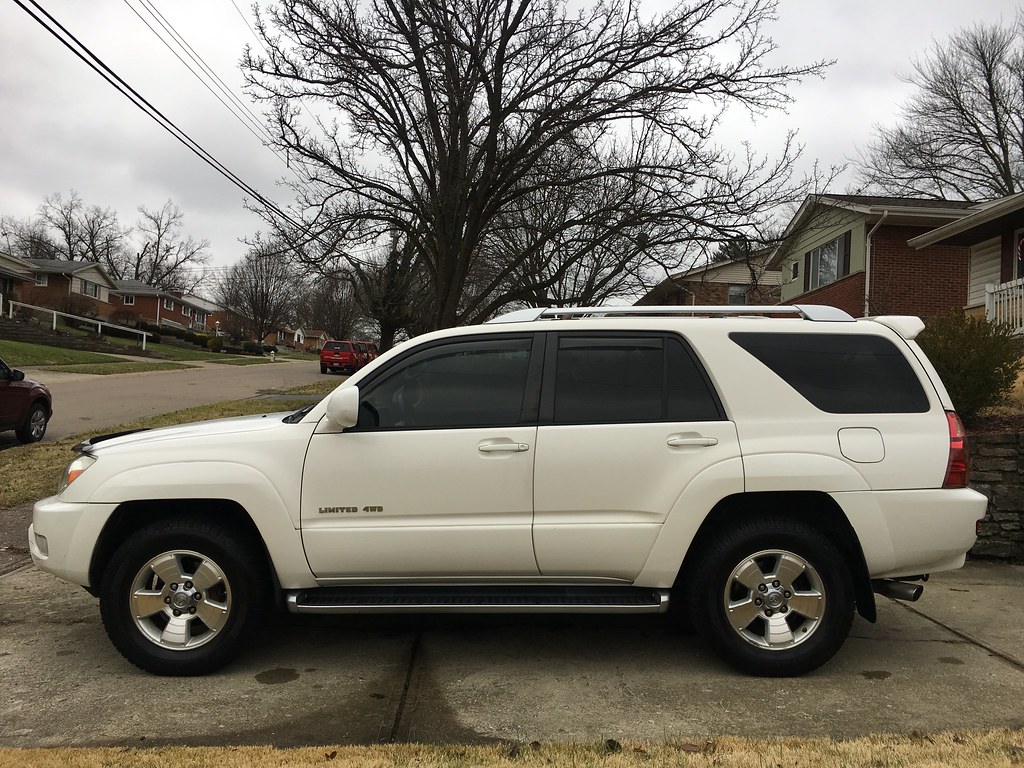
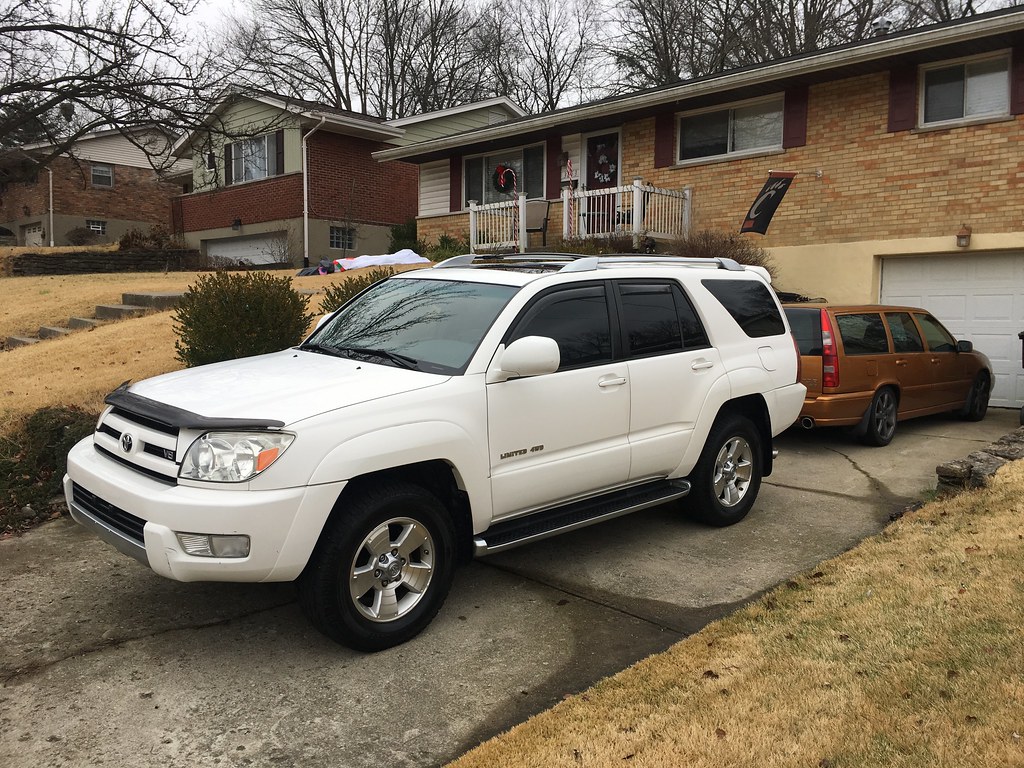
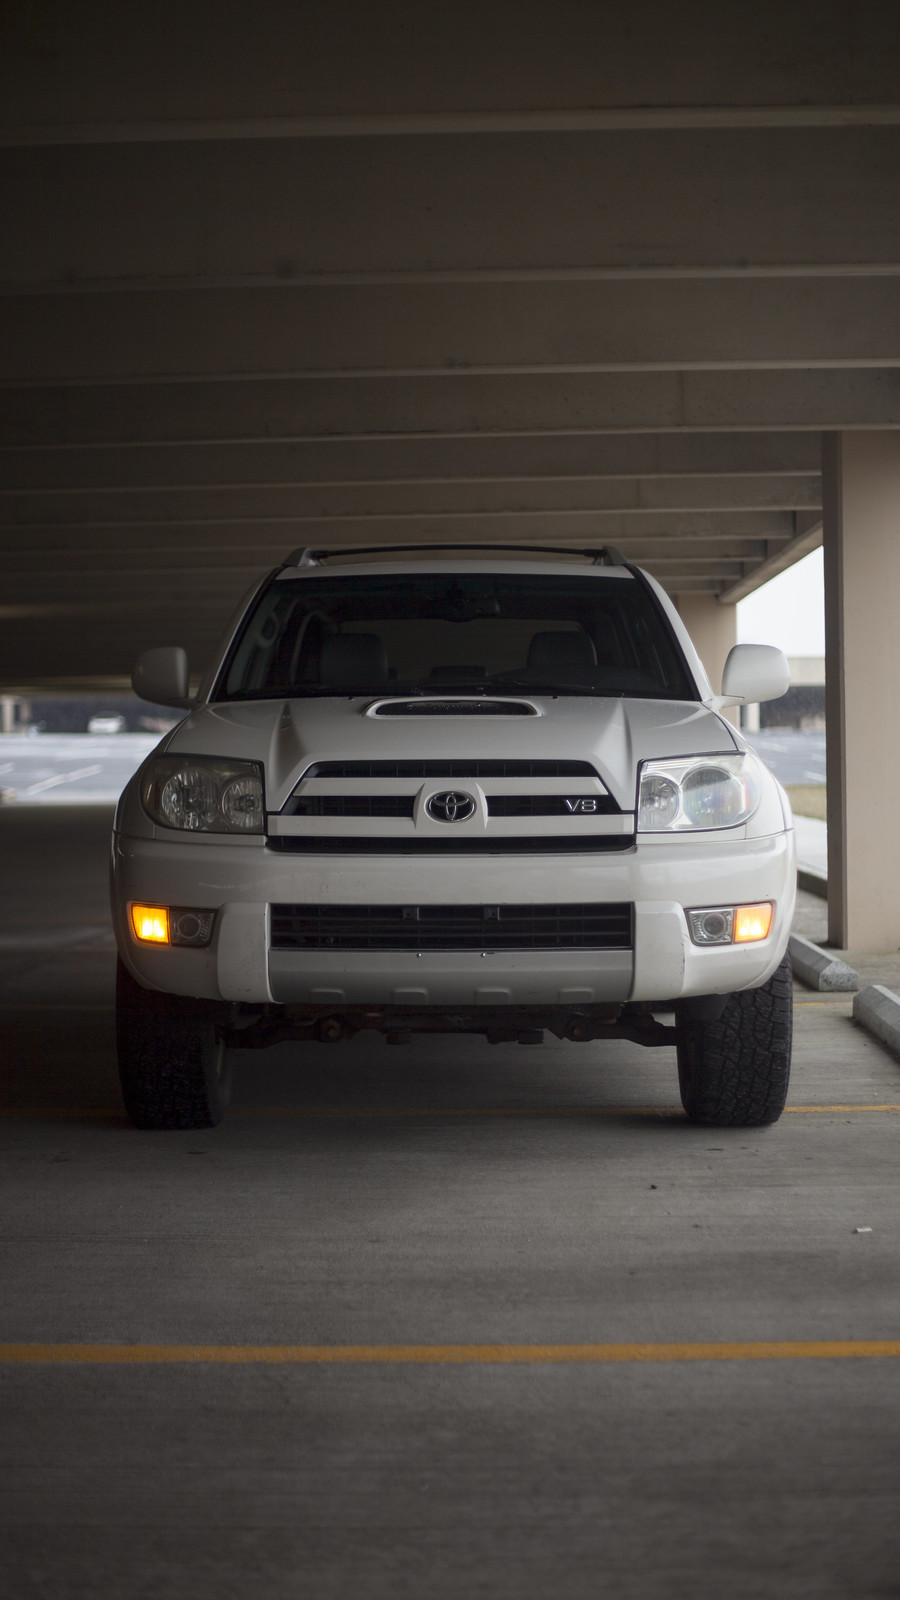
I recently picked up a 2004 4Runner Limited V8 for my new daily so I figured I would start a thread to chronicle its “build” (although I hesitate to truly call it a build). This is going to be my daily and is my entry into the world off of pavement.

My background is largely filled with Volvos. My family had Volvos as I grew up and I have had a few myself and love them. Earlier in 2018 I got bit by the SUV bug after a friend had me pick up an XC90 V8 for him here in Ohio and hold onto it until he arranged shipment back to Maryland. I drove it a bit and realized that I needed to “upgrade” my daily and acquire an SUV of some kind.

After a few months, I fell off the XC90 V8 train as I was starting to find it hard to find exactly what I wanted and inherently, they can be pricey to fix if you don’t buy the right one from the get go.

Right around this time, I made a last minute trip to SEMA with a friend of mine and then detoured home with him for two days to Denver. While in Denver, we took out his Jeep JK into the mountains to explore and ended up getting caught in a rather windy snow storm and had my first experience in offroading.

Side Story: This friend of mine owns a few cars that are rented out on Turo in Denver which include a JK, a Subaru STI and a 5th Gen 4Runner, when I came in town that weekend both the 4Runner and STI were already rented out, otherwise we probably would have taken the STI to Pikes Peak or not gone nearly as far off road in the stockish 5th Gen.

Later that day I sat at the airport and began my search for a new daily. Realizing that the JK had very little creature comforts, I knew a Jeep wasn’t going to be the solution. Then looking into 4Runners from the suggestion of my friend, I started to look at pictures and fell in love with 4th gens.

As usual with car guys, I got home and spent every waking moment looking online and reading forums, browsing Instagram, and searching craigslist for what I wanted in a 4Runner. After a brief chat with a friend who has owned a few 4th Gens in his day, he asked some questions and helped me come up with the list that I wanted as it came out below.

V8 4WD
Not Black Exterior (White preferred, red, blue, or sand acceptable)
Not Tan Interior (Black preferred, gray alright, preference to leather and heated seats)
Under 150k-160k
Priced under $12k out the door.
Frame in alright shape and not rotted through (okay with needing some light work)

I searched for a while, almost gave up, then test drove an Urban Runner priced at $11k, and realized that a V6 might not be that bad of an option. Knowing that my towing needs would be largely limited to a 1-2 place Jet Ski Trailer, and a car trailer once a year at most, I changed my search to include V6’s.

Within a week of test driving that Urban Runner, a friend of mine hit me up since he heard that I was looking for a white 4th Gen V8 and he connected me with a buddy of his who happened to have just the car I was looking for and was willing to sell it as he had planned to sell it anyways in the spring.

His price was fair, I didn’t feel the need to negotiate and the history of the vehicle was good because it was a 2 owner with him being the second owner and also a Toyota Technician.

2004 V8 Limited 4WD
White Exterior
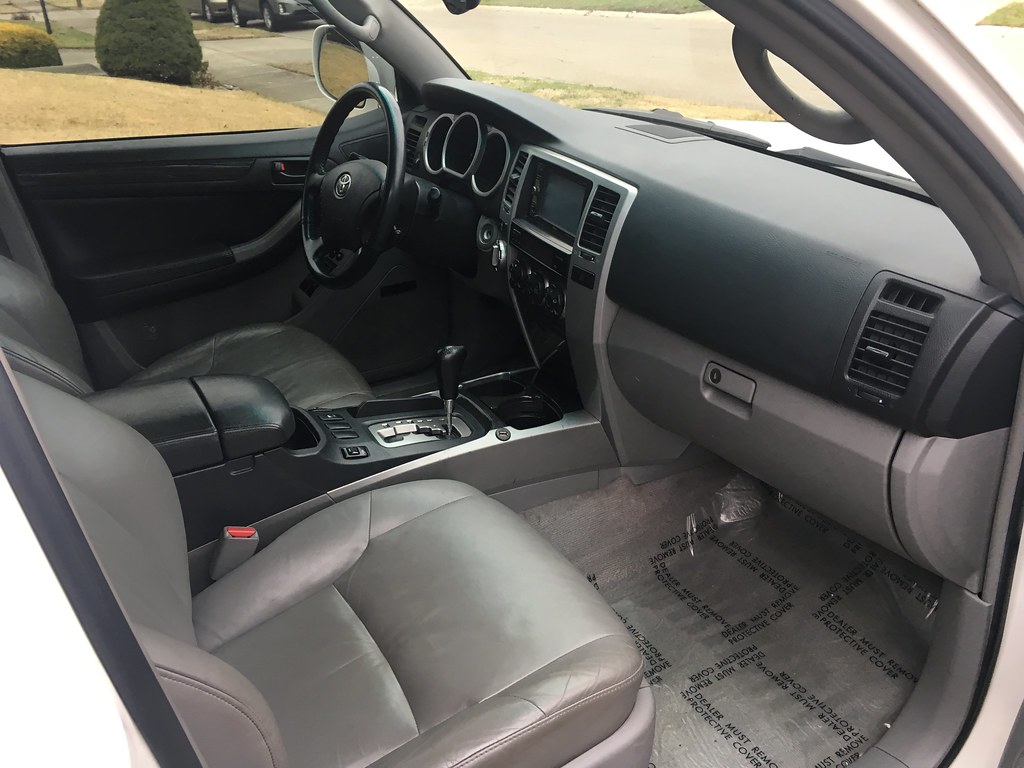
Gray Leather Interior
156k – all fluids recently changed (oil, coolant, trans, t-case, diff)
Slight exhaust manifold crack and power steering whine when cold (neither of which have been that noticeable to me)

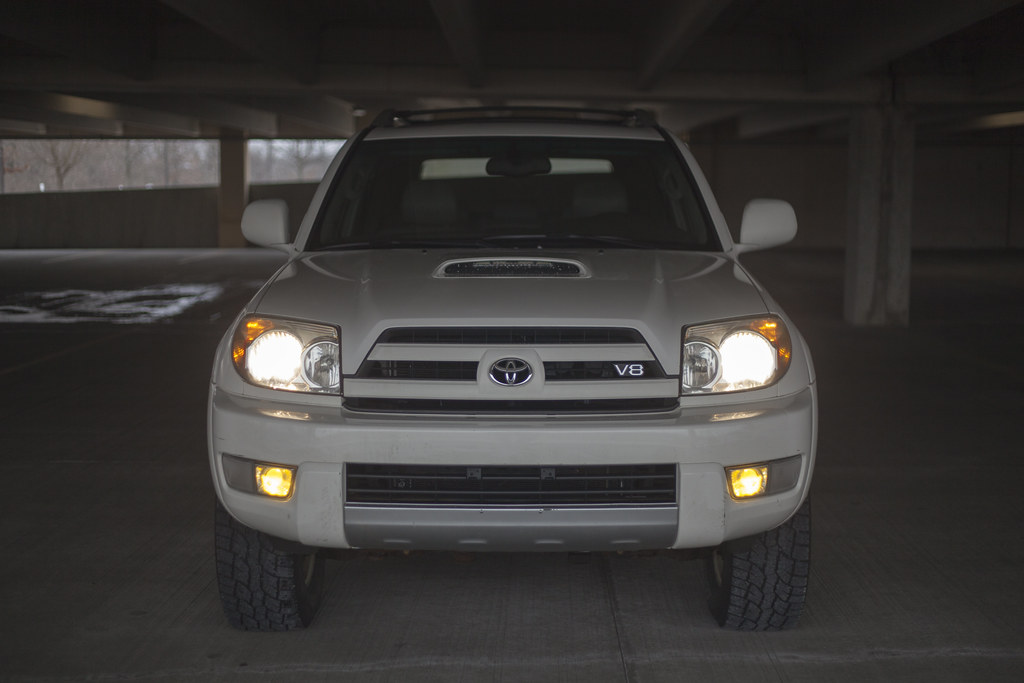
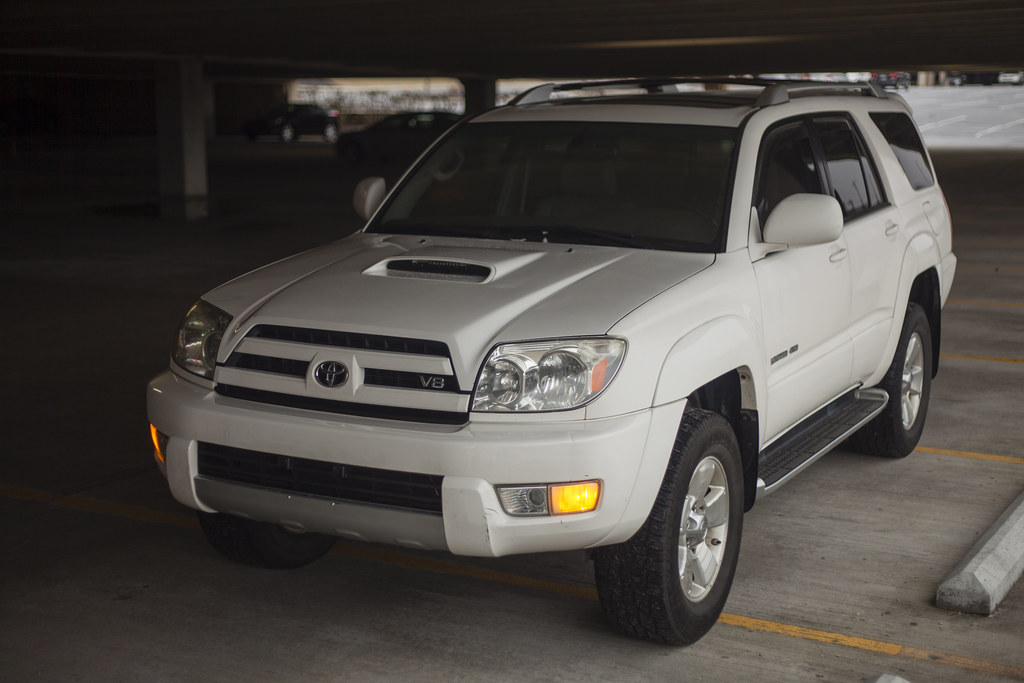
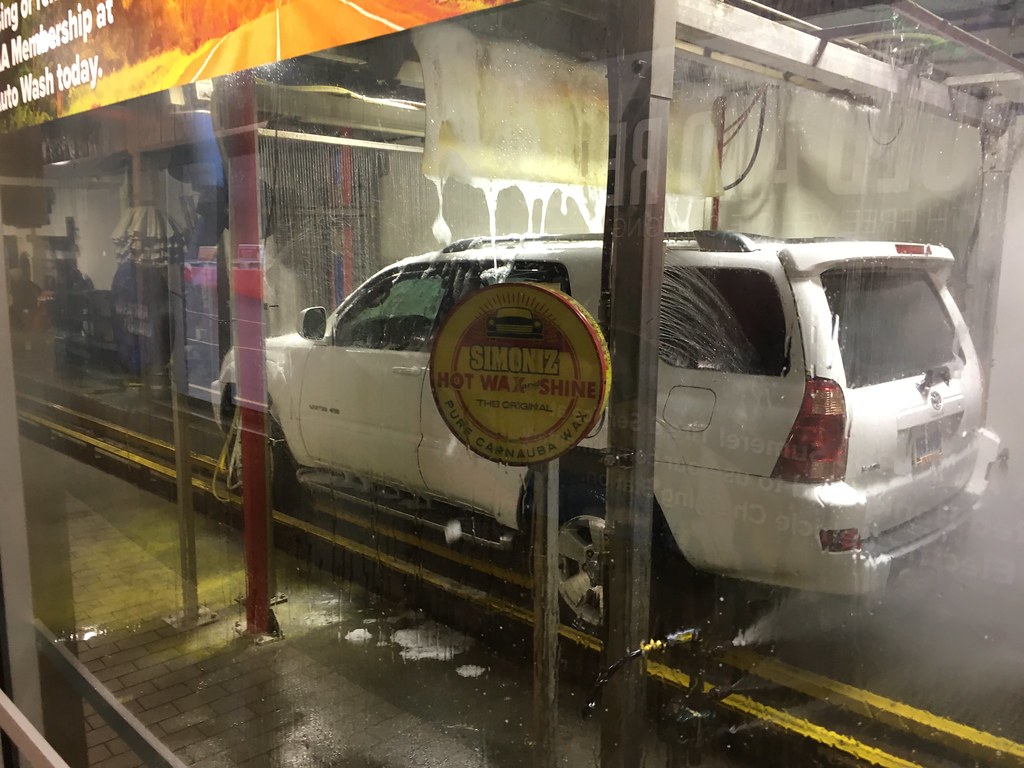
Picked it up yesterday and had to give it a quick clean up, here are a few pictures from Day 1!
32685679798_3b47ea14f2_b.jpg


44741585900_7770c18cda_b.jpg


45645462875_9cf77517a8_b.jpg


31618385817_db14ce63d6_b.jpg


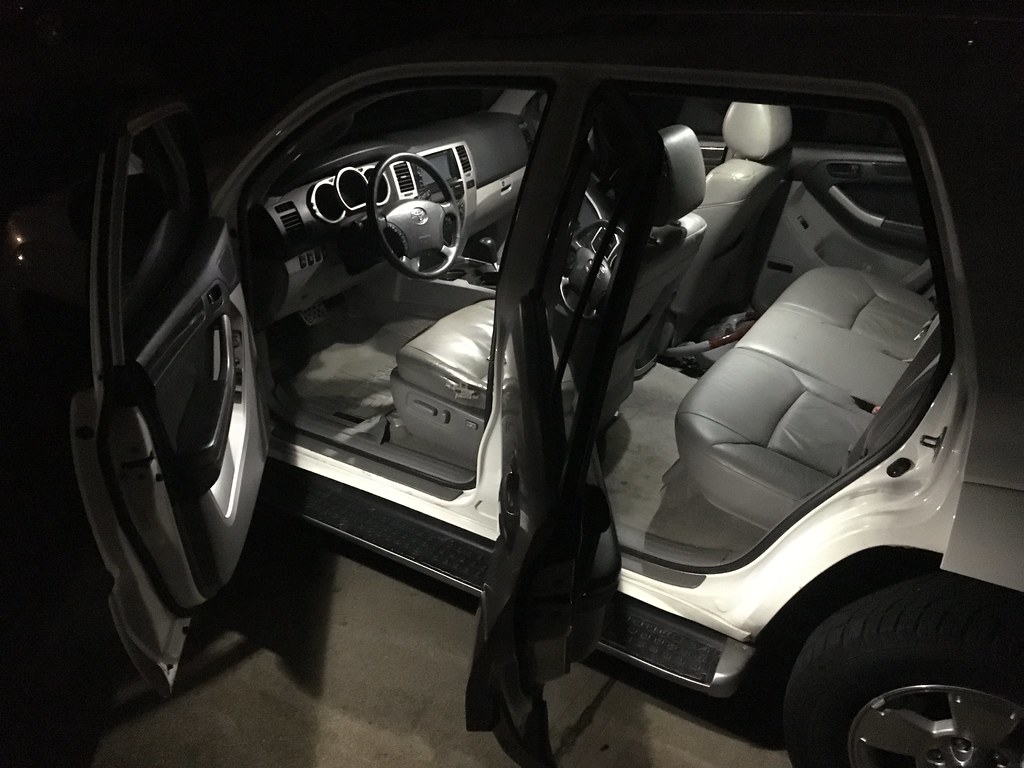
Completed my first few “mods” this weekend which included LED Lighting throughout the interior from SuperBrightLEDs.com. I went with Natural white to avoid the typically blue hue of LED Interior bulbs. I am really happy with the color on these overall and they’ve got a really good brightness that’s not overwhelming but just perfect in my opinion. Next thing will be to do the Map Light Mod so that the fronts come on when the door is opened the same as the rears.
46595119332_f69f6e6165_b.jpg


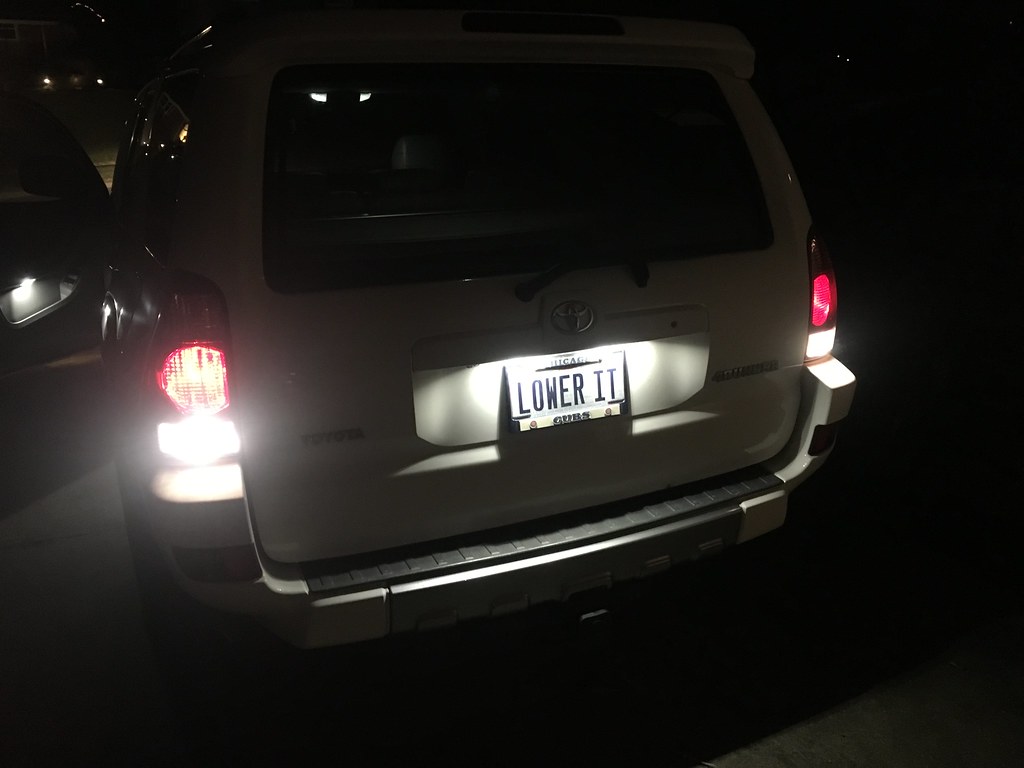
I also installed LED Reverse and License plate lights in “natural white” too. The Plate lights are perfect in my opinion, and the reverse lights are a tad warmer than the others. Also, I had some difficulty with one of the bulb holders for the reverse bulbs not wanting to make contact in the headlight. I might have to troubleshoot it a bit to see why it’s not working perfectly and occasionally flickers or doesn’t turn on from vibration of driving. (License Plate is from my other car for the time being, still looking at ideas for Vanity Plates for the 4Runner).

39682577603_d89b5aea81_b.jpg


46595119082_e812b172ef_b.jpg


Popped in some Nokya Yellow Fog Light bulbs to hold me over until I pick up some Element LED Amber Cannons.
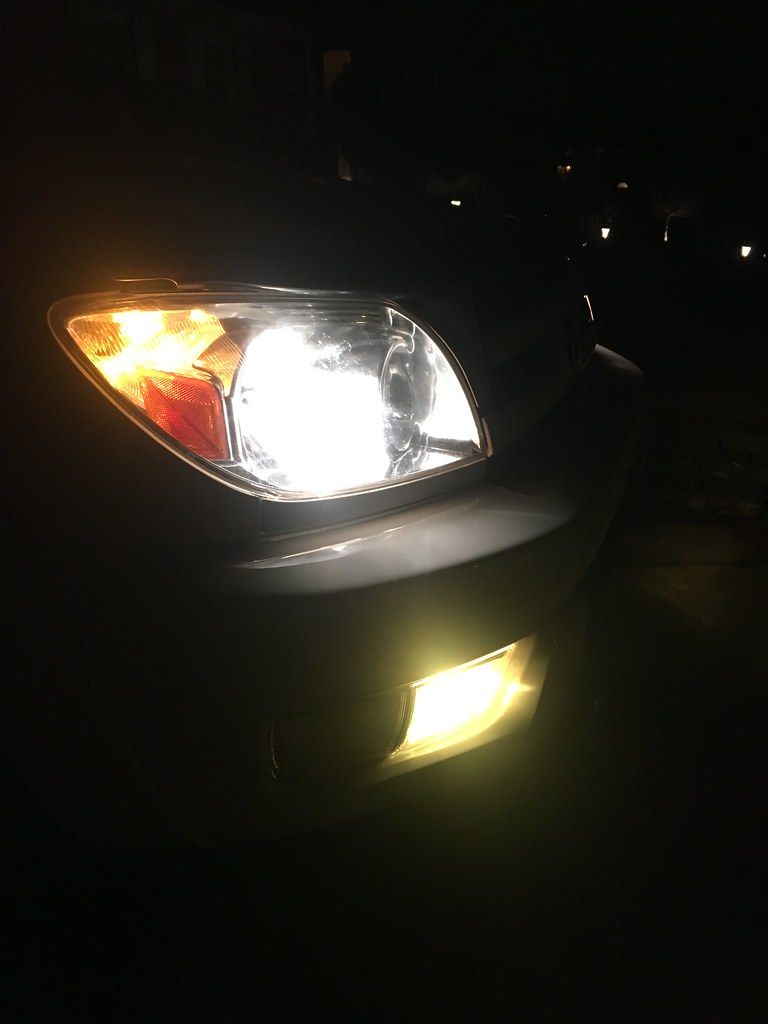
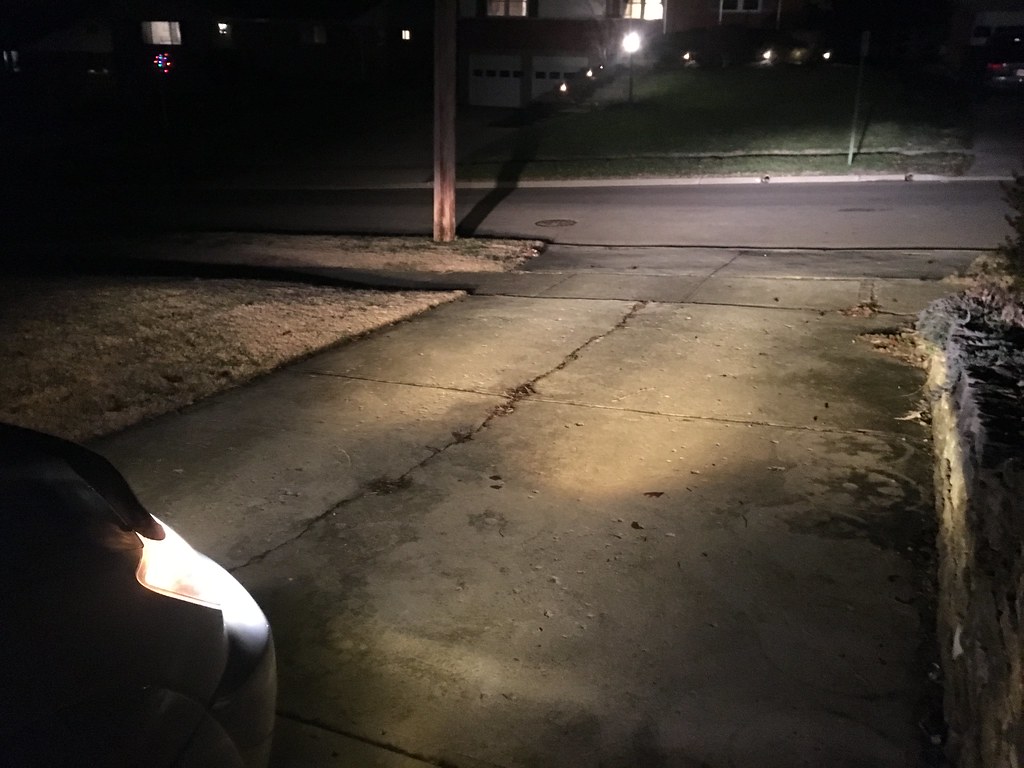
45922891204_8c958af713_b.jpg


46595119422_f453b14c1a_b.jpg


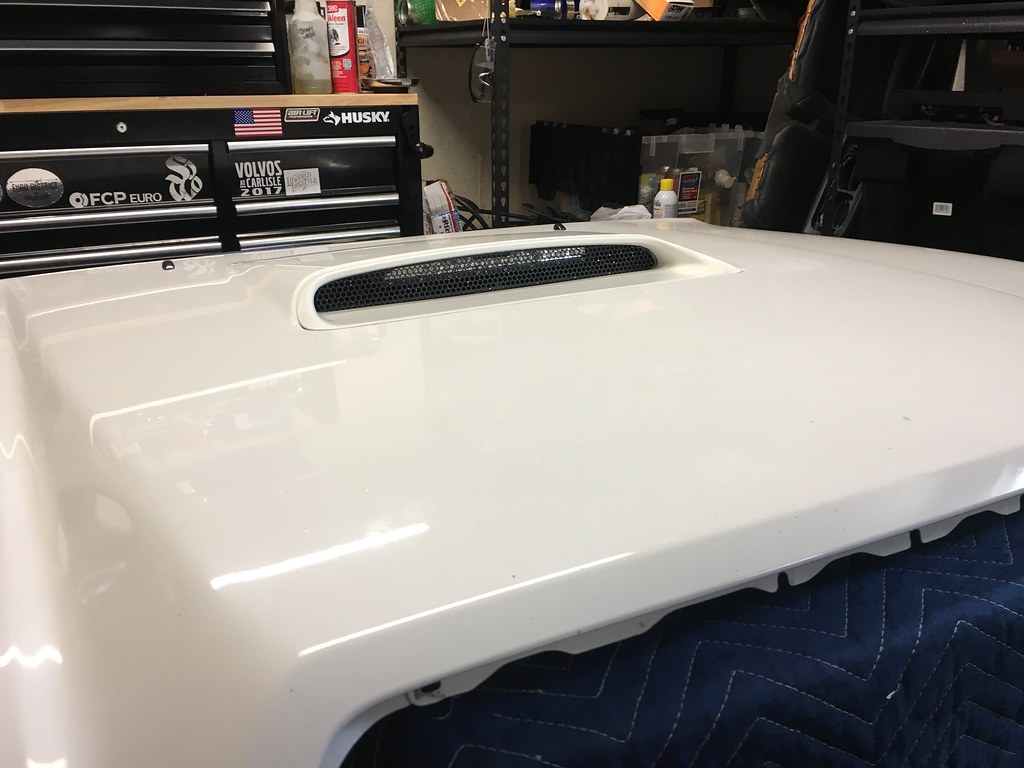
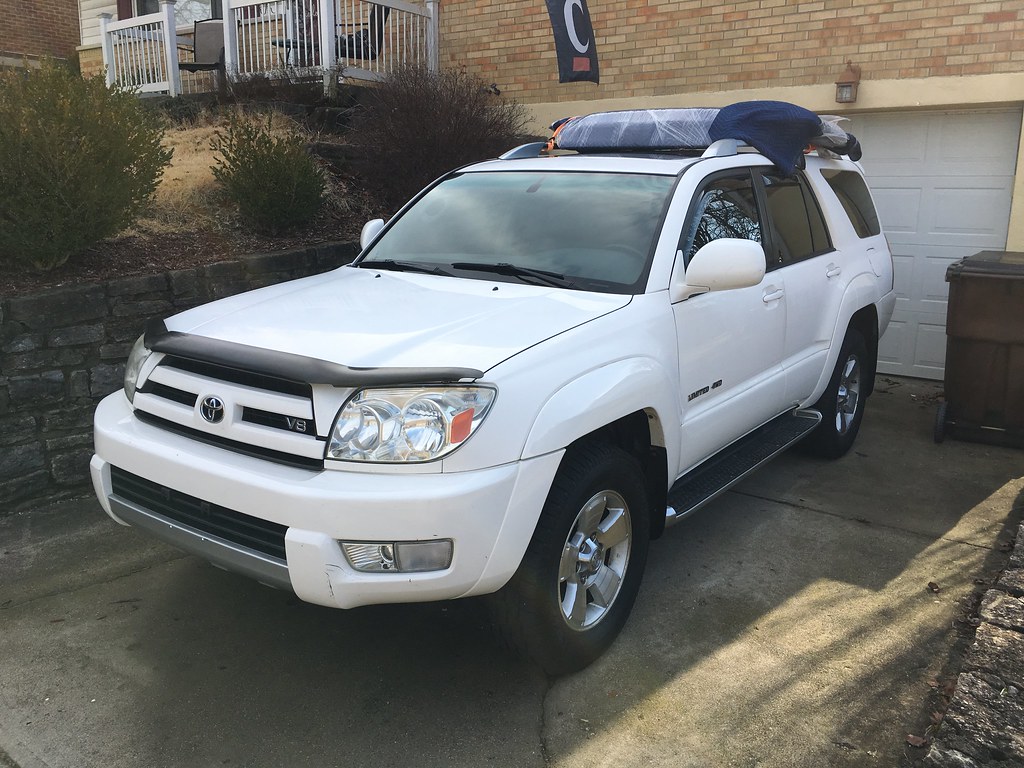
I also made a drive about an hour and a half north of Cincinnati and picked up a white sport hood! Here’s the best pic I have of it on the roof wrapped up from the drive home. It’s got a few more rock chips than my hood has currently so I’m going to address some of those before installation and before I have the whole truck detailed to bring back the shine on this single stage white paint.
45922891434_17594b8d36_b.jpg


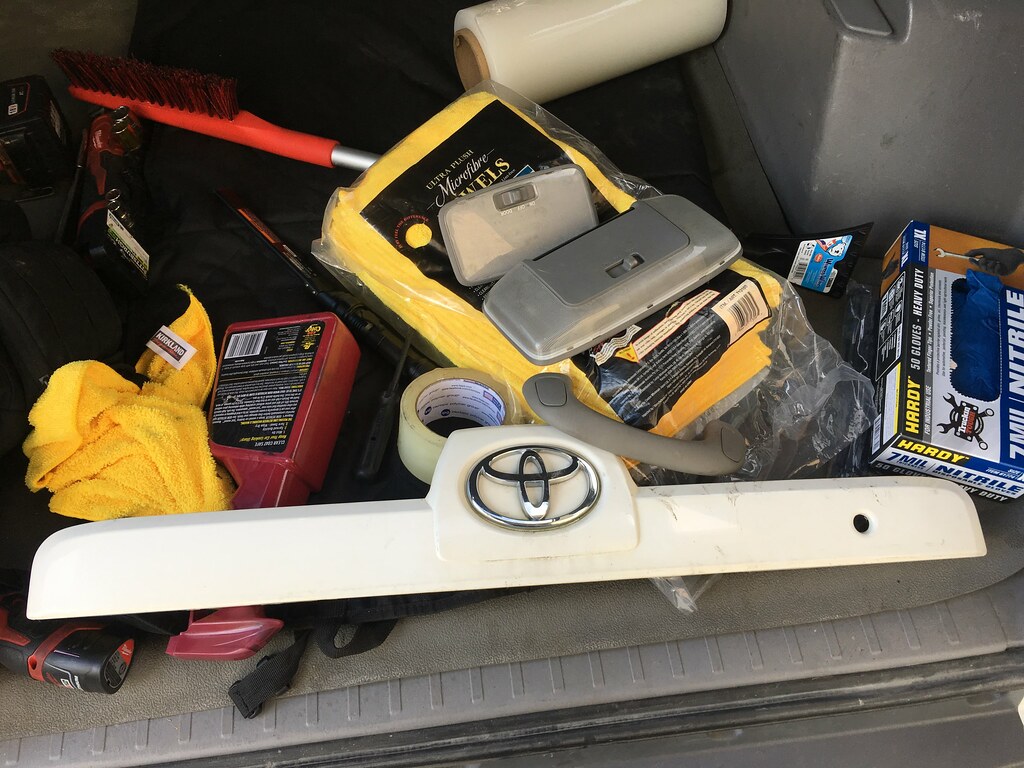
No pictures of this stuff at the moment, but my next steps are to install the Pioneer headunit I removed from my Volvo Wagon, as well as the new reverse camera I bought from my friend’s shop here in Cincinnati. I also managed to pick up the tailgate trim from the 4Runner I got the hood from (it was being parted out) so that I could install the reverse camera in it ahead of mounting to the trunk.
45922891394_7f5220e44c_b.jpg


Rough plans for this are as follows
- Wire Wheel and Rust Protect Frame
- Pioneer Head unit from my Volvo Wagon (aftermarket Clarion is dated and has some interference issues)
- Back Up Camera (purchased, not installed yet)
- Tacoma TRD Off-road Front Struts (Bilstein 4600)
- FJ Trail Team Rear Springs (already ordered)
- 8” JBL Sub Upgrade with Aftermarket Amp
- Wheel/Tire Package (Possibly 5th Gen TRD Pro, otherwise Rotiform or Fifteen52)
- Projector Retrofit (possibly facelift swap first?)
- LED Tail Lights (06-09)
- Black Carpet installation (gray is a bit gross and I want to do more black stuff in the interior)
 
Register to hide this ad
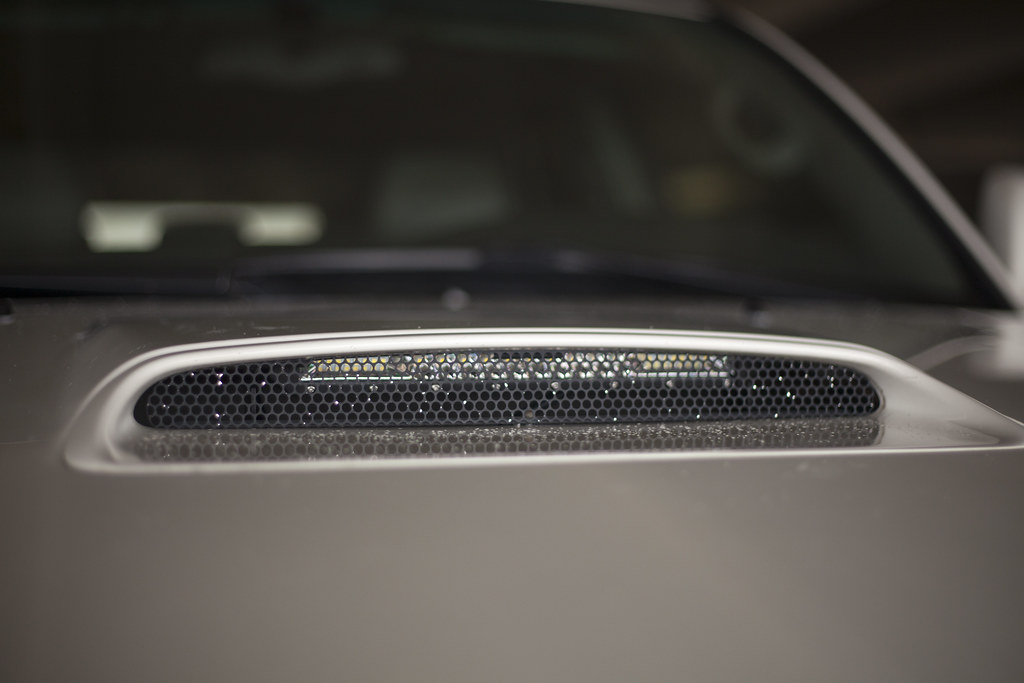
Placed an order for the C4 Fabrication hood scoop light bracket. I like this solution as it will allow me to add a little bit more light without having it visible or accessible from outside the truck.

I'm not planning a ton of offroad travel with this ride so it'll be cool to have a bit of extra light available when I need it without it being visible and will be able to retain an OEM+ look that I love.

Instead of spending for the Rigid light, I plan to do some research and find another more cost effective option for those of us not looking to break the bank. I'll be sure to update and report back as I get it in and determine whats needed to use a different light bar.
 
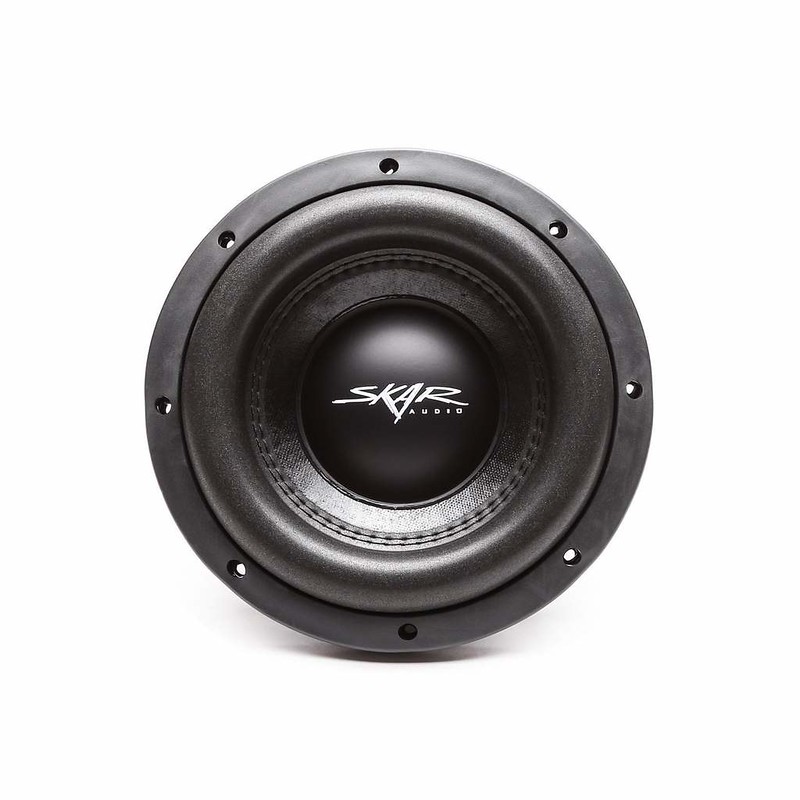
Ordered a replacement 8" Subwoofer to go into the factory box with an aftermarket amp from my previous car (Soundigital 250.2).

Went with the Skar 8" Shallow, based on a suggestion of a friend who's a 12v installer, he has had surprisingly good success with Skar despite their lower price point and convinced me to give it a shot!

Skar Audio - VD-8 | 8" 600 Watt Max Power Subwoofer (Shallow Mount)

45802878035_d566dcda6c_c.jpg


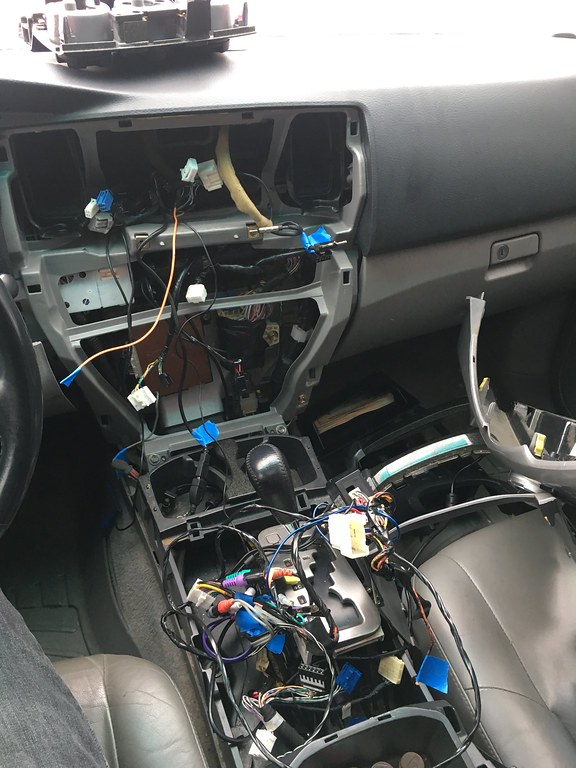
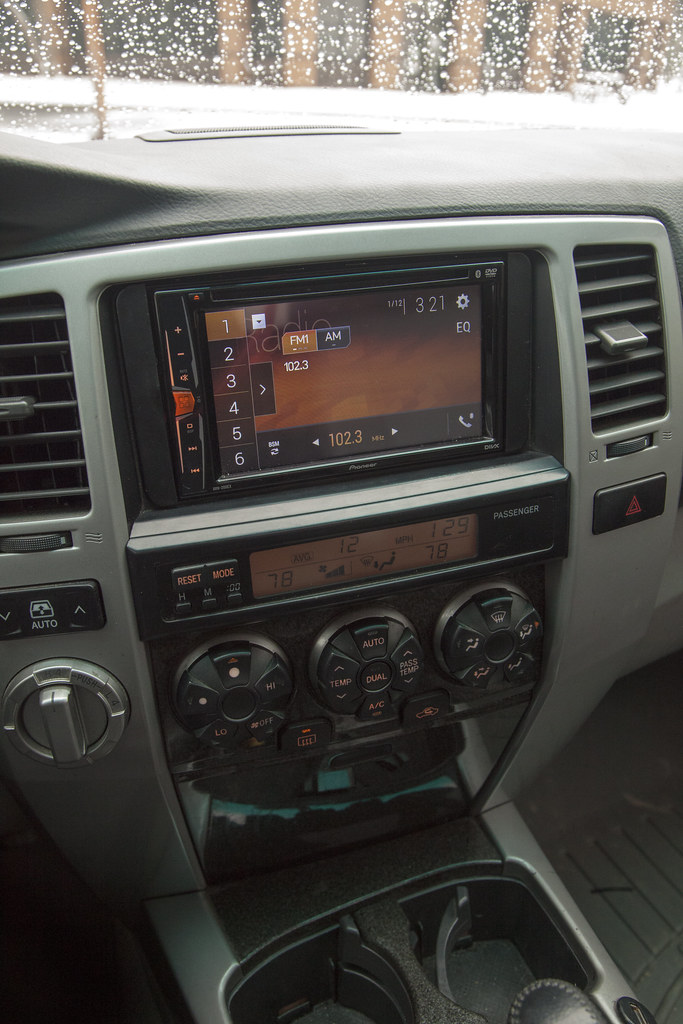
The project for this weekend was to install the Pioneer headunit (AVH-200) I had from my last car in place of the dated Clarion NX500 that was installed (if anyone wants the old one, free to a good home, just PM me)

Taking the old headunit out and getting an idea of what wiring was in there.

45993494844_1631f3570e_b.jpg


Turns out the steering wheel control module the previous owner had with the Clarion doesn't work with the Pioneer unit, oh well, I'll order the right one and install that when I go back in there to wire in my back up camera and sub RCA's/remote wire.

In the meantime I'm happy to have quality bluetooth connection back as well as this eliminated an interference whine that the old radio had. Might have been in the wiring job since some of it was pretty shoddy.

All finished up and adjusted the color on the buttons/display to "match" the OEM color.

45802788195_97d3305c66_b.jpg


No pictures for it, but while I was in there I replaced a few HVAC bulbs that were burnt out. Super simple process, I picked up 10 bulbs for $8 or so on Amazon and replaced all of them so that they would all match in terms of brightness.

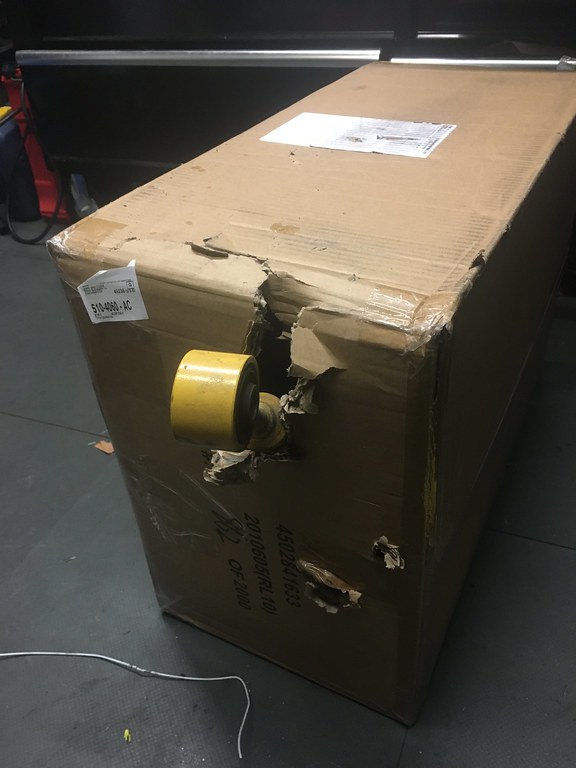
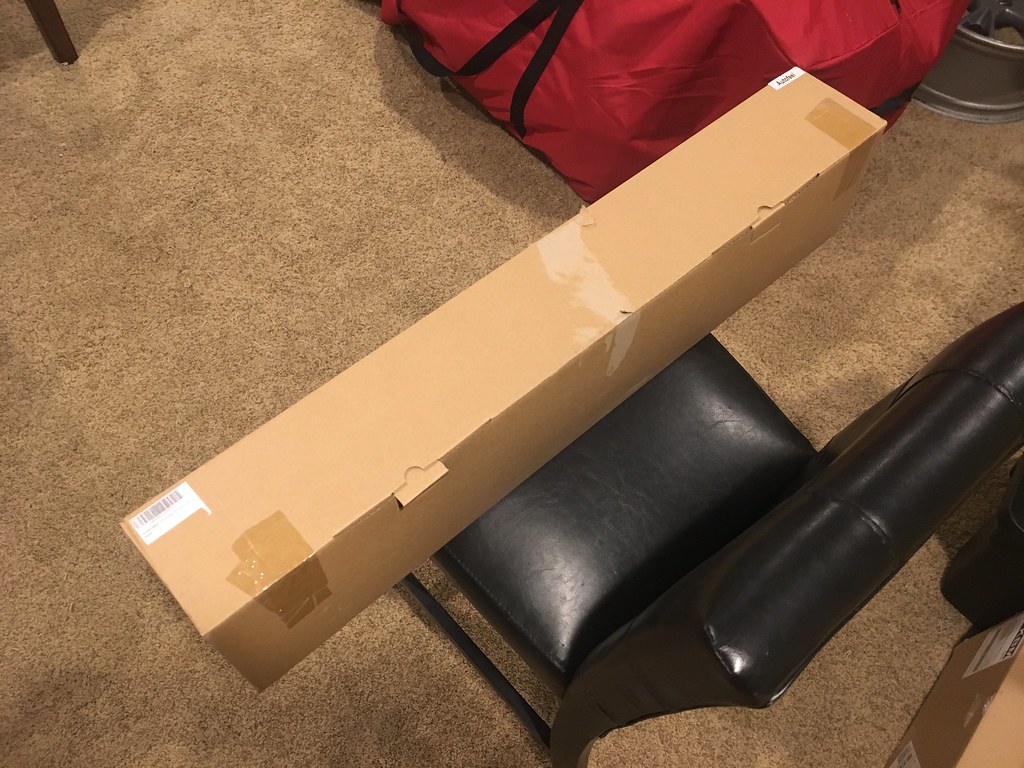
Yesterday I also got a package in the mail. Lets just say the packaging job wasn't top notch, but it made it alright...

45993490554_5600105603_b.jpg


45993490514_64a350ff9a_b.jpg


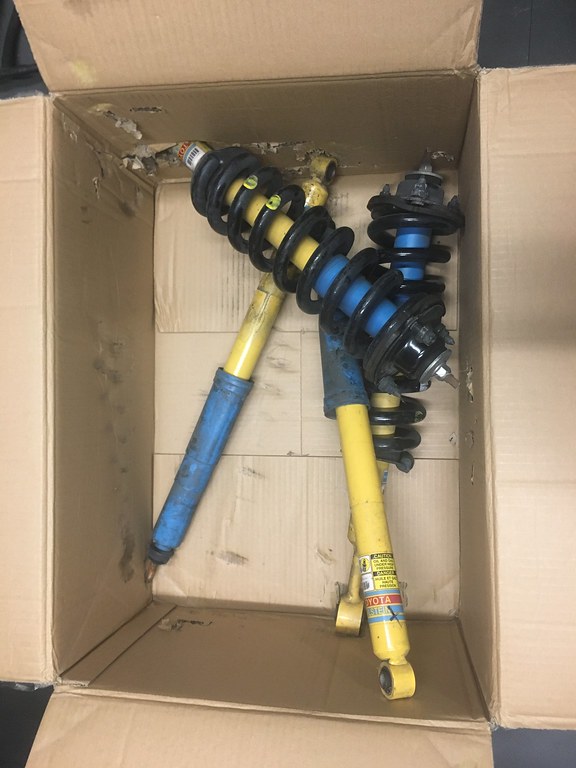
Picked them up off of Facebook for $170 shipped, 12k miles from a 2015 Tacoma TRD Off Road. I also picked up some FJ Trail Team springs from [MENTION=131456]Trashcatmotorsport[/MENTION] that are not pictured here but will be installed as well. I'm going to order the bushings for the rear shocks and then these will be ready for install whenever I feel like it's time to rip out the Xreas and put these in.

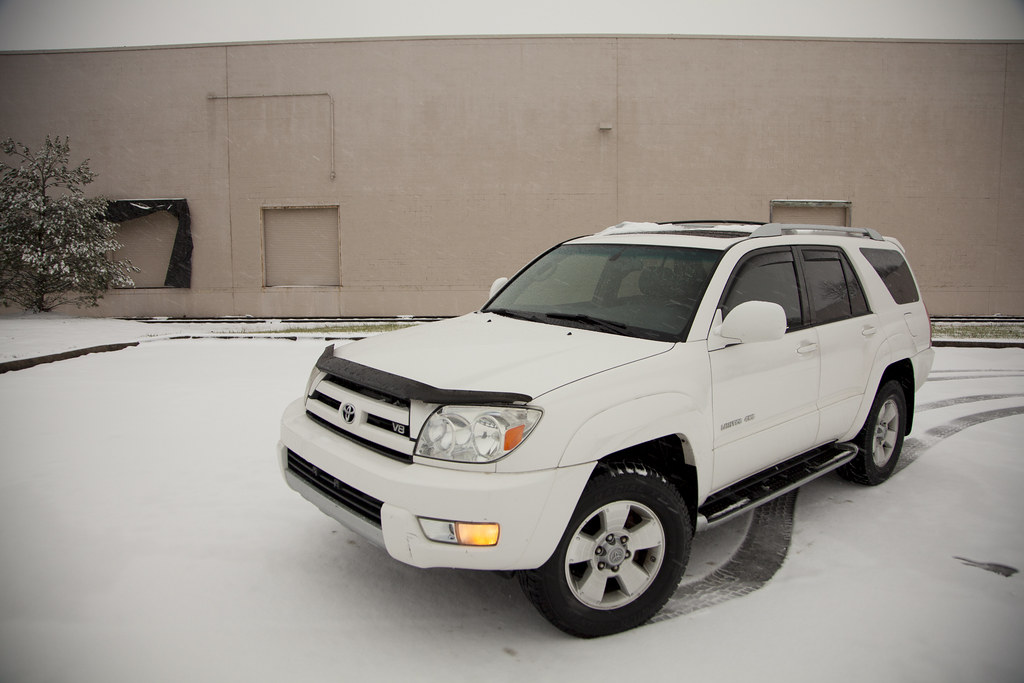
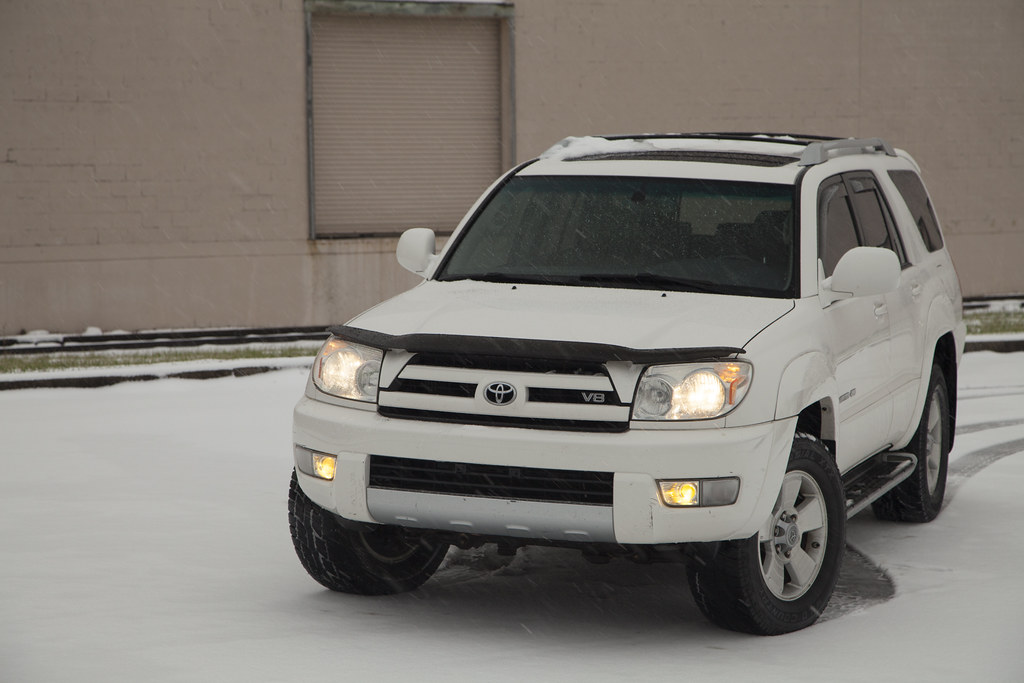
We got some snow down here in Cincinnati today so I took it out for a few quick pictures. Only got like 2 inches so far and the roads are fine so it wasn't much of an adventure but I had to snag a picture or two!

45802787245_f0e3979b5e_b.jpg


32843111868_63e989ac42_b.jpg
 
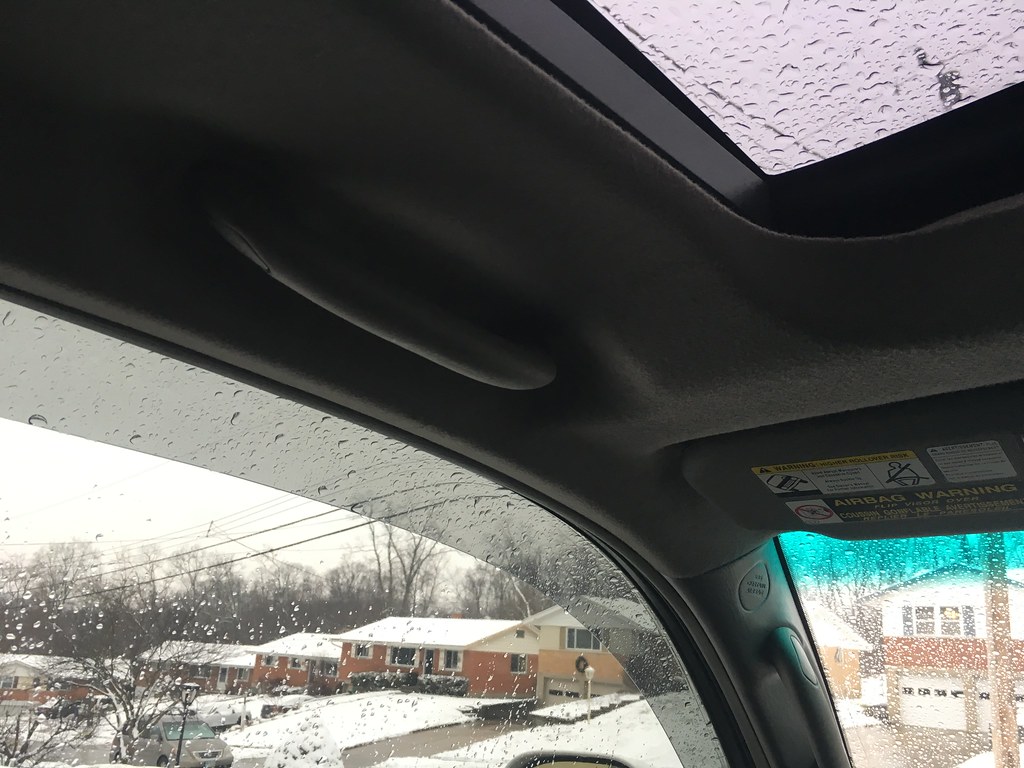
Installed a a grab handle on the drivers side that I bought from the same part-out that I got my sport hood from (not yet installed). My only guess as to why they didn't come with a grab handle in this placement on the passenger side was due to the fact that it sits a bit close to the drivers head (I'm 6' 2"). Although after re-thinking that logic it really doesn't make any sense since they install one on the passenger side and that seat doesn't raise/lower.

39774065573_3e3c922271_b.jpg


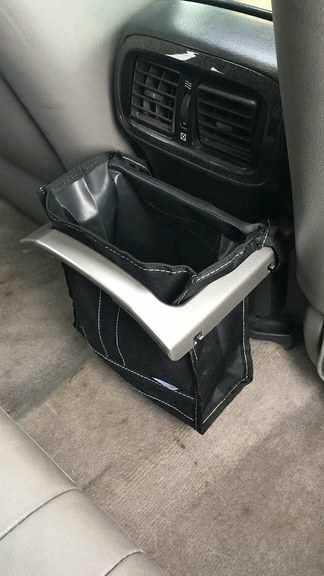
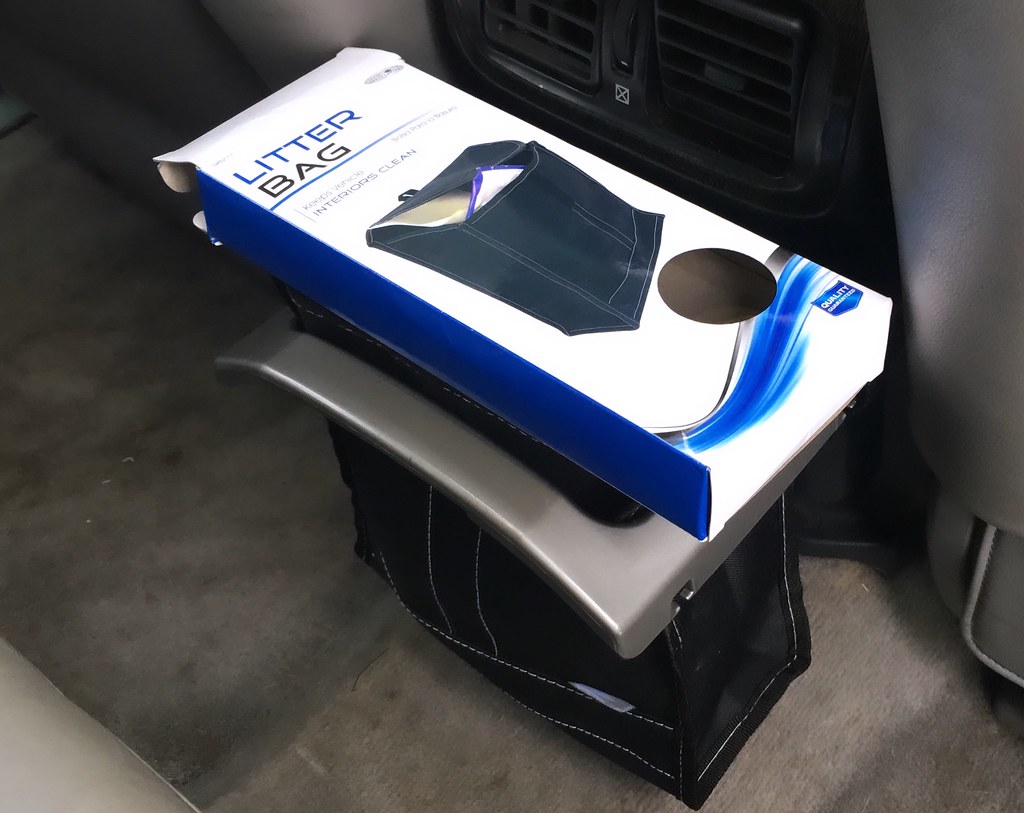
Another quick mod while we got some more snow over this weekend was that I picked up a small re-useable trash bag at the suggestion of @Carton on Instagram (not sure if he's on here or not).

It fits perfectly in the original housing and gives me a place for small waste (straw wrappers, etc). We'll see how long it lasts in this location and if I use it or not! ($7-8 at OReillys)

39774065353_5295c5afde_b.jpg


46739161361_23f2dc23ee_b.jpg


Also got an update from my friend who does side work at his house (and has a lift). He has me scheduled in for Feb 5th to install my suspension and delete the Xreas. I am also going to buy new Sway bar bushings, end links and the correct shock bushing for the rear and have him do a "refresh" on those other components while in there.

I might also have him install the 1.25" Spidertrax spacers I picked up on Facebook Marketplace (before I bought the truck!), otherwise those might wait a little longer until I find a new wheel/tire package.
 
Installed a a grab handle on the drivers side that I bought from the same part-out that I got my sport hood from (not yet installed). My only guess as to why they didn't come with a grab handle in this placement on the passenger side was due to the fact that it sits a bit close to the drivers head (I'm 6' 2"). Although after re-thinking that logic it really doesn't make any sense since they install one on the passenger side and that seat doesn't raise/lower.

39774065573_3e3c922271_b.jpg


Another quick mod while we got some more snow over this weekend was that I picked up a small re-useable trash bag at the suggestion of @Carton on Instagram (not sure if he's on here or not).

It fits perfectly in the original housing and gives me a place for small waste (straw wrappers, etc). We'll see how long it lasts in this location and if I use it or not! ($7-8 at OReillys)

39774065353_5295c5afde_b.jpg


46739161361_23f2dc23ee_b.jpg


Also got an update from my friend who does side work at his house (and has a lift). He has me scheduled in for Feb 5th to install my suspension and delete the Xreas. I am also going to buy new Sway bar bushings, end links and the correct shock bushing for the rear and have him do a "refresh" on those other components while in there.

I might also have him install the 1.25" Spidertrax spacers I picked up on Facebook Marketplace (before I bought the truck!), otherwise those might wait a little longer until I find a new wheel/tire package.


Can you post a link to the HVAC bulbs you got? They still light up amber? LED?
 
Can you post a link to the HVAC bulbs you got? They still light up amber? LED?
Here they are! They're still incandescent, just replacements for those that were burnt out. They were pretty quick and easy to replace once the HVAC control was out.

https://www.amazon.com/gp/product/B00L8BR76A/ref=ppx_yo_dt_b_asin_title_o01__o00_s00?ie=UTF8&psc=1

The bulbs in the HVAC have a tiny little green rubber cap that you peel off and put on the new bulbs, this is what maintains the color of the HVAC control being right. I have since been reading up on some LED conversions and may do that in the future, but for now it was just nice to be able to see the controls in the car as I do not know the locations of the controls well enough by hand since I've only owned it a few weeks, I still have to look to be certain I'm making the right adjustment.
 
Here they are! They're still incandescent, just replacements for those that were burnt out. They were pretty quick and easy to replace once the HVAC control was out.

https://www.amazon.com/gp/product/B00L8BR76A/ref=ppx_yo_dt_b_asin_title_o01__o00_s00?ie=UTF8&psc=1

The bulbs in the HVAC have a tiny little green rubber cap that you peel off and put on the new bulbs, this is what maintains the color of the HVAC control being right. I have since been reading up on some LED conversions and may do that in the future, but for now it was just nice to be able to see the controls in the car as I do not know the locations of the controls well enough by hand since I've only owned it a few weeks, I still have to look to be certain I'm making the right adjustment.


Thanks. Did you have to solder these on?
 
Thanks. Did you have to solder these on?
Nope, you unscrew the bulb housings with a small flat blade screw driver (1/4 turn or so) and then I just used a very small flat head and a small pick to "un-hook" the wiring from the housing then fish it backwards through the housing.

Basically, the bulbs have two long contacts that thread through two little holes in the bulb holder and then they get wrapped around the base so they contact with the circuit board. It may sound a little goofy but you'll get it once its taken apart!
 
Nope, you unscrew the bulb housings with a small flat blade screw driver (1/4 turn or so) and then I just used a very small flat head and a small pick to "un-hook" the wiring from the housing then fish it backwards through the housing.

Basically, the bulbs have two long contacts that thread through two little holes in the bulb holder and then they get wrapped around the base so they contact with the circuit board. It may sound a little goofy but you'll get it once its taken apart!

Sweet, going to order these soon. Dealer wanted $8 a bulb....:smokin:
 
Sweet, going to order these soon. Dealer wanted $8 a bulb....:smokin:
Yeah, I forget where the thread was on here that someone mentioned them but for $8 and 30 minutes of my time (admittedly while watching football) I was able to resolve all of the burnt out lights and still have 4 or so extra bulbs. I need to see if these are similar bulbs to those in switches since my hatch window switch doesn't light up which I only noticed once I put the dash back together.
 
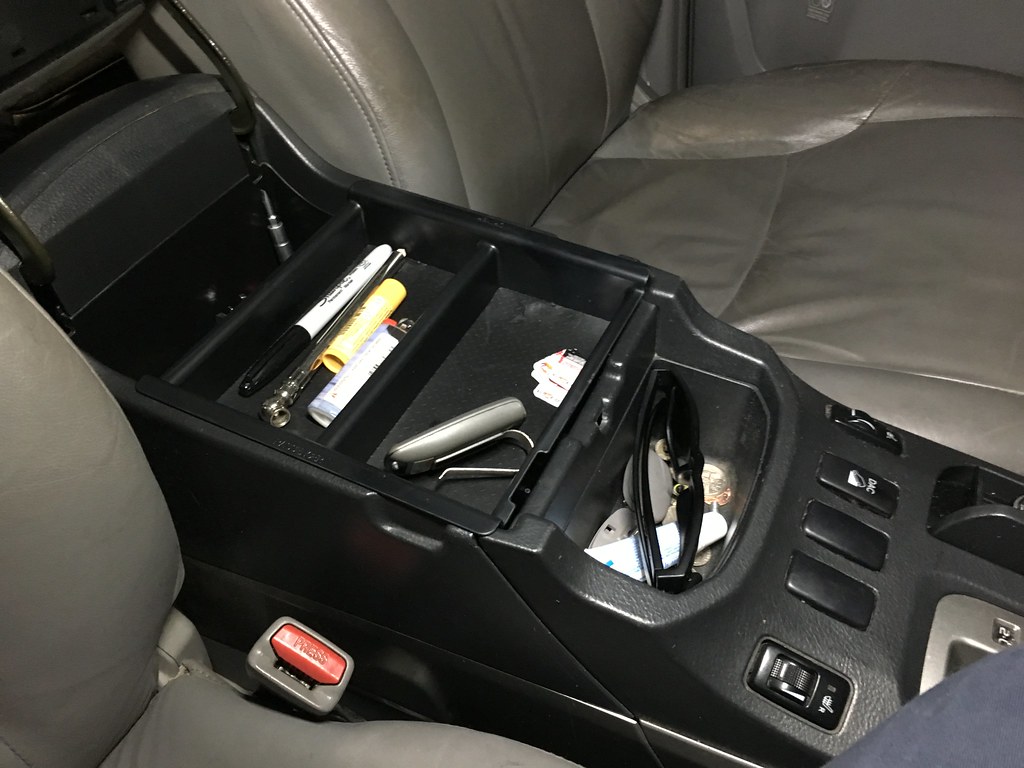
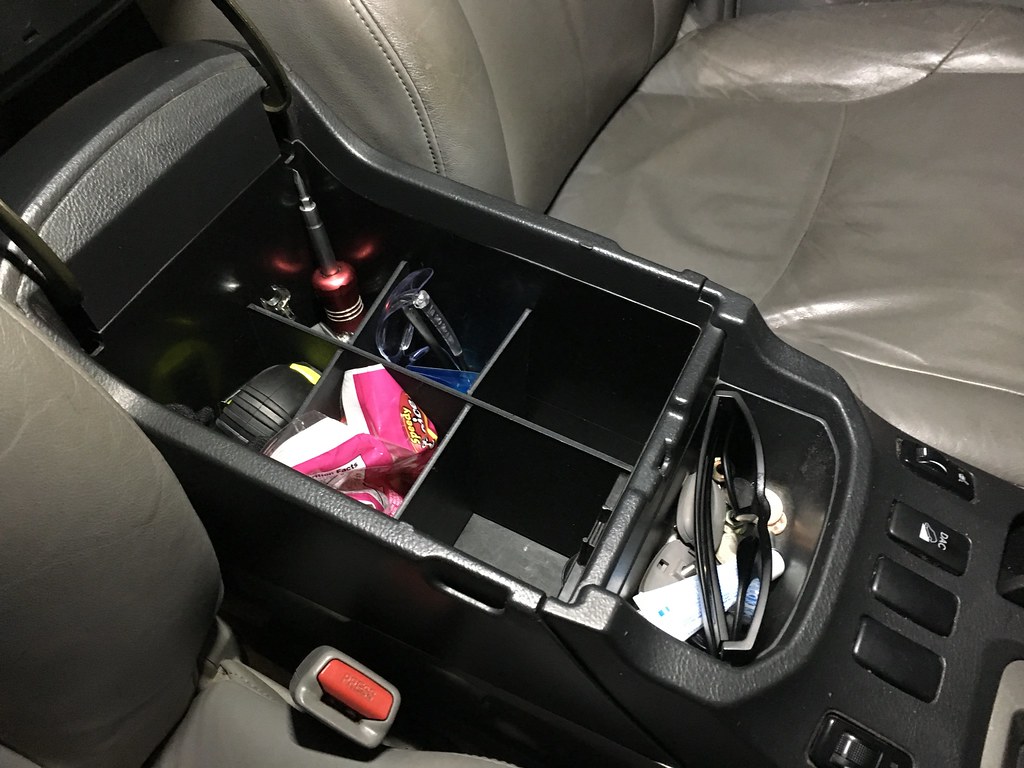
Installed my Vehicle OCD organizers from Salex Organizers yesterday.

Salex Organizers - Center Console Organizers

Honestly, I'm not sure why the 4Runner didn't come with the top one of these, it seems so logical compared to all the other cars I've owned or been in. The lower one is a bit more of an aftermarket upgrade (although just as easy to assemble/install). I'm sure I'll reorganize these a few times before a final, but it's nice to have things like small tools, cords, miscellaneous items in a "home" rather than just all tossed in there.

31834609217_48a5ffee0e_b.jpg


45861357655_629fbbebbb_b.jpg


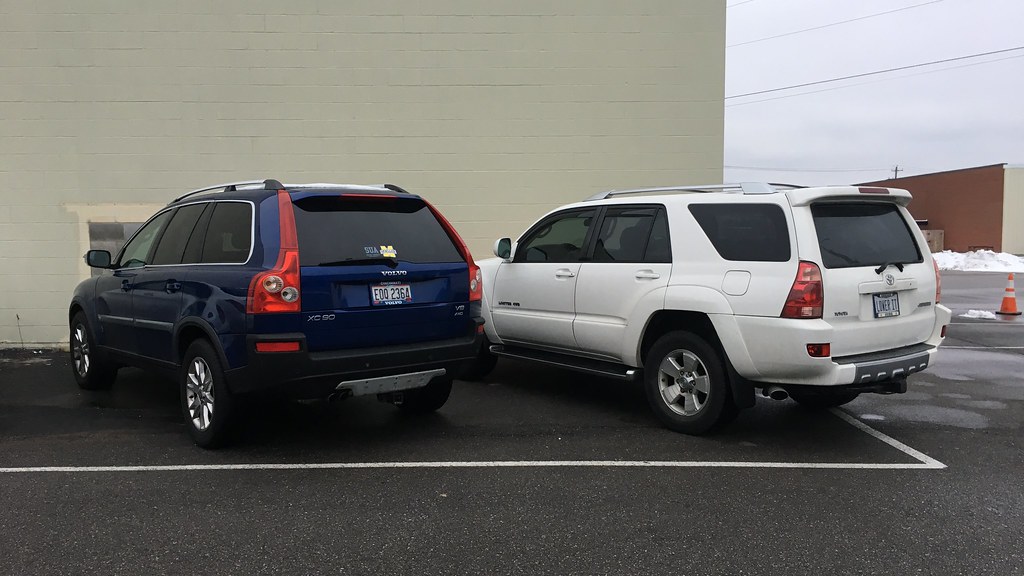
And here's a pic of my 4Runner next to what I thought I wanted when I started my new daily search. I had the opportunity to drive a friends XC90 V8 for a few weeks and fell in love with the sounds and comfort, but after really analyzing the pros and cons, it didn't present any huge benefit over the wagon that I owned at the time. It was going to be able to tow, but wouldn't trust it with anything truly heavy, it wasn't going to be too capable off road, so ultimately I decided against it and started looked for a 4Runner.

45861357645_cc1b4812e4_b.jpg


This picture/angle makes the 4Runner look way bigger, but based on measurements available online it's within 1-2" in any direction (height, width, length).

I have a few more boxes expected to show up between now and the weekend so I'll post up a bit more when I unbox them! Also hoping to get around to installing my back up camera and routing the microphone for my headunits bluetooth this weekend.
 
Scooped up a $11.07 curved 32" Light Bar made by AutoFeel from WOOT thanks to [MENTION=119498]blackjackck[/MENTION] I actually ordered two of them since they were so reasonably priced.

ORIGINAL THREAD FOR LIGHT BAR DEAL
Light Bar deal for anyone looking for one

Got 1 of 2 of mine in yesterday. Interestingly enough one of them is shipping from Jacksonville, FL and this one came out of Chattanooga I believe?

The box looked like it had been opened before, but it was taped closed again.

32912476998_910c48deb8_b.jpg


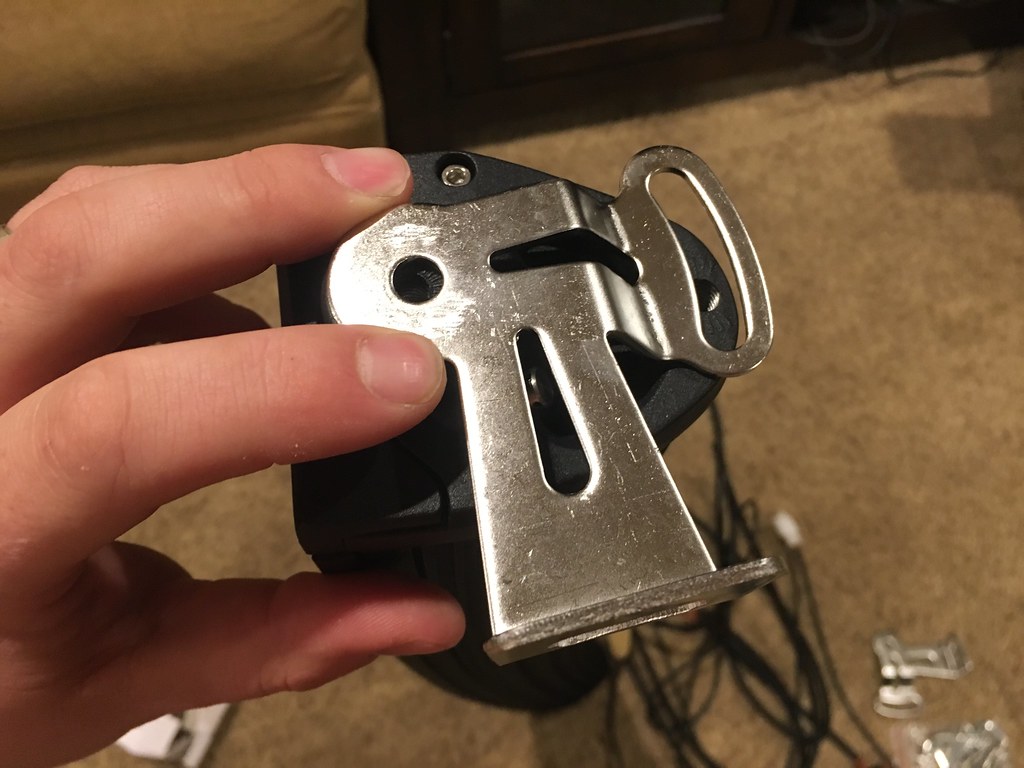
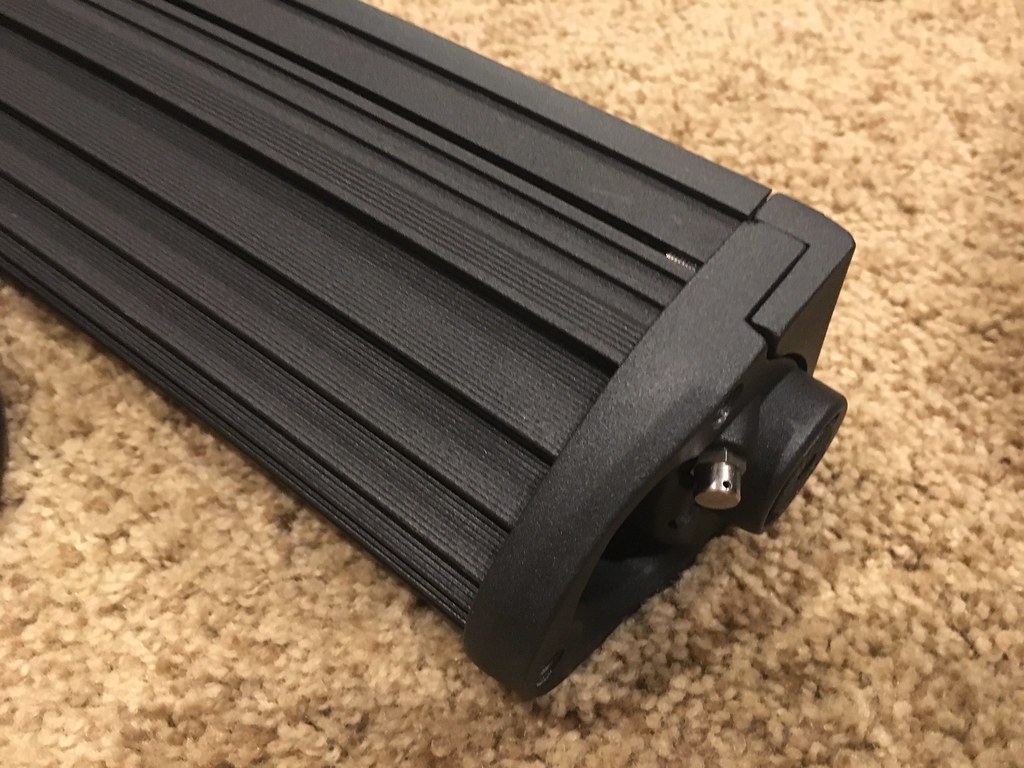
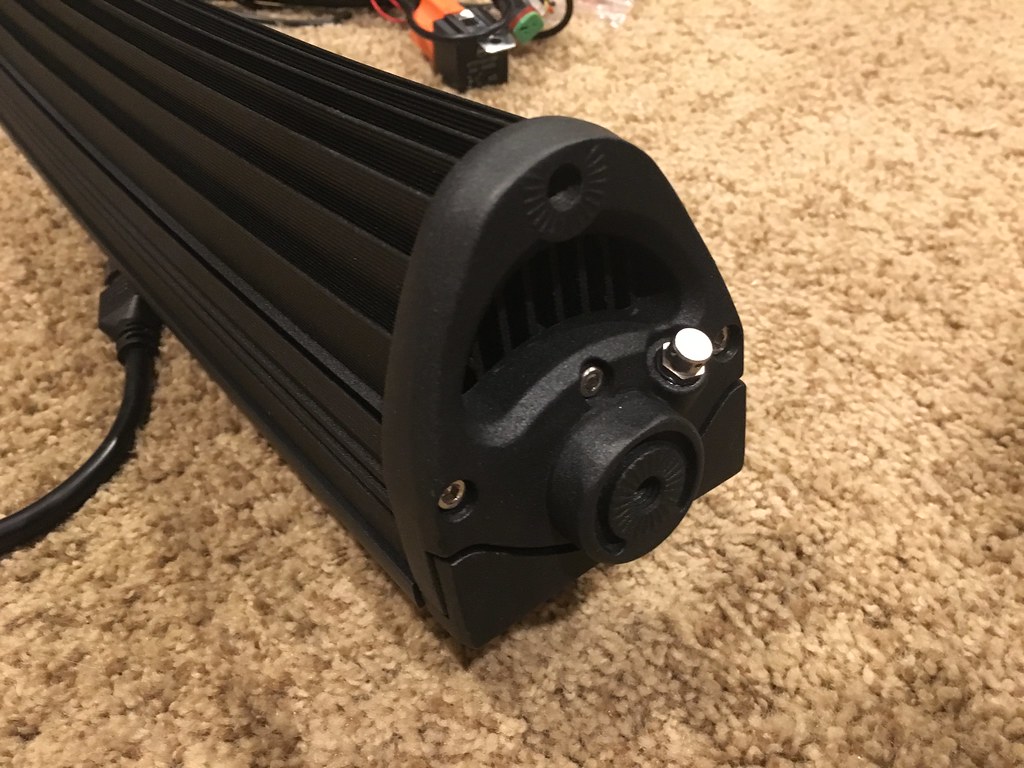
Everything in the package laid out, comes with a harness and brackets/hardware.

32912477218_ecf7e37d44_b.jpg


Brackets

32912477108_703ee43cf3_b.jpg


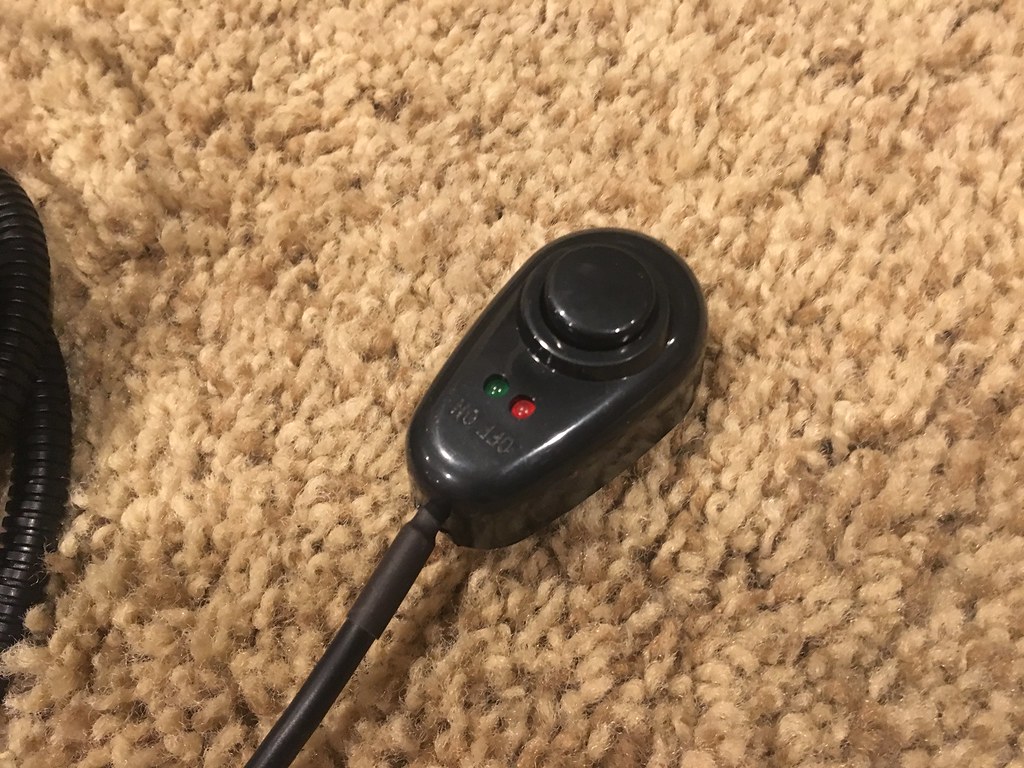
The switch feels cheap so more than likely I will cut this off and wire in something that fits better to the dash. It does have double sided tape on the back though if you wanted to just stick it somewhere and run the wires in behind some trim.

31846473017_6793d2eabe_b.jpg


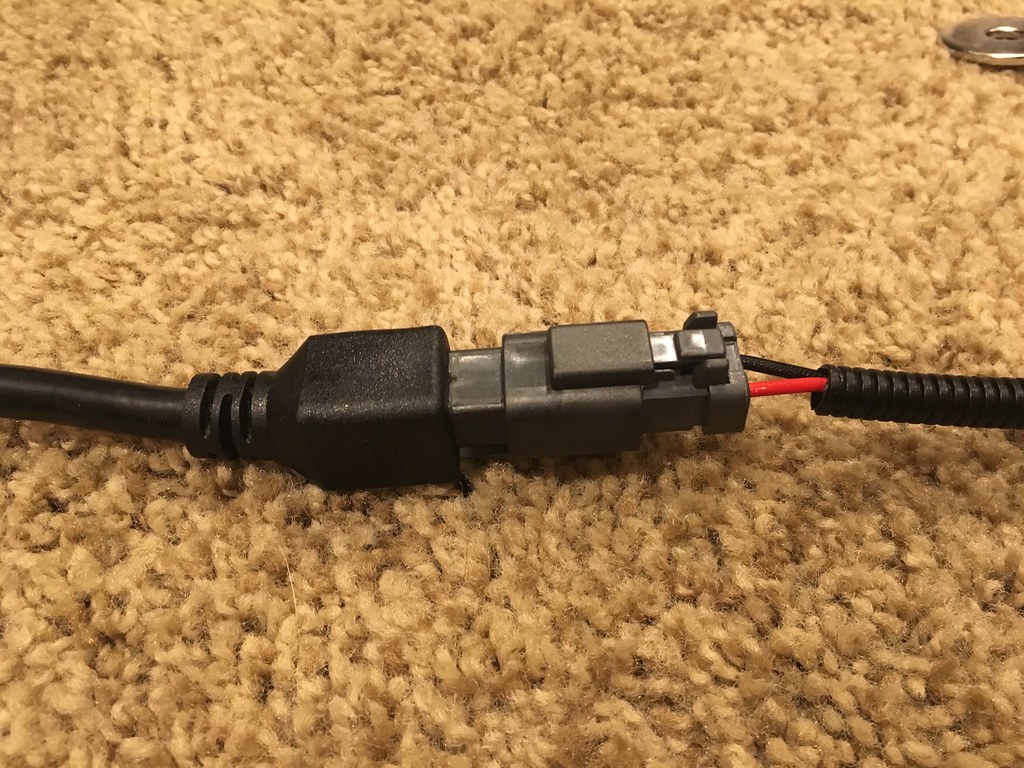
"waterproof" connector on the light bar to the harness.

46788191051_4928bdc1be_b.jpg


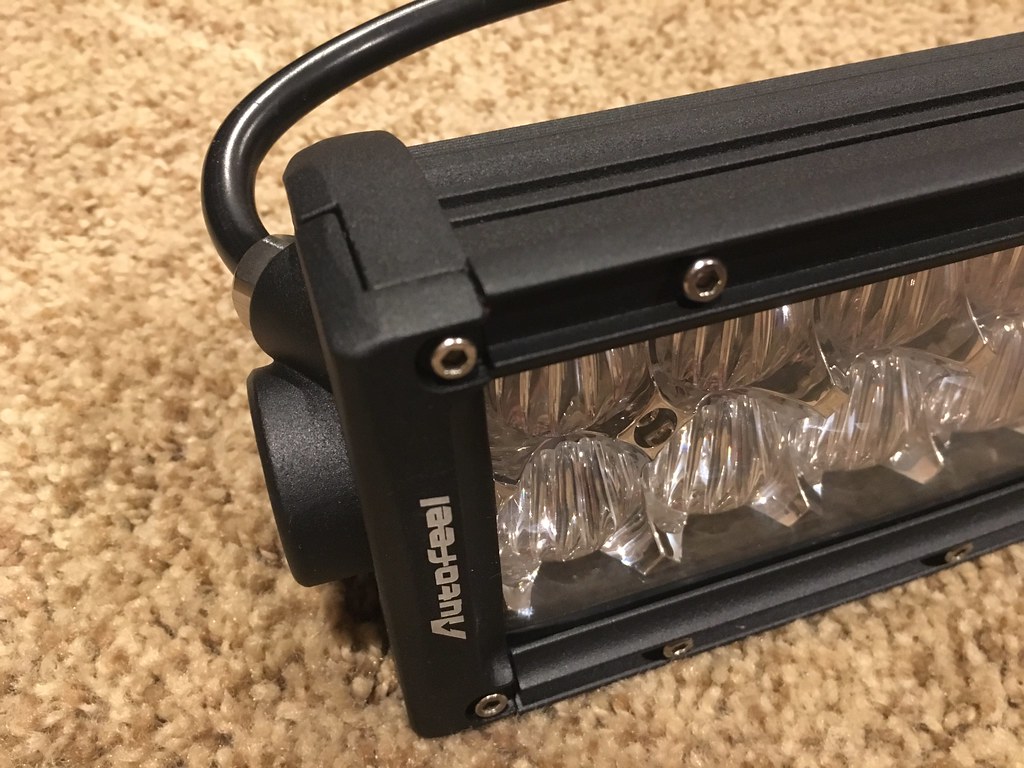
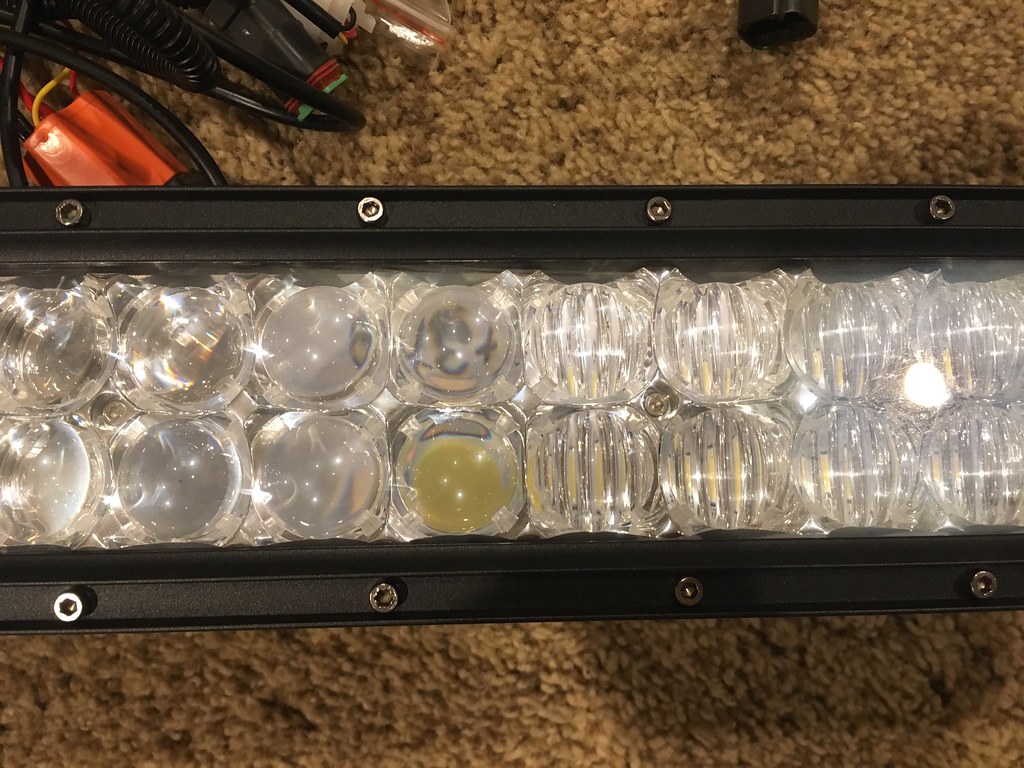
More up close pics of the bar itself.

46063104304_1103eeae81_b.jpg


39822762953_302cbdbd39_b.jpg


46735507162_2a8563420c_b.jpg


46735507212_568da75719_b.jpg


30a Fuse and a Relay on the harness, ultimately for $11, its not too bad of a pre-wired harness even if the light bar is junk as we discussed.

46788189621_75060199ed_b.jpg


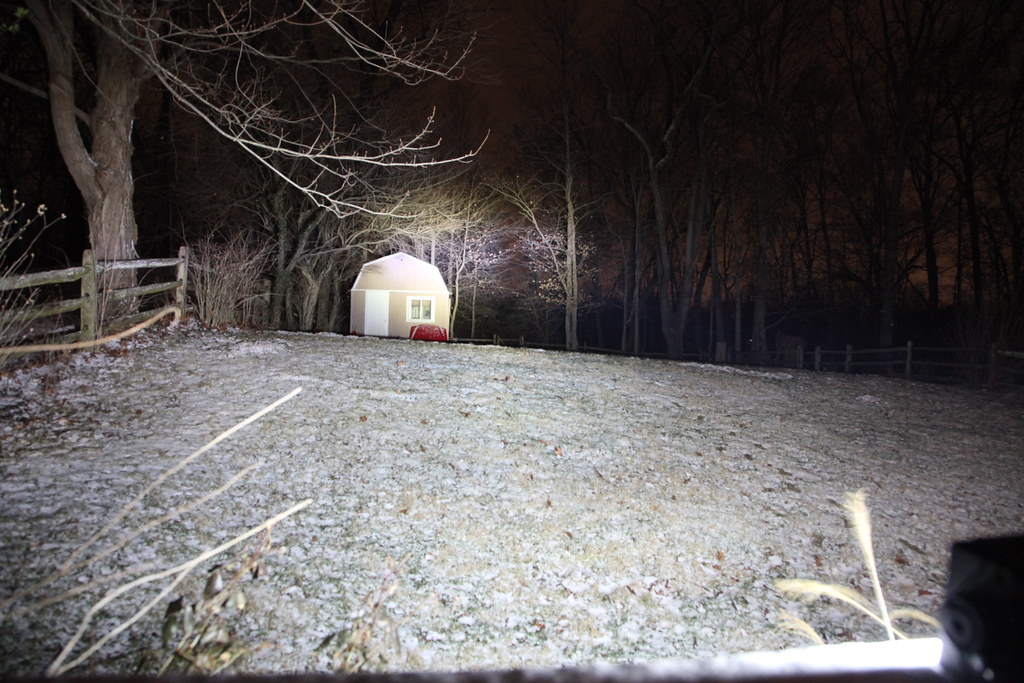
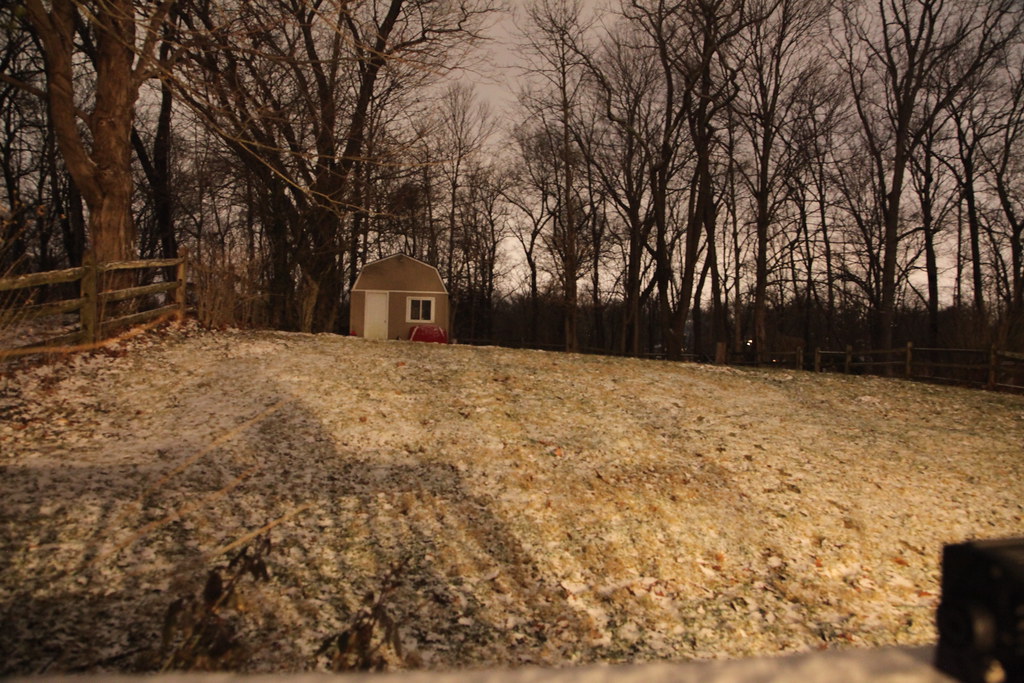
I'm going to try to light it up in the backyard tonight to get an idea of light output, I'll use my DSLR so that I can maintain the shutter speed etc to get the best comparison of dark vs light.

The other idea that I had if I don't decide to mount it in the bumper is to make two suction cup mounts (with Harbor Freight suction cups) and then arrange all the wiring so that it could be temporarily "hooked up" to the battery and then suction cupped to either the hood or roof. This might be a good option for me as I don't have to havev it on the car all the time and can just bring it with me if I'm going offroad or somewhere I might need it. Of course then I don't have it all the time unless I leave it in the car, but I don't find myself unexpectedly offroad ever given my normal schedule/travel route.

If not a temporary solution for mounting, I'll make some brackets similar to those from Rago Fab to mount it in the front bumper once its a bit warmer out!
 
Well, it was cold and snowy here in Ohio this weekend, so I didn't get as much done as I would have liked. I played around with some LED strips in a spare domelight housing but ultimately it wasn't going to be bright enough to be worth doing over the drop in LED bulbs I got from superbrightleds.

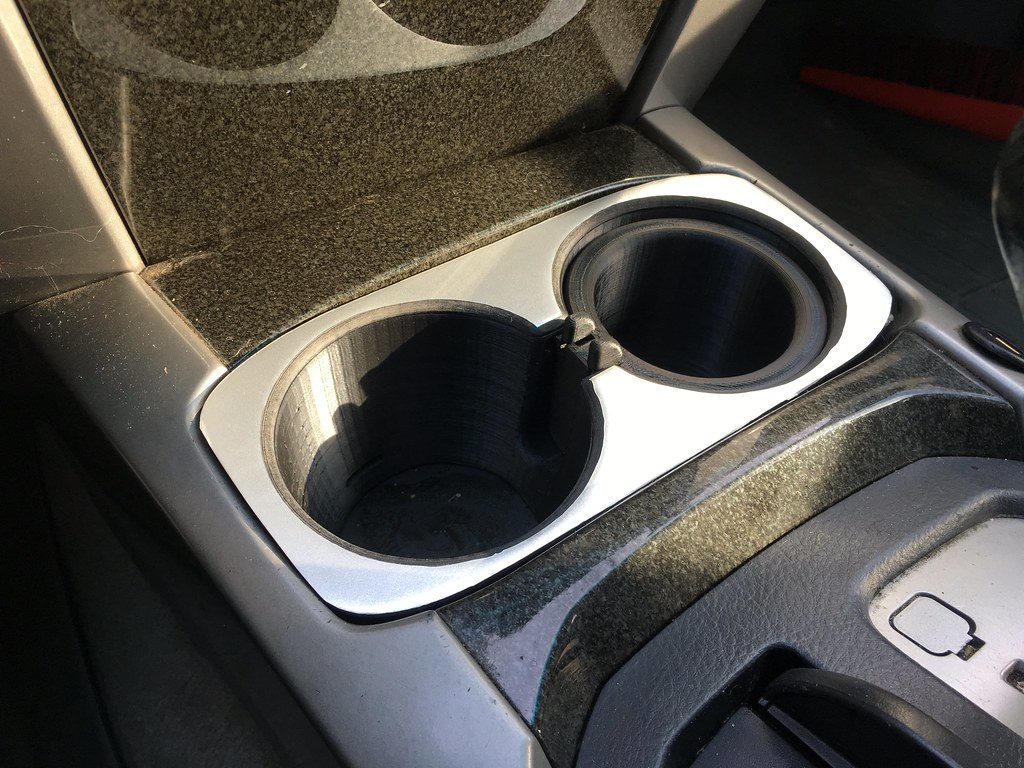
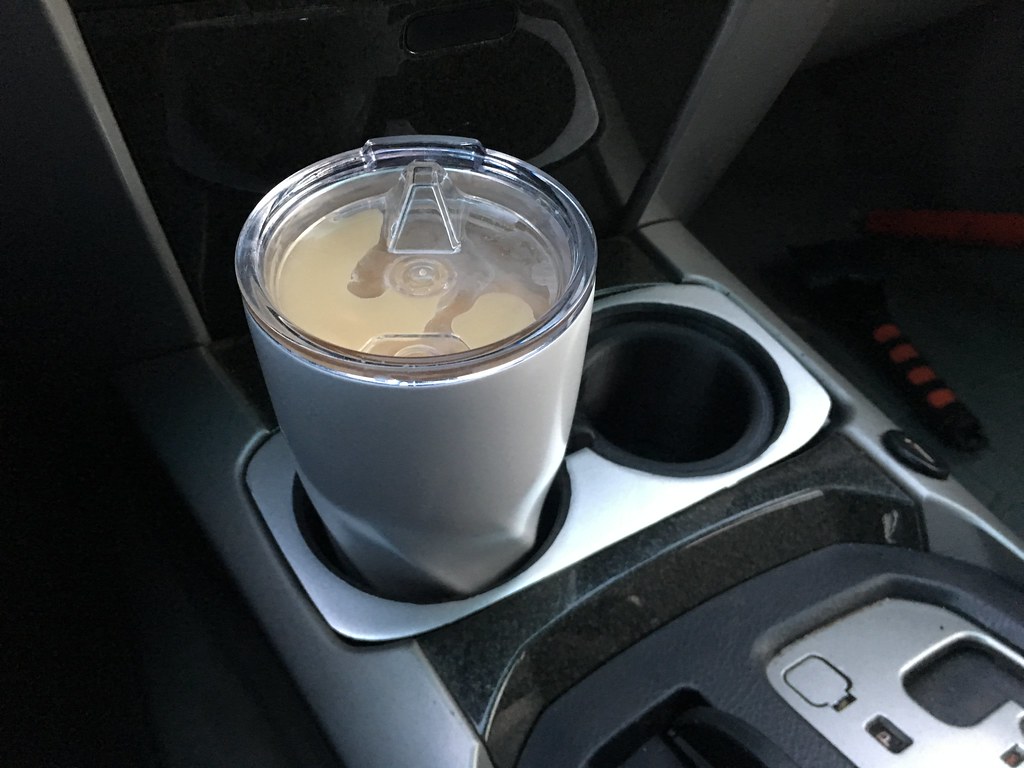
I did however assemble my 3d printed cupholder insert I got from [MENTION=82542]Macallan[/MENTION]

I sanded the top plate smooth so that the 3d printed castings were gone, then I wrapped it in some leftover silver vinyl I had kicking around.

I used 5 minute epoxy to assemble the two pieces together with a few clamps holding it tight.


I'd give it a 9/10 on functionality, it's by far better than the factory "cup holder" especially when using smaller bottles, cans, or cups.

As far as fit and finish go, it'd give it a 6/10. The top plate has a nice height, but it doesn't actually fill the opening in the trim, it's close but leaves a lot to be desired in terms of looks.

45911641165_345013a824_b.jpg


46826522621_4dbf959954_b.jpg


Whenever I decide to deep dive into an interior overhaul this spring I will likely re-wrap this or paint it to match whatever I decide for the rest of the trim.
 
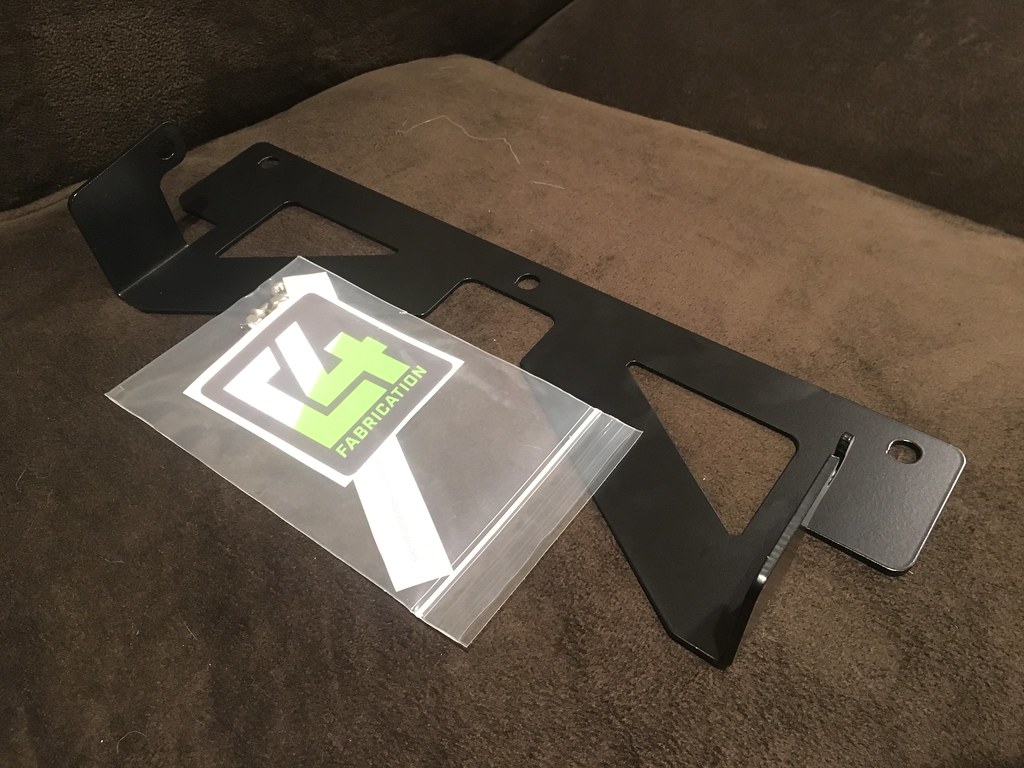
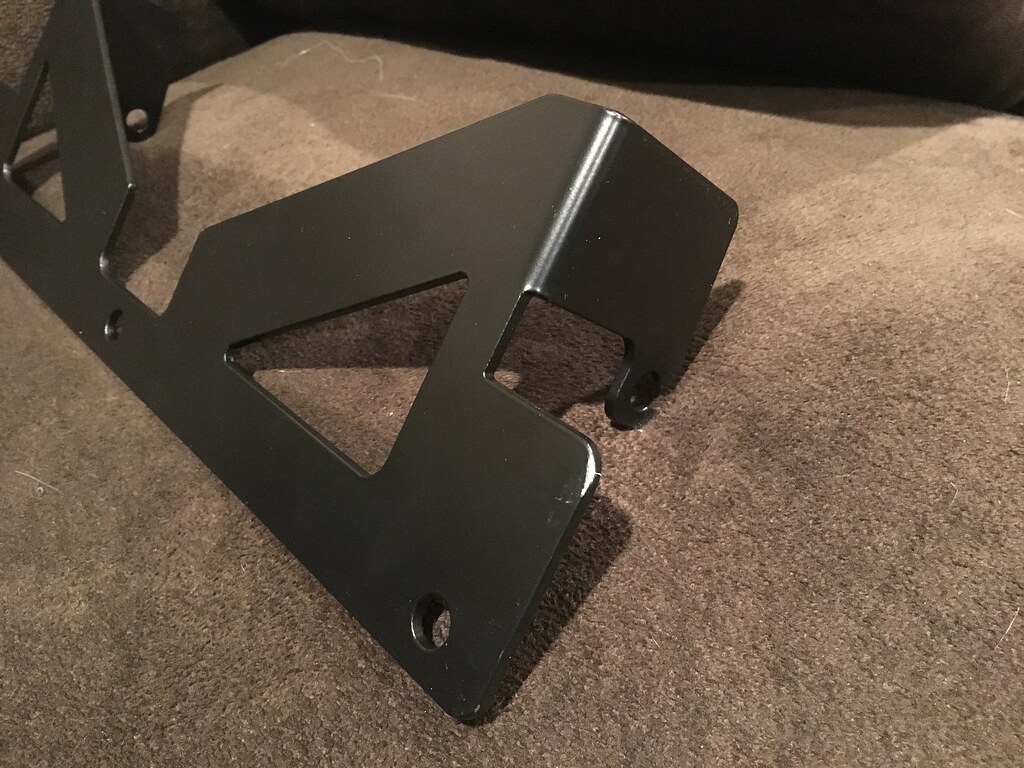
C4 Fabrication Hood Scoop Bracket showed up yesterday. Unfortunately it wasn't packed the best on the corners (shrink wrap, then inside a FedEx padded envelope). It has a small ding but I'm not nit picky or perfect enough to worry about it, I'll probably scratch or ding it when doing the install anyways.

Time to order a 10" Light Bar now I guess!

39873446813_58eb3c37b6_b.jpg


39873446823_0f06470104_b.jpg
 
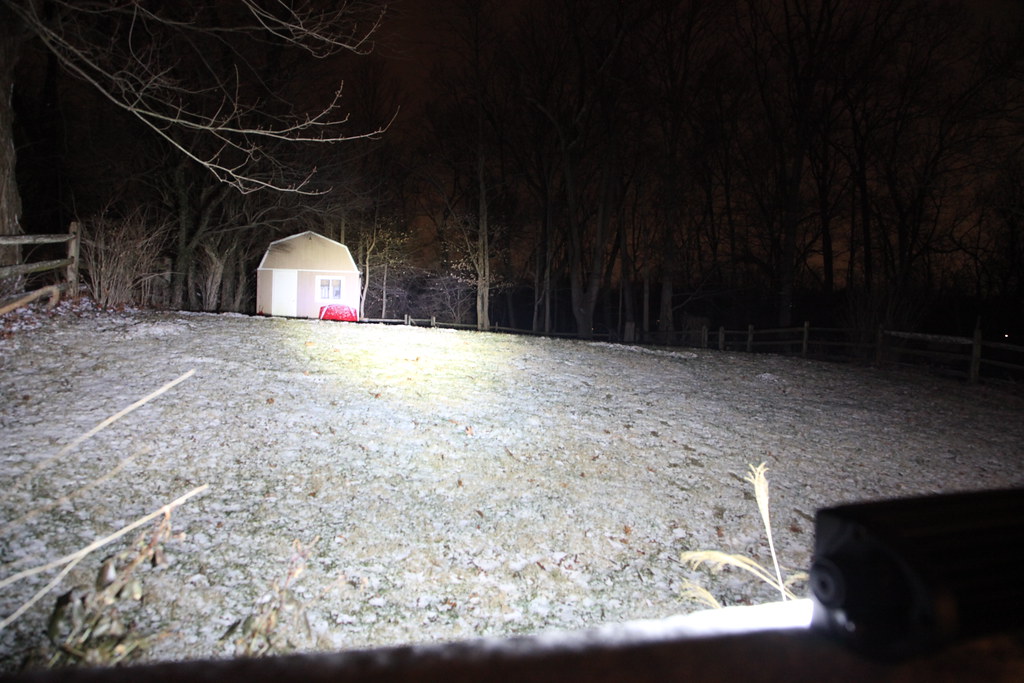
Fired up the 32" in the backyard last night just to see how it looks.

39901520513_bcc4c417e4_b.jpg


(tipped it up a little bit to hit the trees further)

39901520503_e3efd0e81f_b.jpg


and for what it's worth, here's a picture of the yard with no lights on and with an over 10x slower shutter speed. (The picture at the same settings as the lit up picture just looked black)

31924959917_4e4c3e33f2_b.jpg


It has a nice amount of flood light near by and the spot seems to have a good amount of light. Overall, I'm pretty impressed and happy with the $11 I spent, I just want to get another switch to put in the cabin since the stick on one is cheap.

I also went ahead and ordered a 10" for $16 from the same seller on Amazon, that should be here today and I'm hopeful to mount it into the hood bracket on the Sport hood this weekend (sport hood not yet installed on the 4R).
 
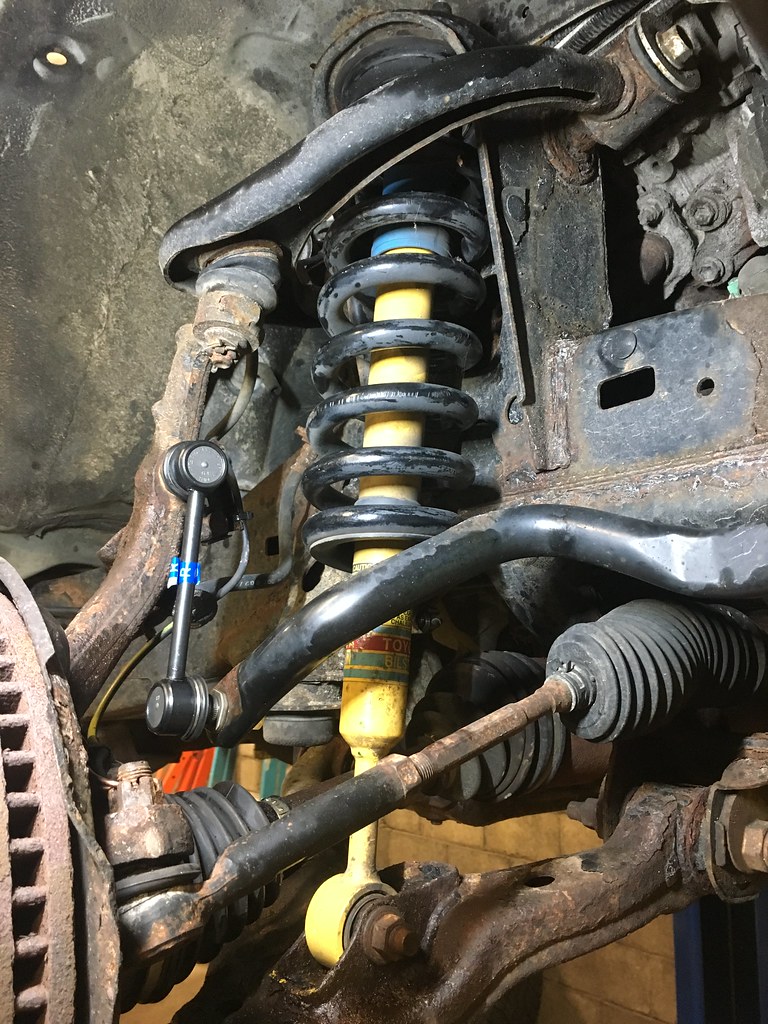
Finished ordering everything for my suspension upgrade. Most of the bushings started arriving over this weekend from Amazon and the final pieces should be here later this week from Rock Auto

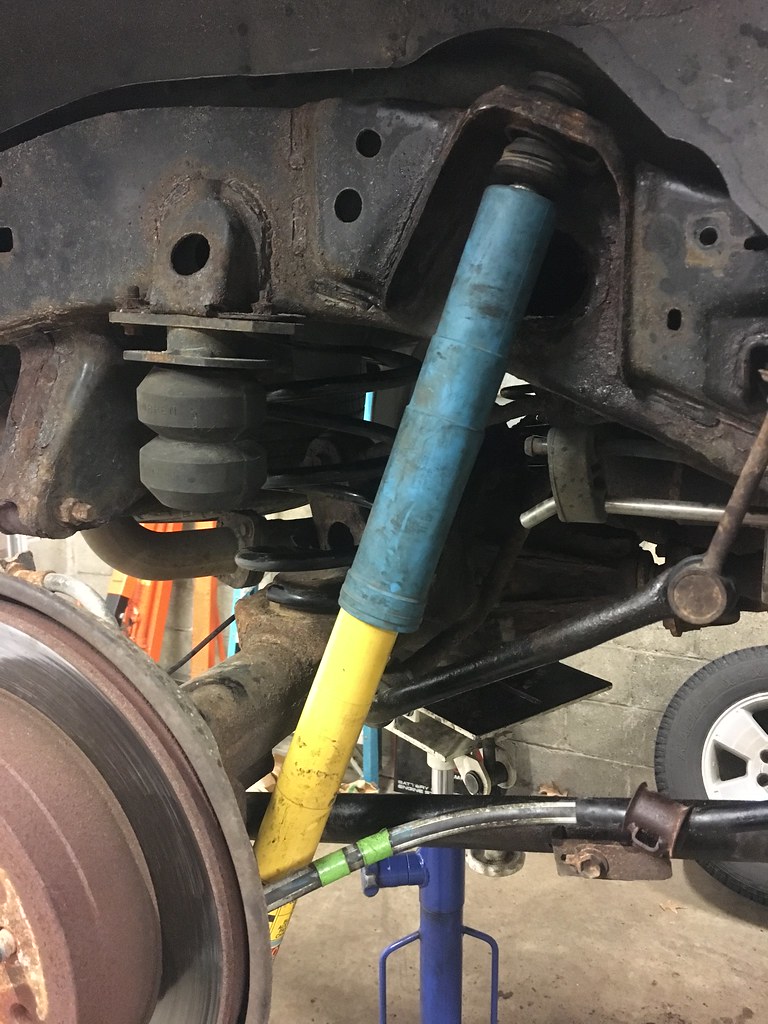
TRD Offroad Tacoma Front Struts & Rear Shocks with 10k miles (Bilstein 4600) - $180 Shipped
FJ Cruiser Trail Team Rear Springs - $50 Shipped
Energy Suspension Rear Shock Bushings, Front and Rear Sway Bar Bushings - $55
Moog Front and Rear End Links - $120

All in all should be a welcome upgrade for everything tallying just a hair over $400 + install.

I'll be sure to take some measurements and before and after pics of everything when the install goes down on the 5th, I might even convince my friend to give me a hand with my sport hood install that evening too since we'll be in his heated garage with a lift.
 
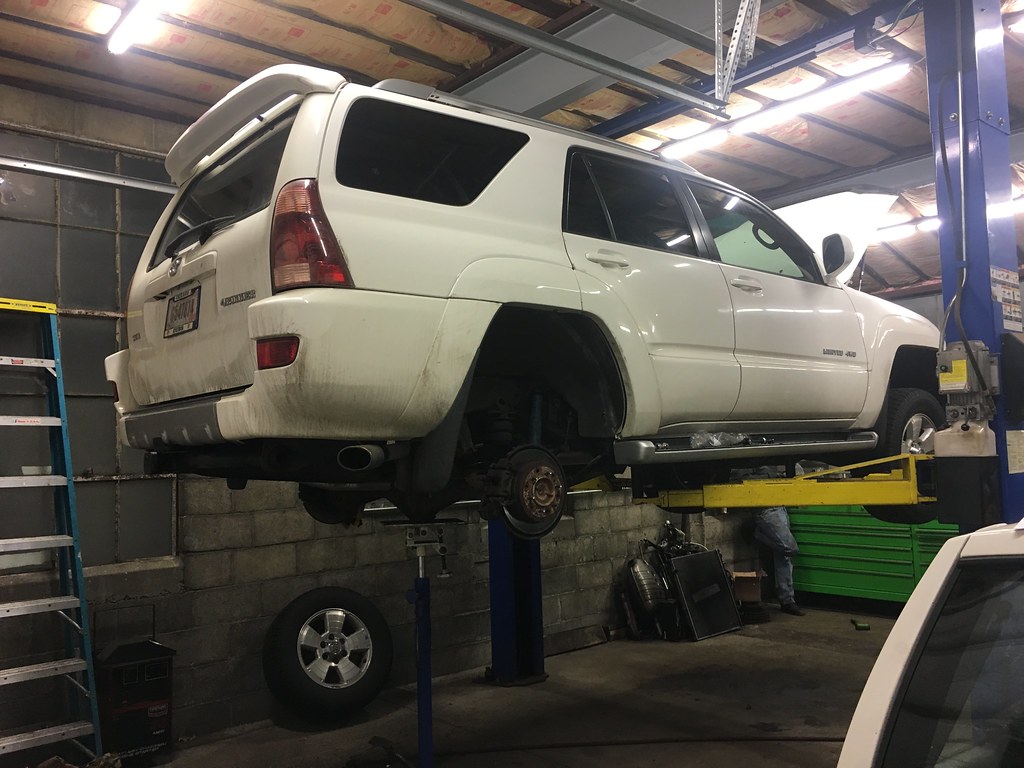
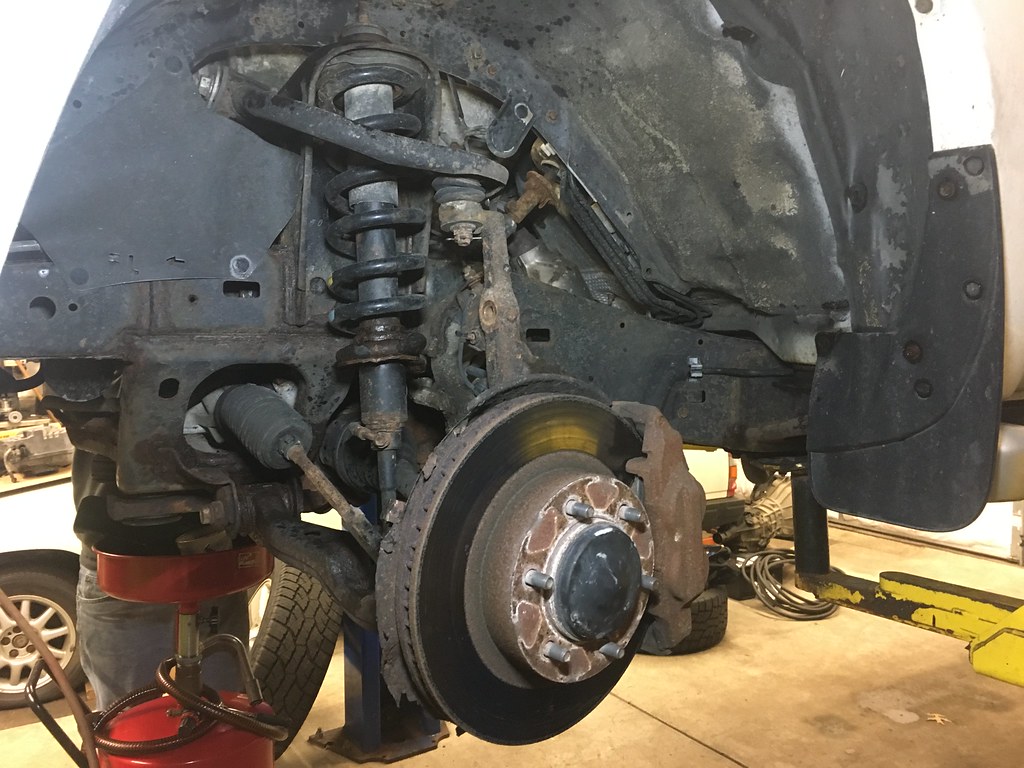
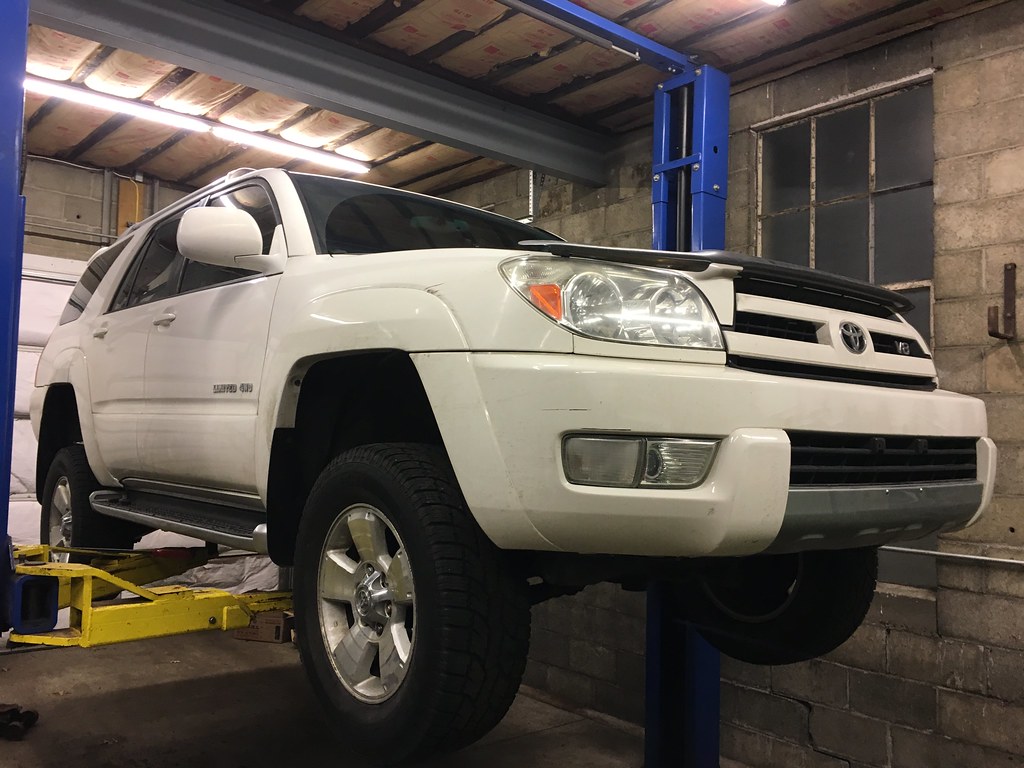
Here's a few pictures from last nights install. The only thing that never showed up from Amazon (still says "on its way") was the front poly swaybar bushings. Luckily those are easy to access and we removed and anti-siezed the bolts for the bar itself so I should have no problem popping it off and putting those on once they arrive. My friend whos house we did this at did most of the hard work while I messed around with a few little things and overall just looked around the underside of the truck since I am not as familiar with it as I was my Volvo beforehand.

First impressions... WOW. The Xreas was very wofty, loose in turns, this is much tighter and rides a bit firmer but not "rough" by any means. That being said, I am used to lowered european cars on low profile tires, so a rough ride is all relative and this thing is like a cloud in comparison.

Beforehand, I had some noise from the front right that I suspected was an end link, and sure enough, the front endlinks were shot. I replaced all 4 corners with MOOG and everything is tight and quiet now. I am honestly blown away by how much of a difference this made, I wish I had done it before my 6hr each way roadtrip for work last week.

The thing that everyone likely wants to know is the height change.

Front went up 1.75", Rear up 1", truck sits just about level and you can certainly feel the difference of leveling from in the cabin, next major exterior upgrade will be wheels and tires, but for now I'm pretty darn pleased with this install. Those measurements were taken after setting the truck down and giving it a bounce. I will remeasure in a day or two when it's not torrential down pouring.

During the installation
33130263258_108b29f988_b.jpg


Front beforehand (sprayed down with pb)
47005710071_59224fae5c_b.jpg


Front after
46091874085_1921ea5d1a_b.jpg


Rear After
46953937392_155b1c60bc_b.jpg


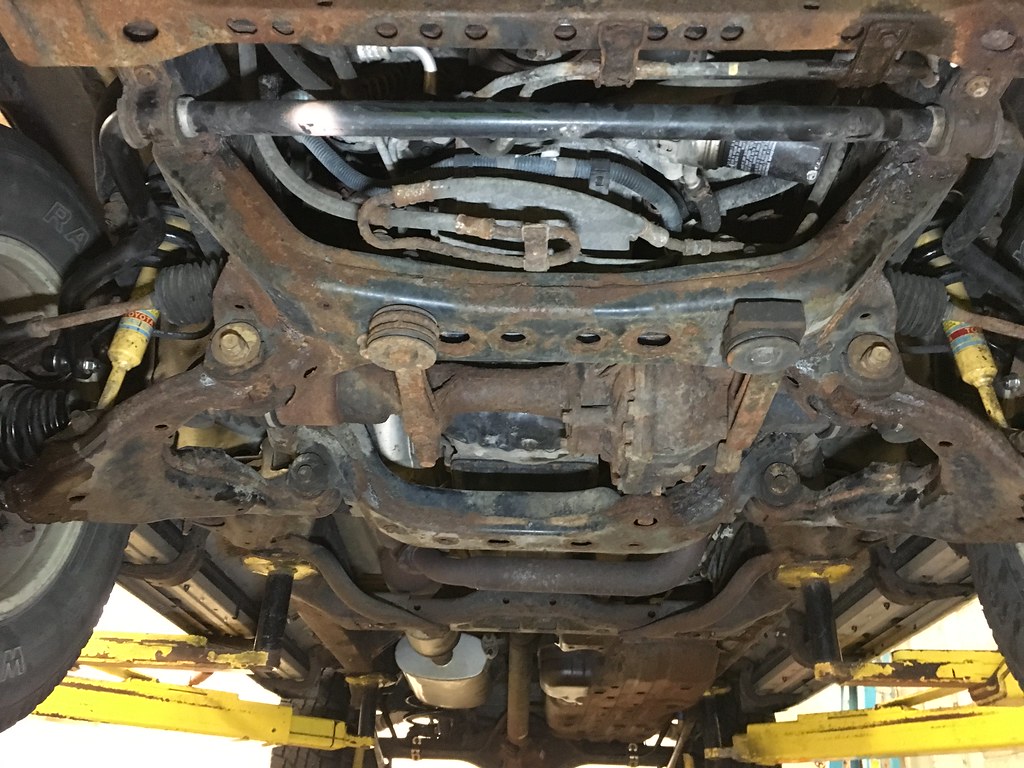
General Crusty Midwest Undercarriage picture. I spent some time poking around to assess the frame condition and it's mostly all surface. I used a flashlight to look inside the frame rails where I could and they all look pretty good. I plan to fluid film the inside and then POR15 the outside in the spring.

46953937432_e323903ec9_b.jpg


Buttoned back up and waiting to be set down.
46281584704_d1952af46c_b.jpg


The only difficulty we really had was with the rear upper shock mounts, the ones from the Xreas shocks were taller and the thread length on the Tacoma rear shocks was shorter than the Xreas so we had to shave down the Xreas rear mounts to make everything work right. It really wasn't that much work, it was just tedious as we didn't anticipate it.

Overall labor cost for approximately 4 hours of his work and access to a lift/tools came out to $150 with me helping just a little bit.

More pics to come in the next few days, this was a great upgrade and I think is just the right amount of lift that I was looking for based on my anticipated use.
 
Looks good!

I didn’t run into the fit issue with my rear shocks. Maybe the ‘06-‘09 mount is a little different.
 
Looks good!

I didn’t run into the fit issue with my rear shocks. Maybe the ‘06-‘09 mount is a little different.

The issue was the threaded part on the shock body from the tacoma shocks was shorter. We ended up using the Xreas bushings and just opened up the center hole a little bit. Part of the reason for doing that is that the Tacoma shocks didn't come with the bushings from the guy I bought them from.
 
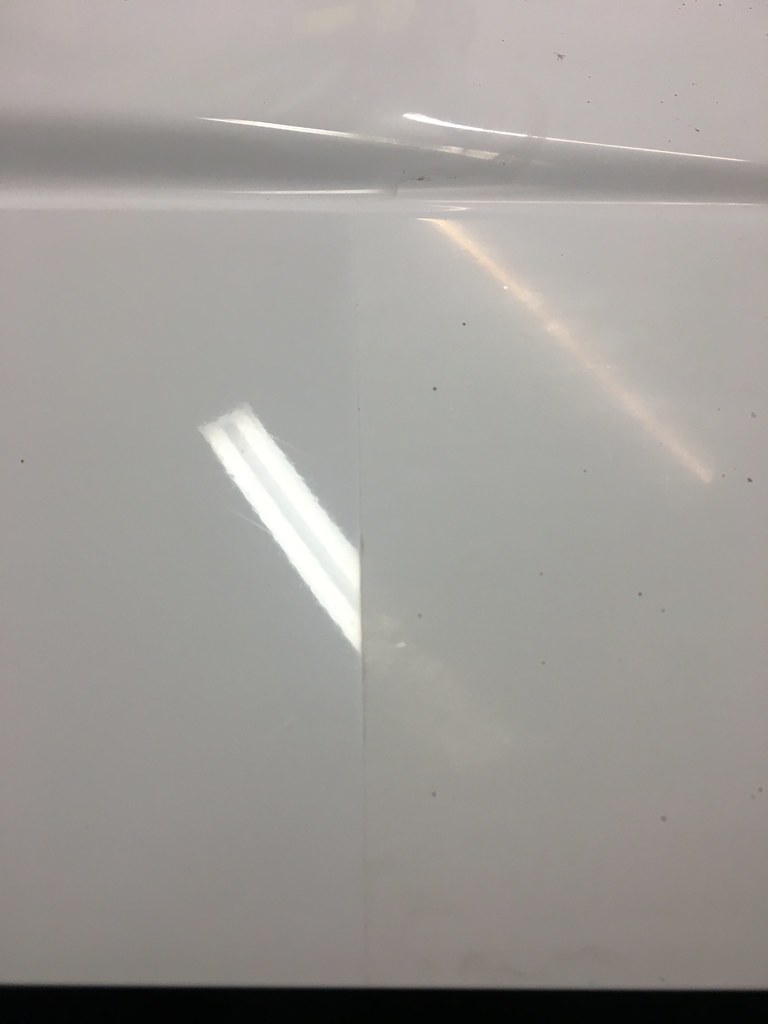
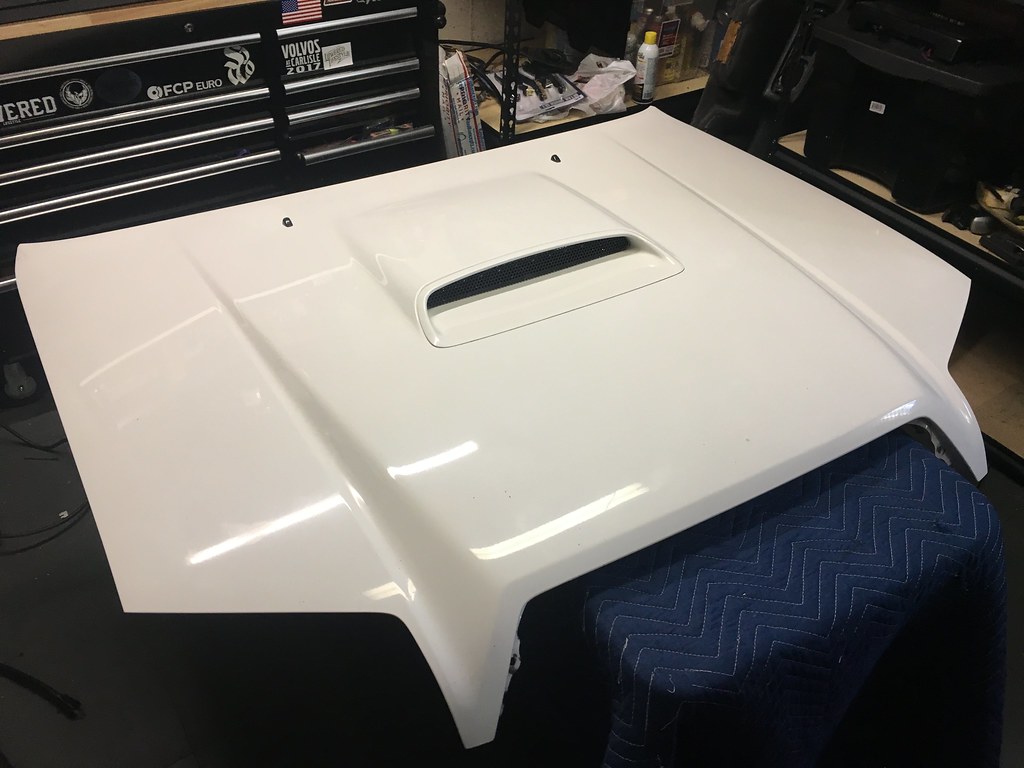
About 5 days into ownership of my 4Runner I found a white sport hood locally and picked it up for $250. I was a bit concerned with its condition as it had a lot of little black marks that were hard to tell if they were rock chips or just contaminants.

Finally brought the hood into the garage and got to work yesterday.

Here's the before.

46998858682_5428d41396_b.jpg


Removed the scoop to clean it up best (1/5 of the bolts had to be cut off)

47050853571_06ddfba4b3_b.jpg


Borrowed a friends Griots orbital while he's out of town and hit this with just some 3M Polish I had kicking around. The whole truck needs a once over once its warm out so I didn't spend too much time on the hood.

46137192625_ac7b5b88b4_b.jpg


46998858672_d754e2c8a1_b.jpg


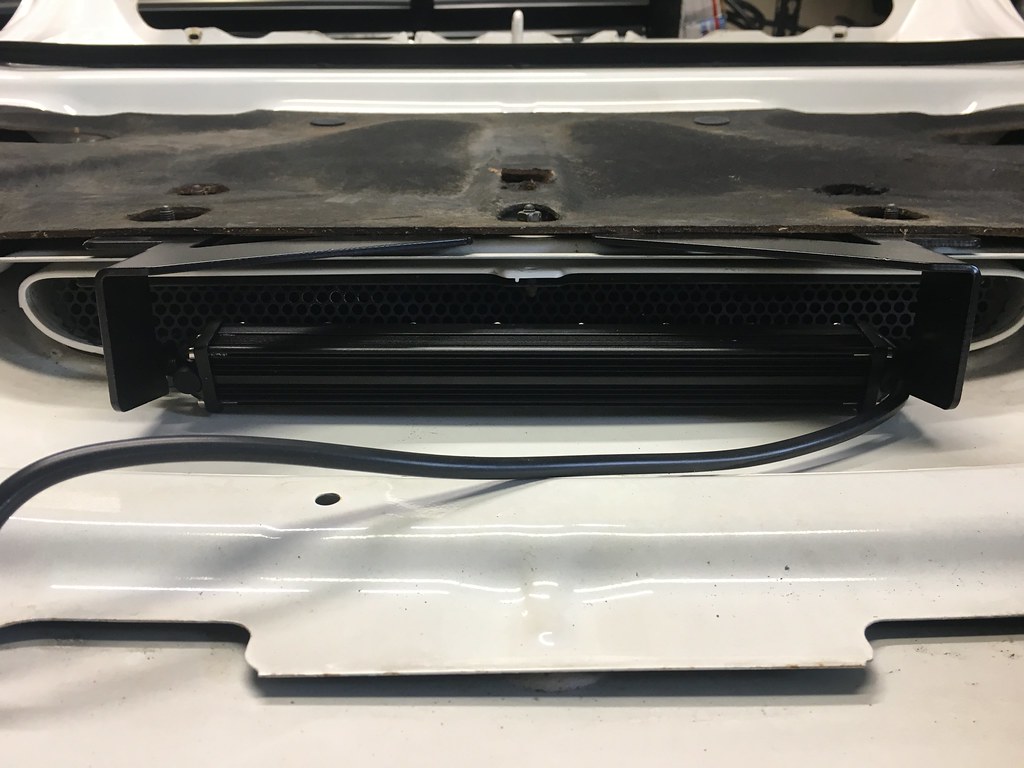
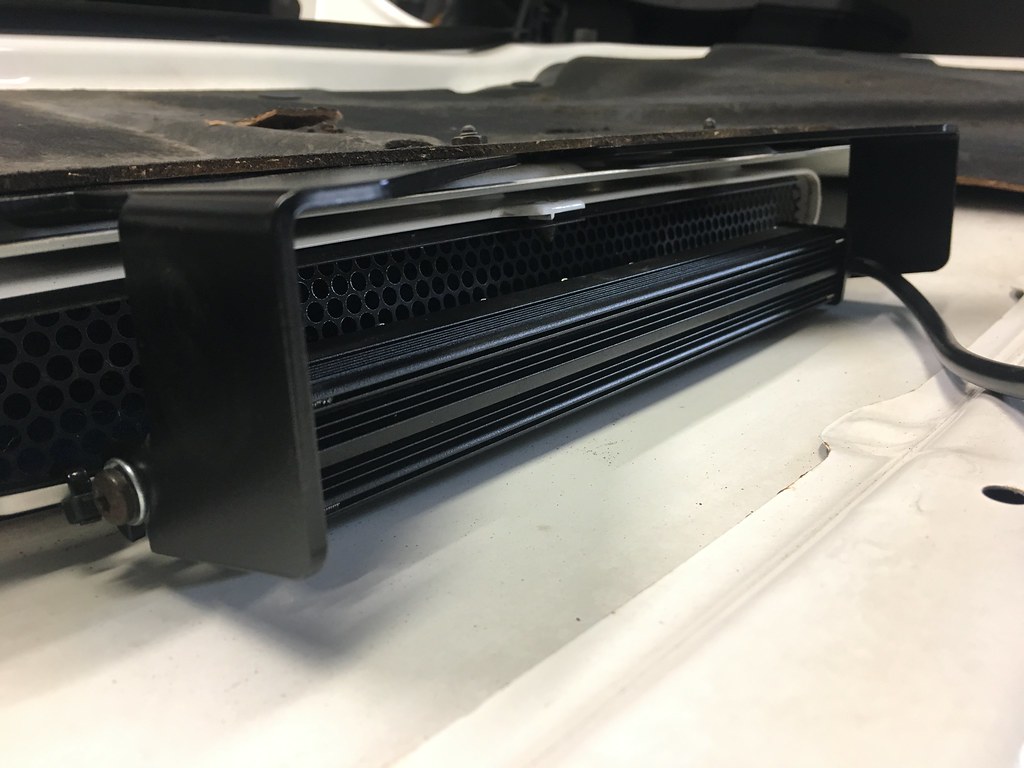
While the hood was off, I mounted the C4 Fab light bracket with the AutoFeel 10" Light Bar I picked up off of Amazon. The light bar seems to sit a bit higher than I anticipated but I'll have to see how it impacts the light output before I make any adjustments. Of course this bracket was not designed for a cheap light bar so I expected some adjustments to be necessary.

46137192745_7d35ffa6bf_b.jpg


46998858622_51276ebaec_b.jpg


47050853801_fca627c734_b.jpg


Then today I went out and snapped a few pictures and took some more measurements after everything has settled for a handful of days.

Front picked up about 1" and the rear got just short of 1". That being said, I still think it looks good and the ride is a drastic improvement from the worn out Xreas.

40085928113_afa2b841dd_b.jpg


46326958444_82cef4039b_b.jpg


46326954574_1e07895912_b.jpg


46326956914_48e23771a7_b.jpg


iPhone Background sized, PM me if you cannot download it and want a hi-res and I can send it!
40085931283_683da5c0d8_h.jpg
 

Members online

No members online now.

Forum statistics

Threads
278,315
Messages
3,554,104
Members
248,016
Latest member
Advally Service

Trending content

Back
Top