JVC8790's Daily Duty Cruiser "Build" Thread

Ordered some more stuff to finalize wiring/installation of the various lighting I have collected after telling myself I wasn't going to do any crazy aftermarket lighting... :noidea:

Ordered 10 of these so that I can better connect/wire in all of the accessories. Seemed like a good idea to allow future lighting adjustments to be "plug n play" if I switch out any of the lighting itself.

s-l640.jpg


I also ordered some light smoke film to put over the light bar in the front bumper. I want it to be stealthy when not installed as I honestly am not a big fan of the in your face silver look of light bars when not in use.

I decided to save myself some time when it comes to install by buying the CaliRaisedLED brackets for the stealth mount 32" bumper bar.

4th_Gen_Stealth_1024x1024-2_1024x1024.jpg


While I was on their site, and thanks to [MENTION=122249]originalg00kster[/MENTION] I found a set of the 14-19 Tundra Ditch Light Brackets in CaliRaised's Scratch and Dent section. Picked those up for a rainy day as I currently do not have any lighting that would mount to those brackets, maybe once I get the rest of these light bars hooked up I'll spring for some Element LED Amber Cannons that I've wanted.

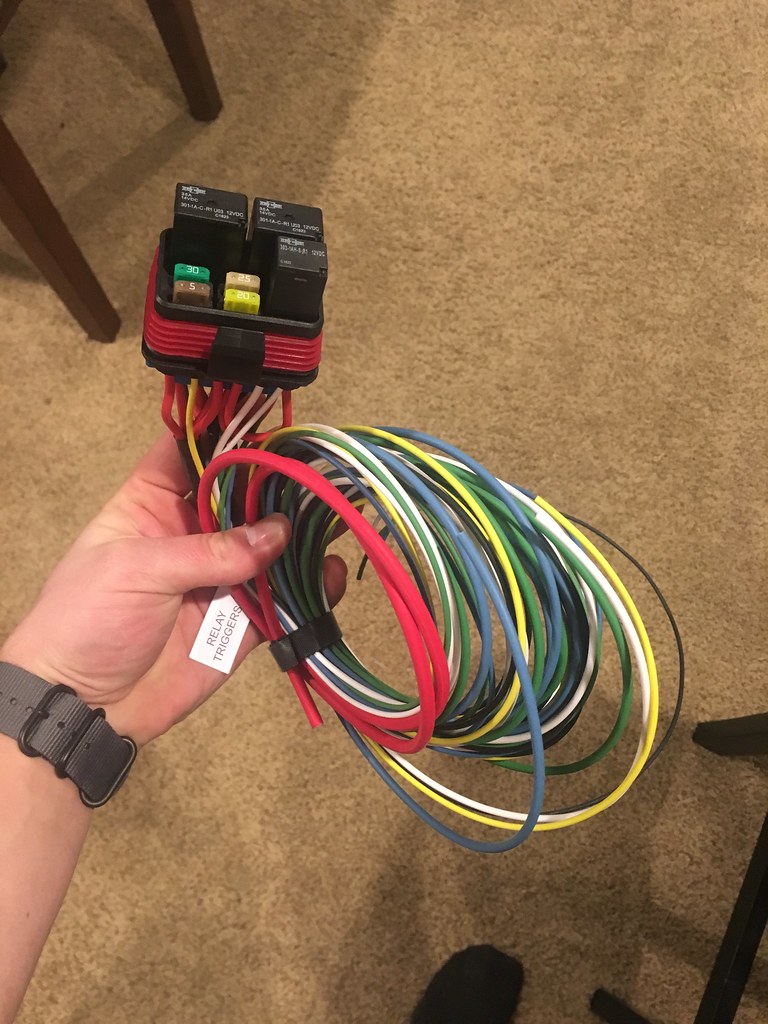
I think was looking into doing a Bussmann RTMR for the wiring, or possibly making my own plate, and then I stumbled upon this option on eBay. It's a 4 fuse, 3 relay pre-wired box that will be a nice starting point for 2 light bars and no other accessories that I can think of at the moment.

GEP Universal Pre-wired Waterproof Mini Fuse Relay Panel Box Holder 80 AMP 12V | eBay

GEP-Universal-Pre-wired-Waterproof-Mini-Fuse-Relay.jpg


This will certainly look better in the engine bay than a spaghetti mess of wiring using each individual wiring kit that came with each bar.

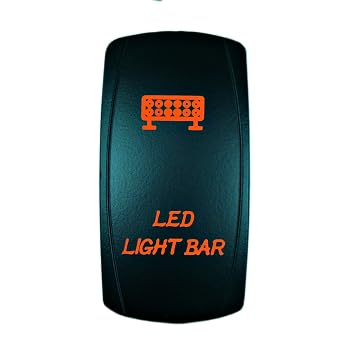
I also ordered a few switches from amazon to complete the interior look, I haven't decided where I'm going to mount them so any suggestions are welcome!
https://www.amazon.com/gp/product/B01C3QCY3E/ref=ppx_yo_dt_b_asin_title_o00__o00_s00?ie=UTF8&psc=1
71AW-fZONXL._SY355_.jpg


I'm REALLY REALLY hoping the weather this weekend is decent so I can make some headway and maybe get one of these light bars wired up. The last few weekends that I have had free it has snowed and I haven't been able to work in the driveway. Then it seems like it ends up being 50 degrees during the week and I have to work.

More updates to come once I get in all of these various pieces to the puzzle and start putting them together/installing!
 
Last edited:
Well, this "build thread" is starting to look like a place just for me to update what I'm doing, hopefully it'll pick up now that some mods are getting done, I've got a variety of other stuff sitting on shelves and waiting to go in as well.

Got some work done over the weekend despite the 30-35 degree temps and some drizzle.

Unboxed the fuse/relay block. First impressions is that this kit is awesome, has everythign neatly packaged together, pre-wired, super easy to understand. The company has many other options and I'll link their website when I get home to find the little business card they included with a coupon code.

47083856822_c5364bbfd9_b.jpg


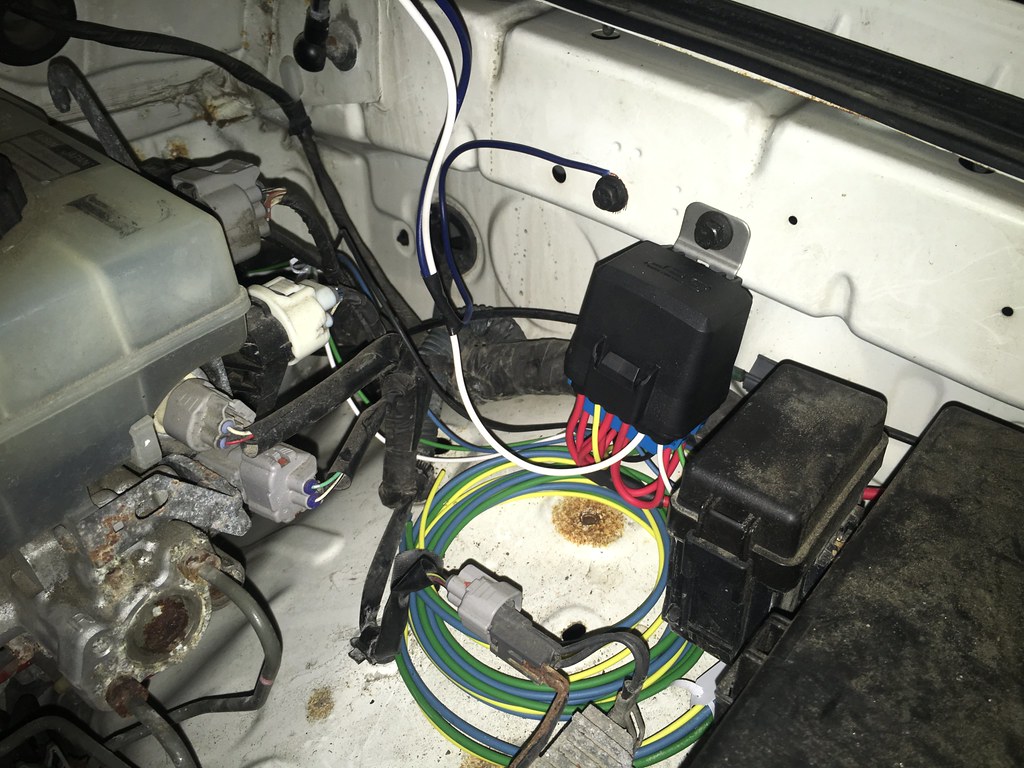
Started by picking where I was going to mount the box.

47135066301_ac3773a20c_b.jpg


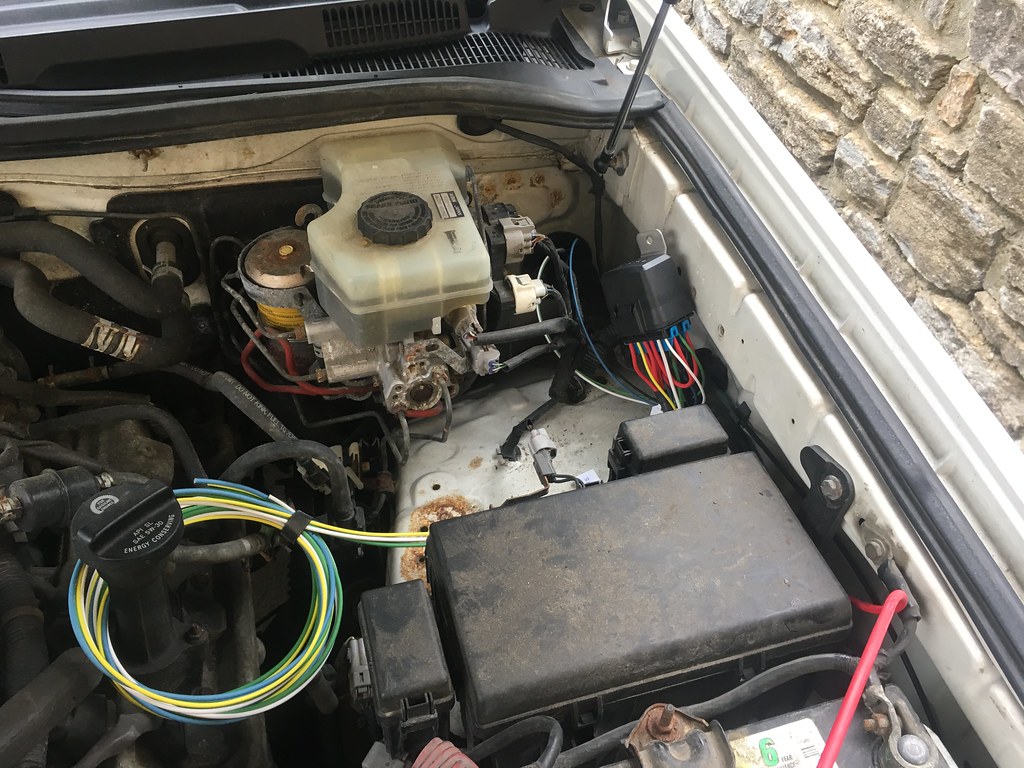
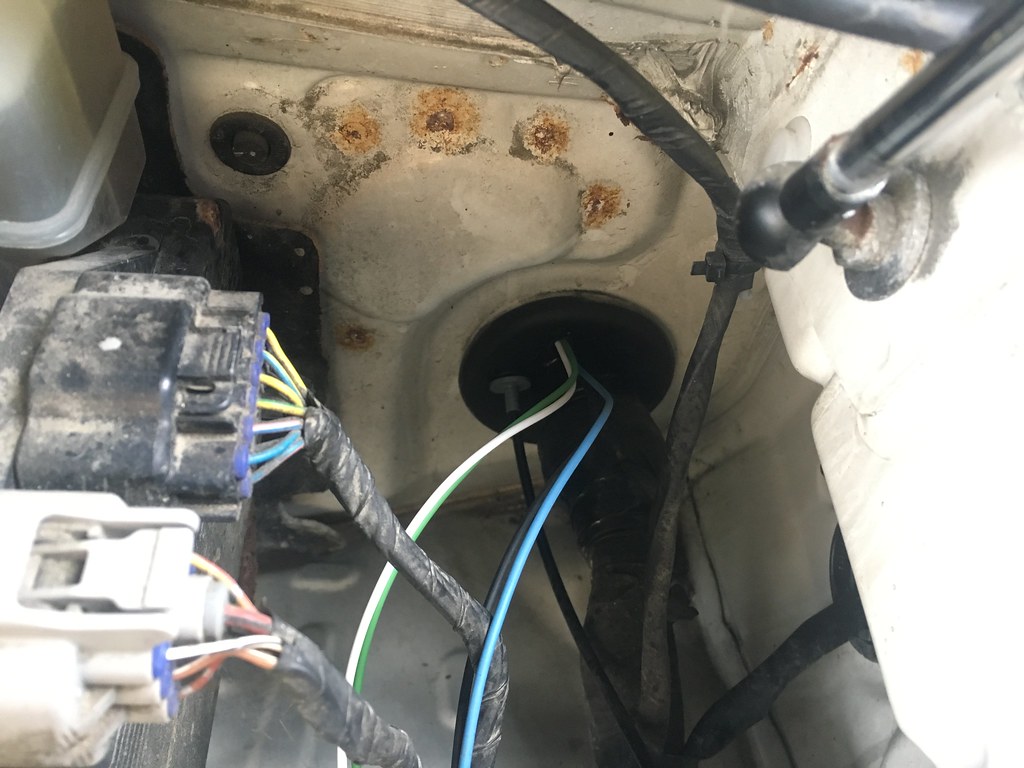
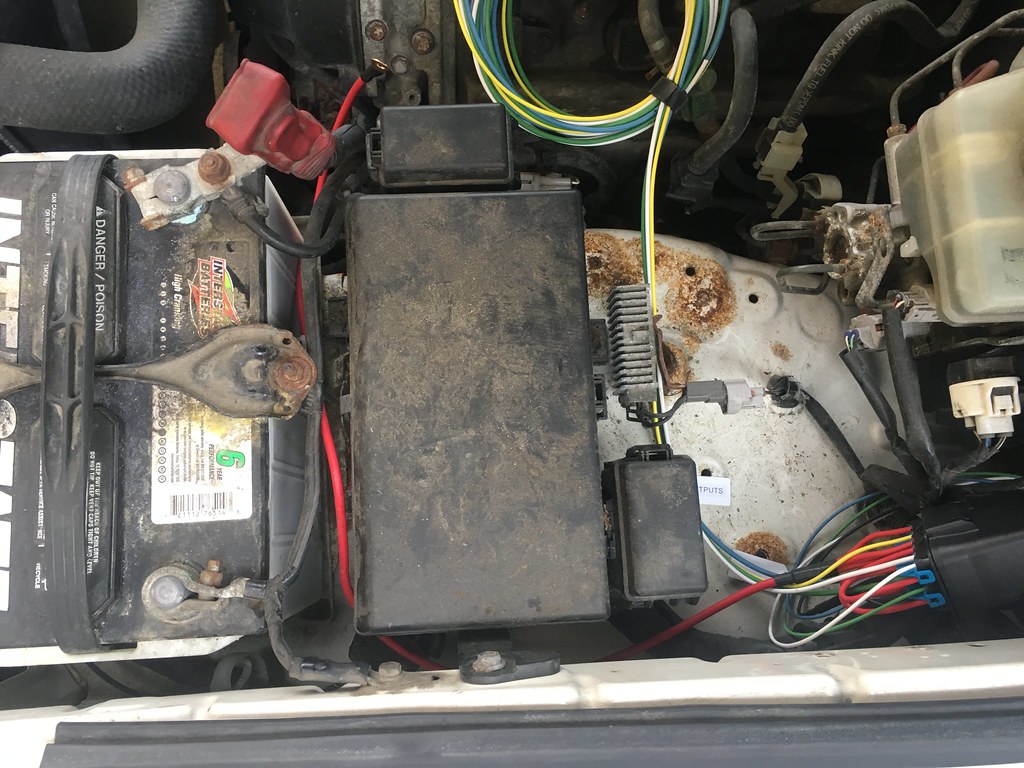
Ran the 3 leads for the relays and the ground into the cabin (probably will pull the ground back through the firewall and ground in the engine bay). I also need to order some wire loom to clean everything up a bit and provide a more OEM look to the install.

32193030907_bc136e7b34_b.jpg


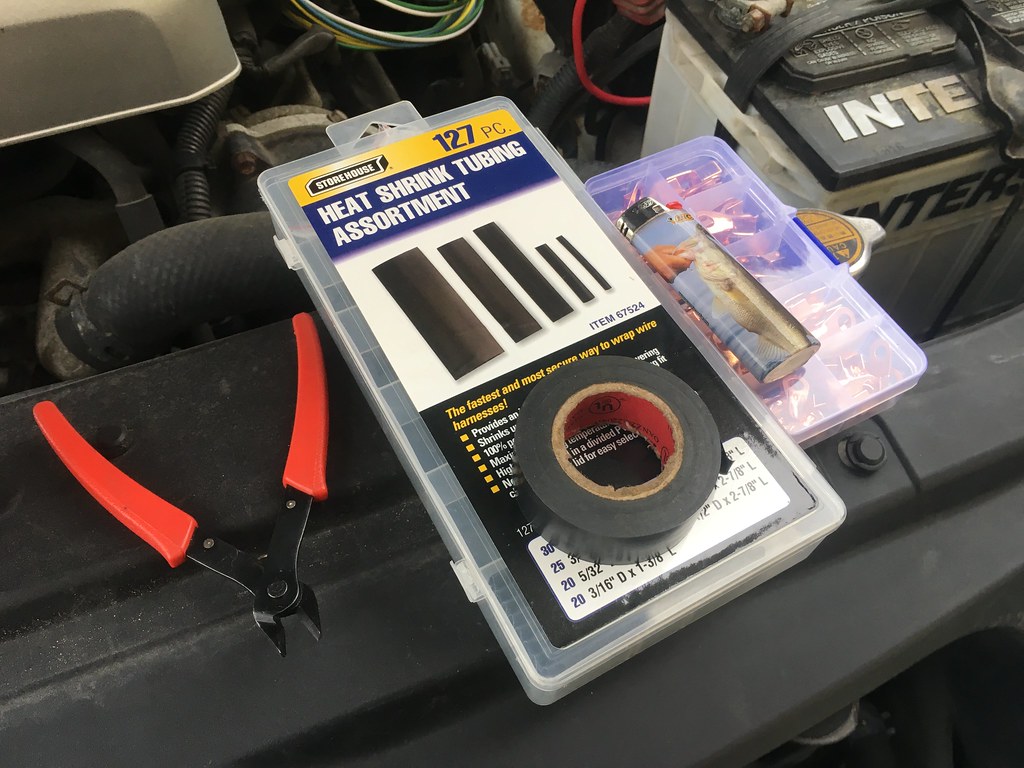
Some of the basic tools I used for the install.

32193030807_cd76491288_b.jpg


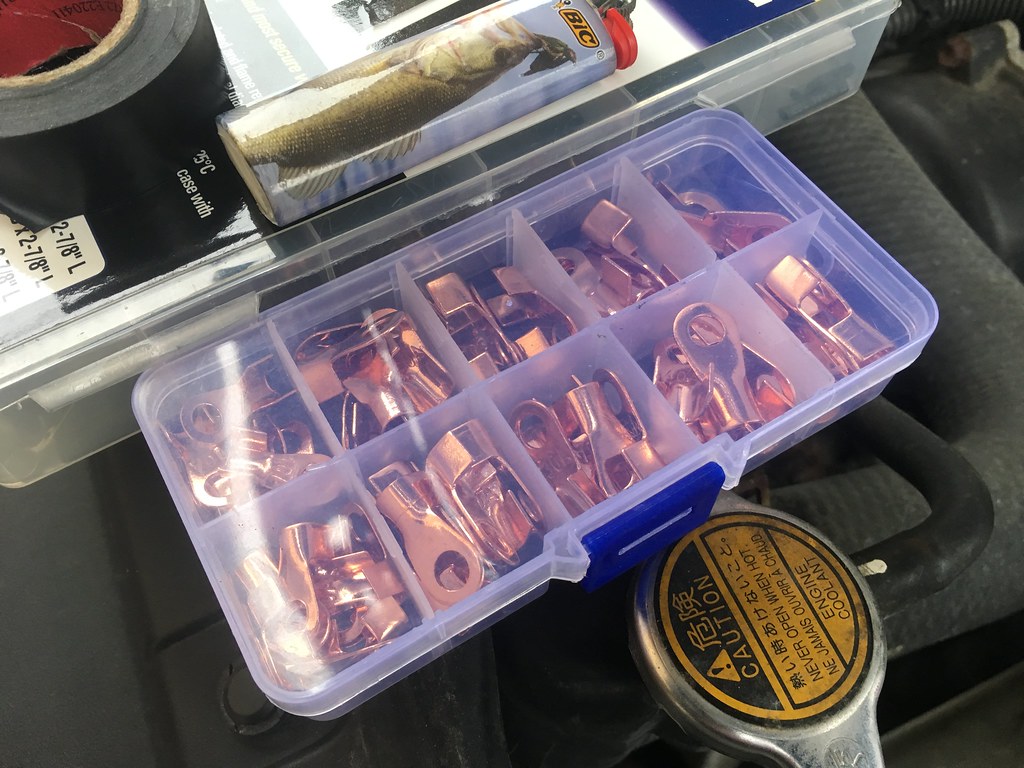
Bought this little box on Amazon a while back and it has been exceptionally helpful, especially in the process of starting to shave the bay in my Volvo. I also have a pair of cable crimpers that were a great investment for stuff like this!

33259544628_13d721f58e_b.jpg


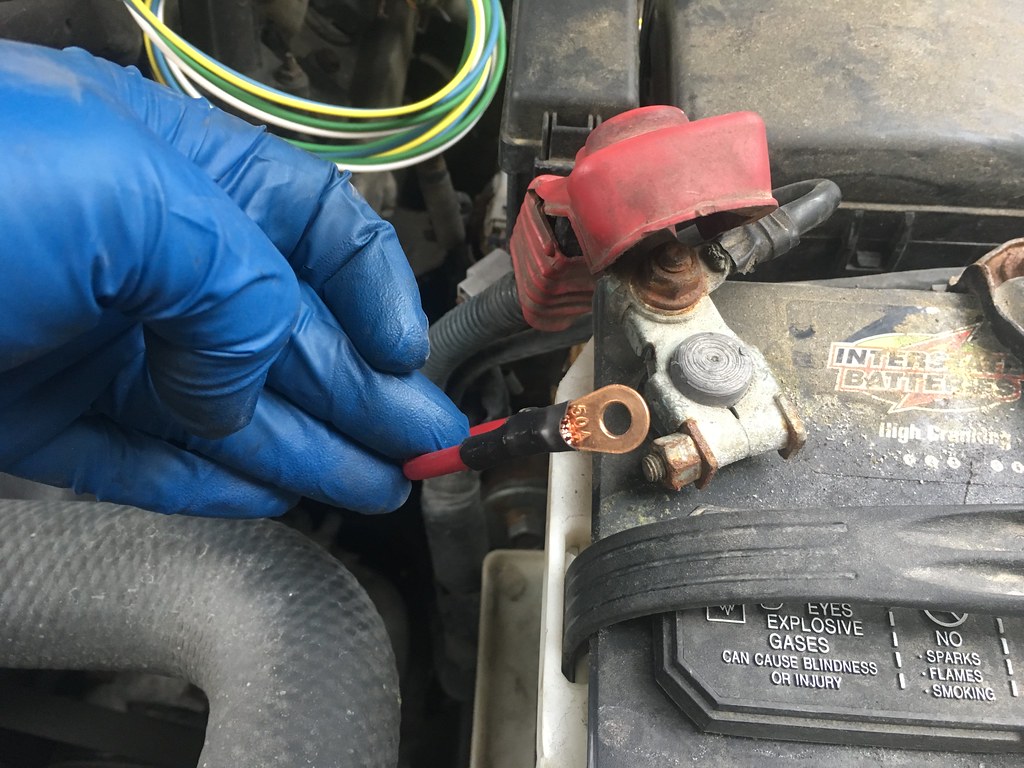
Positive cable crimped (ended up having to drill out the hole a little bit to accommodate the battery post.

33259545948_5ea98e9231_b.jpg


Showing how I ran the positive cable. I did take about 6" off of the length it came with, but that was more-so just because I didn't want a big extra loop of wire.

33259545868_63fdb3b205_b.jpg


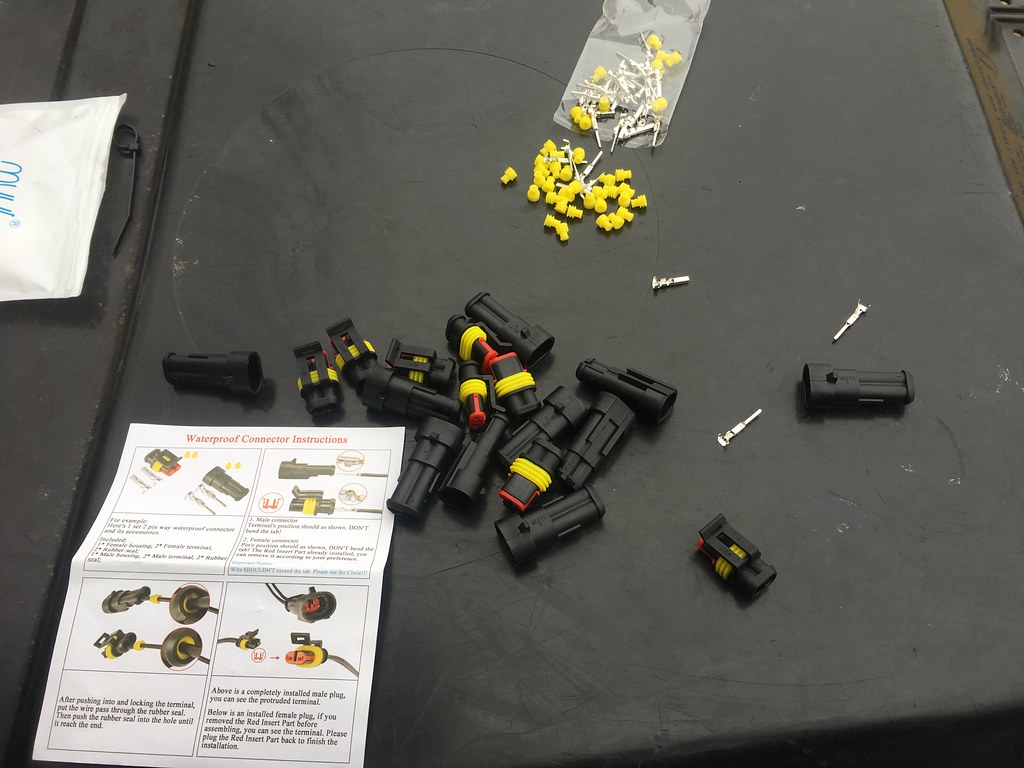
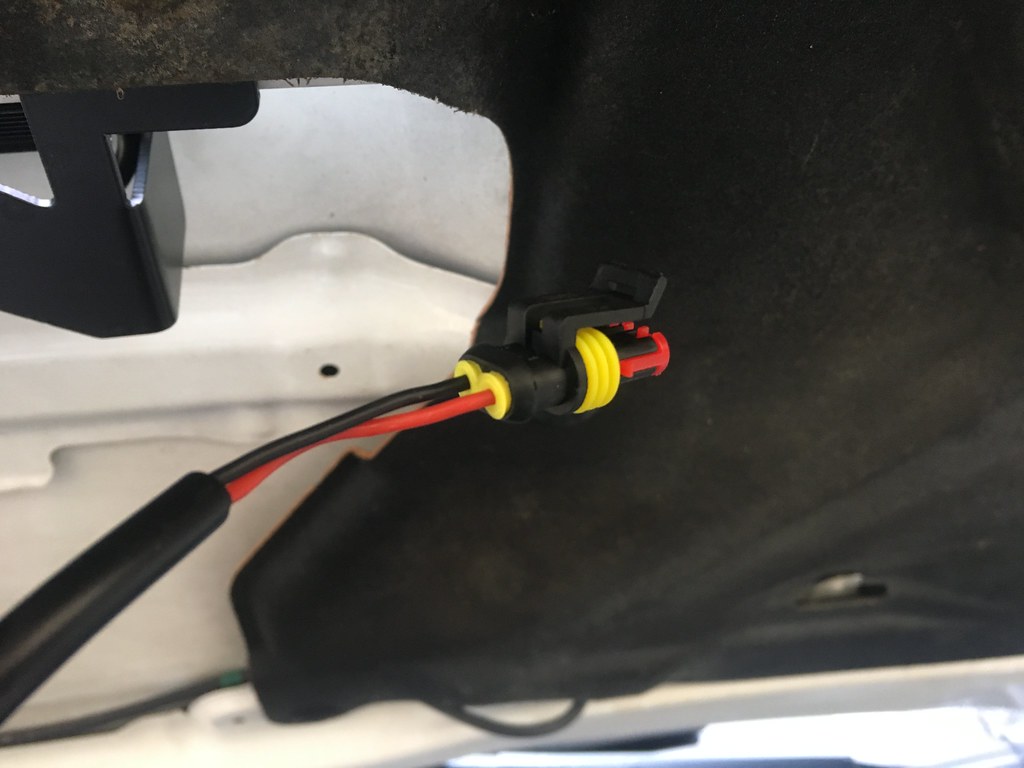
Bought a pack of weather-proof connectors to use for the light bar since it came with bare wires.

33259544488_436099e24a_b.jpg


Assembling these connectors was a little difficult for the first time but will likely be easier next time!

33259545688_8674f3a2c1_b.jpg


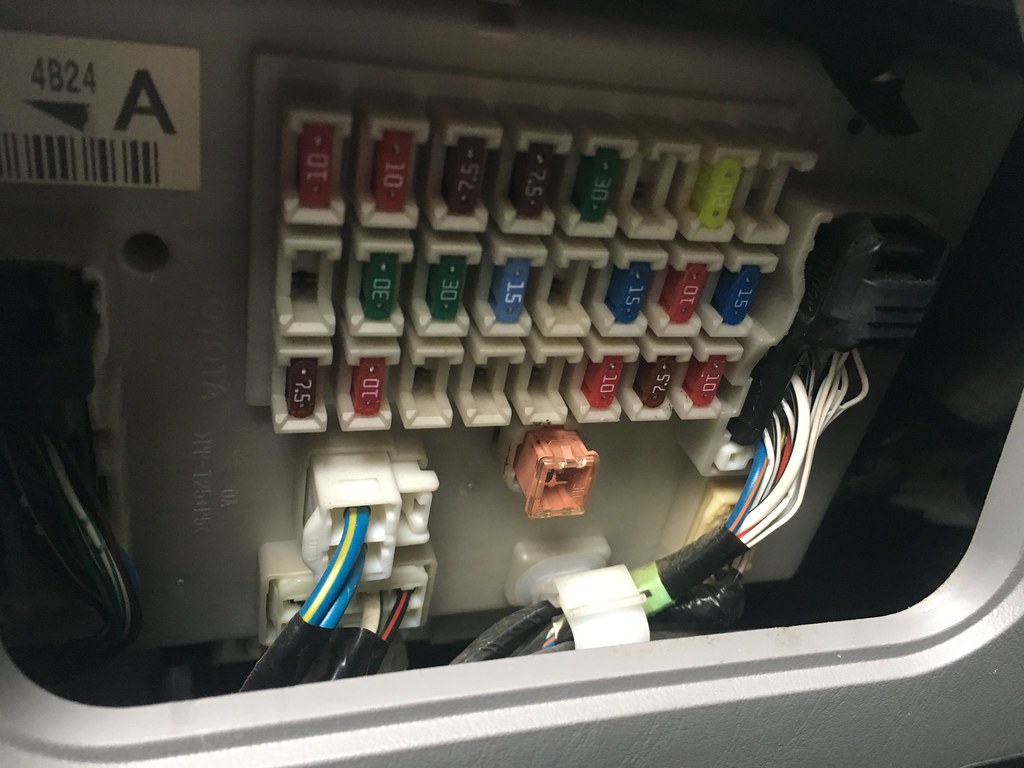
Tapped a blank fuse in the panel for my 12v for the switches, I used the fuse spot on the top row between the 30 and 20 to the right side. I'll likely pin out the back of this fuse panel down the road, but for now I just used a fuse panel tap (add a fuse, not pictured)

33259545508_5c18898e00_b.jpg


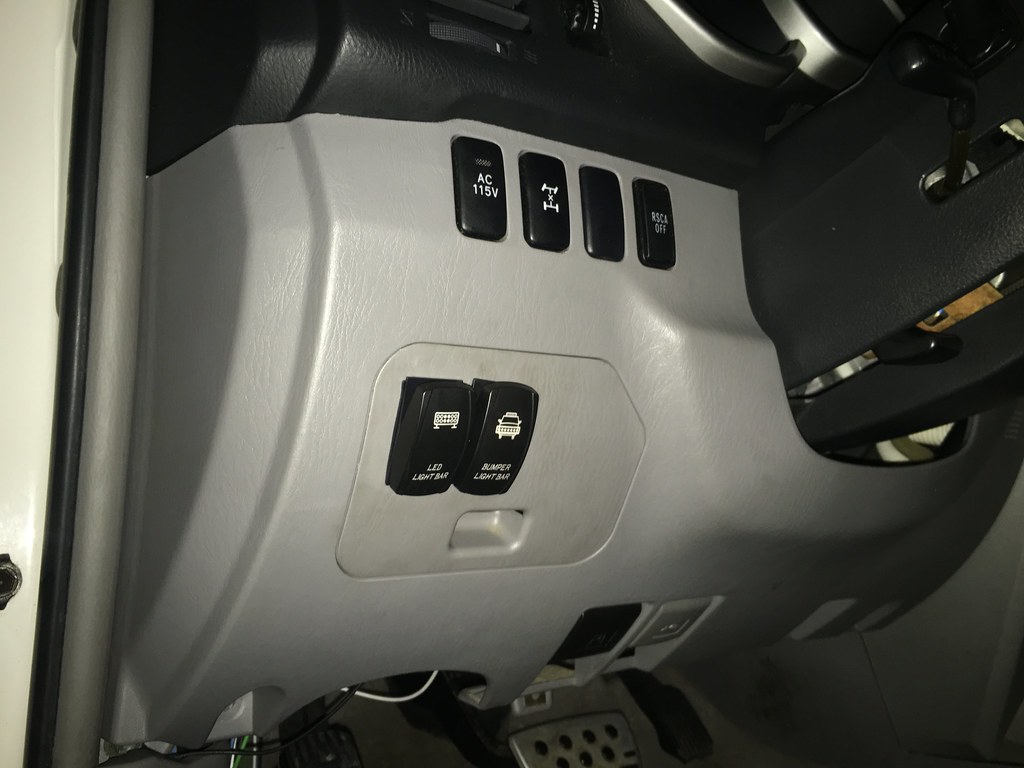
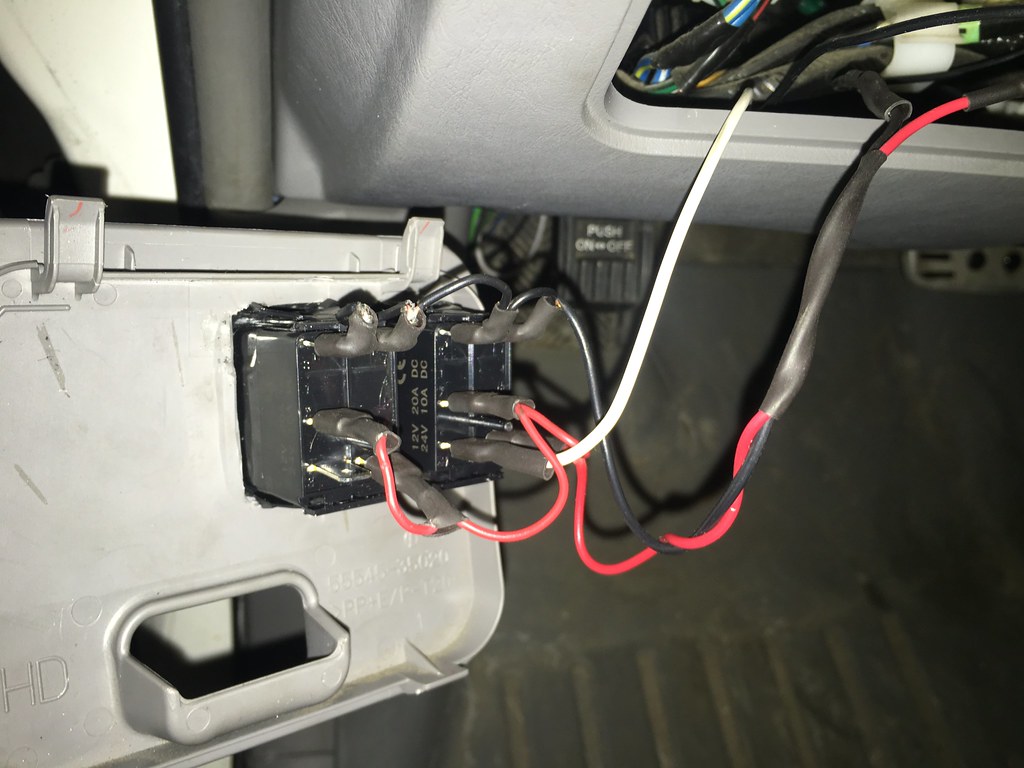
I bought rocker switches on Amazon and later found out about the Toyota fitment push button switches, so I'll be ordering some of those and then re-locating these two switches. I wired it to have a switch for my hood scoop light bar, and then pre-wired for the 32" bar I'll be putting in my lower bumper when the CaliRaisedLED brackets show up this week.

33259545138_e5b990e90c_b.jpg


This switch location seemed easiest temporarily, I looked it up and a replacement cover for this is only like $15 from Toyota. I dremeled out two holes and popped the switches in.

Show of the pigtail harness I made to connect both switches together with the power/ground/trigger wire setup.

33259545038_3b1a5f8292_b.jpg


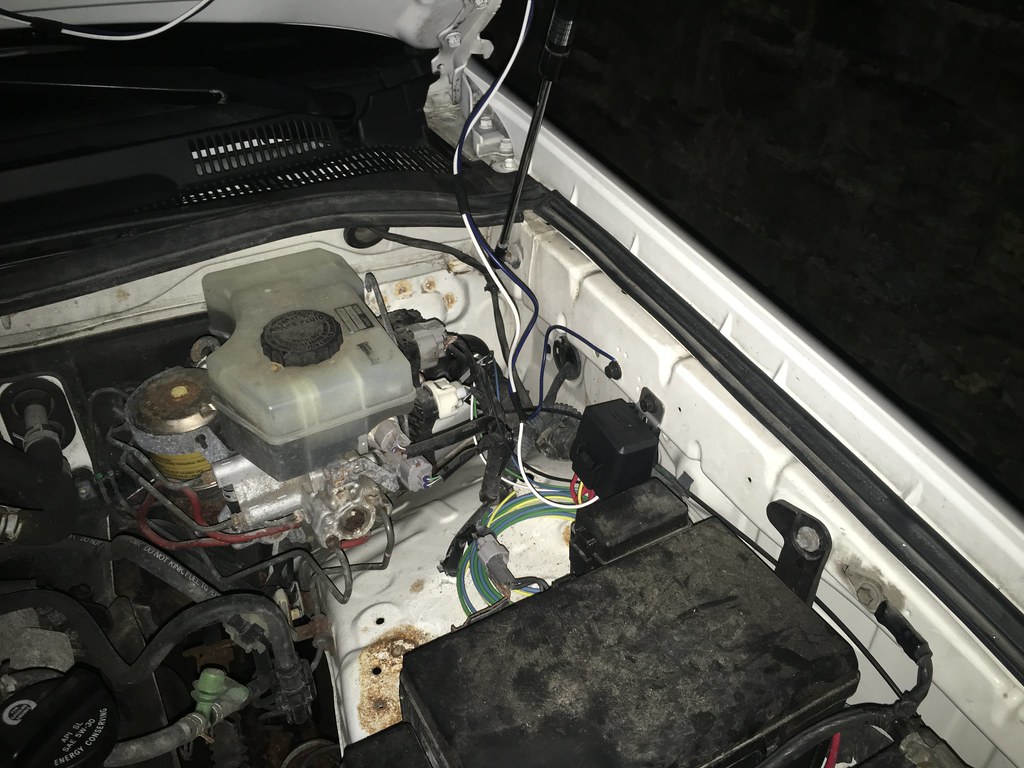
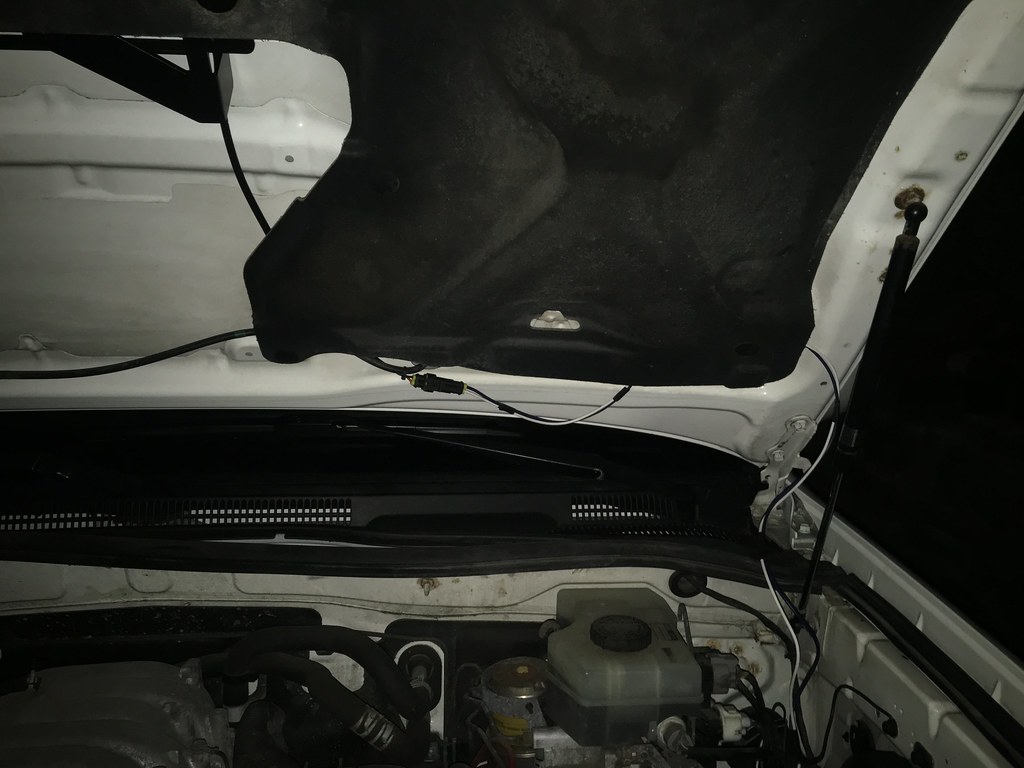
Completed shots in the engine bay (at night, phone died while finishing the install and it started to rain)

33259544938_2a891f27ae_b.jpg


33259544758_0542994e84_b.jpg


Plan is to put these wires in some loom and then route them up through the cowl panel to make the install look cleaner.

33259544278_827abb39a1_b.jpg


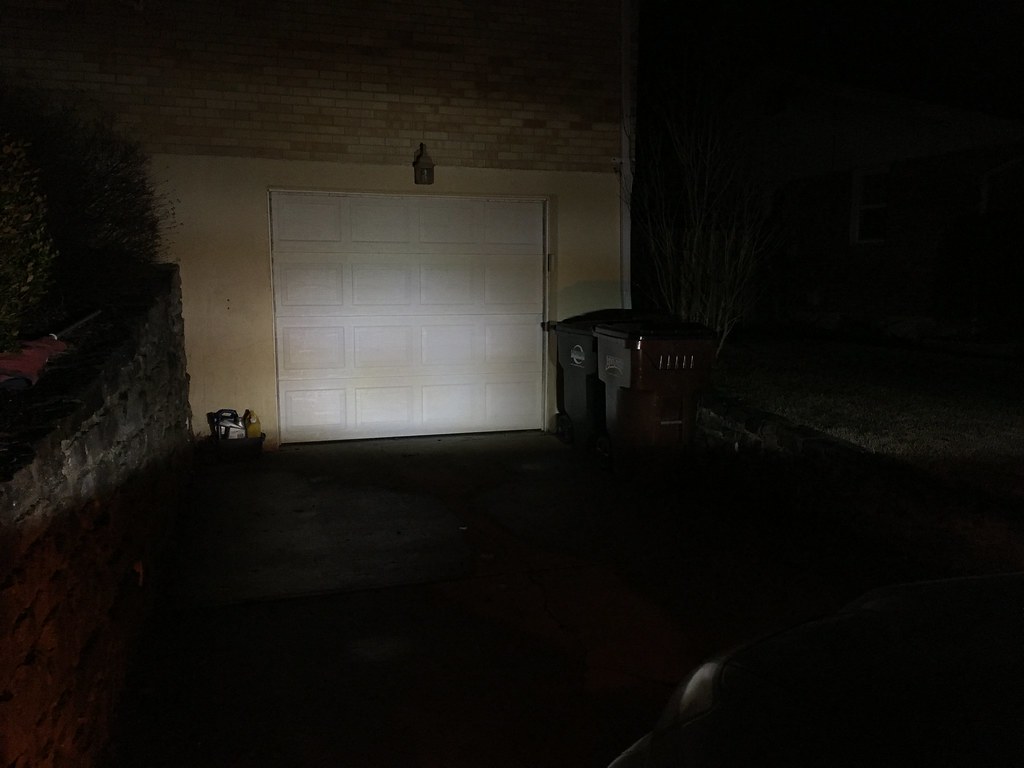
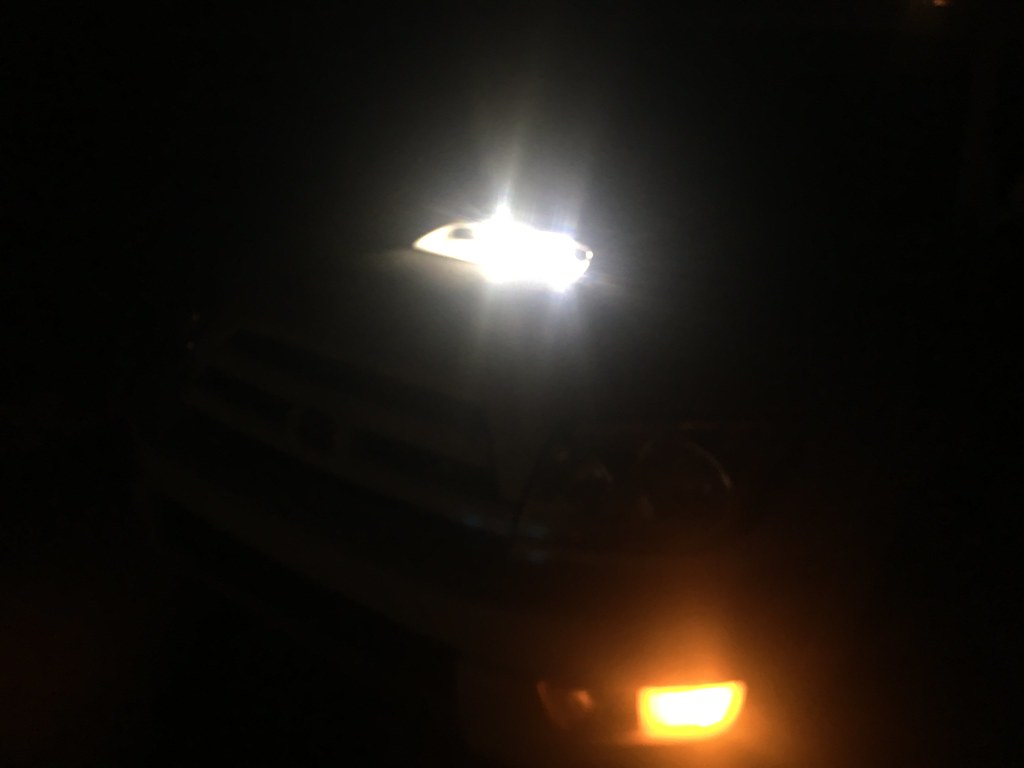
ANDDDDD On to the part that everyone has been waiting for. Light output shots of the 10" Amazon $17 light bar.

33259545268_cc43926a0e_b.jpg


33259545328_d023770478_b.jpg


Honestly, it sucks... haha. The light bar sits a bit too high so I think there's a lot of light lost on the edge of the hood. That being said, I tilted it around and it never really got better.

I'm now on the hunt for a better (but not $200) 10" Light bar for this mount. I may keep this light bar and try to mount it elsewhere just for fun down the road, but honestly it's light output is dismal, the headlights (with 9005 mod) BLOW it out of the water.

Should be able to get the 32" bar mounted up this week in the front bumper and that is likely to throw a bit more light and help out. The good news on this 10" is that I've done all the hard work so all I have to do is pop the bracket off, change the light, wire on the right connector to the new light and re-install.

Anyone have any suggestions for 10" bars that aren't crazy expensive? There's a few Rigid ones on eBay open box that are about $120 but I'll wait to pull the trigger until the 32" bar is installed to see how much the 10" is really important vs. just having it to have it.

IF YOU MADE IT THIS FAR, THANKS FOR READING!!
 
Last edited:
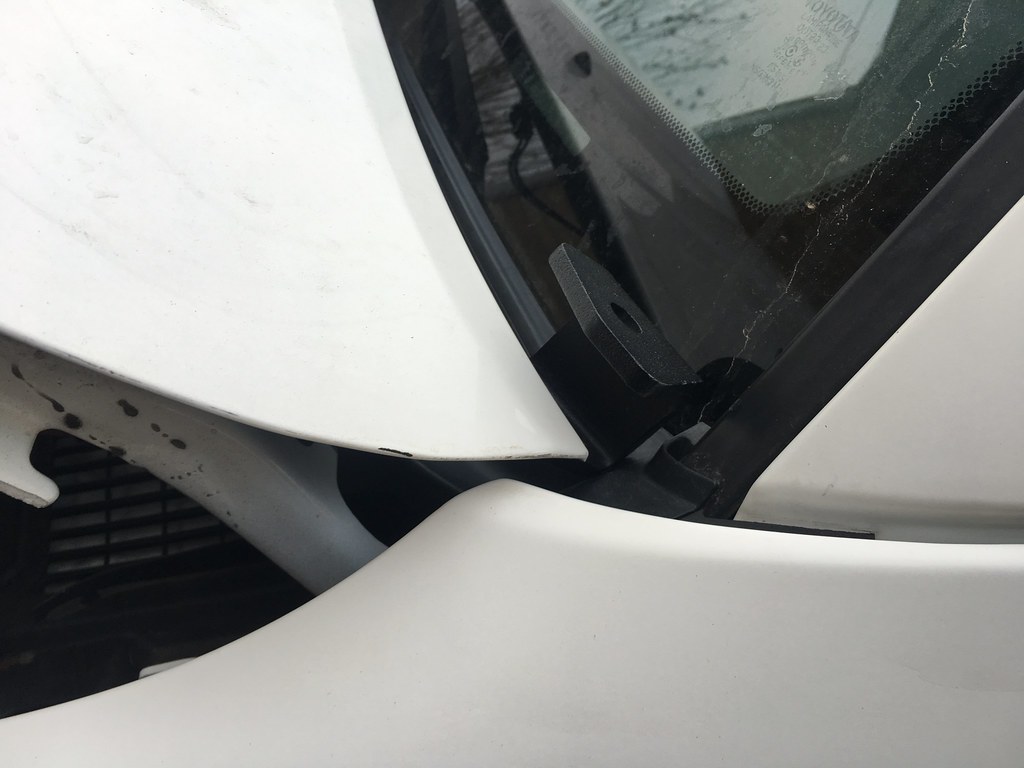
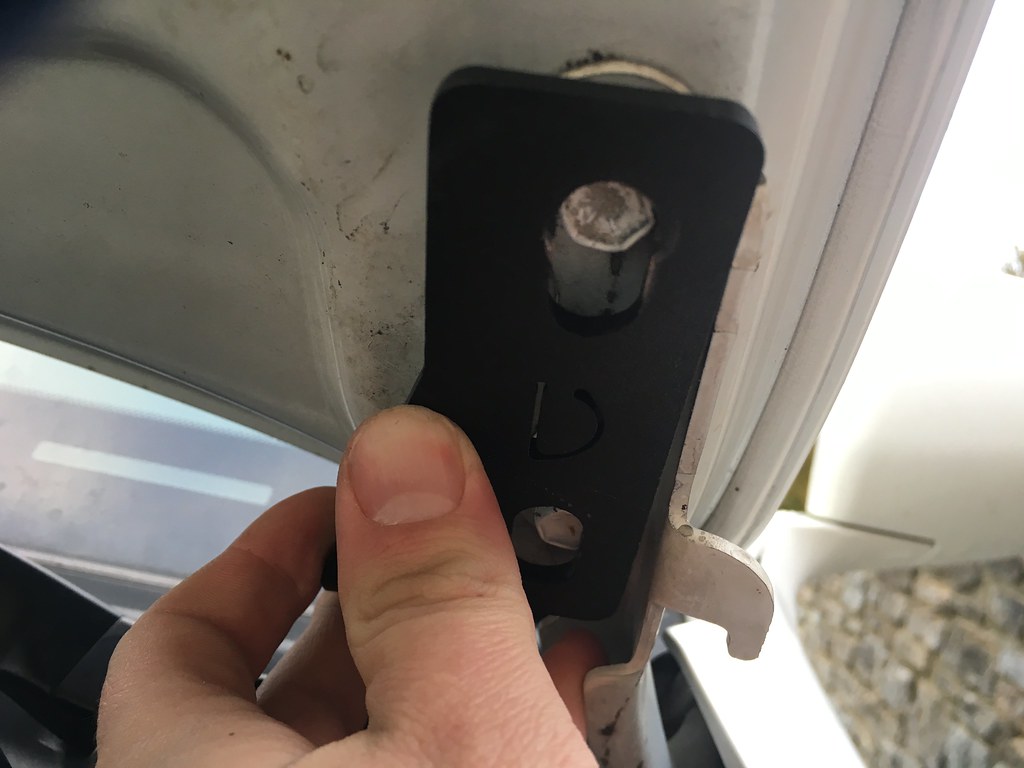
Based on this post by [MENTION=122249]originalg00kster[/MENTION] and the image below, I bought a pair of 14-18 Tundra ditch light brackets. They're pretty darn close on the fitment around the hood. The only thing that I noticed was that they do contact the plastic wiper tray (just barely).

Other Notes, they're pretty low profile, so whatever lights I end up with I may have to trim the bottom nut under the bracket so that it doesn't hit the hood. Also whatever lights I pick cant be too tall as I think they might end up pressing against the hood if they're too bulky. For that reason I was looking at some Element Eggs or Amber Cannons from Element LED.

179b9bc83c19ba97c17817eb87d43143.jpg


47093796672_8586171e48_b.jpg


47093796642_908376f86a_b.jpg


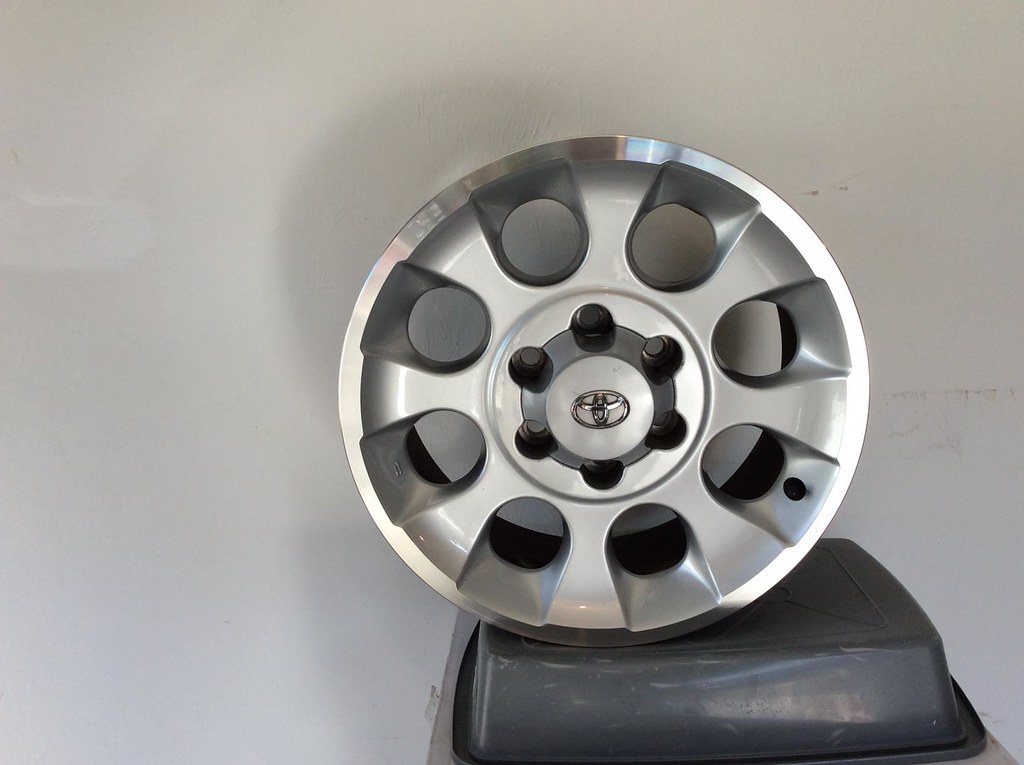
Also, thoughts on these 2010 Trail wheels? There's a cheap set in Florida near where I'll be in a few weeks for Vacation and I'm thinking about picking them up, packing them, and shipping home to myself. Funny enough, the last time I did that was with a set of wheels for my Volvo and I was in the Clearwater, FL area.

47093796592_bb00fd46ba_b.jpg
 
Nice Write up, I figure I'll wait till spring/ summer to work on mine. Definitely post if those lights are worthless as I'll be getting later.
 
Nice Write up, I figure I'll wait till spring/ summer to work on mine. Definitely post if those lights are worthless as I'll be getting later.
Thanks! I'll post up more pics/details of the 32" Curved AutoFeel bar that I picked up when I get it mounted and wired up. The 10" one just doesn't have the output to be meaningful, I think it's mostly the design as the Baja/Rigid one has only 6 LED's, where as this one has a bunch of tiny tiny ones. I think a cheap bar with only 6 LED's like the Baja/Rigid one have might be better, that's my next step after I get this 32" installed.
 
Had a friend over last night who was re-upholstering the seat on his snowmobile and needed to use my heated garage and my air compressor for the stapler. I had a few hours in the garage to tinker while in between helping him out so I had some fun.

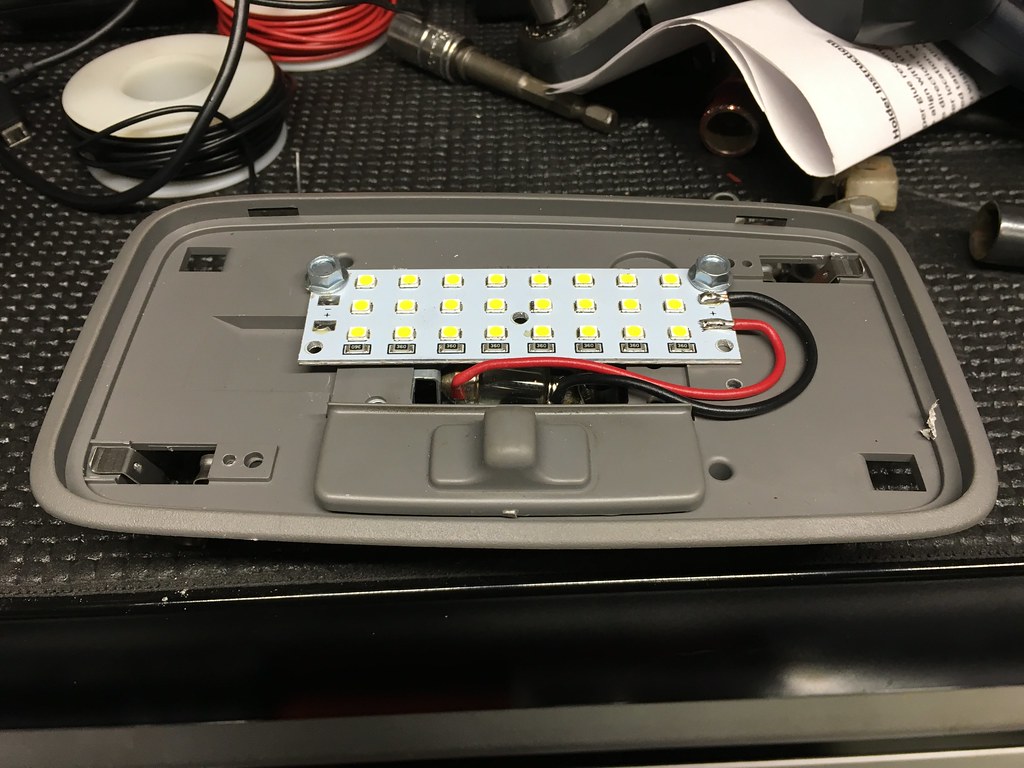
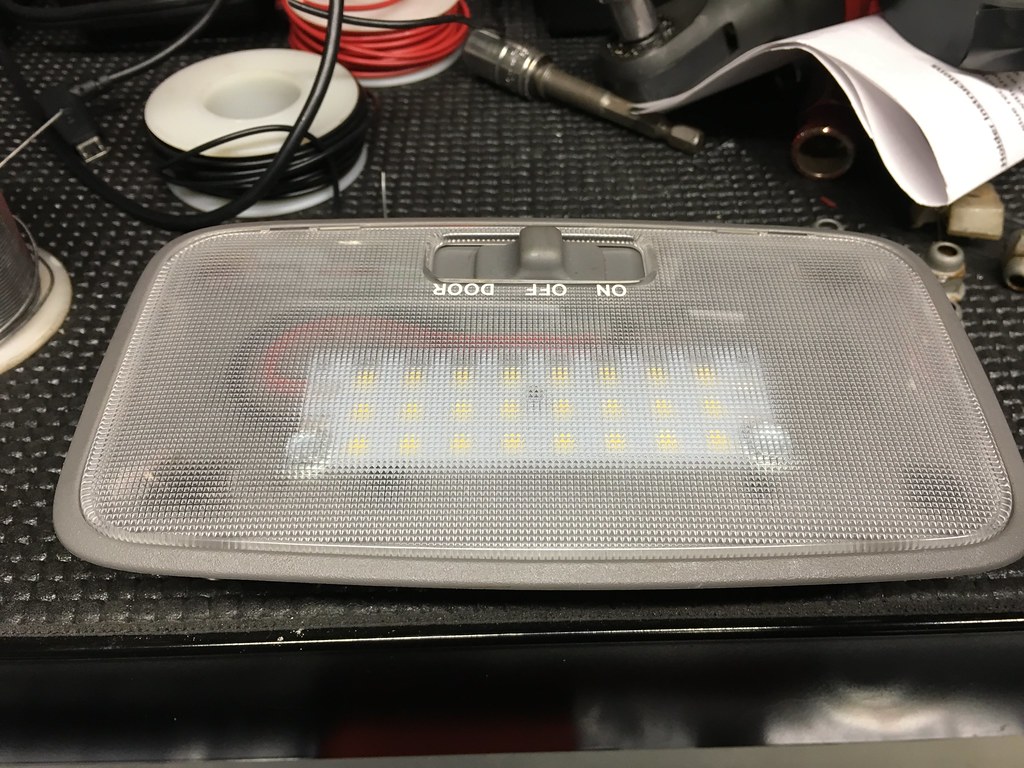
I bought a variety of LED boards on eBay to test and tune my interior light setup. These were one of the "left over" pieces that didn't show up from China quick enough.

47103932812_4b5bdf773d_b.jpg


When I bought the hood from a part out, I snagged this light housing, and the middle dome light for a retrofit just like this for even more light.

47103932862_600029086f_b.jpg


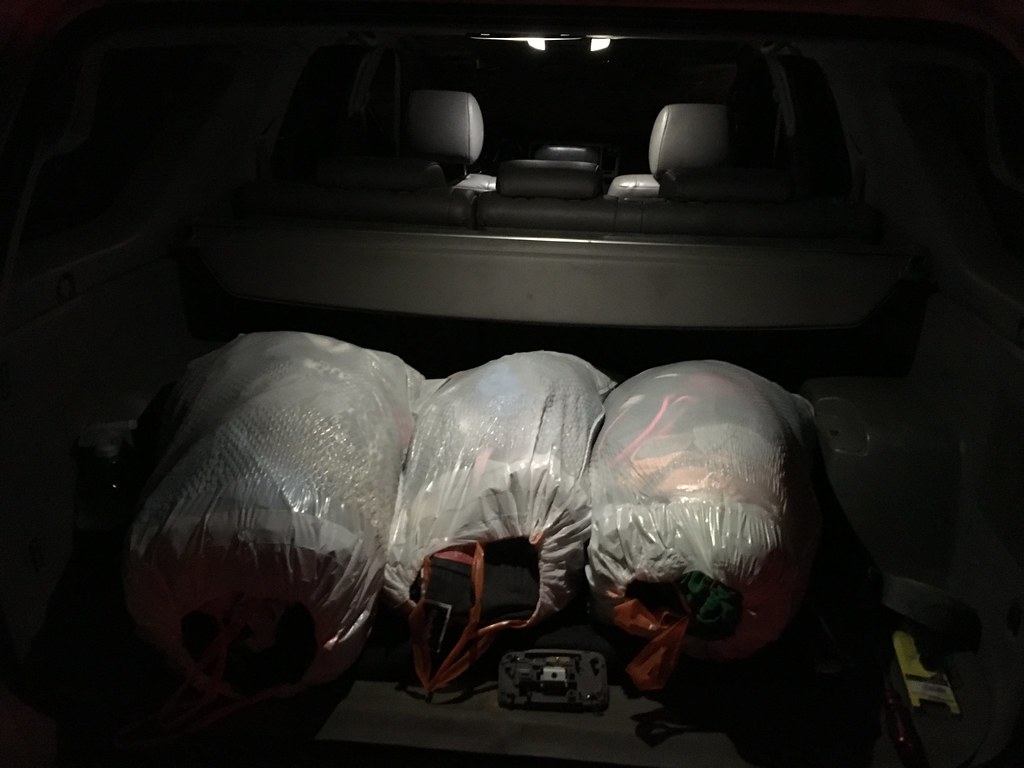
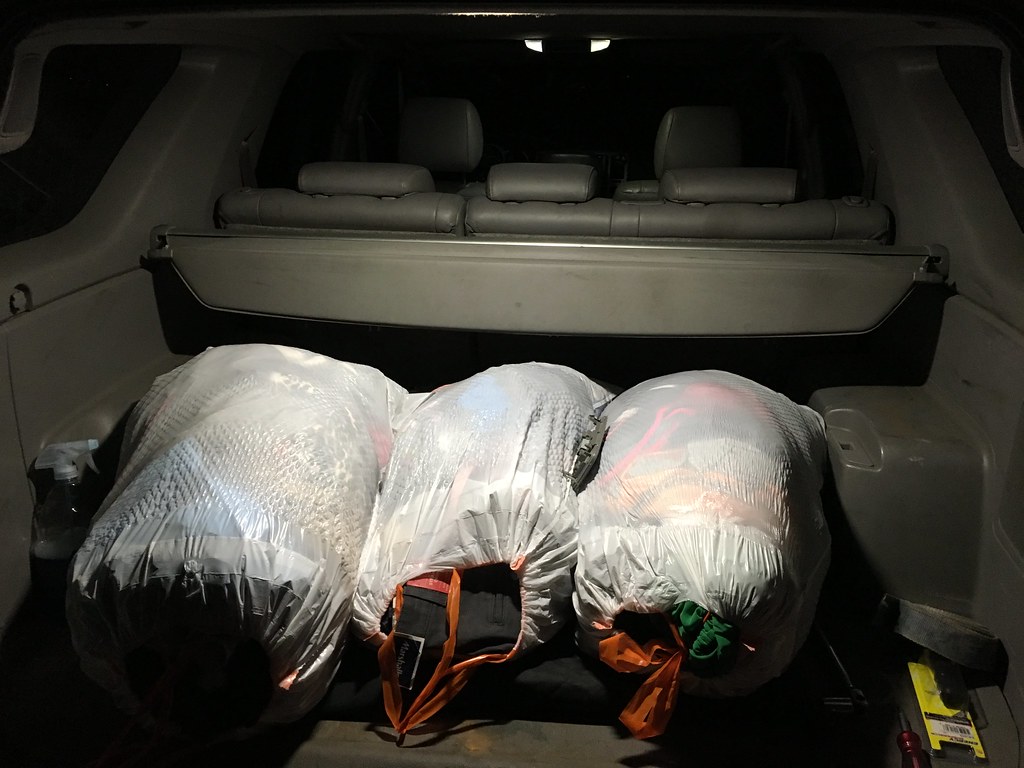
Before Picture, this was already a drastic improvement over the stock bulbs. This is one SuperBrightLED festoon bulb (garbage bags are clothes going to be donated, not trash)

32214125607_01d6de2f84_b.jpg


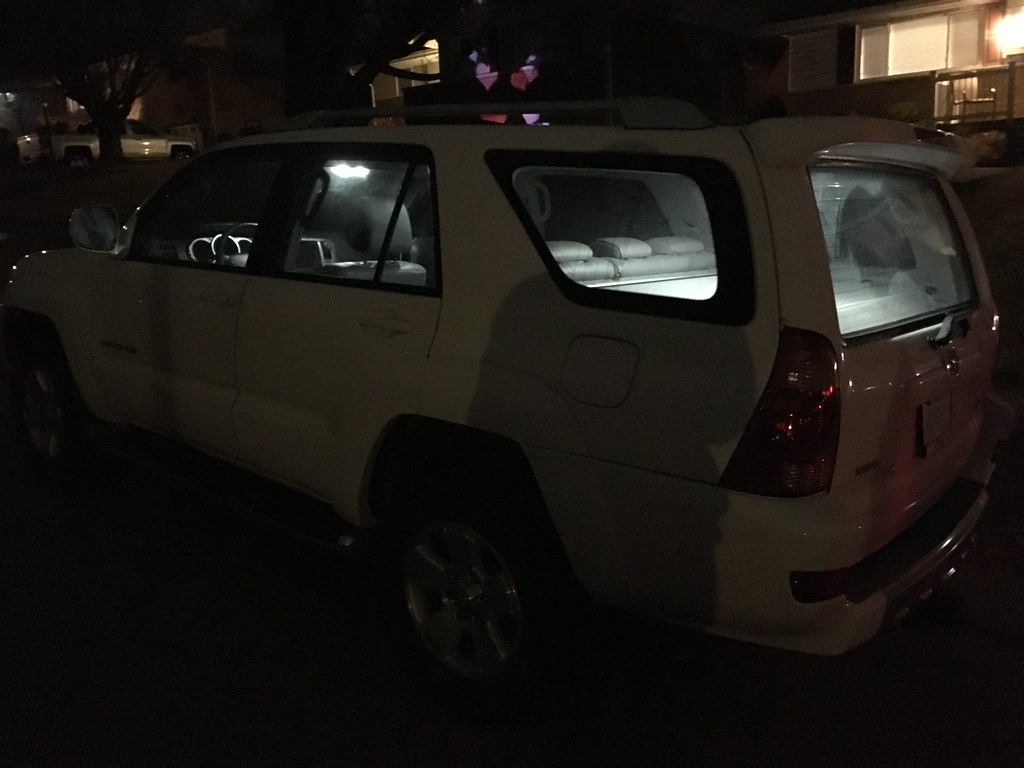
After!!

47103932892_1708caff97_b.jpg


I'm ordering a few more of these panels and looking for some slightly smaller ones for elsewhere in the car, but holy crap, they're bright!

47103932712_bd8e391e75_b.jpg


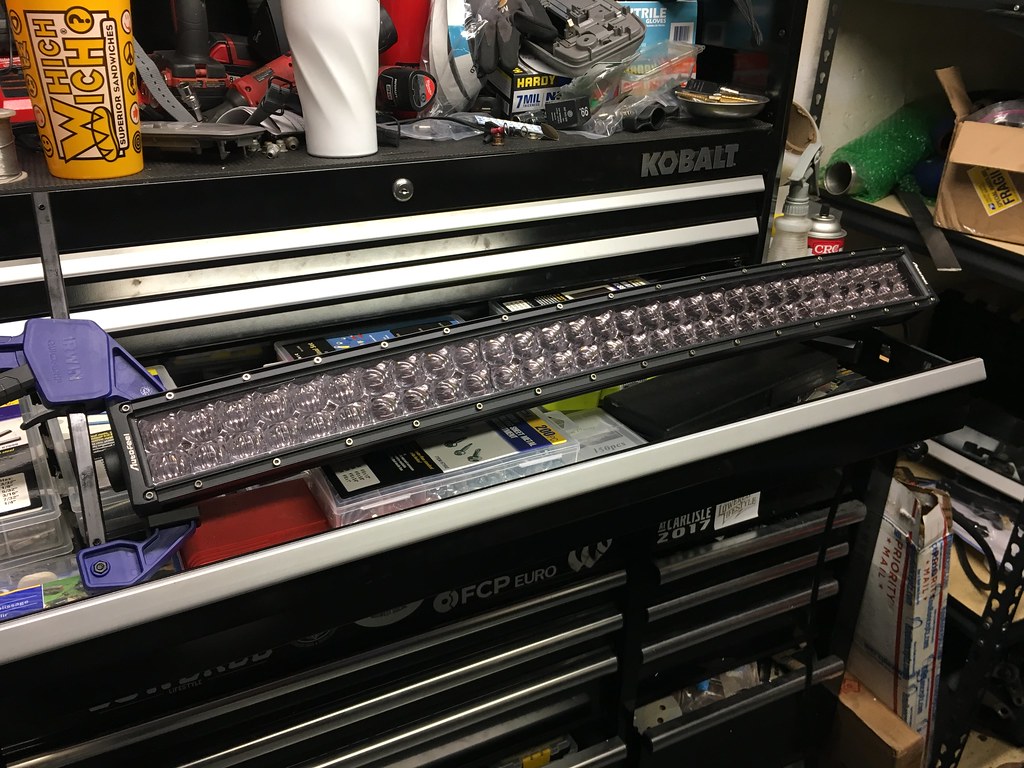
While I had some time, I also applied a smoke film to the 32" light bar that is going in the bumper with the stealth (behind the grille) brackets from CaliRaisedLED. I wanted to do this to minimize how visible it was during day time and when looking at the truck with it off. I'm not a huge fan of big silver/chrome light bars front and center, so this was a good way to make it a bit stealthier and hopefully without losing much meaningful light output.

33280846748_c0f26a225c_b.jpg


More details later this week/weekend when this gets mounted and lit up!
 
Had a friend over last night who was re-upholstering the seat on his snowmobile and needed to use my heated garage and my air compressor for the stapler. I had a few hours in the garage to tinker while in between helping him out so I had some fun.


More details later this week/weekend when this gets mounted and lit up!


That's what I need too, a buddy with a heated garage with an air compressor. I'm only a couple of state from you. ;-)
 
Really getting after those modifications. Looking bright!

Thanks! I'm doing what I did with my last daily (1998 Volvo V70R) which is go hard for the first few months of ownership until I'm happy with it, then try my best not to touch it for the next 6 months and just drive it. Seems like a good way to not spend all year ignoring my project car and instead just take a 2-3 month break from the project car then get back after it once the daily is situated.

That's what I need too, a buddy with a heated garage with an air compressor. I'm only a couple of state from you. ;-)

Well, It's a 1 car garage (12'x25') so I have about 6-8 feet between my project car and my tool box in front. Unfortunately, it's in my basement underneath our master bedroom so I can't work too loud or too late. The nice thing is a small space heater works wonders in keeping it a reasonable temperature and for an added boost I'll crack the door into the finished basement to let some heat (or AC in the summer!) into the garage.

Next house will have a 2-3 car minimum with a tall enough ceiling to do a lift, or at least enough height to do a small scissor lift/short 2 post!
 
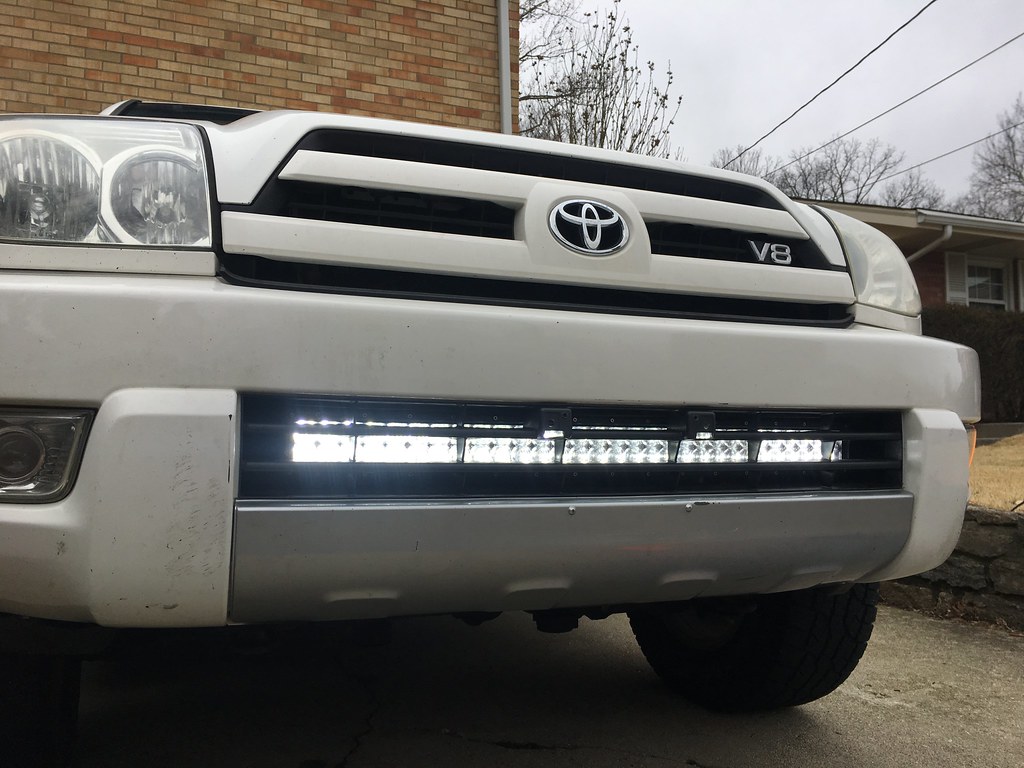
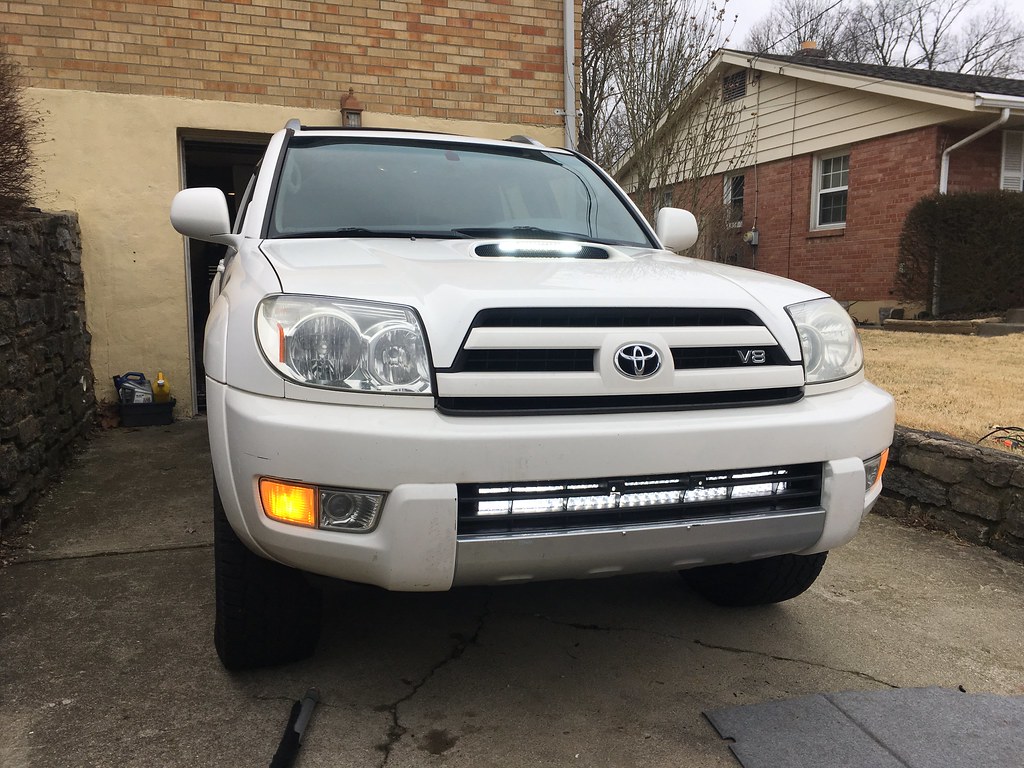
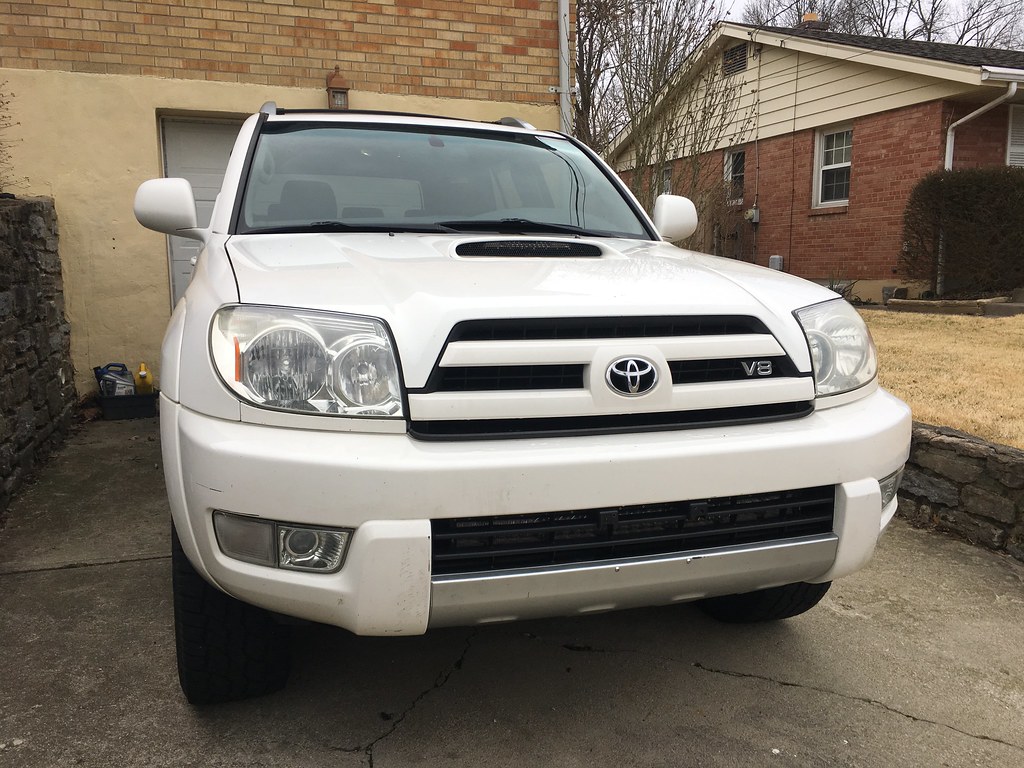
Got my 32" AutoFeel (Amazon) curved light bar installed with the CaliRaisedLED brackets this weekend! I also put some smoked film on the light bar itself so that it wouldn't stick out behind the grille too much! I love the stealthy look! The install was pretty easy and I think I'll have to line it up with a wall to make some aiming adjustments and move the light bar down a little bit so it's centered with the grille opening rather than behind a few slats of the grille.

46285841765_df3176fd77_b.jpg


46285841885_5231f1f59f_b.jpg


And with it turned off!

46285841955_30376f98a5_b.jpg


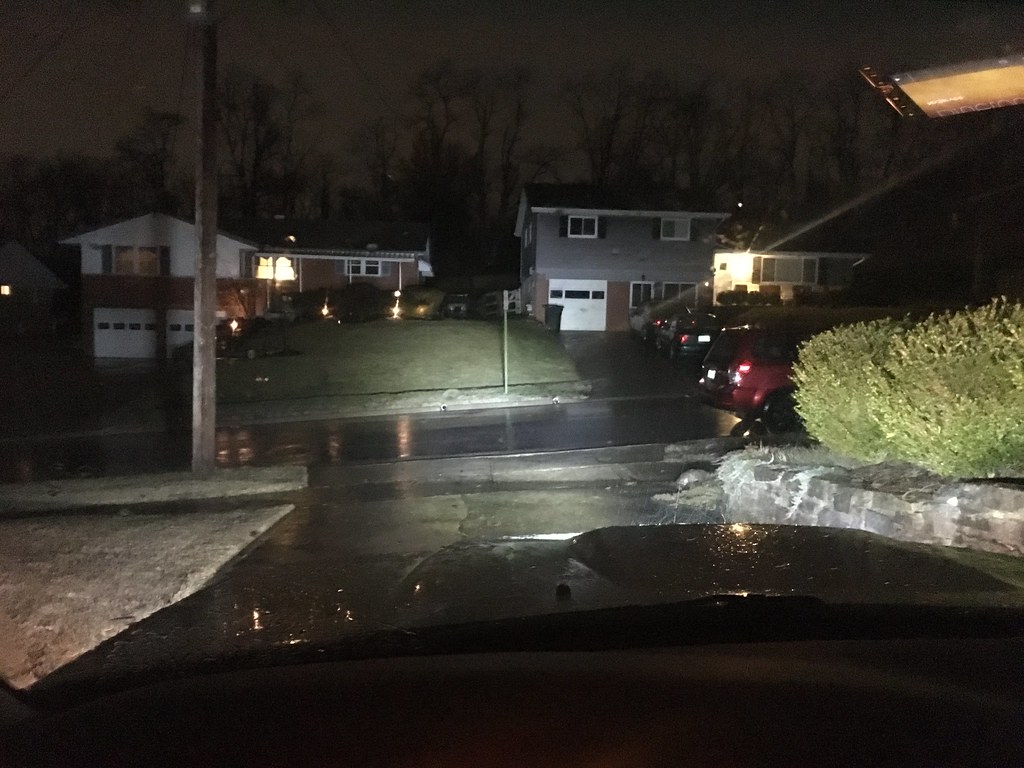
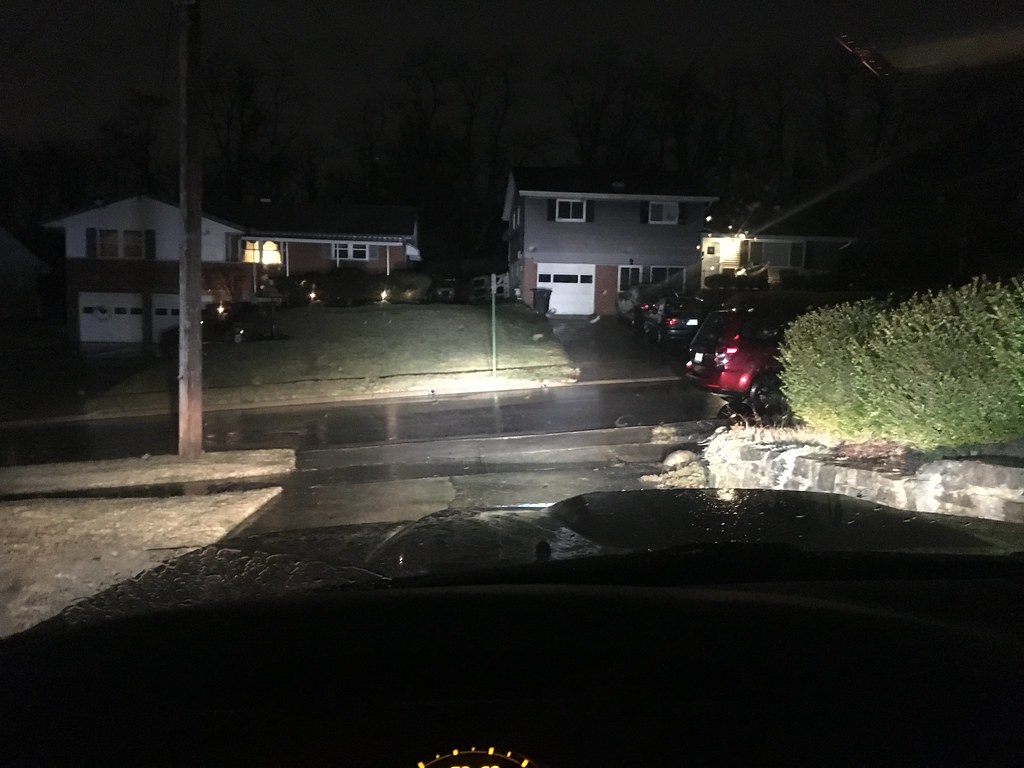
Light Bars only (rainy, including my 10" hood scoop bar)

47148500232_46fdaea6aa_b.jpg


Light Bars and stock headlights with the 9005 bulb mod.

46285841755_509e68d2ba_b.jpg


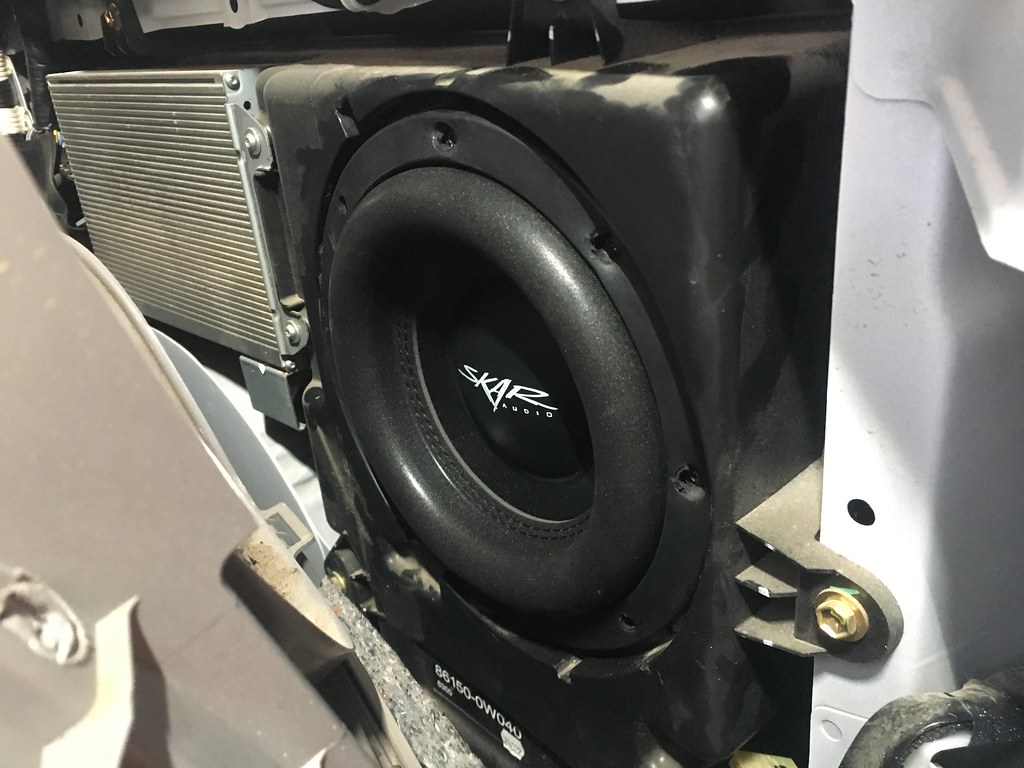
After that, while the weather remained cooperative. I tackled replacing the factory subwoofer with a Skar 8" Dual 2 Ohm I got on Amazon.

I didn't take any pictures during the process since it's well documented, but I did have to cut out some of the castings on the inside of the box to make this fit. After firing it up, there isn't a hugely noticeable difference over the working 8" JBL sub that I had, but this will be ready when I have the time to wire in my amplifier for this and throw a bit more power at it, then it should sound better!

32258124277_266c42c4af_b.jpg


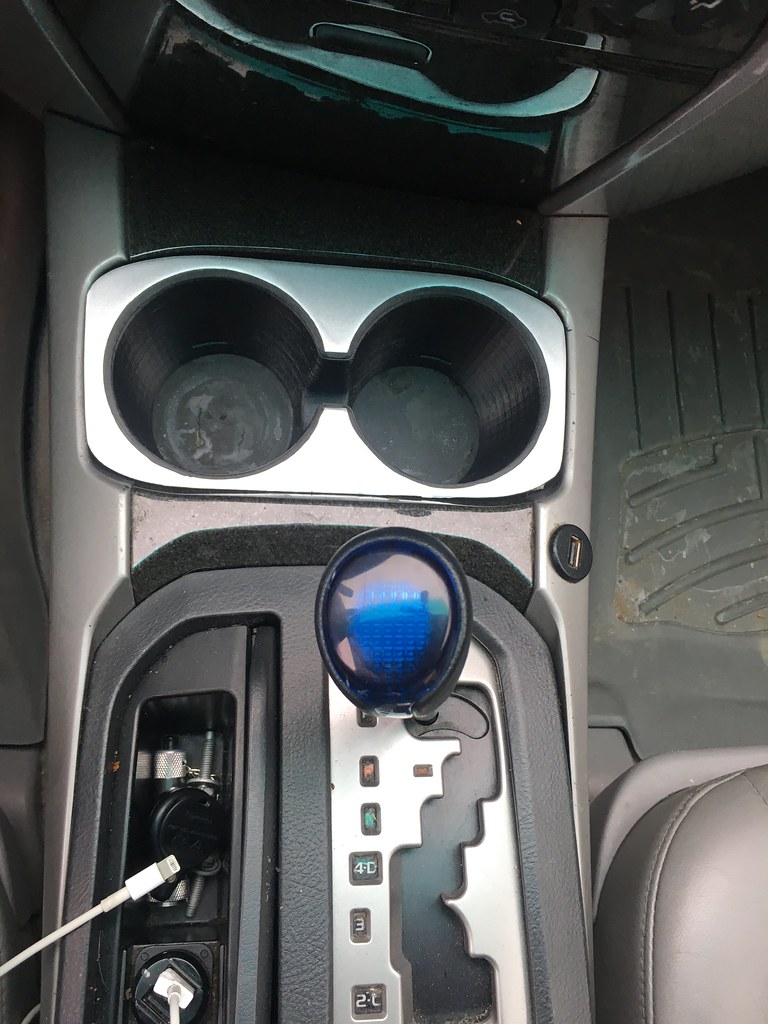
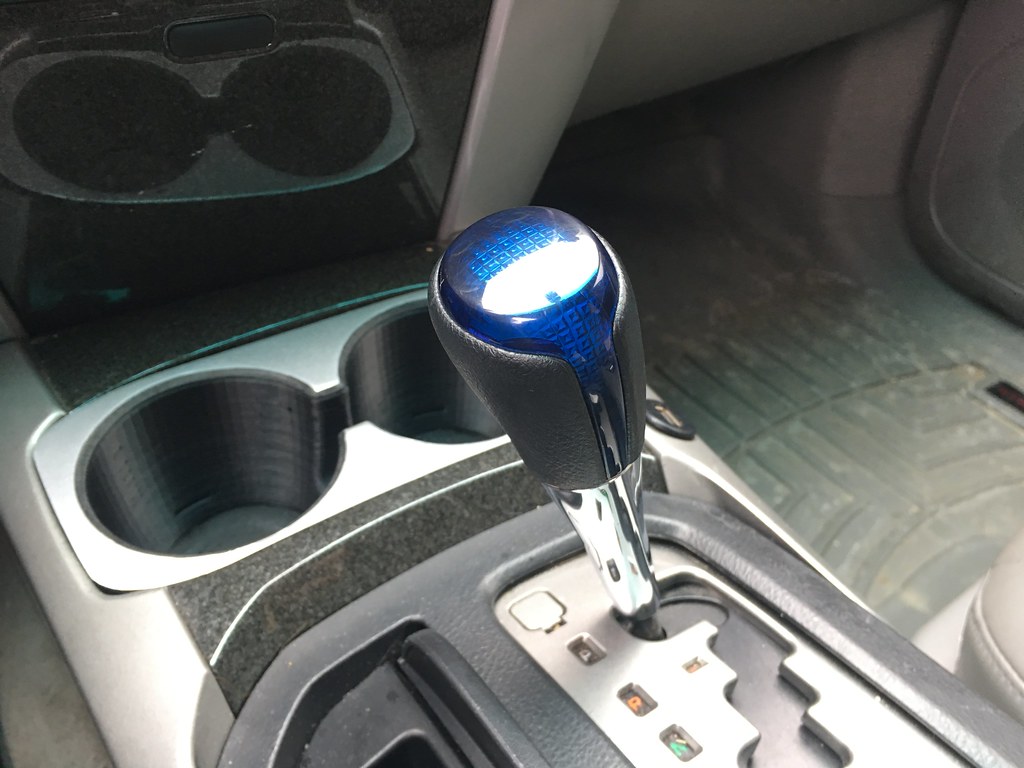
Also installed a new/used shift knob I snagged on eBay. Admittedly I was looking for an FJ Cruiser one to cut down and had been drinking and bought this for $25 from Japan on eBay. I'd actually pretty cool although nothing in the interior really matches it, we'll see how long it hangs around for!

47200251601_49951cac1b_b.jpg


40235597693_8232aca6ef_b.jpg


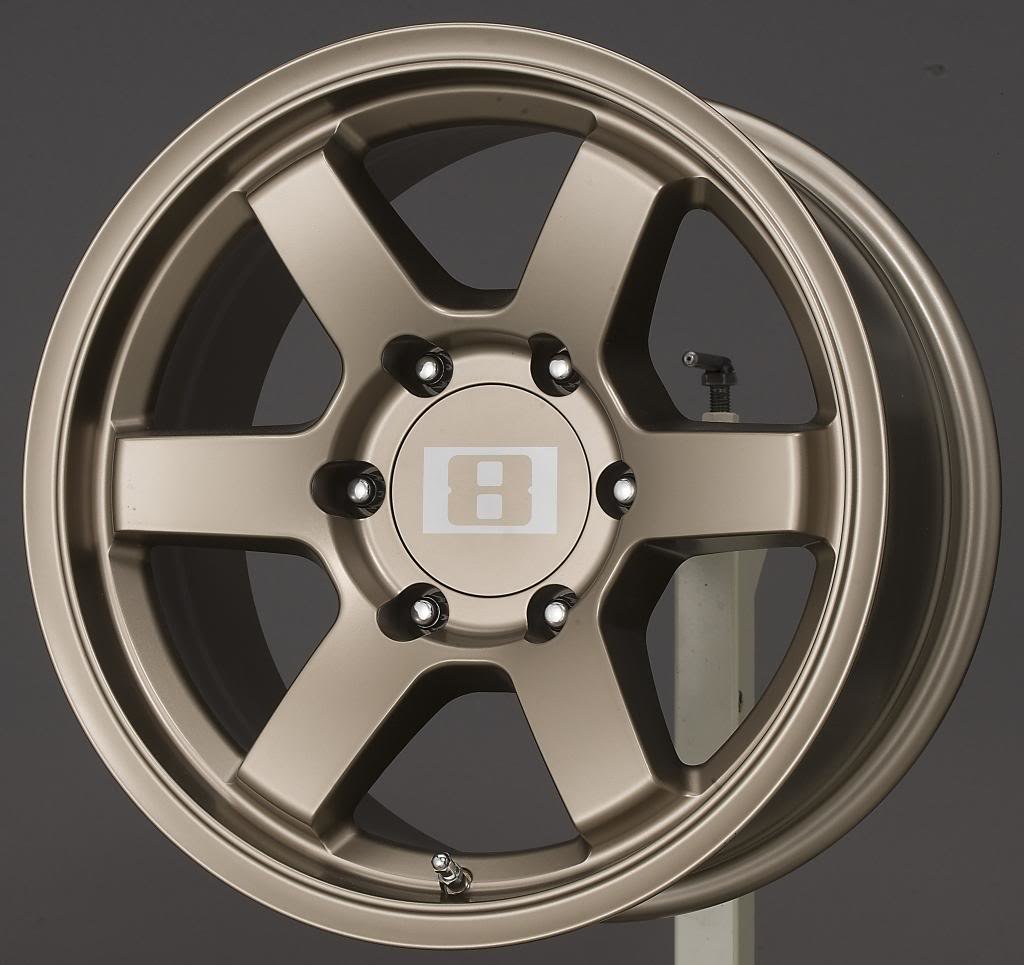
Last but not least, I ordered some wheels a bit unexpectedly. I was looking to find some 17's but I stumbled across these in 18x9 on SummitRacing.com

Level 8 Wheels MK6 Bronze Wheels MK618906139+00BRZ - Free Shipping on Orders Over $99 at Summit Racing

They have a $51 off $500 or more code right now code "ALWAYS" so I put 5 in my cart, dropped $2.99 on a pack of chrome valve stem caps to raise my subtotaly to $500.49 and then used the promo code and IT WORKED.

Scored 5 wheels for $483 shipped. More pics when they arrive later this week. Time to start deciding on what size tires to run since I had all but decided what tire size with 17's but here we go, onto 18's.

32258122807_2f6b5d57f0_b.jpg


They look like they're a bit more gold/champagne in person rather than this image, but I'm still excited and for the price I can't go wrong. Worst case I'll plastidip or have them powder coated down the road.

That's it for now! Maybe a bit more tinkering later this week but my parts pile is starting to dwindle!
 
Nice build so far, except the shift knob (it’s from a Prius C) haha I like that you swapped hoods. I too have been considering this.


Sent from my iPhone using Tapatalk
 
Nice build so far, except the shift knob (it’s from a Prius C) haha I like that you swapped hoods. I too have been considering this.


Sent from my iPhone using Tapatalk

Good looking out! That looks like it is what it's from. I kinda wish that I could do it in orange/red instead of blue, but it feels nice and looks unique! I'll be hush hush on telling people it's from a Prius, I'll just say its JDM. haha

Maybe I'll try to winyl wrap the blue part with some silver/black vinyl, that way it keeps the shape/style but makes it look less like a Prius knob!
 
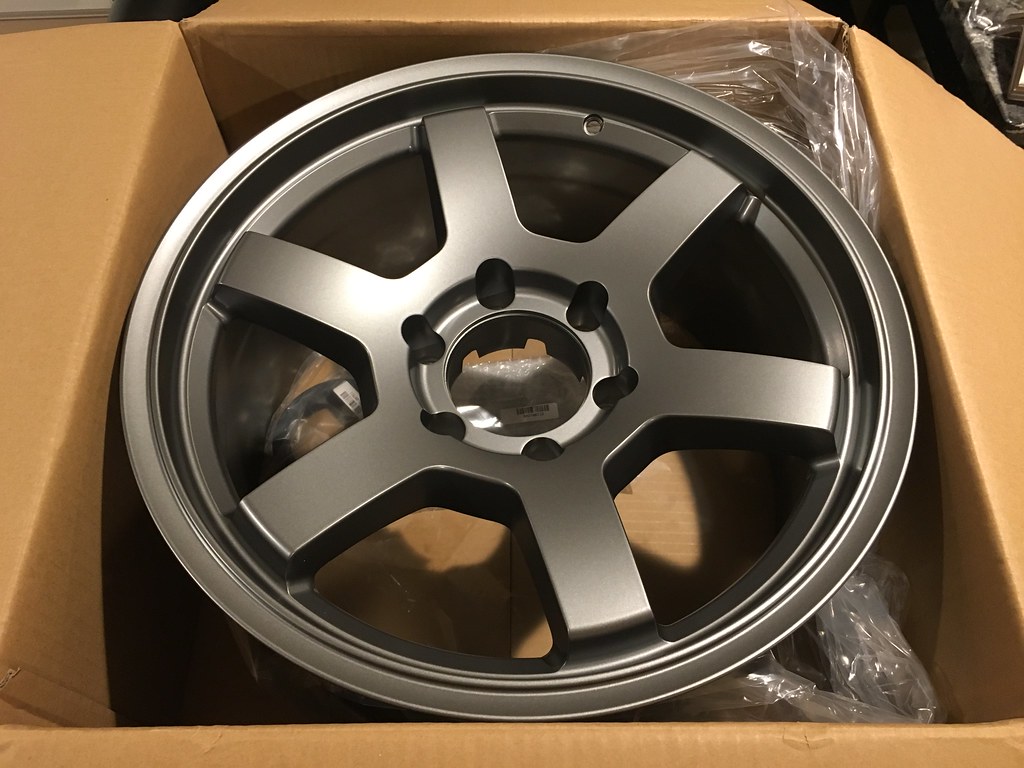
Well, I reached out to Summit as I still did not have tracking information on those wheels. Turns out they are on backorder with an expected in stock date of 6/28/19 just for anyone else thinking about placing an order.

I'm hoping I can maybe convince them to just ship me some Gray ones instead (doubtful) or maybe the ET12 version instead of the ET0.

That being said, if they can't, I'll probably just plastidip the wheels I have on it now, and then toss on the Spidertrax spacers I have sitting on a shelf to tide me over for a little while until these show up. That will give me plenty of time to get the tires picked out, and ordered!
 
TLDR - Summit Racing's customer service is AWESOME!

I was in contact with them over a handful of days regarding my order of wheels that showed "IN STOCK - SHIPS TODAY" but were actually back ordered for months.

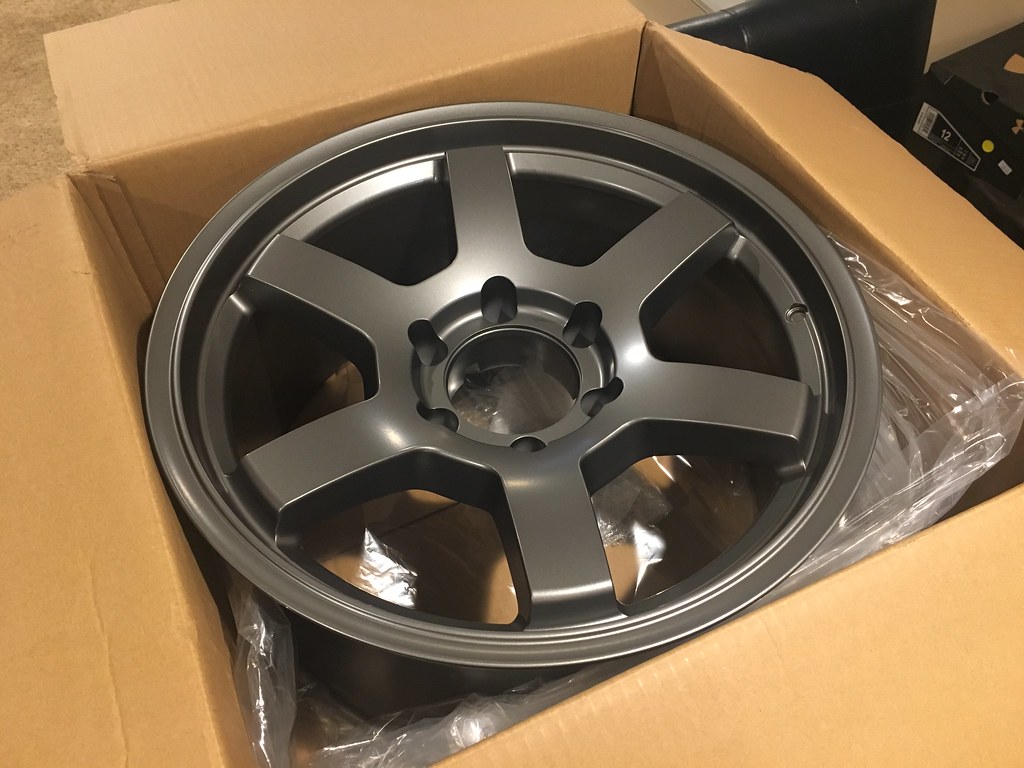
After talking with them, they agreed to change my wheel choice to the same wheel, but in Gunmetal (I actually preferred the gunmetal color but they weren't on clearance). I was concerned that they were going to also charge me the full price of the Gunmetal instead of the clearance price of the Bronze.

They did this at NO extra charge, so in turn, I got gunmetal wheels (normally $160 on discount tire, and $199 on Summit) for the price of the clearance Bronze/champagne ones. After the coupon code that I used and everything, I got 5 brand new wheels for $480 shipped (which includes tax).

They have since updated their website and fixed the "issue" but I managed to get lucky during this issue and scored a set of 5 wheels for basically half price.

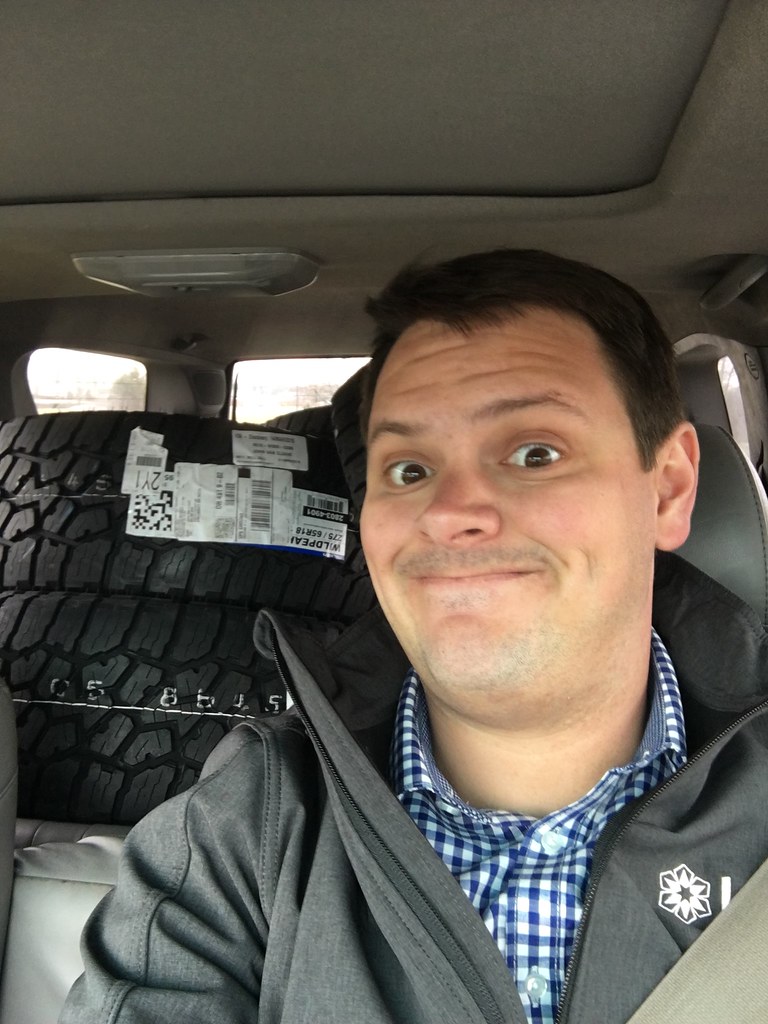
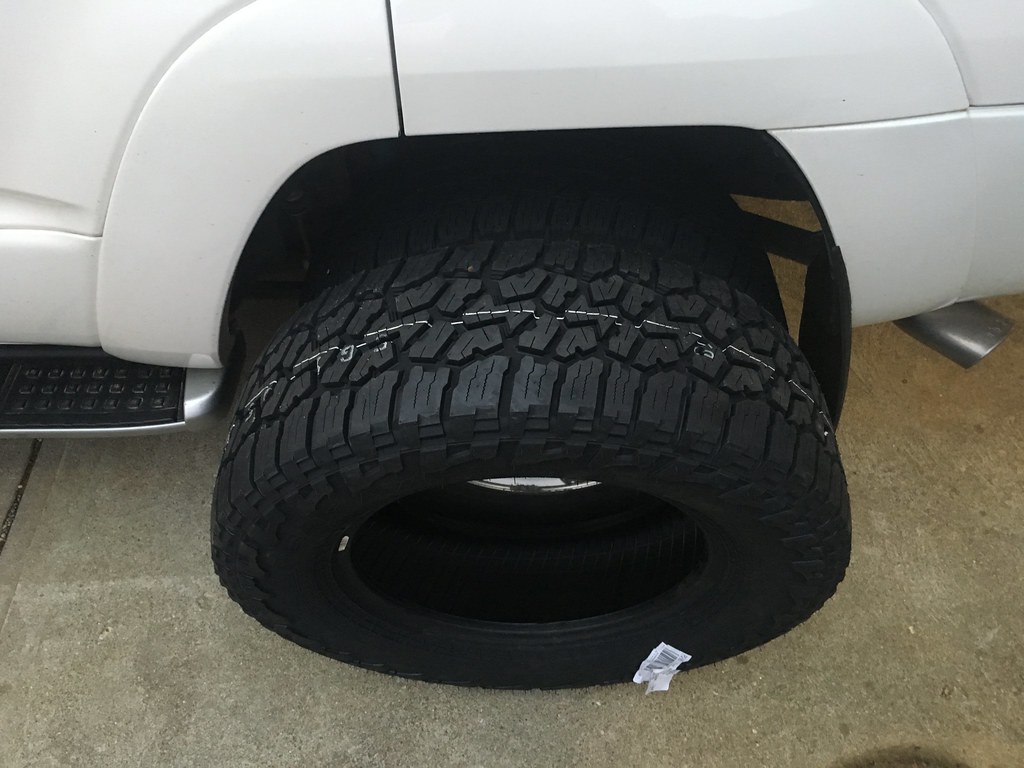
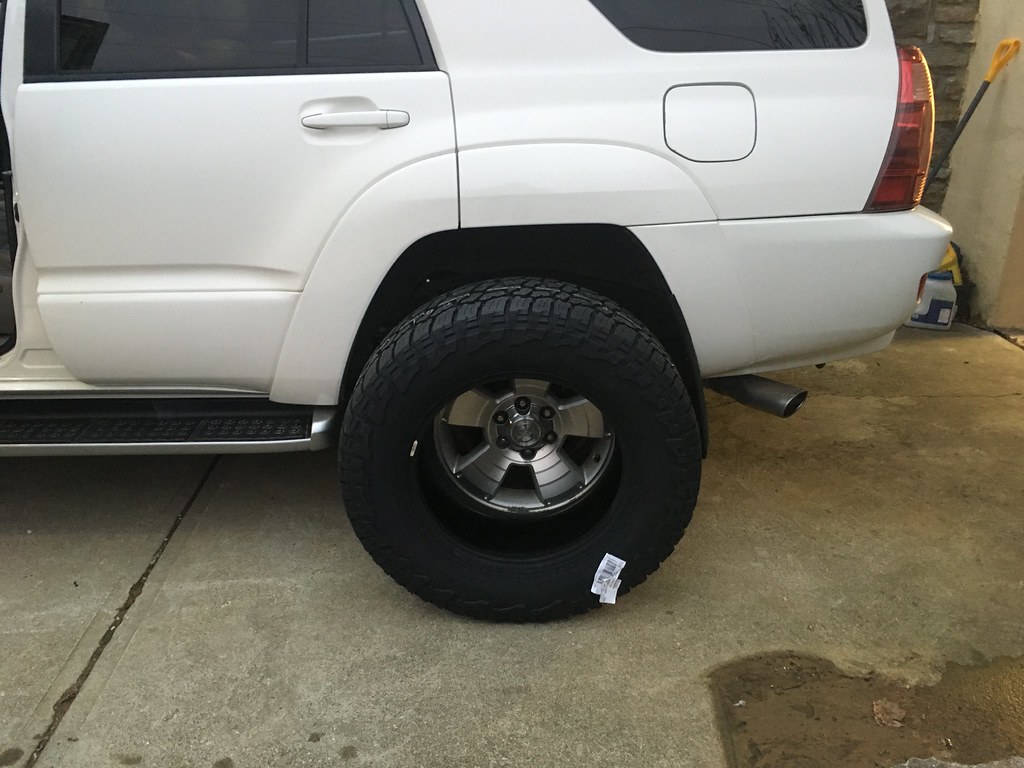
Then, on Tuesday, eBay had a discount code for 15% off your purchase, and I ordered 275/65R18 Falken Wildpeaks for $770 shipped (after tax) for 5 of them, again, a really good deal on a quality tire. I waffled on tire size, but ultimately decided to go with this size partially due to price, and the other because I wanted to go slightly oversized, but nothing too wild since it's mostly a daily driver and will see a bit of "offroad" driving.

I still need to source TPMS sensors and lug nuts for these, but here are a few pictures of my recent pick ups. If anyone has good suggestions for either of these let me know!

46470455515_ed8c2f4d27_b.jpg


46662308124_00005784cf_b.jpg


46470455425_5f0cd857bd_b.jpg


47385578631_cb6f94f2d7_b.jpg


47385578691_aebc62b639_b.jpg


47385578621_2c36a19c7b_b.jpg
 
After much delay (waiting for my fun money to renew) I'll be dropping my wheels and tires off at my local 4 Wheel Parts at the recommendation of my friend who has a Raptor and whose friend works at 4WP here in Cincinnati.

I've decided to skip buying or swapping in TPMS sensors from my old wheels and in turn I'll be disabling the TPMS light once the new wheels get mounted and balanced. They'll just put in rubber valve stems into these wheels and get everything mounted up.

I'll follow up this weekend with pictures when I install them on my 4Runner (lug nuts on their way) since I'll be swapping my wheels/tires along with taking the winters off of my wife's Forester.

More updates coming later this week!
 
After much delay (waiting for my fun money to renew) I'll be dropping my wheels and tires off at my local 4 Wheel Parts at the recommendation of my friend who has a Raptor and whose friend works at 4WP here in Cincinnati.

I've decided to skip buying or swapping in TPMS sensors from my old wheels and in turn I'll be disabling the TPMS light once the new wheels get mounted and balanced. They'll just put in rubber valve stems into these wheels and get everything mounted up.

I'll follow up this weekend with pictures when I install them on my 4Runner (lug nuts on their way) since I'll be swapping my wheels/tires along with taking the winters off of my wife's Forester.

More updates coming later this week!

Glad you're disabling the TPMS, it was the 2nd thing I did after disabling the AIP. It always pisses me off when I hear people talking about replacing messed up sensors because its so expensive to get them done and worthless IMO You can tell by looking at your tire if something is wrong, or if you're hyper-aware like me I can feel when a tire has lost air because it pulls to one side or another, this affect gets even more exaggerated since you're going with larger and more aggressive tires
 
If it was my wifes car, I'd make sure they were going to function since she would drive on a flat tire if the light didn't tell her to stop. No saying she's dumb, but she's not car savvy.

I just couldn't stomach $175 for 5 new sensors and then the need to go buy a TPMS tool etc etc. I'll jumper the two wires under the dash and be done with TPMS on these wheels for now.
 
If it was my wifes car, I'd make sure they were going to function since she would drive on a flat tire if the light didn't tell her to stop. No saying she's dumb, but she's not car savvy.

I just couldn't stomach $175 for 5 new sensors and then the need to go buy a TPMS tool etc etc. I'll jumper the two wires under the dash and be done with TPMS on these wheels for now.

Luckily my gf and I have been dating a while, and she has spent considerable time around cars with me since about 15 years old. Her knowledge has become far and beyond most women that I know and most men as well. Seems like hardly anyone has a clue about how the metal box that they are traveling in every day over 70 mph, operates and functions. In fact she knows what all common car fluids smell like and even how to change a spare and even oil! However she doesn't really do any work on cars or get dirty, because she doesn't enjoy it like me, but she at least has an understanding of what is going on and if there is ever a problem can typically give me all pertinent info over the phone for diagnosis.

Yeah, a 5$ pack of scotchlocks did the trick for me and was obviously better than shelling out ~150$~ for worthless (imo) sensors
 
Luckily my gf and I have been dating a while, and she has spent considerable time around cars with me since about 15 years old. Her knowledge has become far and beyond most women that I know and most men as well. Seems like hardly anyone has a clue about how the metal box that they are traveling in every day over 70 mph, operates and functions. In fact she knows what all common car fluids smell like and even how to change a spare and even oil! However she doesn't really do any work on cars or get dirty, because she doesn't enjoy it like me, but she at least has an understanding of what is going on and if there is ever a problem can typically give me all pertinent info over the phone for diagnosis.

Yeah, a 5$ pack of scotchlocks did the trick for me and was obviously better than shelling out ~150$~ for worthless (imo) sensors
You're in luck! Mine doesn't have a desire to learn, which although frustrating sometimes, is okay because cars are my hobby, not hers. Also another reason I got her a Forester and put Blizzaks on it even though it doesn't get that bad here in southern Ohio. I'd rather not have to worry about her getting about in the winter and having to get out of bed to find out she's slid off the road into a ditch.

Maybe I'll make her help me swap over her wheels and tires, after all, I bought the winter set up so the least she could do is help swap the summers back on!
 
You're in luck! Mine doesn't have a desire to learn, which although frustrating sometimes, is okay because cars are my hobby, not hers. Also another reason I got her a Forester and put Blizzaks on it even though it doesn't get that bad here in southern Ohio. I'd rather not have to worry about her getting about in the winter and having to get out of bed to find out she's slid off the road into a ditch.

Maybe I'll make her help me swap over her wheels and tires, after all, I bought the winter set up so the least she could do is help swap the summers back on!

There ya go haha. gotta start somewhere and at least show her so stuff along the way, for safety reasons if nothing else. Mine has no desire to work on stuff but does like to know how they function. Maybe that's because she is going to school for engineering haha....:laugh:
 

Members online

No members online now.

Forum statistics

Threads
278,316
Messages
3,554,111
Members
248,016
Latest member
Advally Service

Trending content

Back
Top