Kennedy's 4Runner's Restoration & Build

Sailwin

New member
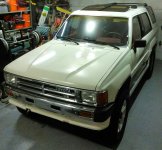
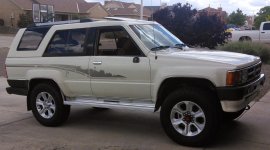
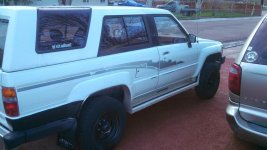
Got my 1989 Toyota 4Runner SR5 V6, with the 5 speed manual and 294k miles on it.

Found it on craigslist in Pueblo, CO. Traded my AWD Chrysler Town & Country LXi in near mint condition and only 134k miles on it for this.

It has/had issues.
 

Attachments

  • image.jpg
    image.jpg
    136.7 KB · Views: 3,912
Register to hide this ad
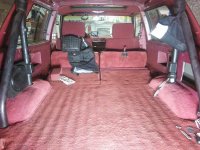
First up, cleaning

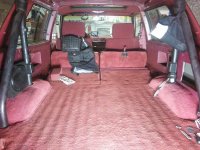
The previous owner had Irish wolfhounds. So dog hair was present, along with what appeared to be ten plus years of oxidation, dirt, and debris. Still cleaning to date. While cleaning, started rewiring radio, swapping speakers, and installing new ones.
 

Attachments

  • image.jpg
    image.jpg
    136.9 KB · Views: 3,805
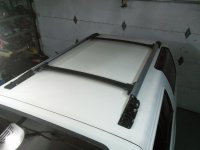
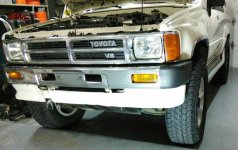
1st gen with 2015 OEM SR5 Roof Rack

Got a deal on rims, and the guy gave me the roof rack for free. They came off a 2015 4Runner SR5. The roof rack was 8" to wide. Disassembled, cur 4" off each side of the cross rails, redrilled ends for bolts, reassembled, then started laying it out.

Decided to cut off the "nubs" around the bolt holes, removed and discarded the rubber "gasket", sanded and painted the aluminum " feet". Later down masking tape for reference lines when eyeballing the final resting place for this roof rack. Marked and drilled the holes, luckily almost perfect alignment with interior.

Now for the test fitting. The original feet had a different cube then my truck. Position rack, Test fit, remove, pound with 5lb min sledg, test fitt, repeat until each foot fitt "good". Maybe 5-10 test per foot/corner.


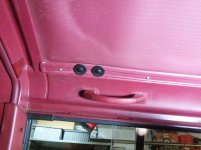
Clear RTV silicone in drilled holes, carriage bolts from inside with fender washer and neoprene washer, more silicone on outside with as washer and nylock nut. Cut the bolts to length just above but with bolt cutters to reduce heat, paint end covers black, paint carriage bolts black.qqq
 

Attachments

  • image.jpg
    image.jpg
    144.6 KB · Views: 3,757
Decided to cut off the "nubs" around the bolt holes, removed and discarded the rubber "gasket", sanded and painted the aluminum " feet". Later down masking tape for reference lines when eyeballing the final resting place for this roof rack. Marked and drilled the holes, luckily almost perfect alignment with interior.

Now for the test fitting. The original feet had a different cube then my truck. Position rack, Test fit, remove, pound with 5lb min sledg, test fitt, repeat until each foot fitt "good". Maybe 5-10 test per foot/corner.
Test fit, and test fit again!
 

Attachments

  • image.jpg
    image.jpg
    135.5 KB · Views: 3,629
Clear RTV silicone in drilled holes, carriage bolts from inside with fender washer and neoprene washer, more silicone on outside with as washer and nylock nut. Cut the bolts to length just above but with bolt cutters to reduce heat, paint end covers black, paint carriage bolts black.qqq

Painting the carriage bolts on the interior was a pain, especially the clean up!
 

Attachments

  • image.jpg
    image.jpg
    132.9 KB · Views: 3,605
cleaner wax

The truck was pretty rusty (compared to all the other desert vehicles I've owned, and dealt with). Washing made it cleaner, but looked like the paint was toast, and rust was everywhere. To my surprise, waxing it with cleaner wax removed almost all my rust, and what turned out to be oxidation on the paint! I now have a nice shiny paint job, that you can see yourself in!
 

Attachments

  • image.jpg
    image.jpg
    136.7 KB · Views: 3,684
cut out for middle speakers

The sound was pretty bad when I got it. 4" factory speakers up front, Sony cassette player, and Sony 4" speakers in the cargo area.

Remove and dispose of factory speakers. Move Sony 4" speakers up front, modify 4" Sony speaker to fit. Much better sounds up front.

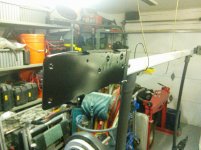
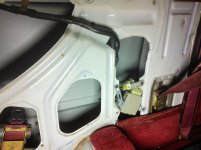
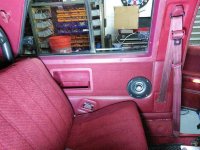
Now to focus on rear seat passengers. After lots of ideas, removed interior panels to look for sheet metal opening. Laid out speaker grill on sheet metal, marked area to trim, and cut it to fit my speaker. Then reinstalled interior panel, and marked the opening location on backside of panel.

Moved relays and wires.
 

Attachments

  • image.jpg
    image.jpg
    135.7 KB · Views: 3,580
Panel mod

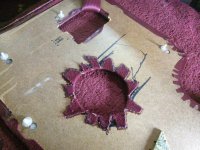
After the speaker location was marked on the backside of the panel, cut panel backing and dispose of, by cut carpet in "triangles" to reglue around new speaker opening.
 

Attachments

  • image.jpg
    image.jpg
    133.8 KB · Views: 3,553
Speaker

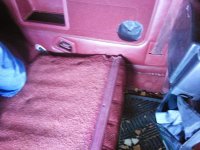
Installed foam baffelinbetween sheet metal and panel, install panel
 

Attachments

  • image.jpg
    image.jpg
    137.1 KB · Views: 3,563
Speaker

And now for some more sound!

Found plenty if room in between interior and exterior body panels to mount an amp. Mounted on driver side near middle speakers! The little amp will power some 6x9's in the rear cargo area.

And where my old 4" Sony speakers were, marked the area to install 6"x9" Speaker boxes!


CAREFUL! lots of wires running to the back right here! Remove the interior panel before cutting!
 

Attachments

  • image.jpg
    image.jpg
    136.9 KB · Views: 3,593
Rims and tires

Tires were a much bigger ordeal then anticipated. Ones that came on the 4Runner were 225/75R15 w/15" x7" x3.5" bs steel plastic dipped rims. Lots of research lead me to believe that I had sas rims instead of ifs. After reading enough threads, decided the general idea was 3.5" bs for SAS and 4.5" for IFS, which ALL IFS TRUCKS use. So I picked up a set of 2015 4Runner SR5 rims, 17" x 7" w/4.5" bs. That has been the most nerve wreaking purchase in a long time!

The next step was tires. Again, what should I have? Los of research lead me to two tire options, 27" or 31". And the way to confirm, diff gearing! 456 gearing equals manual
W/31" tires from all my research, but my front diff had 488 gearing (automatic transmission with 31" tires).

So I should have 31x1050xR15 tires, not the 27" that were on it.
 

Attachments

  • image.jpg
    image.jpg
    137.4 KB · Views: 3,535
Tire Size

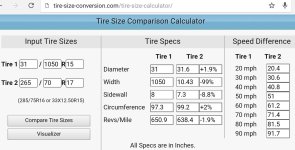
So I needed 31" tires to be stock again. Maybe this was why my speedometer was off 15 mph slow at 80mph on the dash.

With the new rims, used a tire size calculator and found a close match to 31x1050xR15 at 265/70/R17
 

Attachments

  • Screenshot_2015-05-07-10-06-41~2.jpg
    Screenshot_2015-05-07-10-06-41~2.jpg
    130.3 KB · Views: 3,655
More cleaning

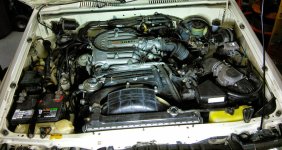
Everyday I clean. Found Turtle wax Chrome Polish to be an amazing product! Restored my front and rear bumpers along with all the trim!

Found a fine steel wool to be the best applicator, followed by a microfiber cloth to buff out the residule polish left behind.

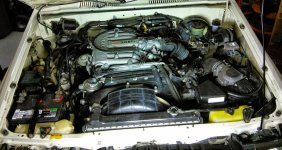
This polish is also amazing on my engine!

Wish I had better before and after pics.
 

Attachments

  • image.jpg
    image.jpg
    146.7 KB · Views: 3,549
Headlights

When I got the truck, I was told the headlights were converted to H4. But the lights didn't work when I tried using them.

Found multiple issues.
First, the new harness was wired wrong. Common is +12vdc, and the low or high beam circuit was the ground.

Low beams - red w/green - gnd
High beams - red w/yellow - gnd

Common - red w/white (lh) or red w/black (rh) +12vdc

I also noticed my high beams only worked on "flash". Again, lots of research later showed a common problem with the switch's contacts. I followed the many threads out there on repairing, and presto! Working headlights!
 

Attachments

  • image.jpg
    image.jpg
    133.1 KB · Views: 3,596
Cargo light rewire

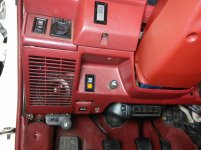
Rewired the power for the cargo light, in the dash, to work anytime, no more turning lights on lghtts to get a cargo lght!

The accomplished two things!

One, cut the power wire going to the dash control, splice in wire and run to radio for my dimmer wire.

Two, wired power from the overhead light circuit. Power anytime, key or not!
 

Attachments

  • 1431567487175205624883.jpg
    1431567487175205624883.jpg
    137.1 KB · Views: 606
belts

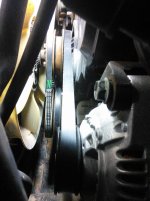
Belts were another issue. Two of the three belts Autozone and O'Reilly's said my truck used were wrong (to big by one size).

Serpentine belt (alternator) to big. Used K040465
V-belt (ac) good. Used 13A0900
V-belt (power steering) to big, maxed out tensioner, need one size smaller. Currently have 13A1220 (need smaller).
 

Attachments

  • 1431573284414673843895.jpg
    1431573284414673843895.jpg
    138.5 KB · Views: 555
Thank you

Nice job. That's a neat trick figuring out tire size conversion. I really like those rims.

Thank you! When I first got the rims they stood out to much. But after waxing the 4Runner, I thought they blended a lot better. I think once I tint the windows, and finish cleaning the middle window trim it will even look more natural, I hope. Still worried they "pop" a little to much, and say look at my nice new rims on my old vehicle. Considered painting them black, but think I'll hold off.
 
Vacuum lines

Another issue I delt with was exhaust leaks.

First started with checking all the bolts on the exhaust and to my surprise I found a loose connection at the "y" pipe to "down" pipe. Retorqued to spec, and stopped the exhaust leak sound, but not smell.

Next I started replacing all the vacuum lines I could get my hands on, including the pcv valve. This made a HUGE difference! Got rid of the remaining ordor and my engine became "alive". It now revs above 3k rpm! Slowly, but it got/gets there!
 

Attachments

  • image.jpg
    image.jpg
    146.7 KB · Views: 550
Last edited:

Members online

Forum statistics

Threads
278,312
Messages
3,554,089
Members
248,016
Latest member
Advally Service

Trending content

Back
Top