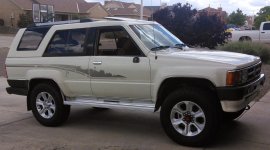
Kennedy's 4Runner's Restoration & Build

fuel filter

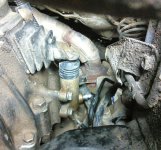
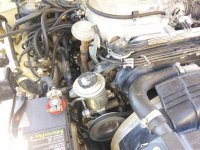
Replaced the fuel filter. Wow, what tool are you supposed to use to loosen the line nut? I broke them loose with an open end wrench, but actually spun the nut with an old fashion pair of pliers. I dont even know the last time I used pliers on a vehicle!

With the new filter, the engine runs smoother and revs faster (still no sports car, and I'm guessing it should still be quicker).
 

Attachments

  • 14315757809411848815415.jpg
    14315757809411848815415.jpg
    137.4 KB · Views: 543
steering stops

When I turned the truck, and had any suspension travel, I had aweful noises! Sound like metal on metal or tires rubbing. Again multiple issues.

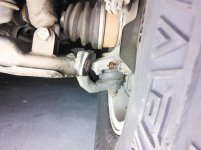
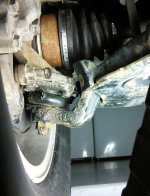
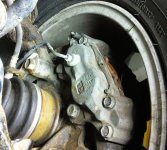
Lots of reasearch lead me to beleive the steering stops were the culprit. Appearantly when the protective caps fall off, they alow for a metal to metal contact, and make lots of noise. Upon inspection, the steering stops were indeed missing their caps, and were rusty, dirty.

Cleaned up the four steering stop bolts and plates with steel wool and turtle wax chrome polish. Removed almost all the rust, cleaned all the grease, and dirt, and then covered the bolt heads and plates with grease. This stopped the majority of the sound, but not everything. Also the grease is a temp fix, and new protective caps will be ordered eventually (and I know some people tink the caps are a temp fix too).
 

Attachments

  • 1431606564675-94078442.jpg
    1431606564675-94078442.jpg
    135.8 KB · Views: 596
Grease fittings

After working on the steering stops and almost stopping the noise, continued inspecting the suspension, and found all the grease fittings were completely covered in grease and dirt. After lots of cleaning, exposed all the zurt fittings, then cleaned the fittings enough to allow a grease gun to fit on, and then had to clean the "ball stop" on the fittings to allow new grease to go in.

Followed the manual and greased upper and lower ball joints. This pretty Mich stopped the rest of the noise! I bet those hadn't been grease in years! I can't believe how much they took, and the color and consistency of the old grease that came out.
 

Attachments

  • IMG_20150514_064322~2.jpg
    IMG_20150514_064322~2.jpg
    137.5 KB · Views: 537
Grease fittings

While I had the grease gun out, figured I should grease everything else I should.

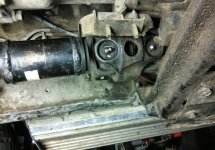
From what I could tell, the only other grease fitting are on the driveshafts. One for each yoke and u-joint. Again lots of cleaning to expose the fittings, then cleaning to get the fittings to allow the grease fun to fit on, and even more cleaning to free the "ball stop" on the grease fitting it self. And again I was amazed bow much grease they took, and what color and consistency of the old grease that came out!
 

Attachments

  • IMG_20150514_064428~2.jpg
    IMG_20150514_064428~2.jpg
    140.1 KB · Views: 539
Clutch fluid

Based on the grease condition, decided I better review all my other fluids immediately.

Next to be changed was the clutch fluid. This was about when I decided Toyota's are small, and confined, and I need to give up on the idea that there will ever be an "easy" job with plenty of space to work.

Replaced the clutch fluid with DOT 3 brake fluid. Went from black water to amber hydraulic fluid! My clutch now has smooth and constant pedal travel, and clutch operation! Thought I was going to need a clutch, had no idea just how important that fluid is!
 

Attachments

  • IMG_20150514_070500~2.jpg
    IMG_20150514_070500~2.jpg
    137.3 KB · Views: 553
Last edited:
Brakes

While I had the brake fluid out, and help from the misses, decided I better change the brake fluid. Again, it went from black water to amber hydraulic fluid. This did not result in the same improvement that the clutch fluid did, but it was close.

I now have smooth and consistent pedal travel and brake engagement!
 

Attachments

  • IMG_20150514_070703~2.jpg
    IMG_20150514_070703~2.jpg
    136.1 KB · Views: 533
Battery Terminals & Cables

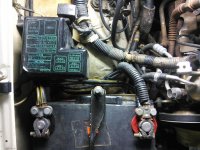
Another job that proved amazing results, was redoing the battery terminals, adding an extra ground, and replacing the main positive cable going to my main fuse block.

Started with disconnecting and removing the battery. Then disassembled the screw together terminals, and cleaned! I ran a new and extra 4ga ground cable to the chassis. I replaced the whimpy, old, undersized cable going to my main fuse block with a nice 8ga cable. Reassembled the battery terminals with the new cables, performed a bit of wire management, and presto, faster, brighter, better working electronics!

My windows, especially the rear tailgate, go up and down almost twice as fast. My headlights are incredibly brighter. My radio is louder and clearer. My HVAC fan blows stronger. WOW! What an improvement!
 

Attachments

  • IMG_20150514_075743.jpg
    IMG_20150514_075743.jpg
    138.5 KB · Views: 544
Door Hinge, Stop, and Jam.

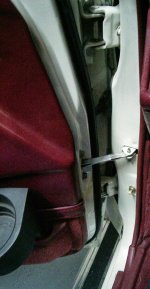
More cleaning! Started, not finished yet, cleaning the door jams and tailgate, door stops, and latches.

Removed all old grease and dirt from door stop and latches with the steel wool and turtle wax chrome polish, regressed and got smooth and quiet doors! Also cleaned and waxed the door jambs. The tailgate has just been cleaned so far, still need to clean and grease the tailgate latch.
 

Attachments

  • IMG_20150514_082239~2.jpg
    IMG_20150514_082239~2.jpg
    132.4 KB · Views: 552
Throttle Cable

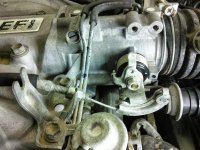
Another maintenance item that gave amazing results, was adjusting the throttle cable!

It appeared to be have never been adjusted, or atleast not for a very long time! The adjustment nuts were in the center of their range, and there was a lot of pedal movement before the cable actually started moving the throttle body. I would wager the truck had not been able to get full acceleration for a very very long time!

Ended up adjusting the cable to its furthest setting, which was just about perfect. I now have instant pedal response, and my truck revs faster, and has so much more power above 3k rpm! Still think it should be quicker (spark plugs, wires, cap and rotor are on there way).
 

Attachments

  • IMG_20150514_085832~2.jpg
    IMG_20150514_085832~2.jpg
    138.7 KB · Views: 527
to do list

Current to do list, not really in order:
1. Tune-up, spark plugs, wire, rotor and cap.(hope to get sometime next week. Toyotapartsoverstock is a very slow company! My last order had issues, they didn't ship for a week after placing the order, and still waiting for shipping confirmation on my last order. If they didn't have the best pricing I could find on the majority of my items, I would never do business with them, but since this is my budget build, every penny counts!)
2. Passenger side mirror, replace broken off electric mirror with manual mirror. (Hope to get tomorrow)
3. Shift lever bushings (hope to get them tomorrow)
4. Try heater core purge again (still makes a sound like a babbling creek, even after flush, and initial purge. Maybe there is a pin hole leak in the heater core?)
5. Replace either diff gearing, or whole third member, and get matching gear ratios front and rear (probably do lockers at this time too)
6. Replace radio, new one was defective, had to send it in for repair, hope to get it end of next week.
7. New windsheild.
8. Tint windows!
9. Shocks and suspension/rear leaf springs
10. Cleaning! It will never end..
 
Cool truck! I love the red :hiding:

Thanks! I have mixed feelings about the red interior. At first it was all going to be ripped out, and replaced with seat covers, aluminum diamond tread paneling, and bed lined. But after some light cleaning, I couldn't believe the condition it was in! Couldn't bring myself to rip it out. Now I'm thinking of either a red dash matt, or actually replacing the cracked dash with another red one.

Although, once the top comes off, I still might try and make it more water resistance.
 
Running Boards

After the new tires and rims, I had to trim the running boards for better clearance. This was not necessary, but I have plans for bigger, wider tires in the future, and might as well make some room now.

I used some levels to try and get an idea of the shape/flow, I wanted/could get. Ended up removing about 5/8" from the front don't and closer to 1-1/2" from the rear. Cleaned the pieces while they were apart, bolted them together, and pounded the "mud flaps" with a 5lb min sledge until it was bent nicely and fitted as close to the way I wanted it as I could get with out too much work. The "mud flaps" now follow the wheel well arch much better, and I dont have weird annoying gaps in between the body and the running board "mud flaps".
 

Attachments

  • image.jpg
    image.jpg
    137.4 KB · Views: 623
Marlin Crawler Heavy Duty Shifter Seat & Socket

Trucks looking great man! Keep up the good work!

Thank you.

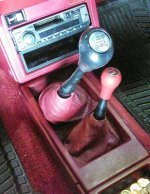
I received my Marlin Cralwer heavy duty white shifter seat and socket today. Took apart the shifter covers to expose the shifter itself, removed shifter handle with the simple "push down and turn counter clockwise a 1/4 turn nut" and cleaned. Followed the simple instructions on marlin crawlers website for installation, and reinstalled the shifter and boots. What a difference! You'd never know your shifting a 295k mile transmission! Another great upgrade/maintenance item that made a huge difference. :banana:
 

Attachments

  • image.jpg
    image.jpg
    133.3 KB · Views: 544
I avoided changing the shifter bushings and seat. I had the parts a couple of years. It turned out to be very easy. Huge improvement.
 
Marlin Crawler Heavy Duty Shifter Seat & Socket

I am so impressed with the improvement from the Marlin Heavy Duty Shifter Bushing and socket, I went ahead and ordered the transfer case heavy duty seat, and new "boots"! By the end of next weekend, I should have some big improvements!
 
Trailer Hitch

Sold my old rims, and have a trailer hitch lined up for tomorrow. This will be an exciting week!
 
Trailer Hitch

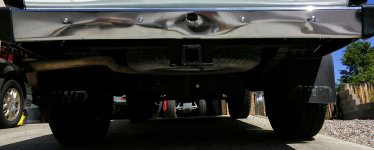
Pretty sure I ended up with a factory Toyota hitch. Was very curious how it was going to mount. It slides into the frame, and sits nicely behind the bumper.:trophy:
 

Attachments

  • IMG_20150518_101607.jpg
    IMG_20150518_101607.jpg
    133.2 KB · Views: 490
  • IMG_20150518_101634~2~2.jpg
    IMG_20150518_101634~2~2.jpg
    139.2 KB · Views: 499
  • IMG_20150518_101551~2.jpg
    IMG_20150518_101551~2.jpg
    137.4 KB · Views: 478
belts

Belts were another issue. Two of the three belts Autozone and O'Reilly's said my truck used were wrong (to big)
V-belt (power steering) to big, maxed out tensioner, need one size smaller. Currently have 13A1220 (need smaller).

Was told I need a 48" v-belt, believe I need somewhere closer to 47-5/8" to 47-3/4". I tried a 47-3/8"- to small.

I tired a 47-1/2", what a pain to get on, but it works! Changing the power steering pump from the max setting to min setting resulted in snapping off my vacuum valve hose ports on my power steering pump (what does that even do?). Could have avoided this if I paid more attention. New one ordered, hoping to have tomorrow. Valve bypassed until then (runs smoother and faster, but can't maintain a steady idle). :gun6:
 

Attachments

  • IMG_20150518_103908.jpg
    IMG_20150518_103908.jpg
    138.3 KB · Views: 492

Members online

Forum statistics

Threads
278,316
Messages
3,554,109
Members
248,016
Latest member
Advally Service

Trending content

Back
Top