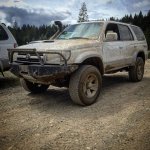
Labrum777 Build Thread

Eibach coils and OME 891 with Bilstein 5100's

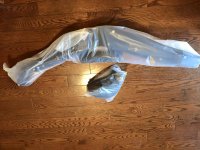
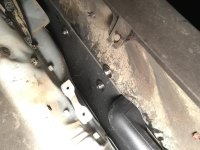
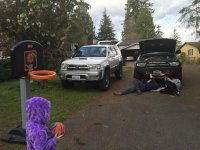
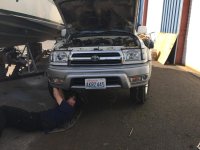
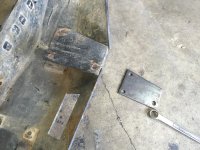
Well, finally got around to doing the new suspension install which was a little compulsive. Had a planned better I could've connected with a few folks here on the forum who had offered up help. I tore into the rear suspension and quickly discovered that I wasn't one of those "lucky" few where the top nut comes off easily by rotating the shock. As I turned the shock, the piston just rotated inside so I had to cut off the dust boot and try to grip the piston with a pair of vice grips.

Even with a new pair of vice grips, I couldn't lock on to it hard enough to keep the piston from spinning so I took a disk sander to either side of the piston. After a fair amount of sparks flying, I was able to box the piston and get a hold of it with my vice grips. After torquing on it heavily it finally sheared the bolt off at the top and dropped through. DONE!! That took way to long.
16267122635_4b6b305f0d.jpg

16266292302_58e84290ef.jpg"

15644705844_07588c86d9.jpg

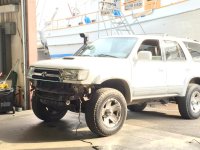
With the back done, it was time to turn my attention to the front but just didn't have the time. I paid a buddy who put it in for me. With Bilstein Tundra 5100's up front and OME 891 with Bilstein 5100 in back, it's sitting at 3 to 3 1/2 inches taller. I have a diff drop that I need to install but my bolts are about two inches short ( I have the 6 inch bolts and need 8). Thanks to a buddy here on the forum who gave it to me free.
16266300572_fcc4fedbb5.jpg

16267137135_52d4768010.jpg

15647237843_8fa691e838.jpg


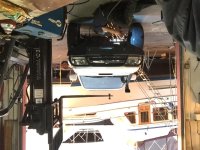
Anywho, here she sits. Had to take the rack off in order to make it into the parking garage at my gym. Might sell the rack and try to get sliders.
16079768190_f467a4f991.jpg

16081017189_44b2f9713d.jpg

16079760460_81ea7c7479.jpg
 
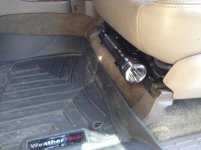
Mag light

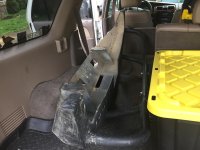
Mounted up the mag lite on the drivers side seat rail. Wish the mounts weren't plastic but, we'll see how it holds up.
 

Attachments

  • image.jpg
    image.jpg
    128 KB · Views: 556
Pulled the trigger...

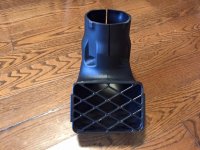
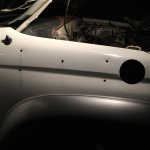
Well, just bought the Hilux Snorkel. Pretty excited about it but know it'll be hard drilling a big hole in the side of a perfectly good fender! I've been wanting a snorkel since my little mishap that totaled my car in a ditch filled with water.
 
Last edited:
Now to carve out time to do the install!
 

Attachments

  • 12495209_10153793109667808_6026128178067297356_n.jpg
    12495209_10153793109667808_6026128178067297356_n.jpg
    95.1 KB · Views: 476
  • 12541143_10153793109682808_4245829102709158669_n.jpg
    12541143_10153793109682808_4245829102709158669_n.jpg
    97.7 KB · Views: 470
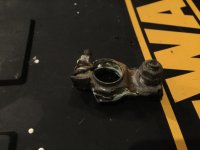
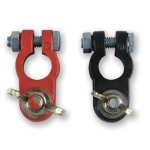
Battery post connectors upgrade

While I'm waiting for a solid 2-3 hours to myself to do my snorkel install, I forgot about a small but important upgrade.

Took the family up to The Summit to do a little sledding.

IMG_5864 by Labrum777, on Flickr

IMG_5217 by Labrum777, on Flickr

Found my way on a forest service road that had a few other 4x4's on it. Pulled a few guys out including a big Dodge 2500 that thought he could flip around on this small snowed in road. Long story short though was my battery post connectors were the OEM stamped sheet metal ones and had corroded so bad that I couldn't get the car to start.
IMG_5358.jpg
After about 30 minutes, it finally started up and I went straight to the parts store to get it worked out. $10 is a cheap price to pay for peace of mind....
4.jpeg
 

Attachments

  • IMG_5358.jpg
    IMG_5358.jpg
    127.7 KB · Views: 434
  • 4.jpeg
    4.jpeg
    21.3 KB · Views: 439
Last edited:
Hilux 167 Snorkel Install

Hilux 167 Snorkel Install:
Thought I'd give some feedback following my install which was the BIGGEST PITA.

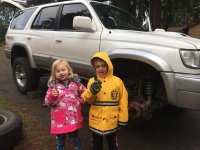
At Least the help was cute...
IMG_5584.jpg
IMG_5594.jpg

First... I'm fairly mechanically inclined and this project took me WAY longer than I expected. I like to do most of my repairs myself, but make sure you give yourself plenty of time. I ran out of daylight and then it started raining on me :rain:.

• Do yourself a favor and buy some of the plugs they mentioned earlier for the mud shield. You'll need them.

• The 3 5/8 saw hole makes for a really tight fit. You'll likely need to clean the hole out a bit with a regular drill bit for a little more clearance.

• don't be shy about using a little bigger drill bit for the bolt holes. The washers from my amazon kit were huge and the little bigger bolt holes allowed me to maneuver the snorkel easier (and without damage to the threads of the bolts).
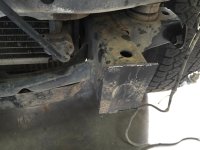
• I used a can of spray paint to paint the holes I had made... hopefully to provide a little rust protection. Doesn't have to be pretty... just have a rag handy to snag any drips... it'll all get covered by the snorkel anyways so no need to be perfect.

• For the snorkel attachment on the A-pillar... don't drill your holes for the A-pillar until the snorkel has been fully tightened down to the body of the vehicle. My holes came out about 1/8 of an inch off and the snorkel had to flex a bit to get it mounted. (And definitely use the rivets. For those that haven't used a riveter, keep pumping the riveter until the stem fully snaps off. This is how you know the rivets have secured fully to the sheet metal and snorkel bracket).

• I tried to install the rubber elbow onto the snorkel before feeding it through the fender and that didn't work for me. I had two hangers inside it which made it difficult for it to flex which resulted in having to install the rubber elbow inside the fender like everyone else.

• This was a helpful tip mentioned earlier: **use a long screw driver to pry the end of the snorkel away form the fender so that its easier to slide on the rubber tube.**

• For the rubber piece to the air box... use a little grease or motor oil to lube the end of the rubber. Vice grips on the bottom, a small screw driver, and a boat load of patience finally resulted in it seating properly. An extra set of hands would've helped tremendously, but unfortunately I didn't have that option (or a heat gun for that matter... tried the wife's blow dryer but not sure it helped much).

• Cheapest place to buy the tools was harbor freight for the mandrel ($10), Amazon ($10) for the hole saw and Home Depot for the Riveter ($10)

Thanks to everyone that's contributed to this thread! :beer:
IMG_5591.jpg
IMG_5589.jpg
 

Attachments

  • IMG_5584.jpg
    IMG_5584.jpg
    134.2 KB · Views: 641
  • IMG_5589.jpg
    IMG_5589.jpg
    96.8 KB · Views: 651
  • IMG_5591.jpg
    IMG_5591.jpg
    131 KB · Views: 629
  • IMG_5594.jpg
    IMG_5594.jpg
    115.8 KB · Views: 661
Great build I enjoyed reading it. I'm down in the Renton area and just picked up my second 4runner 97 Limited almost two weeks ago. I sold my 99 a year and half ago and regretted it ever since. I went with a Billstein/Tundra coils/ OME906 lift.
 
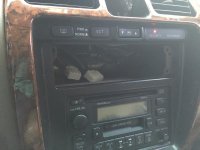
Climate Control

Well, finally pulled the trigger on getting the climate control fixed. I read on a couple other threads that some guys have pulled their's apart and just soldered a couple things and got it working again. I opened my unit up, took one look and said, "nope".

Off it goes to get fixed! Found a guy on ebay that will repair it for $48 which was a steal. He also offered an $11 upgrade for those who wanted LED lights exchanged. I didn't care about changing the color and so I didn't go for that option. I'll give an update once it's back and installed.
IMG_5878.jpg
 

Attachments

  • IMG_5878.jpg
    IMG_5878.jpg
    136.3 KB · Views: 488
Plate Winch Bumper

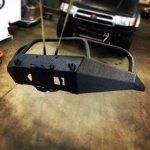
Well, it finally happened. I found a plate bumper on craigslist for a really good deal that I couldn't pass up. Here she sits...
IMG_6328.JPG
IMG_6321.jpg
IMG_6317.jpg
I'll post up more pics once I have it mounted. I've got some cutting and welding that needs to happen first.
 

Attachments

  • IMG_6328.JPG
    IMG_6328.JPG
    81.4 KB · Views: 475
  • IMG_6321.jpg
    IMG_6321.jpg
    128.4 KB · Views: 471
  • IMG_6317.jpg
    IMG_6317.jpg
    136.4 KB · Views: 465
Well, it finally happened. I found a plate bumper on craigslist for a really good deal that I couldn't pass up. Here she sits...

I'll post up more pics once I have it mounted. I've got some cutting and welding that needs to happen first.

Is that one of those NWTI bumpers that's always on craigslist?
 
No... this one is a little different. NWTI always has their little logo cutout - but then again, probably something similar. Looks and feels like an ARB - very solid build. I also can't remember if you have to modify your bumper rails for the NWTI bumpers but for this one, I do. Can't wait to get this thing mounted!
 
Bumper Installed

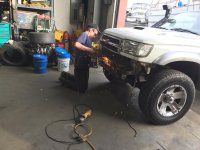
Well, finally got the bumper installed. Took about 4 hours... the guy I bought it from was super cool about the doing the install for me. Amazing what having a shop with all the right tools can do for you.
IMG_6776.jpg

IMG_6786.jpg

IMG_6790.jpg

IMG_6793.jpg

IMG_6797.jpg

IMG_6795.jpg
 

Attachments

  • IMG_6776.jpg
    IMG_6776.jpg
    134.9 KB · Views: 398
  • IMG_6786.jpg
    IMG_6786.jpg
    124.9 KB · Views: 402
  • IMG_6790.jpg
    IMG_6790.jpg
    127.8 KB · Views: 427
  • IMG_6793.jpg
    IMG_6793.jpg
    137.1 KB · Views: 433
  • IMG_6795.jpg
    IMG_6795.jpg
    131.6 KB · Views: 422
  • IMG_6896.jpg
    IMG_6896.jpg
    137.3 KB · Views: 402
  • IMG_6797.jpg
    IMG_6797.jpg
    132.9 KB · Views: 407
Last edited:

Members online

Forum statistics

Threads
278,307
Messages
3,554,054
Members
248,016
Latest member
Advally Service

Trending content

Back
Top