• If you plan to post to Classified forums, you must follow these rules, or your post will be deleted.

    1. Thread title must include at a minimum: FS or FT, Item(1st, 2nd, 3rd, 4th or 5th gen), Price and Location. For Example: FS: 4th GEN Carpet Floor Mats - Tan, $50 Denver, CO.
    2. All Threads must contain the following information
      • What is for sale/trade (model, specs, etc.)
      • Condition
      • Price/What you want to trade for
      • Location of item
      • At least one picture of the item for sale or for trade
    3. No "Feeler" Threads - Its either for sale or it isn't.
    4. Moderators lock Classified Threads that have not had any activity in 90 days or when the part is announced SOLD.
    5. Threads not complying with the rules will be deleted without notice.

LED Lighting Kits

4.Lava rocks - 5th gen 4Runner under hood lights (warm white) both switches

5.Ohio_Steve, 5th Gen Hood Kit, warm white, manual switch

6.Panman, 3rd gen Hood Kit, white, manual switch

7.ggferrier, 3rd gen (sport hood, need a beta?), white, manual switch under the hood.

8.the great him, 3rd gen and GX470, white, dual swtich both sets

9. NZDZRT, 5th gen hood kit, manual switch, warm white

10.toy4runner - 4th gen 4Runner under hood lights, warm white with both switches
 
5.Ohio_Steve, 5th Gen Hood Kit, warm white, manual switch

Dane,

I'm going to have to back out. I'm buying an ARB Fridge, and need to stop spending on a 4Runner I don't even have yet. Thanks, and sorry for any trouble I've caused. If you've already got it made, #9 [MENTION=123266]NZDZRT[/MENTION] is asking for the same thing.

Steve
 
Dane,

I'm going to have to back out. I'm buying an ARB Fridge, and need to stop spending on a 4Runner I don't even have yet. Thanks, and sorry for any trouble I've caused. If you've already got it made, #9 [MENTION=123266]NZDZRT[/MENTION] is asking for the same thing.

Steve
I totally understand. I deff want an arb fridge. Just when ever your ready again, let me know. I'm not going anywhere.[emoji56]
 
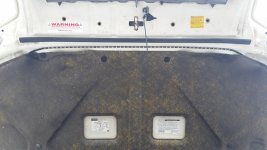
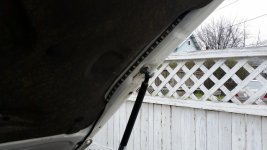
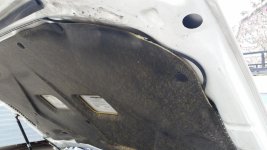
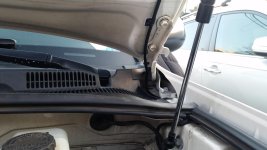
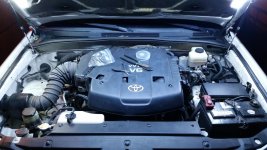
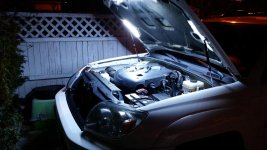
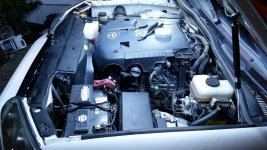
Here is a pic of the hood lights installed. They are crazy bright and extremely well made. I'll post more about the install in a new thread
e2eb120fbd054ce3e2a31e1816da0914.jpg
1c7a52fe6b7910f276f1a54add346947.jpg
 
4.Lava rocks - 5th gen 4Runner under hood lights (warm white) both switches

5.Ohio_Steve, 5th Gen Hood Kit, warm white, manual switch

6.Panman, 3rd gen Hood Kit, white, manual switch

7.ggferrier, 3rd gen (sport hood, need a beta?), white, manual switch under the hood.

8.the great him, 3rd gen and GX470, white, dual swtich both sets

9. NZDZRT, 5th gen hood kit, manual switch, warm white

10.toy4runner - 4th gen 4Runner under hood lights, warm white with both switches

11. wmiranda, 4th Gen (2004) Limited V8, Hood Kit, warm white, both switches please. No rush. Enjoy your vacation.
 
Put me in for the Hood and Rocker Kits,

3rd Gen 4runner,

Any wiring diagrams for both kits? , still have to figure out how to wire the Rocker Kit with the Dome lights or when the car is unlocked.
 
Put me in for the Hood and Rocker Kits,

3rd Gen 4runner,

Any wiring diagrams for both kits? , still have to figure out how to wire the Rocker Kit with the Dome lights or when the car is unlocked.

The hook kit is easy because everything is right there. Your just connecting the red to the battery and the black to the underside of the hood pin. He sends out instructions that cover everything. Here's where I put the pin under my hood.
9b5af28961ec08306a8f75dd99839a03.jpg

As for the rocker kit I asked the same about them coming on when the runner is unlocked and it gets complicated fast. He only supplies the leds and wire harness with switch so anything more then that is on your own. If you do get this working please post details.
 
The hook kit is easy because everything is right there. Your just connecting the red to the battery and the black to the underside of the hood pin. He sends out instructions that cover everything. Here's where I put the pin under my hood.
9b5af28961ec08306a8f75dd99839a03.jpg

As for the rocker kit I asked the same about them coming on when the runner is unlocked and it gets complicated fast. He only supplies the leds and wire harness with switch so anything more then that is on your own. If you do get this working please post details.

Wow, thats such a great idea! Is that the same switch that will be comming with the LED hood kit?, so when you open it up it just turns on?

Yeah I bet it would get complicated fast, I can't even think of a way to wire it to turn on when i unlock the car, but synchronizing it to the dome light i guess would just be somehow connect the wire to the dome light fuses.
 
Wow, thats such a great idea! Is that the same switch that will be comming with the LED hood kit?, so when you open it up it just turns on?

Yeah I bet it would get complicated fast, I can't even think of a way to wire it to turn on when i unlock the car, but synchronizing it to the dome light i guess would just be somehow connect the wire to the dome light fuses.
Yeah that's the switch that comes with it and you'll get all the connectors as well. Real easy job. If you add a switch then you'll have to spice that in and mount it somewhere. Personally if I wanted the lights off with the hood open id just pull the wire from the hood pin or pull the fuse.
 
My installation experience, instructions -4th Gen -- & endorsement of the kit!

Dane,

I finished installing my kit this Thursday, and I love it.
I wanted to let everyone know that it's incredibly well made, and of high
quality. Thank you, Dane.

THIS KIT HAS MY HIGHEST ENDORSEMENT.


With that said, I wanted to share a few issues that I dealt with during my installation. THESE WERE NOT DANE's fault, rather they were a few SMALL problems that I had, and a few small mistakes that I made.

So, I thought I would post about my particular issues, and try to write up instructions on the installation to save others from my silly mistakes, and to clarify the small confusions that I had.

Let me repeat. THIS IS NOT A CRITICISM. DANE MAKES AN INCREDIBLY HIGH QUALITY KIT, AND I RECOMMEND IT, WITHOUT RESERVATION, IF YOU WOULD LIKE A LIGHT UNDER YOUR HOOD. This is the best you can get, and it is awesome.

With that endorsement plainly stated. Below were my experiences along with my humble attempt to document installation instructions.

Issue 1) I wasn't sure how everything hooked up. I consider myself a sharp guy, but I was a little confused at first. I soon figured it out, but I'm also adding this write-up in case others are similarly confused.

Status: SOLVED.

Issue 2) I had trouble with the high quality female crimp on spade connectors in the kit.

For the female, crimp on spade connectors, every one that I crimped either wasn't tight enough, or was so tight that it broke off the wire. I *thought* I was good at this. I have two of your more common "cheap" crimpers, and one high quality, rather expensive crimper.

When I tried the cheap crimper, the wire was thin, and the connector was loose.

When I used the high quality crimper, the soft thin wire broke off inside the connector. I just couldn't get it right!

I ended up using my own, cheaper crimp on connectors and high quality electrical tape to seal it. I'll probably go back and apply heat shrink over everything including the tape.

I don't know why I had this trouble. I'm serious when I say that Dane supplied high quality crimp on connectors. His are the more expensive kind that include heat shrink tubing built onto the connector so that you can have a good, watertight connection, but for some reason I had problems with the ones that were provided.

Status: SOLVED. (I used cheaper connectors that worked for me.) :-)

I'd like a kit for a 4th gen.

I'd like to request that my kit have BOTH a hood pin AND a toggle switch... thus the light will turn on and off when the hood is open and closed, but I'll also have a toggle switch to permanently turn it off... that way I can't forget and leave the light on with the hood closed, but I can also use the toggle switch to keep the light off, so I can open the hood and not look like a light house when I'm outdoors!

It's fine for the toggle switch to mount under the hood. That keeps it simple.

Thanks for the kit with both switches.

I'll chime in below with a few installation tips.

Yeah that's the switch that comes with it and you'll get all the connectors as well. Real easy job. If you add a switch then you'll have to spice that in and mount it somewhere. Personally if I wanted the lights off with the hood open id just pull the wire from the hood pin or pull the fuse.

So I consider myself a bright guy, but it took me a while to figure out what to do. Of course, going to the truck and loosely laying everything around and looking under the hood helped clear up A LOT for me.

The hook kit is easy because everything is right there. Your just connecting the red to the battery and the black to the underside of the hood pin.... Here's where I put the pin under my hood.
9b5af28961ec08306a8f75dd99839a03.jpg

[MENTION=69687]Tucson4runner[/MENTION] is correct.

--> Step 1: TEST FIT) -- look under your hood with your kit in hand, and loosely hold the kit up to see where it will mount.

--> Step 2: CLEANING PREP) -- Clean the mounting surfaces well with alcohol or mineral spirits, or windex, etc, so that you aren't trying to stick to a dirty surface.

--> Step 3: INSTALL CENTER LIGHT STRIP) -- Locate the center part of the center light. Hold your finger there as a way of marking that spot. Pull the backing off starting at the center, and you can apply the center piece starting from the center of the hood. Pay attention to run it so that your hook up wires will end up on the side of the truck near the battery.
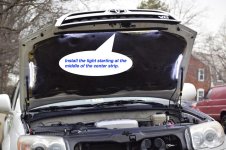
4R_03_CenterLight.jpg

--> Step 4: PLAN AND ROUTE SIDE LIGHTS) Determine how you want to route the wires connect to the two side light strips. I decided to snake them behind the hood pad myself, although based on the length of the wires, it seems that it was intended for the wires to simply go around the edge of the hood. NOTE: I didn't realize that the hood pad will crumble easily. It's almost like well-baked cardboard. Now I know. Don't try to take the pad off, ir fit your hand behind it. If you do go behind the hood pad, use the light strip itself to fish the passenger side behind the pad.

On the driver's side, use the wires, or choose your favorite "fish tape" type of solution, and temporarily connect the wire to it via duct tape or any other suitable means to fish the wire and the light strip behind the hood pad on the driver's side.
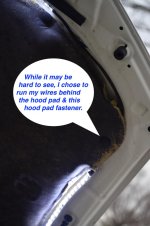
4R_04_routeSideWires.jpg

--> STEP 5: INSTALL SIDE LIGHT STRIPS )
This is dog-simple. Peel the backing off each side (one at a time), and stick them where they below.

--> Step 6: INTALL 2 to 4 OF THE ZIP TIE SUPPORTS ) You want to peel the backing off the small plastic squares, and stick them where they can support the wires for the two ends of the center light strip. Mount the supports so that they will not have interference when you close the hood. Use the zip ties to secure the wires to these parts.

--> Step 7: RUN THE WIRE INTO THE ENGINE BAY )
I decided to run my wire though an existing slot in front of the windshield.
On the driver's side of the firewall, there is an existing wire that runs into that space, and about 1.5" or so rubber plug that the wire runs through. I decided to remove this plug, and run my wires through it too. It was difficult to remove the electrical tape on the back of this plug and not worth it to me to put in the time, so I used a small knife to make a new slit in the rubber, and with some stretching and pulling on the rubber of the plug and some needle nose pliers, I was able to fish the wire and it's looming through the rubber plug. Leave a enough free play so that you aren't straining the wire when the hood if fully opened. Then put the plug back.
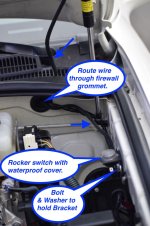
4R_07_RouteToEngineBay.jpg

--> Step 8: IF YOU HAVE A TOGGLE SWITCH, MOUNT THE BRACKET FOR IT)

I did a test fit of the switch into the bracket. I decide to cut a small notch in the plastic mounting bracket to accommodate the small notch on side of the switch. Put the washer on the bolt and feed it through the hole in the switch bracket. Use a wrench or ratchet (preferred) or pliers to thread the bolt into a pre-existing threaded hole on the inside of the engine bay on the driver's side of the engine bay wall. My hole had factory paint in the threads, so I needed to use hand tools, even to get the bolt started, but it wasn't hard. I just turned it slowly by hand, and the bolt screwed in, clearing the threads of the paint as I screwed it in.

--> Step 9: PLAN WHERE YOU WILL ROUTE YOUR POWER WIRES AND GROUND WIRES) Look, lay it out, and think about it.


--> Step 10: INSTALL YOUR POWER WIRE & SWITCH)

Simply run the wires straight along the driver's side of the inside of the engine bay. If you do this, the wire looming will easily reach to a good location where you intend to ground the circuit. If you have a switch, you need to make a hole in the looming below the switch, separate the end of the red wire from the black wire, and pull the red end through the hole in the looming.

Now you can leave an inch or two of length on the red wire, and cut it, and attach the crimp on connectors to the red wire. THE CRIMP ON CONNECTORS SUPPLIED ARE A GOOD KIND (they have heat shrink tubing built on to them), but I couldn't use them -- or I was using them improperly. I tried using my crimpers, and everytime I tried it failed to connect the wire. I end up using my own inferior crimp on connectors, and good quality electrical tap to wrap them carefully so they are weather tight.

FOR THE SWITCH ROCKER SWITCH
-- it comes with a nice, water proof cover. I hadn't used one before, so I kept trying to install it the wrong way. Here's the scoop. It's easier than I thought. The water proof cover has a small, split lip around the edge. This split lip fits snugly over the bezel built onto the switch. Pull the two ends of the red wire through the hole, and hook the wires up to the switch -- the center connector and one of the ends, and the gently push the switch into the mounting hole, so that the wires come out the bottom.
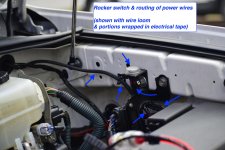
4R_10_RockerSwitchAndWires.jpg

--> STEP 11 INSTALL YOUR FUSE) Cut the red wire on the fuse. I left about one inch of wire on one side, so that their was a longer piece of wire on the other side. Strip a little wire and crimp the ring connector on the the long end of the wire. Strip a little of the other end, and the end of your power wire, and use the crimp-on butt connector to connect these two ends together.

I then used electrical tape to wrap a protective layer around all of the exposed parts of the red power wire. This is just to give the wire's sheath some protection against drying, cracking with age and rubbing.

PUT THE FUSE IN THE FUSE CONNECTOR, route the red wire, and connect the ring at the end to your positive battery terminal.
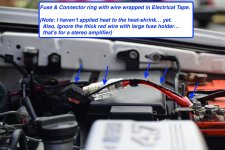
4R_11_PwrWithFuse.jpg

--> Step 12: INSTALL YOUR GROUND WIRE & CONNECTOR OR SWITCH)
If you don't have a hood pin, then apply the crimp on ground ring, and ground it either directly to the negative side of the battery, or by bolting it to bare metal somewhere appropriate on the chassis.

If you have a hood pin switch, find a suitable location to mount it, drill a hole if necessary or otherwise prep the location, and the mount the hood pin switch.

I partially removed the plastic trim along the front edge of the engine bay. I did this by using a small flat blade to pop up two the black "push pin" connectors that held it on. This allowed me to lift up enough of the trim to see what was under it. Near the driver's side edge of the trim, hidden by the plastic itself, there was an existing, unused hole that was a good size for the hood pin switch. I trimmed off a semi-circle from about the last 1 inch of the plastic trim. This allowed access to the hole, even when the trim is re-installed.
I used a small knife, and carefully removed the paint right around the hole, so that the hood pin & it's start washer would contact bare metal.
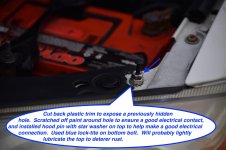
4R_12_1_hoodPinSwitch.jpg

Then I used blue lock-tite on the threads of the hood pin, and installed the hood pin in the hole, using two sets of pliers to tighten it down securely. (one set to hold the nut underneath, and the other needle nose set to tighten the nut on top that was closest to the truck's frame.

Then install a crimp connector to the end of the ground wire. Use heat shrink or electrical tape to neatly seal the wire looming to the crimp connector, and plug the ground wire connector onto the bottom flat spade of the hood connector. The hood pin will now connect to ground when the hood is open, completing the circuit so that your light can come on, and it will disconnect the ground when you close the hood, turning your light off.

I also looked at where the looming on the ground wire might rub against some metal on the truck's frame, and I wrapped several layers of electrical tape around the outside of the looming for about two inches near the part that might rub.
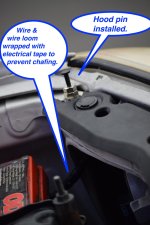
4R_12_2hoodPin.jpg

--> Step 13 CONNECT THE REST OF YOUR FASTENERS ) Use the rest of your zip ties and stick on fasteners to secure your wires. Trim the loose ends with wire clippers.

--> Step 14 APPLY HEAT TO ALL HEAT SHRINK CONNECTORS OR HEAT SHRINK TUBING IF YOU USED ANY) I used a heat gun.

--> Step 15 TEST YOUR SYSTEM & FIX ANYTHING YOU MISSED )
Test your system. With the hood open, the light should be on. If you have a rocker switch too, in one position the light should be on when the hood is open.
In the other position, the light should be permanently off. When you close the hood, make sure that the hood pin turns off the light by disconnecting the ground.

 

Attachments

  • 4R_03_CenterLight.jpg
    4R_03_CenterLight.jpg
    113.8 KB · Views: 498
  • 4R_04_routeSideWires.jpg
    4R_04_routeSideWires.jpg
    73.4 KB · Views: 501
  • 4R_07_RouteToEngineBay.jpg
    4R_07_RouteToEngineBay.jpg
    103 KB · Views: 1,181
  • 4R_10_RockerSwitchAndWires.jpg
    4R_10_RockerSwitchAndWires.jpg
    125.4 KB · Views: 519
  • 4R_11_PwrWithFuse.jpg
    4R_11_PwrWithFuse.jpg
    129.9 KB · Views: 498
  • 4R_12_1_hoodPinSwitch.jpg
    4R_12_1_hoodPinSwitch.jpg
    131.8 KB · Views: 514
  • 4R_12_2hoodPin.jpg
    4R_12_2hoodPin.jpg
    125.9 KB · Views: 664
Last edited:
Great reviews on the kits. I have instructions for the tacomas, similar as any hood kit I will provide. Yes ive come to notice those female connectors can get to me at times as well. I'm glad the kits are working out great. I will chime back in here later when I get a free min to go over every post individually. Thanks everyone
 
Great reviews on the kits. I have instructions for the tacomas, similar as any hood kit I will provide. Yes ive come to notice those female connectors can get to me at times as well. I'm glad the kits are working out great. I will chime back in here later when I get a free min to go over every post individually. Thanks everyone

Thanks again, Dane. I really like the kit.

I also updated my previous post. It now includes lots of photos with arrows and captions.

I think these would serve as pretty thorough instructions for anyone doing an install on a 4th gen 4Runner.
 
Thanks again, Dane. I really like the kit.

I also updated my previous post. It now includes lots of photos with arrows and captions.

I think these would serve as pretty thorough instructions for anyone doing an install on a 4th gen 4Runner.
Great! And thanks for those instructions. How did you like the length of the light strips and wife's connecting those strips together? I got some very detailed measurements from the member who was the beta and they couldn't be anymore close to being perfect with what he provided.
 
Great! And thanks for those instructions. How did you like the length of the light strips and wife's connecting those strips together? I got some very detailed measurements from the member who was the beta and they couldn't be anymore close to being perfect with what he provided.
The length of the lights were spot-on, and the connections, the wire looming, and the way it was sealed to the lights is truly an A-1, professional job.

These are of a high quality, like they came out of a good factory and were manufactured for the truck. Nothing about them seems home-made, the least bit sloppy or unprofessional in any way.

A big kudos to your wife for perfect work.


(P.S. You can paypal my endorsement fee. I usually get $10K per gig, but
I'll give you a discount since I genuinely like the product. :fish: )
 
Kit installed

I was lucky to be able to help with some beta fitting.
No doubt as the others mentioned this is a stellar kit and the output is just perfect for most anything you would need to do under the hood at night.

This is on a 2005 SR5 V6 4wd...you may have different holes or things depending on year.

Pjbrownva covered most of the details in his post...just make sure to wipe it all down and then use rubbing alcohol to clean residue from the led strip areas.
Instead of the starting in the center, I start at one end of the strips and peel back just a bit of the sticky back paper and then press the strips on removing the paper as I go little by little.


LED strips are the perfect length.

Upper

Upper strip.jpg


Drivers side

drivers side.jpg

I laid everything out and sort of test fit to make sure the lengths were all correct and then started by applying the passenger side first. Then just stuffed the wiring up and behind the hood matting. If your under-hood mat is still in good shape do not touch it or try to remove it. It will crumble. The wire loom will sit between the mat and the hood no problem without need any sort of tie-down (at least mine does)

I left some sticking out in this photo so you can see how it fits nicely in there.

20160319_135406.jpg


Don't be afraid to have someone help you or use masking tape to help support the wire loom and led strips during install. That 3M VHB tape likes to stay sticking once it's been stuck!


After the strips were installed I routed the loom down along the hinge using one of the sticky back tywrap tie-downs and a supplied zip-tie to an existing hole in the hinge then was able make a large radius bend and bring the loom back toward and into the engine bay.

at hinge.jpg


I thought about going through the hole behind the hinge a little closer to the A-pillar and then routing it through the wiper motor area and out the rubber plug in the firewall but did not feel like removing the plastic grating/cover and/or fishing it all through.
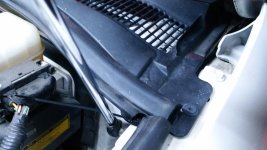
I was able to just route it under the drivers side edge of the plastic cover and hood gasket then wrap it back behind the hood strut and down to a factory loom along the drivers side inner fender. There is actually a sheet metal bend in here that the wire loom sits under to help protect it. Can't see it in the photo but it's super easy to just lift the edge of the plastic cover and feed the end of the loom through and out into the engine bay.

at hinge 2.jpg


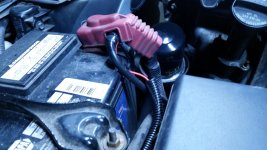
From here I just followed the factory wiring using tywraps to the battery and made my connections.

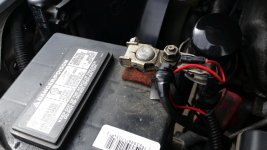
Initially I connected my red +12v directly to the positive battery terminal as designed and it works great. I used some electrical tape on the ring terminal here since I got the the heat shrink too hot and it split...totally my fault wasn't paying attention and using a too large of a torch.

20160319_135532.jpg


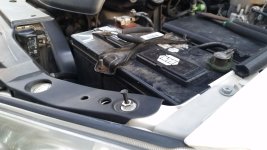
The hood pin switch is easy as pie to install. I popped out the little factory plastic hold down for the upper radiator support cover trim and installed it there. I tried it in a couple of the other holes here but didn't like the interference with the headlight directly beneath it. In this hole the pin switch is angled just slightly to avoid hitting anything and you don't have to cut or drill any additional holes. Choice!
I had to use a washer on top because the hole in the plastic is oversize, but this switch is sitting directly on top of the sheetmetal with the star washer and one nut to tighten it all together underneath. The pin switch comes with 2 nuts so you can adjust the height of the pin switch but I found that it was not necessary in this location to try to raise the switch up.

20160319_192413.jpg

I think that pretty much covers the install. It's simple. If you know how to use wire crimpers and know which battery terminal is positive you should be able to install this.


Output shots and misc in next post...
 

Attachments

  • Upper strip.jpg
    Upper strip.jpg
    134.6 KB · Views: 460
  • drivers side.jpg
    drivers side.jpg
    135.6 KB · Views: 483
  • at hinge.jpg
    at hinge.jpg
    125 KB · Views: 473
  • at hinge 2.jpg
    at hinge 2.jpg
    130.6 KB · Views: 459
  • 20160319_135532.jpg
    20160319_135532.jpg
    134.1 KB · Views: 461
  • 20160319_192413.jpg
    20160319_192413.jpg
    126 KB · Views: 465
  • 20160319_135406.jpg
    20160319_135406.jpg
    136.3 KB · Views: 470
Last edited:
Output shots. These lights are just right. Photos taken at night.

Front
20160315_202222.jpg

Side
20160315_202237.jpg


Side again
20160315_202325.jpg

A close up to show with lights on
20160315_202536.jpg


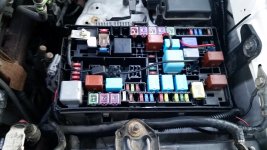
So, in my previous post I showed the red +12v wire attached directly to the battery post. Being the perfectionist, anal retentive person that I am I wanted the fuse holder and wiring to be hidden so I put it in the factory fuse box. This is not how the kit is designed, this is just my mod to do it my way.

I just pulled power from an empty spot in the fuse box with a spade connector and ran the red+12v wire up where the alternator ( I think it's the alternator wire) comes into the fuse box from the engine. The other red wire in there is for the '12v on all the time' mod or maybe it's the fog light mod, I don't remember.

20160319_192551.jpg
 

Attachments

  • 20160315_202222.jpg
    20160315_202222.jpg
    138.8 KB · Views: 457
  • 20160315_202237.jpg
    20160315_202237.jpg
    132 KB · Views: 475
  • 20160315_202325.jpg
    20160315_202325.jpg
    143 KB · Views: 473
  • 20160315_202536.jpg
    20160315_202536.jpg
    135.7 KB · Views: 466
  • 20160319_192551.jpg
    20160319_192551.jpg
    137.2 KB · Views: 457
Last edited:
I need to do the 12v anytime mod on my vehicle. Lol

Thanks for all the output shots. Will start using them in the first post
 

Members online

No members online now.

Forum statistics

Threads
278,309
Messages
3,554,071
Members
248,016
Latest member
Advally Service

Trending content

Back
Top