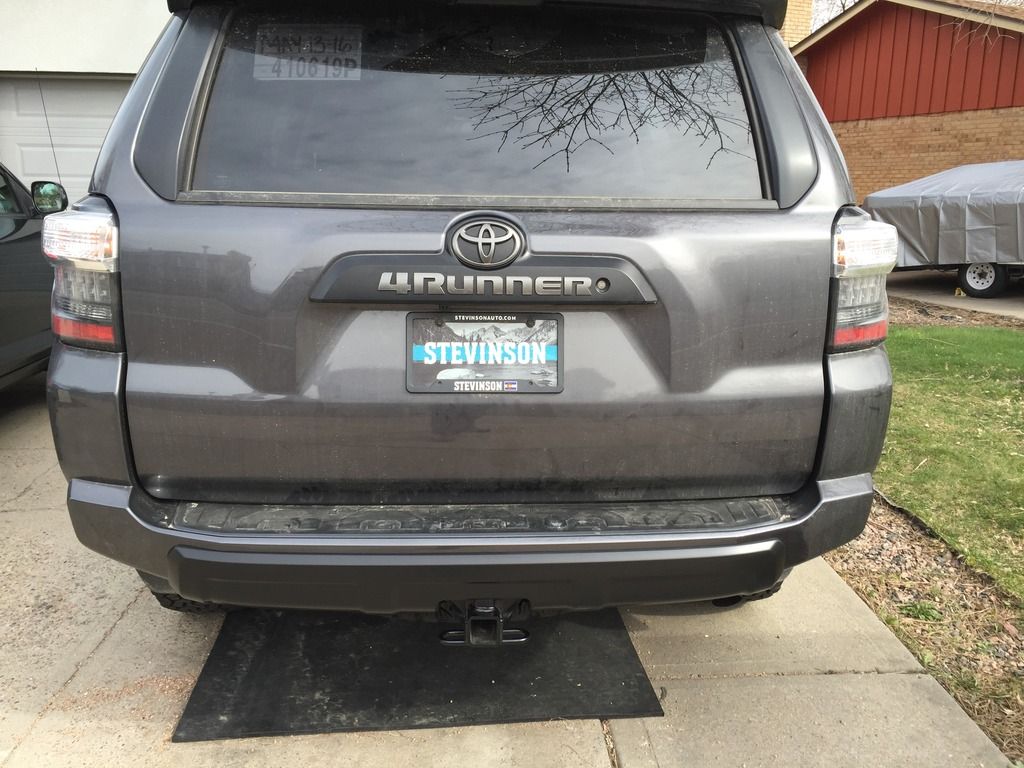
Liquidmantis's modest [boring] build thread

I'm new to this so I'm just starting trail hunting myself. Give a heads up when you're headed this way though as there a several of us in the general area and we could probably get a little 'Runner outing.

Thanks! I definitely like looking at her, admittedly I haven't done much more than make her into a TEP Pro so far.
.

I'm headed out for the month of June but afterwards Let me know if you want to hit some trails sometime in the truck, or even a dual off-roading/biking outing. I'm sure [MENTION=129019]IMun2VnM[/MENTION] might be up as well. I've hit a lot of the easy runs south of I70 and have been exploring more moderate stuff since I bolted all this steel armor on.
 
Just for clarification. That's NOT my house haha. That's my aunts house. $$$$$$$$$$$$$$$


2016 SR5P 4wd - FN wheels countersteer X - 265/70 BFG KO2 - Bilstein 5100 (1.75 setting) - NFab side steps - TRS Morimoto 4300k HID kit - NOKYA yellow fogs & DRLs
 
I'm headed out for the month of June but afterwards Let me know if you want to hit some trails sometime in the truck, or even a dual off-roading/biking outing. I'm sure [MENTION=129019]IMun2VnM[/MENTION] might be up as well. I've hit a lot of the easy runs south of I70 and have been exploring more moderate stuff since I bolted all this steel armor on.

Sounds good! I'm finally riding regularly again but this winter was hard on me and I'm in seriously shitty shape. But I'm back to training now hoping to salvage this season yet.
 
I'm headed out for the month of June but afterwards Let me know if you want to hit some trails sometime in the truck, or even a dual off-roading/biking outing. I'm sure [MENTION=129019]IMun2VnM[/MENTION] might be up as well. I've hit a lot of the easy runs south of I70 and have been exploring more moderate stuff since I bolted all this steel armor on.
Runner is looking good [MENTION=138432]Liquidmantis[/MENTION]! Yep. Dying to get some wheeling and Mtn biking in. I really need some sliders now. Headed to Grand Junction this next week for work,hoping to get quite a bit of saddle time in Fruita.(Horsethief Bench is one of my favorite rides). But would love to run some trails near home after that.
 
She needs a wash but today I Plastidip'ed the Trail silver valance and knocked out the chrome. For the chrome I sprayed four coats of matte black Plastidip then two more with the graphite metalizer. I think it's a great match for the TOYOTA badge on the front TRD Pro trim.

2016-04-08%2016.25.41_zpsqamq3e5c.jpg~original


Interested in how you did the plastidip and metalizer. I was thinking of something similar. And this looks so good on the Metallic Grey (I JUST) got one yesterday!

Can you spray the metalizer over the plastidip and peal away? Or did you mask the letters and logo perfectly?
 
Interested in how you did the plastidip and metalizer. I was thinking of something similar. And this looks so good on the Metallic Grey (I JUST) got one yesterday!

Can you spray the metalizer over the plastidip and peal away? Or did you mask the letters and logo perfectly?

Thanks! And congratz on your new baby.

So yeah, the metalizer just goes on the Plastidip like another layer. In my experience Plastidip works out much better if you don't try to mask close and just give it a modest border like the DipYourCar Youtube videos show. When there's any gap at all the Plastidip "self-cuts" and with a bit of care you just peel right off the surrounding area. The metalizer is thin, so spray it like a regular spray paint as it will try to run otherwise. Once everything is dry, just peel up the excess Plastidip "border" and the metalizer overspray comes off with that.
 
Thanks! And congratz on your new baby.


So yeah, the metalizer just goes on the Plastidip like another layer. In my experience Plastidip works out much better if you don't try to mask close and just give it a modest border like the DipYourCar Youtube videos show. When there's any gap at all the Plastidip "self-cuts" and with a bit of care you just peel right off the surrounding area. The metalizer is thin, so spray it like a regular spray paint as it will try to run otherwise. Once everything is dry, just peel up the excess Plastidip "border" and the metalizer overspray comes off with that.


Ok awesome. Thanks for the clarification. I've been watching a lot of the videos and will hopefully do this next week.

Last question for you.

Am I correct that you did one round of just black plastidip over the entire area (all the chrome and the logo/letters), peeled it away from the paint.

Then went back and sprayed metalizer just on the letters & logo (on top of the black plastidip) and then peeled the metalizer off of everything except the logout & letters?

I hope that question made sense...

Thanks again.


Sent from my iPhone using Tapatalk
 
Am I correct that you did one round of just black plastidip over the entire area (all the chrome and the logo/letters), peeled it away from the paint.

Then went back and sprayed metalizer just on the letters & logo (on top of the black plastidip) and then peeled the metalizer off of everything except the logout & letters?

No, no. You want to leave the Plastidip as effectively a liquid mask. So I did a rough mask with newspaper and tape, leaving an inch or so around the area I wanted to 'Dip. The paper-and-tape mask is just so you can spray a nice clean border that you remove at the end by peeling and don't have an overspray mist to deal with. I did four coats of plastidip, enough to build up a solid, even coat and an easily pealed border (less spray is harder to remove). Then, before doing anything else, I just did a couple coats of the metalizer, but lighter coats and without the heavy spray to the tape line. Once it was dried I then peeled up the paper and tape, then finally peeled up the Plastidip border which takes care of any metalizer overspray too.

Also keep in mind that the Plastidip coats need to go on heavier than you think. That's how it levels. If you go too light you'll build up a bit of an orange peel texture. It's not bad, like it is in paint, just different. If you want a smooth look you need to lay down fairly wet coats. The best thing is that the worst case scenario is you peel it all off and start over from a clean slate. It's not like botching a paint job that means tons of effort to clean up.
 
No, no. You want to leave the Plastidip as effectively a liquid mask. So I did a rough mask with newspaper and tape, leaving an inch or so around the area I wanted to 'Dip. The paper-and-tape mask is just so you can spray a nice clean border that you remove at the end by peeling and don't have an overspray mist to deal with. I did four coats of plastidip, enough to build up a solid, even coat and an easily pealed border (less spray is harder to remove). Then, before doing anything else, I just did a couple coats of the metalizer, but lighter coats and without the heavy spray to the tape line. Once it was dried I then peeled up the paper and tape, then finally peeled up the Plastidip border which takes care of any metalizer overspray too.

Also keep in mind that the Plastidip coats need to go on heavier than you think. That's how it levels. If you go too light you'll build up a bit of an orange peel texture. It's not bad, like it is in paint, just different. If you want a smooth look you need to lay down fairly wet coats. The best thing is that the worst case scenario is you peel it all off and start over from a clean slate. It's not like botching a paint job that means tons of effort to clean up.


Ok makes sense.

Thanks! I'll post a pic if I get it done this next week!


Sent from my iPhone using Tapatalk
 
Love you're thread. You and I are in the same page - not doing anything serious, just want a good expiration vehicle. I'll have my build thread started shortly.

You're truck is looking great man!
 
Love you're thread. You and I are in the same page - not doing anything serious, just want a good expiration vehicle. I'll have my build thread started shortly.

You're truck is looking great man!

Thanks! I need to stop slacking and process trip photos too. I know that while I enjoy a good build thread the "4Runner in its element" porn is what really motivates me. Now I just need to make some more trips!
 
Thanks! I need to stop slacking and process trip photos too. I know that while I enjoy a good build thread the "4Runner in its element" porn is what really motivates me. Now I just need to make some more trips!

I'm with you on that! Not much in the way of overlanding in Florida. Most of what we have are sand trails through pine forests. The kids and I have been loosely working on a trip to the smokey's this winter for some off highway exploring, adventuring and camping.
 
We are planning much the same for our vehicles. Any rubbing with the bigger tires?

275s seem to depend on your alignment. I get a bit of rub on the driver side in near full lock left when compressing or in reverse. I reduced it by reshaping the mud flap some with a heat gun. I could eliminate it by being more aggressive with the heat gun or just notching the "bubble" where the tire hits. But when I do my lift I'll most likely have Slee install it and they do a lifted-specific alignment for handling and tire clearance.

Edit to add that I will seriously consider 285s for my next set, post-lift. I think I've already seen the worst of the performance and MPG hit going to E load rated tires and the 285s are a modest upsize from the 275s. But it's enough to make a subtle visual difference and that 1/4" or so of radius should slightly help offset the loss of clearance from airing down.
 
Last edited:
275s seem to depend on your alignment. I get a bit of rub on the driver side in near full lock left when compressing or in reverse. I reduced it by reshaping the mud flap some with a heat gun. I could eliminate it by being more aggressive with the heat gun or just notching the "bubble" where the tire hits. But when I do my lift I'll most likely have Slee install it and they do a lifted-specific alignment for handling and tire clearance.

Edit to add that I will seriously consider 285s for my next set, post-lift. I think I've already seen the worst of the performance and MPG hit going to E load rated tires and the 285s are a modest upsize from the 275s. But it's enough to make a subtle visual difference and that 1/4" or so of radius should slightly help offset the loss of clearance from airing down.

285's for sure up next for me.

Also, not that I have a lot of spare time but I'd bet we could install that lift, I did new rear springs and shocks myself and it was suprisingly easy. I bet we could find another member or two to help for speed...
 
285's for sure up next for me.

Also, not that I have a lot of spare time but I'd bet we could install that lift, I did new rear springs and shocks myself and it was suprisingly easy. I bet we could find another member or two to help for speed...

That's an awesome offer! I'm not sure when I'll squeeze the lift into the budget right now. I'm also waiting for word on the 4Runner specific BP-51 package to see if I want to go that route.
 
I've finally done something new to my truck! Over the summer I've done a fair bit of travel, completely reorganized my basement and set up my electronic/hobby workshop, and have been busy with work so I haven't had time or budget to do anything to the 'Runner.

A week or so ago I replaced the stock battery with an Odyssey 34R-PC1500T and ran the ARB wiring harness to the back. I plan on redoing that with a 4 ga power "bus" to the back with a distribution block and reterminating the fridge harness to that.

I had been trying to come up with a way to secure the fridge and today I [mostly] finished up the installation. This was a bit of a rush because I leave out tomorrow to meet up with my brother in New Mexico. I'm going to see how I like the tie-down locations and after I get back from my trip I'll pull the plywood out and spray it with bedliner. I'm also going to see about setting some rivnuts to bolt it down so that I can remove the boondoggle of brackets and turnbuckles.

2016-09-10%2010.33.58%20HDR_zpsucgt3glr.jpg~original


2016-09-10%2011.02.01%20HDR_zpsyysga6fb.jpg~original


2016-09-10%2011.21.57_zpsmuwj2lp5.jpg~original


2016-09-10%2012.08.26_zpssyhzpvzi.jpg~original


2016-09-10%2012.25.08_zpsmalocxkv.jpg~original


Here I was trying out how secure I could get it with a trucker knot, which works awesome, so I may change the tie-downs to better accommodate that since I don't have a good way to use the cinch straps. This also shows the void left behind the seats which will hold my folding chairs and Crescent toolkit in daily "seats up" configuration.

2016-09-10%2012.27.28_zpsv9qqavv9.jpg~original
 
I like it! You WILL want a slide at some point, but just out of convenience. With what you have there you should be able to easily mount a slide on the plywood. Could always box in the fridge as well with a slide in that, probably wouldn't get two of those bins side by side any longer. Would be a lot cheaper than that drawer system you are looking at (not as nice, but cheaper!)

I'm still debating how I want to put in a slide, boxed in or just on plywood. I still want third row access and to take it out in the winter.
 
Thanks! Even adding just the slide would break the bin system. There's no room to spare right now. My current thinking is that instead of rushing on the drawers and slider I'll get the Gobi first. Then when I put the fridge on a slide I can just shift the displaced bins to the roof. If/when I get drawers that will hopefully replace two of the bins anyway.

Current four bin load plan:

- "Truck" box - the EDC bin
--- recovery gear
--- tire kit (plug tools, air down/up accessories)
--- cordage, tarps, duct tape, gloves, zip ties, first aid and SHTF stuff
--- jumper cables
--- axe

- Cook box
--- The grab'n'go box for picnics or camping
--- paper plates, towels, silverware
--- cooking accessories
--- trash bags
--- misc.

- Camp box
--- camp kitchen
--- camping accessories
------ tent stakes, mini broom
------ lantern mantles
--- etc.
--- "pantry"

- Clothes and personal items

For camping with the family the "clothes bin" would be replaced with a dedicated pantry bin. But camping with a family of four plus dog requires either a roof rack or rear cargo carrier. In the past I used a large Yakima roof box for all the soft gear. With a Gobi my plan is to use the bins on the roof and keep the soft gear inside.
 

Members online

Forum statistics

Threads
278,310
Messages
3,554,077
Members
248,016
Latest member
Advally Service

Trending content

Back
Top