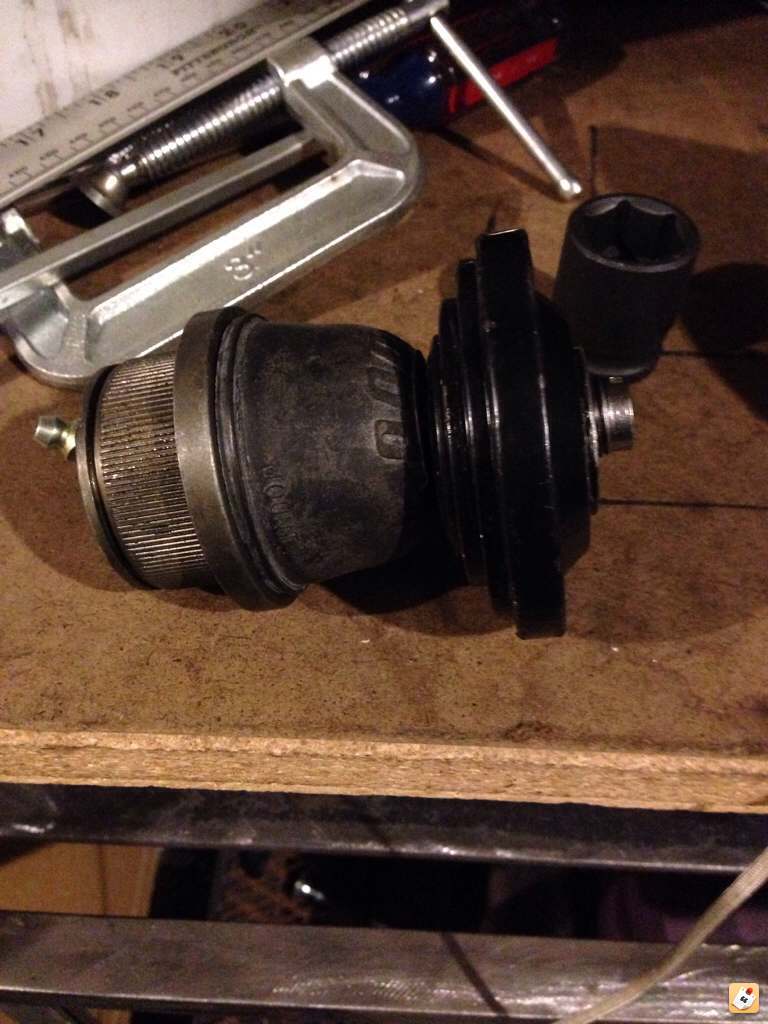
lower ball joints

bubba 10

New member
Lower ball joints are worn out. In looking at them, it appears that they can be removed with a puller. However, The dealership says they usually replace the entire control arm. They also said that you can't just buy the ball joint, that another part must be used. Has anyone done this repair? 2004 4runner sr5 v-6. 138000 miles.

 
Register to hide this ad
have you checked to see if the ball joints are sold seperately? i know the uppers can be purchased, but not sure about the lowers. Might want to check that first because your only option might be complete lower control arms.

My old Lexus Sc400 had worn ball joints and both Toyota and aftermarket did not sell the part seperately.
 
I was in your boat not too long ago. Had a tear in the front passenger lower ball joint boot. I began pricing my options on whether I wanted to replace the entire control arm or just the ball joint, assuming it was possible. After looking around, I found a few sites/links discussing how the remove the ball joint (ttora.com); certainly a lot cheaper than buying a whole new control arm, running about $150-$400 depending on whether you buy OEM/after. I almost considered doing the work myself and bought some new greasable ball joints from RockAuto (MOOG Part # K500017).

I ended up going to the dealer and using my Extra Care warranty, paid $50 (deductible) for a new control arm. I'm in the process of returning the ball joints.

http://www.toyota-4runner.org/suspension/75485-replacing-lower-ball-joint.html

DIY LCA Ball Joint Replacement 2005+ Tacoma - TTORA Forum
 
Lower ball joint

Finally replaced lower ball joints 2004 sr5. After fabricating some tools, was able to press out and in with extreme difficulty. 8 hours later, done. This can be done, but is not easy.
 
Finally replaced lower ball joints 2004 sr5. After fabricating some tools, was able to press out and in with extreme difficulty. 8 hours later, done. This can be done, but is not easy.

The lower ball joints are a PITA for sure, having a good press can make the job less pain staking. Main PITA for me was to get all the cam lobe bolts out of the lower control arms to get the LCA's out just to do the rest of the work on a work bench and press. I'd def recommend just purchassing the ball joints as you have the option to purchase a better qaulity also greesable product, than OEM. If you dont have the tooling to press out the old ball joint and press in the new one, simply revome the LCA's with the truck on jack stands and take them to a local auto-repair shop. They should be happy to do the press work for you. At a fair price aswell since they dont even have to touch the car, nor does your car have to touch there shop floor. then just reinstall the repaired control arms. sorry i didnt see this post before hand i may been a little more of assistance.
 
Lower Ball Joints

I pressed them in and out without removing the LCA, probably not the ideal way to do it, but successful. I used some after market joints with grease fittings and now the front end is tight. 4 foot breaker bar and some strong ab muscles. The rowing paid off!
 
I pressed them in and out without removing the LCA, probably not the ideal way to do it, but successful. I used some after market joints with grease fittings and now the front end is tight. 4 foot breaker bar and some strong ab muscles. The rowing paid off!

I hear ya boss! that does sound like a hell of a job lol. with them being new you'll need to work the greese in good so after driving a few miles just hit them good with a greese gun there should be holes in the top of the boot where it seats to the spindel you'll pump a few shots of greese in until you see the greese seep out right there where the top of the boot meets the spindel.
 
Last edited:
Any updates on this? I'm struggling with it right now. Nearest I can tell I need a ball joint separator and then the press.

The ttora tutorial is missing some pics, and I can't find any other walk throughs.
 
Any updates on this? I'm struggling with it right now. Nearest I can tell I need a ball joint separator and then the press.

The ttora tutorial is missing some pics, and I can't find any other walk throughs.

Yup, ball joint separator and a large ball joint press kit from autozone or equivalent store that loans out the kits (get the one with 15+ pieces...the 7 or 9 piece one won't work). The second part of the tacoma writeup is good. The removal is the opposite...you just need to experiment with the spacers to get the correct sizing.

I'm still kicking myself for not documenting the process but it isn't difficult...just a puzzle of sorts. The Tacoma writeup is as close as you're going to get on a walkthrough, as far as I know. I wouldn't worry about the whole freezing part as it wasn't necessary.
 
Cool, thanks. I have the small kit from Orielly, but I think it will work. I've set the stuff up and it appears to be what I need. I found a generic video online that helped.

My current hangup is getting the bottom bracket, that bolts to the wheel off of the ball joint. Is that hard to press onto the new one?

I'm going to take pics on the process once I get one done. Maybe even a video.
 
Cool, thanks. I have the small kit from Orielly, but I think it will work. I've set the stuff up and it appears to be what I need. I found a generic video online that helped.

My current hangup is getting the bottom bracket, that bolts to the wheel off of the ball joint. Is that hard to press onto the new one?

I'm going to take pics on the process once I get one done. Maybe even a video.

I loosened all the bolts with the tire still on the ground. Once you get the tire off and on jacks, take the nuts off the rest of the way. Then tighten up the ball joint separator real tight and give the bottom bracket a smack with a hammer. Should pop right off. To get the bottom bracket back on the ball joint, just put the nut on the torque it down. It should seat itself.

Oh, and watch the zerk placement so it doesn't end up under the cv axle. Aim it diagonally out. Good luck!
 
got it, I just need the separator, I'm assuming you used a pickle fork?

Also, when pressing the new one in, I'm assuming you do it downward? For some reason pushing past the boot form the top seems like it would be a long way to go, any advice on that?

Thanks so much for your time man, I really appreciate it.
 
got it, I just need the separator, I'm assuming you used a pickle fork?

Also, when pressing the new one in, I'm assuming you do it downward? For some reason pushing past the boot form the top seems like it would be a long way to go, any advice on that?

Thanks so much for your time man, I really appreciate it.

it should only go one direction.
there should be a lip/edge on the BJ that seats against the control arm.
 
got it, I just need the separator, I'm assuming you used a pickle fork?

Also, when pressing the new one in, I'm assuming you do it downward? For some reason pushing past the boot form the top seems like it would be a long way to go, any advice on that?

Thanks so much for your time man, I really appreciate it.

I used a large tie rod puller. Pickle fork will probably work but I've never been a fan of them.

Old ball joint gets pushed down and out. New gets pushed up. The spacer sits around the new ball joint during the install pressing.
 
I used a large tie rod puller. Pickle fork will probably work but I've never been a fan of them.

Old ball joint gets pushed down and out. New gets pushed up. The spacer sits around the new ball joint during the install pressing.

you can knock the old one out with a pair of hammers.

hold the head of one hammer under the edge of the control arm, but not ON the bj. use the other to beat the joint out.

you can also set the control arm on a jackstand, but make sure its very close to the edge, and close to the bj. even then sometimes it helps to hold a hammer there.
 
Last edited:
AHHHHHHH. I'll just two of the collars to get it pushed up in there. That's what i was having a hard time visualizing. But the balljoint pressing tool stays with the nut on top, just re configure the pressing rings. Ok, now I can picture it. You guys rock. I'm taking pics of this once I get it.

And yay, I just found my upper's are shot also.
 
Ok got the bracket off, used a pickle fork which still didn't get it all the way off, had to smack it a few times. Only to find out the press kit will not work by itself. It had appeared the pressing rings were the right size but nope. Looks like the write up on ttora was right about the sizes needed. I put it all back together and will hit a few stores tomorrow. May have to go to harbor freight.... We will see. One last thing though.....

Did you press it in like this
ta9ejahu.jpg


Or like this - I think this way is right?
dabubyne.jpg
 
The second picture is the correct way but you need to use the disc piece from the first picture on the bottom of the spacer in the second. Hope that makes sense.
 

Members online

Forum statistics

Threads
278,306
Messages
3,554,046
Members
248,016
Latest member
Advally Service

Trending content

Back
Top