Machinist's Pics Thread

Inv4drZm

Senior Member
Are there any other fabricators or machinists out there?

I would like to start a thread for people to show-off their talents as metalworkers. Any sort of projects involving metal, not necessarily related to their 4Runner. Projects involving welding, machining, or otherwise modifying metal are welcome. Please be sure to mention (if you want) what tools, materials, and processes you used to make your work of art.

I will occasionally be posting in this thread as I'm a mechanical engineer that gets to make prototypes and fixtures at work along with making stuff for my truck.


Using a manual mill, lathe, and belt sander I turned this:


Into this:


I machined the parts to our senior design project, an air permeability tester for a local company.

The piston I made out of a chunk of aluminum. It has 2 o-ring grooves and 21 holes drilled all the way through. I machined the ACME thread to press fit into the smooth shaft:


Another fixture at work. Small chunk of aluminum I programmed the Bridgeport to cut out an intricate design with a 1/4" ball nose endmill (it was sharper than the regular endmills).


These are just examples, I have some more pics I want to post later.

So what do you guys make?
 
Register to hide this ad
Some more pics...

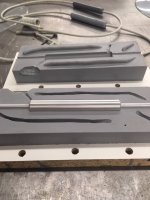
A couple molds I made from aluminum for a low pressure injection molding machine we have:

36975735413_fc97351b64_b.jpg


23793763438_bd41253281_b.jpg
[/url]

Small aluminum port I made with an o-ring seal:


Small aluminum wrench:


I machined these slots out of this hardened steel blank:


Designed, cut out, and welded together a couple of these layout board storage racks:

 
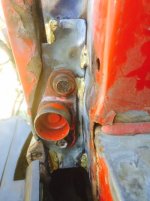
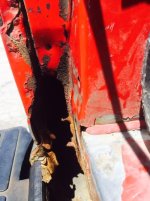
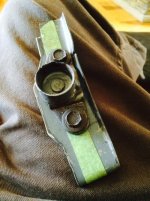
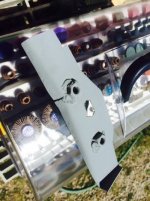
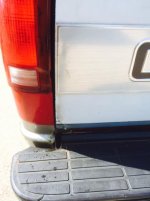
Tailgate Hinge Jam:
On my 1998 Silverado 2500 4x4 pickup, the left tailgate hinge jam, rotted out / while the box sides are still perfect.
- made a new piece out of 16 gauge sheet metal / I cut up a scrap SQ-D electrical box, for thicker metal over body steel (typically 19g)
- most difficult part was measuring x/y/z coordinates correctly, & welding nuts on the backside
- check to fit, only works once the fabricated patch, is brazed in solid / surrounding metal a little thin to mig, in the driveway
^^ Once completed, the tailgate lined up perfectly / and hinge fabrication was strong, my tailgate can hold a lot of weight again.

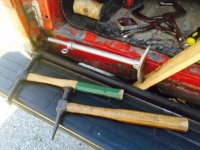
My 3 favorite tools:
a) aircraft aluminum (adjustable length) patch holder, with ductile iron forked end / a clever & practical tool, aka providing a "3rd arm"
...from 1980's
b) Proto #1426 body hammer / good for forming door edges and shrinking lips...from the 1980's
c) Snap-On #BF604 body hammer / my first tool purchase, in grade12 ... forge quality is awesome, still no dents on face...from early 1970's
 

Attachments

  • 98hinge12.jpg
    98hinge12.jpg
    25.5 KB · Views: 226
  • 98hinge11.jpg
    98hinge11.jpg
    42.3 KB · Views: 231
  • 98hinge6.jpg
    98hinge6.jpg
    31.6 KB · Views: 255
  • 98hinge8.jpg
    98hinge8.jpg
    37.1 KB · Views: 222
  • 98hinge10.jpg
    98hinge10.jpg
    31.8 KB · Views: 231
  • 98hinge22.jpg
    98hinge22.jpg
    22.9 KB · Views: 235
Last edited:
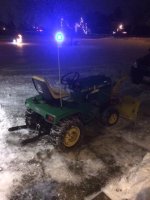
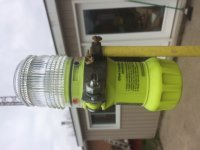
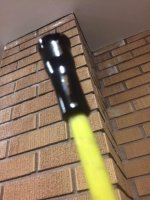
Beacon-Strobe Light Mount, on John Deere 318 - for snow blowing safety.
- used a 3/8" diameter fiberglass Chimney Sweep Pole / cheap garage sale find
- hand fabricated the top mount, to the pole / and brazed on a nut to secure the hand threaded yellow pole
- bottom pole mount to Garden Tractor Pan, required a washer & inside nut be brazed on the end / to accept a bolt, through bottom of pan.
 

Attachments

  • 318bluelight.jpg
    318bluelight.jpg
    29.6 KB · Views: 230
  • 318Beacon7.JPG
    318Beacon7.JPG
    77.1 KB · Views: 212
  • 318DriftCutter7.jpg
    318DriftCutter7.jpg
    37.3 KB · Views: 228
Last edited:
re:

Love the concept of this thread. Very unique and more importantly cool as hell. Thanks to the OP and all the contributors for an interesting read!
 
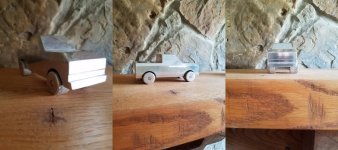
In my career I have designed countless components and systems. I have had the pleasure of personally making many of the prototypes myself. When I first got out of college I designed high pressure hydraulic telescoping cylinders. For this thread though I will post a fun little project I did 20 years ago for my (then) two year old son.

Material: T6, T1 and steel
Type:
2" bar stock for the body
.875 T1 dowel for the wheels
.125 mild steel dowel for axle

The only tricky part was press fit of axle into wheel. Anyway, my son played with this for a long time. He just finished his BSME and is working on his MBA. He told me to keep it on display so when he has kids they can play with it.

Also, I am not a machinist. I am an engineer. Machinists actually know what they are doing when using their equipment. I just piddle.

BTW I also made the mantle it's sitting on. 4"X18"X12' long. Also cut the gussets. Material is red oak. Enjoy!
 

Attachments

  • Toy Truck.jpg
    Toy Truck.jpg
    77.4 KB · Views: 200
Last edited:
Id like to post more but I work in a prototype shop. customers frown on pics of their designs being posted. I like my job too much.
 
Are there any other fabricators or machinists out there?

I would like to start a thread for people to show-off their talents as metalworkers. Any sort of projects involving metal, not necessarily related to their 4Runner. Projects involving welding, machining, or otherwise modifying metal are welcome. Please be sure to mention (if you want) what tools, materials, and processes you used to make your work of art.

I will occasionally be posting in this thread as I'm a mechanical engineer that gets to make prototypes and fixtures at work along with making stuff for my truck.


Using a manual mill, lathe, and belt sander I turned this:


Into this:


Nice work. What is it?
 
There's a thread like this on the RC forum that I go to daily, lots of talented guys doing interesting things just because they want to. I have a manual machinist background in aerospace tool and die. I recently went back to a local community college for an AA degree in 3D modeling/ mechanical design.

I have a great local maker space that has a small machine shop, welding shop, blacksmith shop and a wood working shop. Tons of talented folks making all kinds of things.

I recently needed to fabri-hack a balancer hold down tool for the 3.4 in my 'runner. I used some scarp from a water jet project, so the metal was free.

2ndhandyotaman-albums-tools+-+tom+foolery-picture48689-20171023-105100.jpg
 
Here's a repair I did for a friend for her chiminea. My MIG skills are getting decent, just started last year. TIG needs a lot more practice before I show off anything, lol.

2ndhandyotaman-albums-tools+-+tom+foolery-picture48690-20171005-112554.jpg


2ndhandyotaman-albums-tools+-+tom+foolery-picture48691-20171005-131823.jpg


2ndhandyotaman-albums-tools+-+tom+foolery-picture48692-20171005-142245.jpg


2ndhandyotaman-albums-tools+-+tom+foolery-picture48693-20171005-155021.jpg


Not too bad of a repair, none of the local metal suppliers had an expanded mesh that was the same size of the original, so I just used what I could get my hands on. Literally $10 worth of material and the 1/2 day pass at the maker space.
 
I gots no fabrication skillz... :moping: Always been a bit envious of those that do because the stuff some people make is freaking awesome. I can take stuff apart and bolt it back together, drill a hole (usually 1/16 - 1/8" off, lol) and make ugly cuts to get things to fit. But nothing good, and definitely not from scratch.

Kudos to you guys! If it weren't for people like you we'd still be walking or riding horses everywhere! :cheers:
 
24325746558_049cf16f10_c.jpg


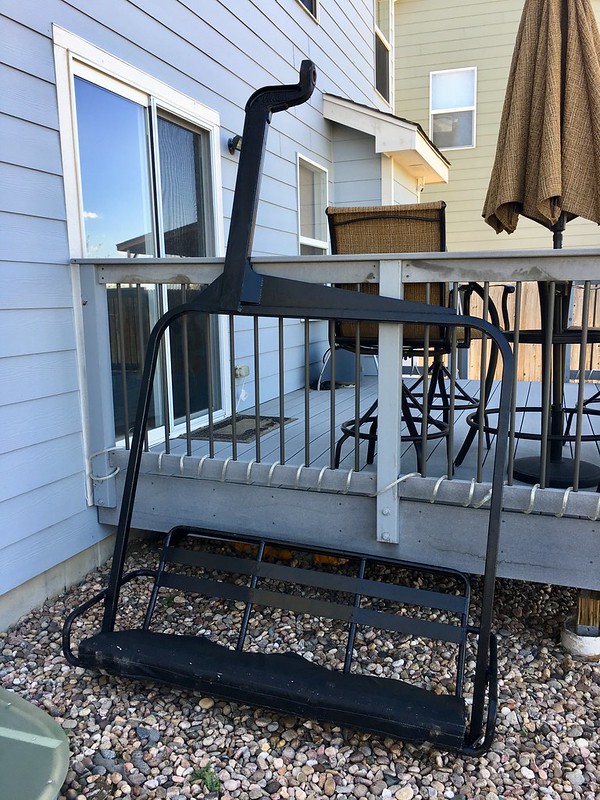
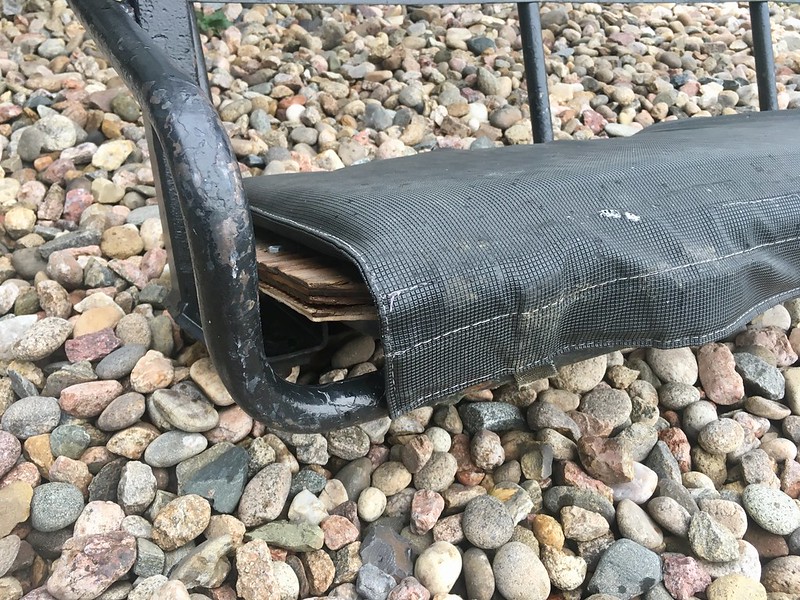
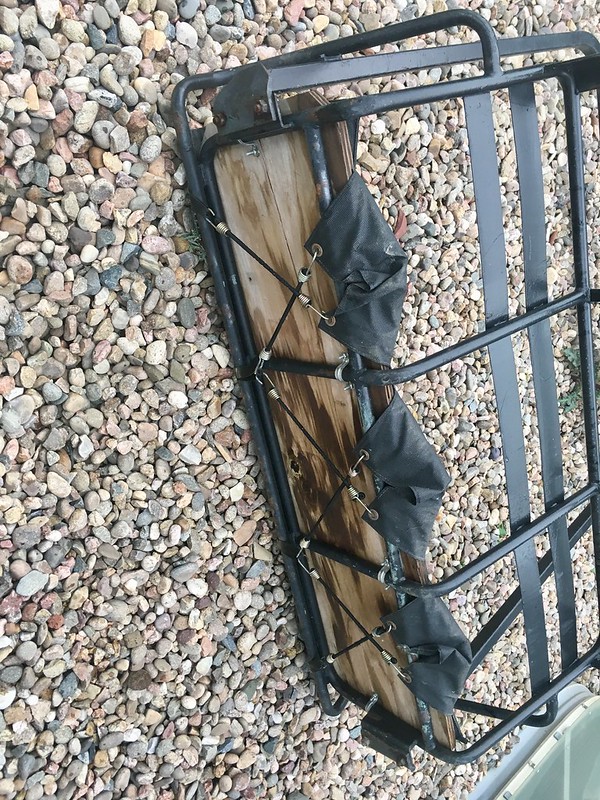
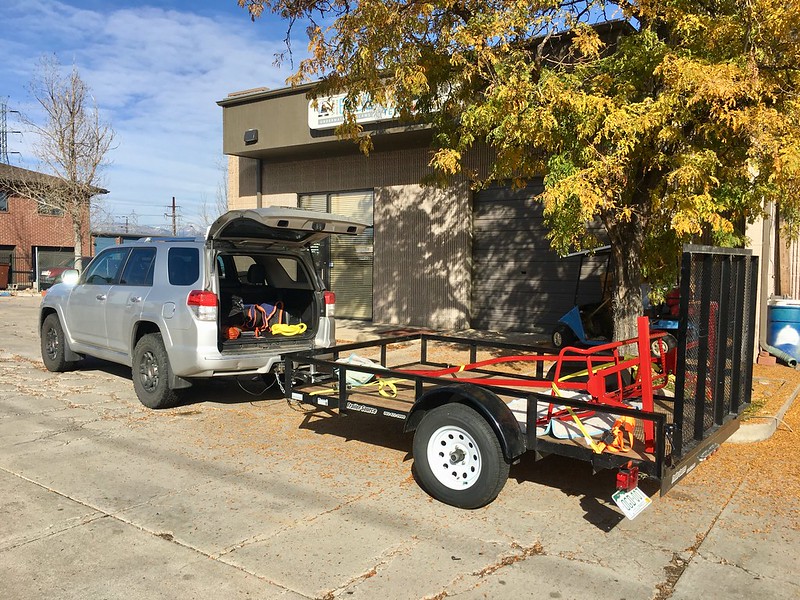
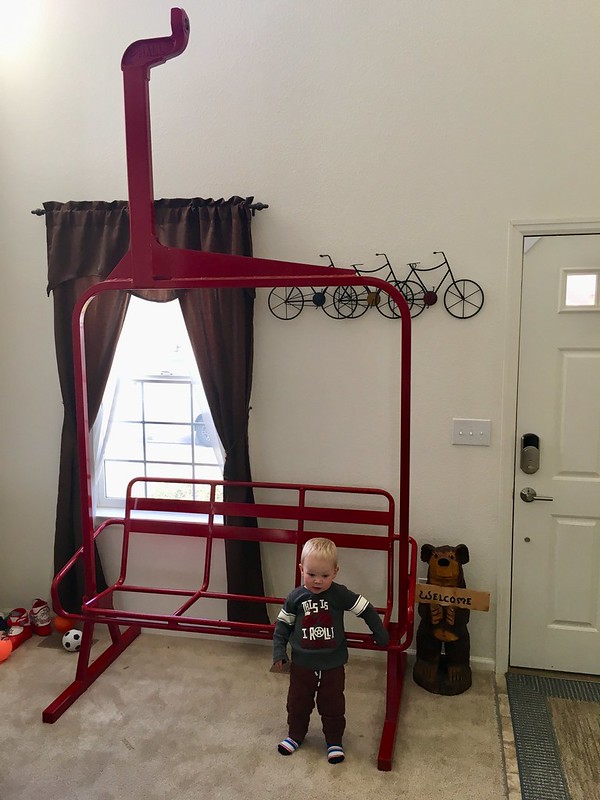
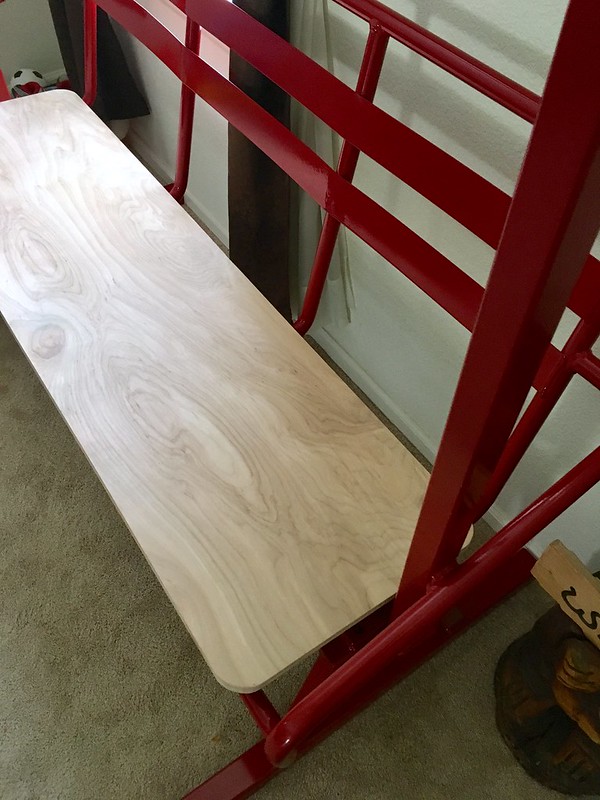
Chair number 116 is my small piece of local history from Boulder Colorado.

This 1971 triple chair was manufactured by Hall Ski-Lift Company out of Turin, NewYork. It was originally installed on Bald Mountain at the Sun Valley Resort in Idaho where it ran as the "River Run" lift from 1970-1992 ski seasons before being relocated to Eldora in Nederland, Colorado where it ran as the Challenge lift from 1992 until 2017. April 9th, 2017 was its final day of service before retiring after 47 ski seasons.

On May 5th, 2017 I picked up my chair from Eldora and brought it home to re-purpose it. After a brief stay in my backyard while pondering exactly what I wanted to do, it got little bit of a face lift. The chair was welded into a single solid piece (as opposed to 3 pieces bolted together), the brackets for the non existent lap bar were cut off, bench height legs were fabricated and welded on, and then it was media blasted and powder coated. After getting it right off my local mountain it was important to me to not change the character of the chair. Existing welds were not cleaned up and ground down, dents and dings were not fixed, imperfections and inconsistencies were not corrected, the mounting arm was not cut down and shortened to accommodate a specific ceiling height, the original brass bushing and grease fitting were cleaned up and reinstalled. It’s perfectly imperfect.

After powder coating I brought back home and started on the finishing touches. Next up was replacing the warped and swollen plywood seat base with a new piece of 3/4” birch. I like the wood but the final step is a new cushion heavily inspired by the original but made from very high quality Crypton upholstery with a much higher degree of craftsmanship and detail in the fit and finish. My mom, used to be a seamstress so while she out in Colorado for a visit she took pictures, measurements, and made a template to work off of back home. The cushion should be done in the next month or so.

38178169201_223380e455_c.jpg


38121504796_20d5d88222_c.jpg


26401529139_beb0a59572_c.jpg


37467625344_32f826b45d_c.jpg


24325749178_9e1013abbe_c.jpg


37467262674_f16c97325e_c.jpg


37467261284_c1db7d59dd_c.jpg


38145871822_47d10ea05e_c.jpg


24325355378_1b8537a559_c.jpg
 

Members online

No members online now.

Forum statistics

Threads
278,309
Messages
3,554,068
Members
248,016
Latest member
Advally Service

Trending content

Back
Top