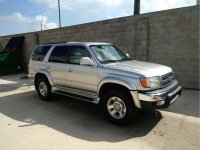
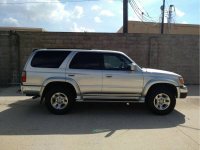
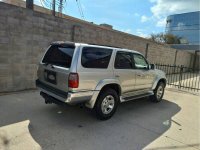
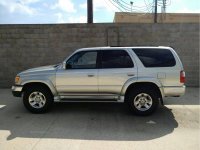
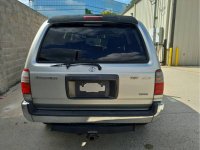
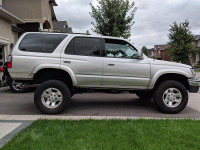
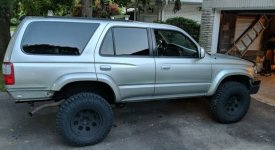
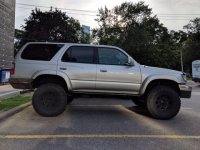
Manualdr5's 2000 4Runner SR5 4x4 5 SP - Build Thread

manualdr5

New member
***** In Draft Mode *****

Purchased on December 1st, 2017 with 110k

The following maintenance was performed soon after

- Marlin Crawler 1200 LB Clutch Kit
- Marlin Crawler Heavy Duty Seats and Socket
- Toyota Flywheel
- Toyota Slave Master Cylinder
- Rear Differential Toyota FIPG with new bolts
- Toyota rear axle seals installed using the Drcoffee method
http://www.toyota-4runner.org/3rd-gen-t4rs/114743-possible-solution-leaking-axle-seals-5.html
- Toyota brake drums and shoes
- All fluids replaced (Rear Diff, Front Diff, Transfer Case, Transmission, Engine, Coolant)
- Toyota Fuel Filter
- Toyota PCV Valve
- Toyota Spark Plugs and Wires

Upgrades
- Sonoran Steel 1.2 lift kit with rebuildable Radflo 2.5's with 650 coils
- SRQ Fabrications Grill
- SRQ Fabrications Clear Side Markers
- SRQ Fabrications HID Projectors
- SRQ Fabrications LED Filler Panels
- SRQ Fabrications Front Skid Plate
- Rocky Mountain roof rack with 38" ExtremeLED lightbar
- Coastal Offroad Rock Sliders
- Coastal Offroad Front Bumper
- Coastal Offroad Rear Bumper
- Coastal Offroad Swing Out Arm - Customized
- 4xInnovations swing out arm hinge
- Procomp 7069 Wheels
- Spydertrax 1.25" Wheel Spacers - Removed after getting new wheels and tires
- Single DIN Pioneer HU
- Paranoid Fabrications 1st Gen Tacoma Din Switch plate (6 switch holes)
- OTTRATTW Contura V rocker switches
 

Attachments
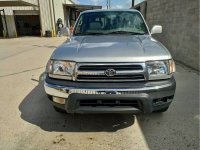
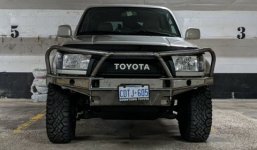
  • Front View.jpg
    Front View.jpg
    41.8 KB · Views: 852
  • Side View2.jpg
    Side View2.jpg
    35.5 KB · Views: 804
  • Side View.jpg
    Side View.jpg
    30.4 KB · Views: 809
  • Side View3.jpg
    Side View3.jpg
    36 KB · Views: 822
  • Side View4.jpg
    Side View4.jpg
    31.7 KB · Views: 872
  • Rear.jpg
    Rear.jpg
    34.2 KB · Views: 793
Last edited:
Register to hide this ad
looks alright, is that front left fender a different color? maybe check accident history?

You haver a good eye Lamer, I had noticed the same thing. The truck was in a fender bender. I had the seller take it to Toyota for an inspection and it checked out but my main concern was rust and it was very clean. The truck is actually from Colorado and it only had 110K. Anyway I'll detail soon enough what Ive done to it so far and what Im planning to do in the near future. Ive put on 6k miles on it and it drives true and smooth!
 
SS 1.2 Lift

Hey Guys,

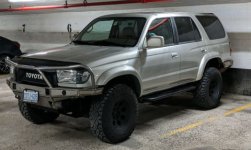
Finally finished getting the SS 1.2 lift installed and loving the look and ride! Here's a side shot of the truck before i put on a new set of procomp 7069 wheels with 265 75 16 duratracs.

Also replaced the following:

front UCA's with stronglex bushings
front sway bar and end link bushings with energy poly bushings
steering rack with energy poly bushings
rear sway bar end links with energy poly bushings
 

Attachments

  • SS 1.2 LIFT.gif
    SS 1.2 LIFT.gif
    87.4 KB · Views: 723
Procomp 7069 with GY Duratracs 265 75 16 - D rated

So the procomp wheels are lug centric so need for a hub ring but Im still getting them.

Now for the goods! Had to remove the 1 1/4 inch spidertrax spacers for the wheels to fit whithout rubbing. I kinda knew it would be an issue with the spacers since the procomps are 8 inches wide compared to stock at 7 inches. Just wanted to see how they would look actually prefer them without the spacers.

Before getting the tires I was on the fence between 265 and 285. I knew the 285's would require some body work so I went with the 265's. After getting them installed I'm so glad I went with the 265's! I also tossed the hub caps, wasnt a fan of the procomp hubs and really like the rugged look without hubs. I just touched up the rear bugs with some flat black paint to match the rims.

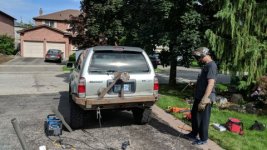
The second pic I installed the coastal offroad steel bumper I had welded weeks back. Getting the single swing arm installed tomorrow then off to powder coating. I'll do a big write on my armour soon enough.
 

Attachments

  • 7069.jpg
    7069.jpg
    36.1 KB · Views: 630
  • 7069 v3.jpg
    7069 v3.jpg
    52 KB · Views: 675
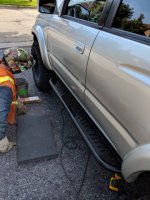
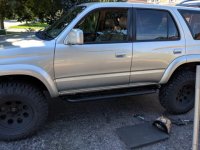
Coastal Offroad Bumper with Single Arm Swing Out and Sliders

I cant say enough how difficult this project has been mainly due to the fact that I chose to go with weld together bumpers! I learned so much about this process and if I had to do it over again I would've definitely gone down a different path.

However when its all said and done the end product is starting to look really good!

Next step will be to get the front bumper welded together, send both bumpers off for powder coat and install.

Here's a few pics.
 

Attachments

  • Sliders.jpg
    Sliders.jpg
    52.4 KB · Views: 628
  • Sliders 2.jpg
    Sliders 2.jpg
    50.6 KB · Views: 621
  • Single Swing Out Arm.jpg
    Single Swing Out Arm.jpg
    50.9 KB · Views: 590
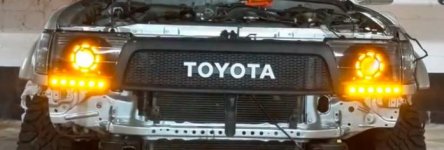
HID Headlights with LED Filler Panels

Finally installed after I got my core support installed! I'm 90% done just waiting for a relay so I can setup the halo as my DRL. I want it on when I turn on the truck but off when my headlights are turned on.

Here's a quick preview of the amber lights using the hazards. They are supper bright, really happy with the quality, thanks Matt from SRQ!
 

Attachments

  • Amber Lights.jpg
    Amber Lights.jpg
    34.9 KB · Views: 548
What lights are you using in the filler panels? I am missing one of my filler panels and would like to replace it with something like this.

Also really looking forward to seeing how your front bumper turns out, considering getting the same one.
 
Last edited:
Finally installed after I got my core support installed! I'm 90% done just waiting for a relay so I can setup the halo as my DRL. I want it on when I turn on the truck but off when my headlights are turned on.

Here's a quick preview of the amber lights using the hazards. They are supper bright, really happy with the quality, thanks Matt from SRQ!

Looks like something right out of the Terminator. Can't wait to see what the front end looks like buttoned up. Keep the pics comin!
 
I've also gotten, straight out of Transformers, I think I like terminator better lol

I should have the bumper back from powder coating next week ready for my road trip to michigan to pickup my TRD cat back exhaust :)
 
Front bumper in raw steel

Here's the front bumper before I pulled it off to get sand blasted and powder coated.

I have a pair of rigid dually's I'll be installing in the square slots. Covering up the turn signal holes for now.
 

Attachments

  • front bumper3.jpg
    front bumper3.jpg
    35 KB · Views: 596
  • front bumper4.jpg
    front bumper4.jpg
    37.1 KB · Views: 526
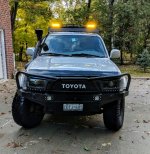
It's official front end done!

The front end is finally done with one minor modification to the light bar placement left to be done. The rear swing out arm will be done this week with my new 4xinnovations hinge, wasn't happy with the one supplied by coastal offroads swing out arm, pics soon to follow.
 

Attachments

  • IMG-20181020-WA0007-480x492.jpeg
    IMG-20181020-WA0007-480x492.jpeg
    107.3 KB · Views: 447
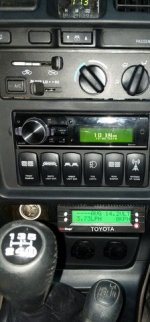
ScanGauge II Mounted

I installed my ScanGauge II in place of the ash tray. Removed the ash tray and the metal mounting bracket. I then used a dremel to trim down the edges to allow the scan gauge to fit flush. I secured the scan gauge using a velcro strip. A very simple install.
 

Attachments

  • ScanGauge II.jpg
    ScanGauge II.jpg
    30.9 KB · Views: 145
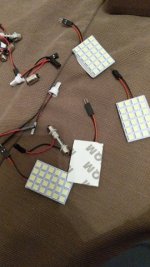
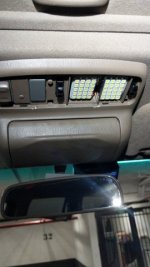
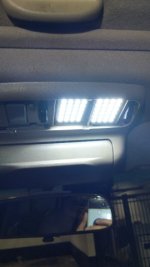
Updated MAP, Dome and Trunk with LED

Cheap, easy and well worth it!

I bought a few bulbs and kits before realizing that my particular truck uses BA9s bulbs for the MAP and 31mm festoon bulbs for the dome and trunk lights. Before purchasing bulbs make sure you know what bulbs you need or just buy the kit I'm recommending below which comes with the proper adapters.

https://www.amazon.ca/gp/product/B0...E/ref=oh_aui_detailpage_o00_s01?ie=UTF8&psc=1
 

Attachments

  • LED 1.jpg
    LED 1.jpg
    34.5 KB · Views: 142
  • LED 2.jpg
    LED 2.jpg
    27.1 KB · Views: 159
  • LED 3.jpg
    LED 3.jpg
    18.7 KB · Views: 149

Members online

Forum statistics

Threads
278,312
Messages
3,554,086
Members
248,016
Latest member
Advally Service

Trending content

Back
Top