Mason's Build Thread

The door jam switches are ground switches meaning that the lights always have 12v+ to them and the circuit is completed when the door opens. I ran a fused 12v+ wire to each set of LEDs and grounded them into the existing jam switch.

I've been toying with the idea of doing the same with the map lights.
 
The door jam switches are ground switches meaning that the lights always have 12v+ to them and the circuit is completed when the door opens. I ran a fused 12v+ wire to each set of LEDs and grounded them into the existing jam switch.

I've been toying with the idea of doing the same with the map lights.

Cool! Where did you actually make the connection to the 12V+ and the existing jam switch? Any pics? Did you just use a 10 or 15 amp fuse for the 12V+ power wires?

I am interested in doing something similar so any additional info helps. Thanks!
 
Cool! Where did you actually make the connection to the 12V+ and the existing jam switch? Any pics? Did you just use a 10 or 15 amp fuse for the 12V+ power wires?

I am interested in doing something similar so any additional info helps. Thanks!

Slow response! I wired directly from the battery for the 12v with (I think) a 10 amp fuse. The door jam switches are pretty self explanatory and I simply wired in directly by the switches. Worked out pretty well.

I got another little toy in today...

DSCF0975.jpg~original


Had the iPad for awhile now but got the mount in today. Planning on using it for trail navigation with MotionX GPS and I also have it connected to my head unit via Bluetooth for running my music. I'll probably only leave it in for trips though.

It isn't a perfect solution however. I was looking at RAM's similar mount that goes for $100 but had heard that it vibrates a fair amount. This one from Akron does as well but only cost me $18 rather than $100! So I'm more willing to deal with a little vibration for the $18. I'm currently looking into a couple different ways to minimize the vibration. :nerd:

Doesn't get in the passengers (or my navigators) way and mounts up very simply.

DSCF0979.jpg~original

DSCF0983.jpg~original
 
Last edited:
Thought I'd disconnect my front sway bar for a trip next weekend and wanted to see what it is like before then. Found something interesting...

d8986c4f.jpg~original


Seeing as how it wasn't doing much I went ahead and completely removed it. If I decide I want it back I'll get some disco's from WabFab or something.
 
Last edited:
Went for a trip to Buckhorn OHV Trails this weekend in Arkansas to test out the new Duratracs!

Things started out fantastically!

DSCF0998.jpg~original


Went to start the 4Runner to hit the trails Friday morning and it did nothing. A little troublshooting revealed a shot starter. Luckily I didn't go alone and my buddy in the FJ gave me a lift into Fayetteville to pick up a new starter and bolts. Someone had previously worked on the starter and horribly cross threaded the bolts. We ended up cutting one bolt with a hacksaw.

Half a day later we were up and running trails!

Air Down
DSCF1017.jpg~original

The new Duratracs at 15psi. I ended up putting some more air in them and felt more comfortable after doing 20psi in the back and 18psi up front.
DSCF1031.jpg~original

DSCF1032.jpg~original

Trails
DSCF1033.jpg~original

DSCF1051.jpg~original

DSCF1053.jpg~original

DSCF1113.jpg~original


I've got some videos to sort through and edit but I will post them up soon.
 
Last edited:
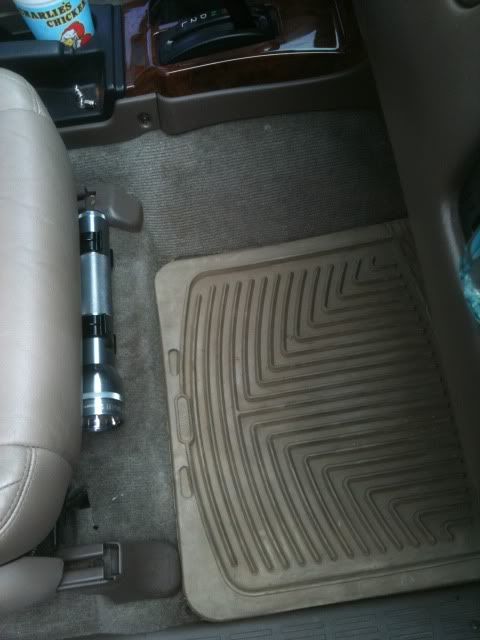
Mounted my maglite under the passenger seat today and goofed off a bit.

IMG_0686.jpg~original


Stock flex... yeaaaaaah.
IMG_0685.jpg~original


And the stable.
IMG_0689.jpg~original


Yeah I'll post up a description of how I got everything to work once I actually get everything to work the way I want. Need to pick up a relay!


i got the same setup!! haha 1997 4runner and a 2003 mazda6. nice choice in vehicles.
 
Ran another trip with Central Overland Travels in Arkansas again this weekend. They truly are a great group of guys.

While on the trip I decided to see how the new Duratrac's fair in mud... But wasn't expecting the mud to be this deep and soft!

DSCF1142.jpg~original

DSCF1147.jpg~original


Other pictures from the trip!

DSCF1138.jpg~original

DSCF1130.jpg~original

DSCF1155.jpg~original

DSCF1173.jpg~original

DSCF1188.jpg~original

DSCF1213.jpg~original

DSCF1232.jpg~original

DSCF1233.jpg~original


Hopefully the videos will be uploaded soon.
 
Last edited:
I slapped a WetherTech Bug Guard on my 98'. Not pic worthy imho. But I did do something! Deckplate mod is next on the list.
 
Well it was time to do something real with the electrical. Before I had rigged the CB up at last minute before a trip. It was working but looked like crap. I was never very happy with the Hella's either (which have been completely pulled out for awhile awaiting a reinstallation).

Blue Sea fuse panel time!

Starting with a breaker and made some custom wires

IMG_20140502_215128.jpg~original


Blue Sea location.
IMG_20140502_213520.jpg~original


My couple devices wired up.
IMG_20140502_225106.jpg~original


I also figured out what to use the garage door opener for! Cables!

IMG_20140502_220916.jpg~original
 
Some Mods I haven't included in this build thread

CB Installation Location:
photo-3.jpg~original

Firestik on the original Drifter33 mount:
9dd07578.jpg~original

Tundra 231 Brake Upgrade (This is a must do IMO):
20120915_150832.jpg~original

...found a little dirt above the skidplates...
20120915_152725.jpg~original

Rally Armor Mud Flaps:
IMG_20140509_204237.jpg~original
 
Last edited:
I have been working on designing a sleeping platform/storage platform. Not sure If I really need the weight or hassle however. I keep going back and forth on it.

4RunnerStorage.png~original

4RunnerStorageOut-1.png~original

4RunnerStoragev7Back.png~original

4RunnerStoragev7Passenger.png~original
 
Last edited:

Members online

Forum statistics

Threads
278,307
Messages
3,554,050
Members
248,016
Latest member
Advally Service

Trending content

Back
Top