mesooohoppy's build thread (99 limited)

mesooohoppy

New member
I wasn’t planning on doing a build thread, but then I realized the more I mod this vehicle, the harder it will be to keep track of everything that was done to it and the maintenance dates. So here we go!

I had two sedans, one was my FWD daily, and the other was my RWD play car that I slammed. It was getting old paying 2x the reg and insurance, aside from never driving my play car. It also snows where I live so I made the choice to sell both and get a Toyota truck that’s 4WD. Well my buddy bought a 3rd gen about 6 months before I did and he pretty much sealed the deal for me after not being satisfied with the quality of used trucks in my area.

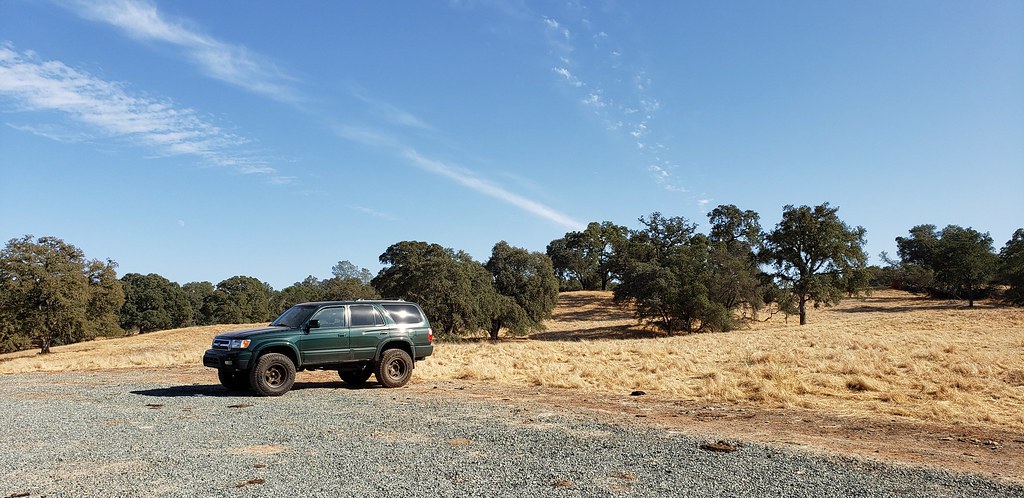
I managed to find this at a used car dealer for under blue book. It has 236k on it but was incredibly clean. Before going to check it out I spoke with a nice gal at my local dealership to confirm the car had the maint done to it. I also confirmed it didn’t come from a rust belt state, so I bought it!
48491421747_1f37191879_b.jpg


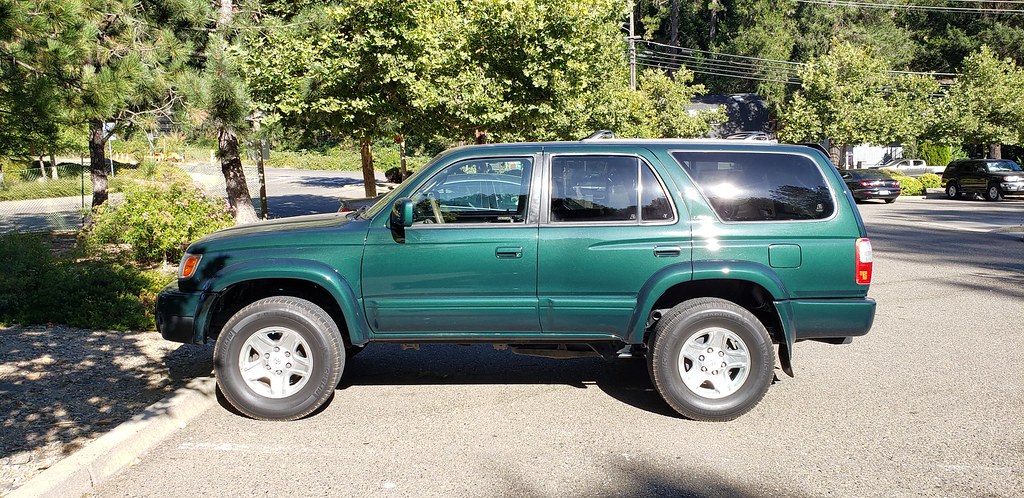
Clean title, zero accidents, e-locker, recently resprayed. Its not perfect, but it is certainly much cleaner than some of the other runners I found in my area. I wasted no time getting the running boards off:
48491251776_d126a80639_b.jpg


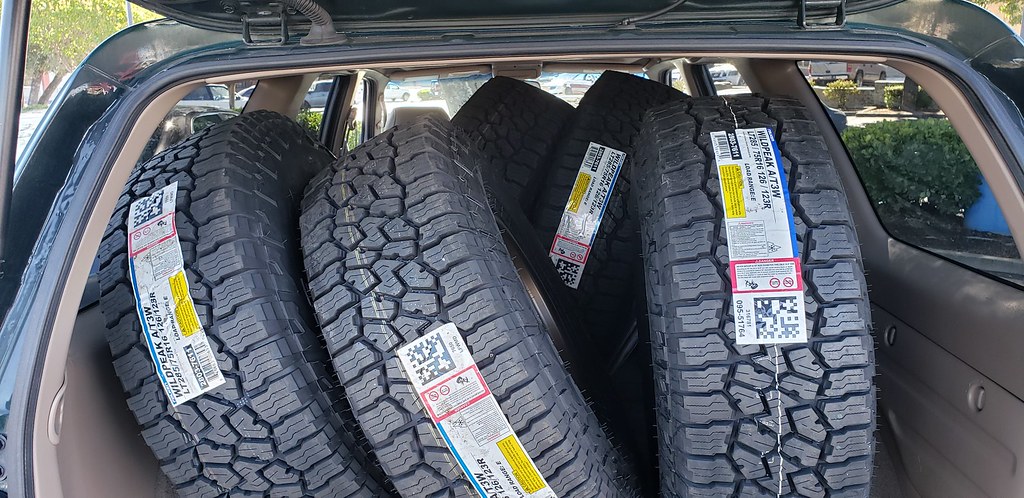
The tires were absolutely junk all of them had no tread left and they were cracked all over. I had my eyes set on the SCS F5 wheels and I knew I had to have them once I saw them. I wasted no time buying a 3” lift from toy tec and getting my wheels and tires mounted. I felt like I was on borrowed time with the stock tires so everything happened pretty quickly:
48491421917_80ca4d2db5_b.jpg


I didn’t think the wheels and tires would fit inside the vehicle (especially with a spare), but low and behold she surprised me! I also de-badged the rear of the vehicle. I think it makes the car look much cleaner (sorry no pic). We got the lift kit on late on a Friday and went for a quick drive:
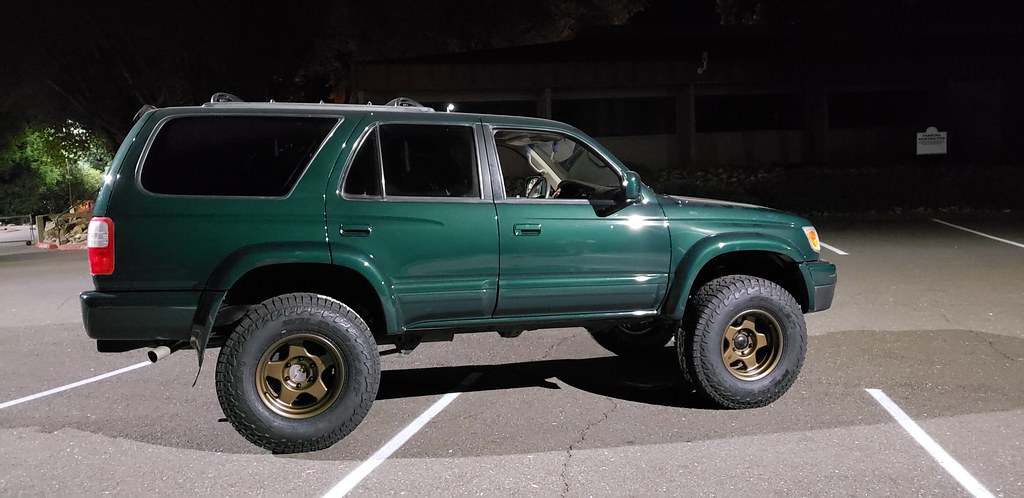
48349427626_34efd617ee_b.jpg


The following weekend I managed to install the total chaos UCAs and get it aligned:
48491251656_eb11d8be52_b.jpg


Here is a tip if you are installing UCA’s on your own. This trick will only work if you have a front diff spacer and if you kept the shorter OEM bolts:
i was doing this on my own with no help so i had to figure out a way to hold the 4 washers per side on each UCA that the total chaos arms utilize while fishing in the super long bolt through the engine bay. here is my tip:

i just recently lifted my 4runner with a toy tec lift. the kit came with diff spacers that utilized longer bolts. i kept the stock bolts. the stock bolts are what make this so easy. the shank diameter is the same as the UCA bolt, but about half the overall length length (which is perfect for what we need it to do).

feed the OEM diff bolt through the backside of the UCA, threading in the two rear spacers as well (left side on the above pic). it is only long enough to reach the middle of the tube on the frame that holds the UCA in place. this is just enough for it to hold the back two spacers in place and orient the UCA in a way that you can thread the long bolt through the front side of the UCA all by yourself. i used packing tape on the bottom to hold the front two washers and it worked like a charm. once everything is in place, all you need to do is push the long UCA bolt into its final resting place, and this will knock out the OEM diff bolt in the rear while still holding the arm and all of the washers in place.

hopefully this makes sense. front OEM diff bolts on left, UCA bolt on right. even though this is a total chaos arm, you can still utilize this trick with other arms or even OEM ones.

48405570291_ed7c4ee784_b.jpg


I then took her up to the mountains and blasted through some fire roads and absolutely had a blast.

48405570411_a370caeabe_b.jpg


As of right now here are the next planned mods:
-Get poly bushings for spare pair of LCAs I have and install LCAs
-Confirm the nardi hub I just bought will fit my steering shaft and figure out the airbag bypass
-Extended sway bar end links from the user on here.
 
Register to hide this ad
Really liking this build so far! If I could do it all over again, I would look for a limited IJM just like this!
 
IJM is the best color!
Really liking this build so far! If I could do it all over again, I would look for a limited IJM just like this!

thanks ya'll. i really dont like green, but i had to look past that to buy such a clean one owner 4runner. if i could do it all over again, i may have waited for a silver one or something, but oh well im not dwelling on the color.

small update, i have just been driving the runner up to the mountains just about every weekend to go shoot and hangout before the snow:
49095893208_e240acbb96_b.jpg

49096346041_424c54fb76_b.jpg


well sometime after i lifted it, the driver side CV boot (diff side) popped off, i fixed it with a large zip tie. that was the end of issues for that side, but somewhere along the line over the last month or two the passenger side CV shaft tore the hub side boot almost in its entirety. i knew this would come sooner than later, but not this soon. the silver lining is i get to do the rest of my front end refresh prior to the snow in my area. i was going to try to hold off until the spring, but atleast i get to test all my new parts in the snow!

i have had these spare LCAs in my room boxed up for a couple of months. i got lazy and never opened the box. i bought them on ebay and was told they were from the same 4runner. once i did open the box last weekened i noticed that one arm had far more surface rust than the other one. this also didnt match up with the pictures. but i waited to long to try to swap it out for a cleaner one and i didnt want to screw with return shipping an arm this heavy. thats what i get for waiting to open the box!
49091651141_34c7cdea7d_b.jpg


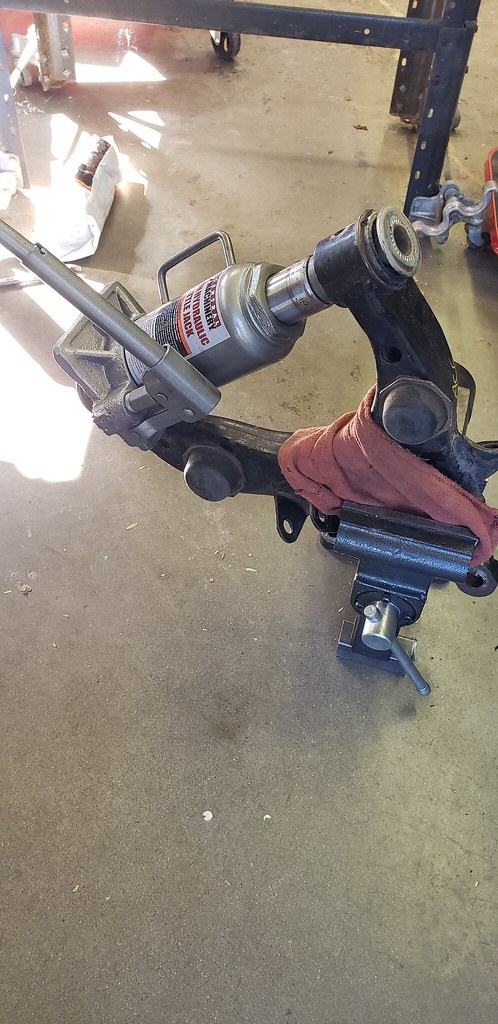
wasted no time on pushing out the old tired bushings. if you do this trick make sure you measure the LCA 'ears' before and after to ensure you didnt open them up. the salty arm opened up 1/16" of an inch. hopefully that will not be an issue on reinstall.
49091852322_3c0b830bbe_b.jpg


i was going to order the energy LCA bushings at half the cost of what the strong flex ones go for from sonoran steel. although thinking ahead i looked up the install instructions and saw that energy requires you to reuse these salty metal sleeves and that i wasnt supposed to actually push the outer sleeves out. not gonna happen, so i ponied up 2x for the strong flex bushings. ive used them in the past on a lexus and they work great.
49091137538_c7f8a71226_b.jpg


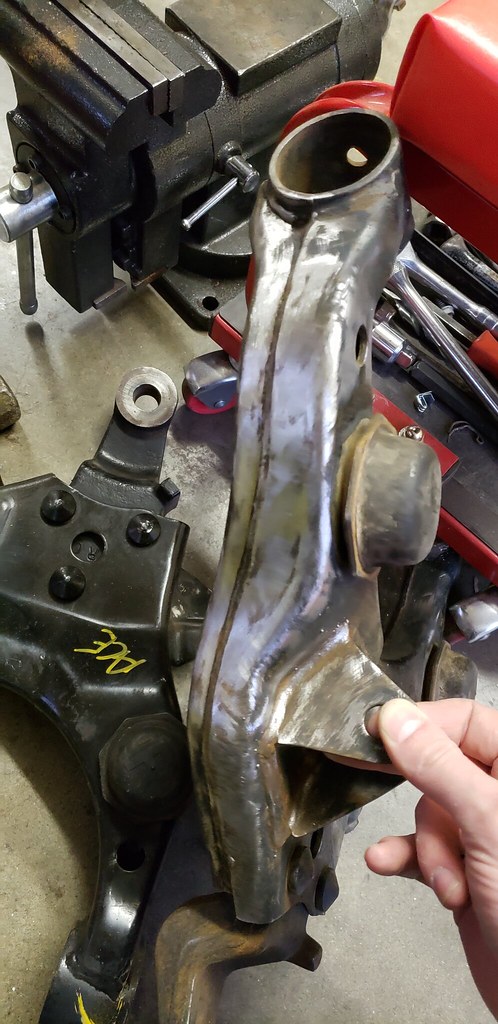
here is some progress done on the saltier arm, the nice part is its just surface rust likely mixed in with dirt and not very deep. this arm can be stripped of all surface rust and saved, which is what i intend to do.
49091137588_38e245d309_b.jpg


i also ordered a crap load of parts and pretty much emptied out my bank acct:
-eimkeith lower control arm braces and PCK
-OEM LBJs and bolts
-sonoran steel LCA bushings
-new CV shafts from Napa (83/side, no core charge, lifetime warranty), and diff seals
-energy rack bushings (after [MENTION=120071]mtbtim[/MENTION] convinced me it was easy with his videos)
-crush washers for the front diff and gear oil.

everything should be here by this weekend. i am going to try to get the LCA braces welded this weekend and then get it all together on black Friday.

down the line after i get this project done:
-weld in PCK
-extended sway end links
-finish steering wheel swap (horn and trim pieces)
-external tranny cooler with the rad lines bypassed
-install extended brake lines with new pads and rotors in front
 
Last edited:
Lots of awesome progress and quite the front end refresh in just a few months! Always nice to see another clean 3rd gen get some love (and upgrades). Keep on keepin' on!
 
Lots of awesome progress and quite the front end refresh in just a few months! Always nice to see another clean 3rd gen get some love (and upgrades). Keep on keepin' on!

thank you. it is slow but steady progress. it really sucks not having two vehicles incase this one goes down for an extended period of time, so im basically limited to weekend projects right now.
 
thank you. it is slow but steady progress. it really sucks not having two vehicles incase this one goes down for an extended period of time, so im basically limited to weekend projects right now.

Yep, that's how it goes for me - daily driver/project vehic on the weekends! Sometimes it's a good thing though- keeps a guy from dropping every penny he earns on upgrades and "sicmods" :lmao:
 
i posed these on Eimkeith's LCA thread, but i figured id post them here as well. quick little update before i tear everything apart on thanksgiving tomorrow:

49123322111_85ff6efacb_b.jpg

49122825503_d839460b7f_b.jpg

49130204062_fd3e567ac3_b.jpg

49122827073_486207d676_b.jpg


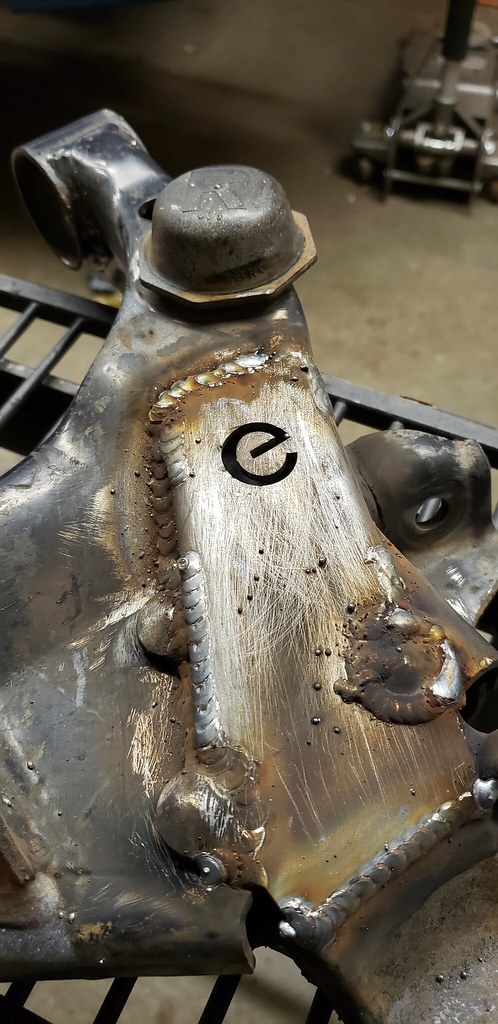
got everything primed where i cant hit it with paint once its welded in, its a small detail but if im removing rust off these arms elsewhere, i dont want it to show up where i cant do anything about it. primer used was SEM weldable primer.

i now have:
OEM LBJs
OEM LBJ bolts
diff fill and crush washer
new napa cv shafts
cv to diff seals
braced control arms
poly LCA bushings
poly rack bushings

i am going to inspect the TREs and see if they need to be replaced and i will do so if the inspection warrants it once i get everything back together. i am going to paint the LCAs tonight and hit the ground running tomorrow. wish me luck!
 
alrighty, quick little update. i was able to get everything done in the bottom of post #10!


49140149637_c609ddf75a_b.jpg

49144659052_0e3b0c1f66_b.jpg

49156137932_97dd0b6d18_b.jpg

49149977012_e32ce2fbdd_b.jpg

49149277268_b65ba51030_b.jpg

49149277463_a335c948a3_b.jpg


started Thursday morning (thanksgiving). Thursday and Friday were pretty much get everything out/off the front end. i started with attempting to drain the front diff oil before i forgot and popped the CVs; well it turns out the drain plug was 100% stripped. so that was not a good start. i still need to weld a tool/nut to it to get it off. my local dealer actually keeps these in stock, so im not the only one getting stripped drain plugs

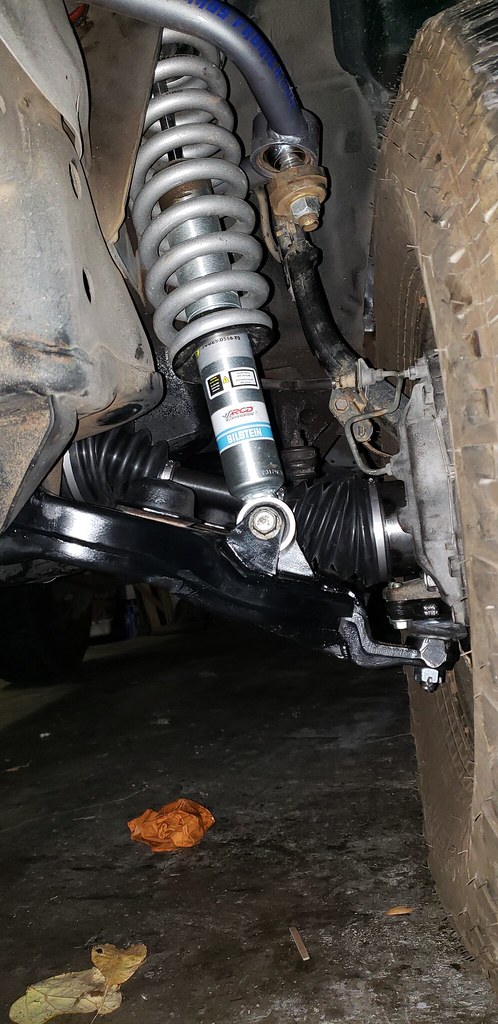
It was just me working on my rig so i had to get creative with certain items. while i certainly do not recommend it, you can see i shoved a piece of tubing between the upper mounting point for the shock and the LCA. that allowed the spindle/knuckle to stay out of the way while i was working on everything. the big downside being if i hit it or knocked the spindle off it would likely damage the uniball from the weight of the knuckle and gravity. luckily i was very careful and i took my 'spacers' out as soon as i could. it really just needed to be there when i was removing the CVs and installing the new ones.

If you need to do CVs and you havent done other items, such as LCA bushings, rack bushings, etc. i recommend you just all do this at once while its all apart and save yourself the headache. i didnt want to spend any additional money on the front end right now, but i also recommend you do the sway stuff while youre at it. that is whats up next

For those of you buying the $83 new napa axles like i did, they come fully dressed with the appropriate metal seals on the axle itself, so you dont need to transfer the metal ones from your torn up CVs to the napa ones, which is nice. also make sure you get the diff oil seals from them. a seal puller takes them out in no time. they're SKF seals which are really nice.

i found out in the [MENTION=120071]mtbtim[/MENTION] videos that the FSM calls for pushing in the diff oil seals 5.5 mms and not to go too far. an easy trick i used was take a picture of the seals before you remove them, reference later if needed but basically both sides are 'flush' with the housing. knowing that if i pushed in the seals too far id need to get new ones as the seal puller i have absolutely junks the seals. what i ended up doing was driving the seals in to be ALMOST flush with the housing knowing that they were likely a millimeter or so too far out, i smacked the CVs in with a brass tipped punch and let the CVs seat the seals to the correct depth. this took all of the guess work out of it.

for the topside of the eim keith braces, i recommend you grind off any slag left from the mig. when the LCA/CVs are at max droop (i had the sways disconnected during reassembly, last thing i put on) you could see that the cv boot was resting on the top brace you weld in. not necessarily a problem for people who never disco their sway, but if you do and you let the front droop, the boot will make contact with the brace and if you have slag on it, it will greatly shorten the life of the boot. once everything is compressed at static there is ample room between the brace and the boot.

when i popped off my TREs they felt fine, but the alignment shop couldnt align it because they said the left TRE was bad and likely creating the rack movement they detected. live and learn i suppose. i will be picking up my OEM TREs today after work and installing on thursday and trying my hand at an alignment again. hoping to god its just the TREs and not the inners as i need that money to spend on sway bar stuff.

next up:
TREs & alignment
PCK weld in
sway bar bushings and extended links
xternal tranny cooler with the radiator cooler blocked off
finish my steering wheel project
extended rear brake line (fronts will be later, pads are still good)
 
Heckuva update! It's very satisfying to crank out a bunch of work in a few days time - especially on the front end, that's for sure! Lookin' spiffy up in there... :rockon:
 
Heckuva update! It's very satisfying to crank out a bunch of work in a few days time - especially on the front end, that's for sure! Lookin' spiffy up in there... :rockon:
thank you. i have OCD issues, so it hard to just replace one thing knowing something right next to it needs to be replaced so i just do it all at once. it also helps save $$ on alignments (even tho this will be my second alignment, lol).
 
small little update, this past weekend i was able to get new TREs in and get the PCK welded in:

49190488866_d30a0fec43_b.jpg

49184409378_5162a9abc4_b.jpg

49190689462_306897e235_b.jpg

49190497491_b1e6b0979b_b.jpg


it was amazing how much easier the panhard bar installed once the PCK was welded in. it didnt fight me one bit like ive had to do in the past when i installed my lift; so that was a nice touch. i got it aligned at a local shop and they got the steering wheel close, but its not perfect. So im leaving work a little early today to (hopefully) get them to fix it.

i did order the extended sway end links from Mstudt and am stoked for those. Going to confirm sway bar size and get the sway bushings ordered and that will likely be the next install, along with the extended rear brake line. i also need to get that stripped drain plug out the front diff. aaaafter that i will get an extrnal tranny cooler installed and finish my steering wheel project.
 
Eff that stupid little plug :mad:

Nice job on everything else though. Looking good!

i am just glad it wasnt me that did it. LOL. although it was a bit disheartening to start off and that being the first thing i saw. luckily i have options. i just need to make the time to do it.

ill make sure to take a picture before i get a tool welded in. the dude who stripped it did a fantastic job stripping it. completely rounded it off.
 
despite the cold, i decided to tackle mstudt's sway bar end links this past weekend. if you know anything about japanese culture and their food, you have seen boss coffee. my brother is in Okinawa right now and sent me some for xmas. excellent coffee and its very cheap in japan.
49289711313_f31171d121_b.jpg


here are the sways endlinks installed:
49290197591_6430707edc_b.jpg


ive already posted my thoughts about them on the FS thread, so i will just quote it here:
i do wish they came for jam nuts with both sides, you can see the bushing side in the front here doesnt have a jam nut. although its not like its going to go anywhere. if you bought these and your truck was not lifted, i can see why mstudt chose not to include the second set of jam nuts (it wouldnt fit). although it looks like it would be a suuuper tight fit if i put a second jam nut in there and im lifted 3".

i also wish the nuts/bolts on the heim end came with washers. i had spares, but i recommend you buy take your hardware into a local hardware store and buy washers before installing. the fronts were fine as the metal flange on the front LCA acts like a washer, but the rears need washers on the heim end, IMO.

i also recommend installing under the static weight of the car. it makes the install a breeze. the turnbuckle center made adjusting incredibly easy. i also confirmed i have 26/19mm sways. i started to research what sway bushings i wanted and i saw a lot of people have issues with certain sizes, so i held off on ordering the bushings till i could confirm what i had. will order soon.

the only thing i wanted this year for xmas was a nice work light. i learned about a month ago that Milwaukee makes a light that will take my drill batteries. i knew exactly that was the light i wanted. so much easier with this light.
49289712528_3429674ef2_b.jpg


finally, i asked my dad to see if he could get me the B&M 70268 kit as they stock B&M where he works. sure enough, it was sitting on the shelf. excited to get this in, i was debating if i put a trans temp gauge in and i think i will.
49299806301_72d35e3acf_b.jpg
 
Boss coffee cracks me up. All the vending machines over there have pictures of Tommy Lee Jones looking like a "boss". And you can get canned, hot coffee out of a vending machine on the side of the road in the middle of nowhere.

But yeah, I survived on that stuff while I was over there.
 
Boss coffee cracks me up. All the vending machines over there have pictures of Tommy Lee Jones looking like a "boss". And you can get canned, hot coffee out of a vending machine on the side of the road in the middle of nowhere.

But yeah, I survived on that stuff while I was over there.

that is HILARIOUS. too bad i never saw a single TLJ vending machine (and i saw a lot). it always ceased to amaze me how many vending machines were all over the place and how cheap everything was. god now you have got me missing the lawson's chicken while out and about and drinking. id love to go back, but the flight was too long for me.

i did however see a huge sticker of Richard Rawlins from gas monkey garage on the side of a building in okinawa when i was there. it was weird.

i saw soooooo many landcrusiers in okinawa, and they werent like what we got here. they were smaller, almost like the hilux surfs (which i did not see a lot of).
 

Members online

Forum statistics

Threads
278,309
Messages
3,554,071
Members
248,016
Latest member
Advally Service

Trending content

Back
Top