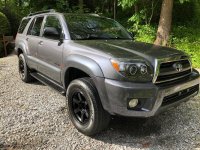
Midnight Runner build

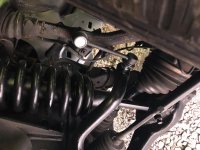
Did you treat the underside of your 4runner with something? I bought a bunch of rust remover and I'm trying to get some ideas on how to seal it after I clean everything up.

Overall the underside of my 4runner was clean before but I did end up using a wire wheel and rust converting primer then used a black rust preventative paint over that. In the wheel arches I used a undercoating spray. Hope that helps!
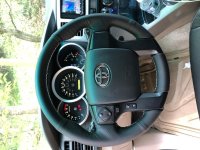
 
if anyone is interested I just finished the install of a 2016 tacoma wheel in my 4runner and have every control working properly! I posted a thread about it
 

Attachments

  • IMG_2772.jpg
    IMG_2772.jpg
    135.8 KB · Views: 472
Full detailing

Just finished a full detail with polishing. I ended up having my stock resonator put back on. But the flow-master still sounds great!

Also just bought a full suspension kit from 1A auto. I like the ride height currently with the spacer lift but after 150000 miles the original suspension could use some love. Im also replacing the sway bar bushings with poly ones to help with handling
 

Attachments

  • IMG_2799.jpg
    IMG_2799.jpg
    142.5 KB · Views: 450
  • IMG_2811.jpg
    IMG_2811.jpg
    126.8 KB · Views: 468
  • IMG_2814.jpg
    IMG_2814.jpg
    134 KB · Views: 466
Last edited:
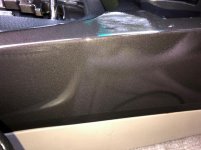
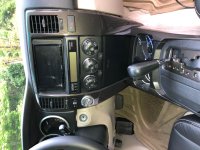
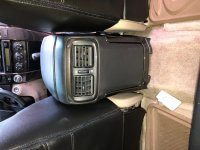
My latest project today was to repaint all the silver trim to be a darker grey color. The paint I went with was a Carbon mist metallic and used a 2K clear-coat on top for gloss and protection. For having 100 percent humidity today the results turned out pretty great haha

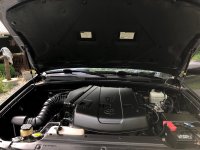
Side note I also replaced all of my rubber vacuum and gas lines under the hood as I was having evap system leak codes. This seemed to solve my problem along with a new gas cap
 

Attachments

  • IMG_2817.jpg
    IMG_2817.jpg
    132.5 KB · Views: 1,105
  • IMG_2818.jpg
    IMG_2818.jpg
    137.3 KB · Views: 568
  • IMG_2819.jpg
    IMG_2819.jpg
    132.2 KB · Views: 544
  • IMG_2820.jpg
    IMG_2820.jpg
    135.6 KB · Views: 555
  • IMG_2821.jpg
    IMG_2821.jpg
    135.9 KB · Views: 575
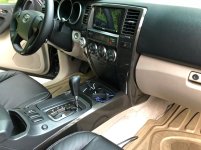
5th gen gear selector in 4th gen

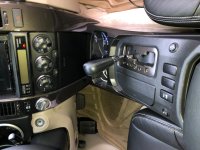
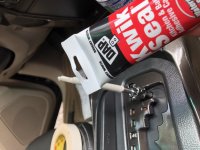
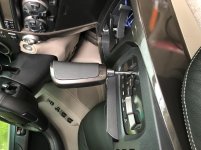
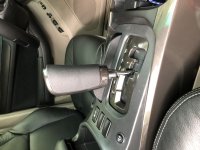
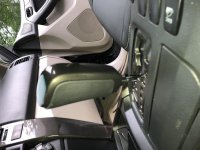
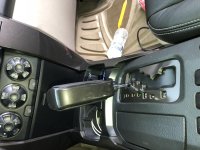
I had bought a 2012 4Runner gear shifter as I was interested in doing a swap but didn’t like the other aftermarket ones. I just installed it today and couldn’t be happier! I took the leather part off to be able to paint it to match the other trim. Also for it to be able to go through all the gears I had to raise it some. I did this by using foam tape to wedge the selector on along with a caulk to seal it in place
 

Attachments

  • 7A7CD0FB-DD80-44C6-9E14-00F0966C7987.jpg
    7A7CD0FB-DD80-44C6-9E14-00F0966C7987.jpg
    123.9 KB · Views: 536
  • 9BAF0C75-3536-4EEF-AE4B-4A24D521E1D5.jpg
    9BAF0C75-3536-4EEF-AE4B-4A24D521E1D5.jpg
    132.7 KB · Views: 523
  • 5A1C9356-29E2-4966-A063-4461B9B930F3.jpg
    5A1C9356-29E2-4966-A063-4461B9B930F3.jpg
    131.8 KB · Views: 521
  • 56AA0D6C-C890-4D4B-9626-21C71104B815.jpg
    56AA0D6C-C890-4D4B-9626-21C71104B815.jpg
    131 KB · Views: 537
  • 6A877A79-0078-4FEF-96EE-87CADFCAD7E7.jpg
    6A877A79-0078-4FEF-96EE-87CADFCAD7E7.jpg
    134.6 KB · Views: 535
Damn dude that looks clean. I got a sport one which is similar in color but this looks absolutely great. I tried to paint my old radio trim but the paint did not adhere at all. What prep work did you do?

Btw, I genuinely enjoy your mods. Nice work man.
 
Damn dude that looks clean. I got a sport one which is similar in color but this looks absolutely great. I tried to paint my old radio trim but the paint did not adhere at all. What prep work did you do?

Btw, I genuinely enjoy your mods. Nice work man.

Thanks man really appreciate it! And I used a sanding sponge as I was able to get in all the little corners. I made sure to mask off anything I didn’t want to sand and later paint. After I sanded everything I went back over it with rubbing alcohol to clean off any grease from the surface. Next I heated up the can of spray paint in hot water for several minutes before I shook it then sprayed about 3 coats of color. I let those dry for about an hour then came back with the 2 stage clear coat which had to be shaken for 4 minutes and did one medium coat then 2 wet coats and let it dry in the sun. It will be drying for about 48 hours to be fully cured so to avoid fingerprints you may want to wait to reinstall haha.
 
My next order of business were the headlights which originally I had gotten black ones which began to melt so I later returned these for a new set of black halo lights.

I like the look of these head lights. They'd look great with my blacked out grill, bull bar, etc. What was source and price?
 
Hey here is the link from where I bought mine. Just a word of advice, get a black weatherstrip sealant to plug all the breather holes in the headlights otherwise they will start to fog up. (aftermarket ones have holes to I guess let the heat escape) Hope that helps!

https://www.ebay.com/itm/CCFL-Halo-...163882?hash=item58f813b7ea:g:pMwAAOSwa81aAiXv


I like the look of these head lights. They'd look great with my blacked out grill, bull bar, etc. What was source and price?
 
Can you teach me how to install the white/blue dash lights? Tired of the orange. Your 4runner looks really good. Your build is kind of what I'm going for on my 4runner. It has 244k miles and it's time to fix her up.
 
Can you teach me how to install the white/blue dash lights? Tired of the orange. Your 4runner looks really good. Your build is kind of what I'm going for on my 4runner. It has 244k miles and it's time to fix her up.

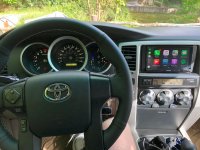
Thanks! and the first thing you will need to do is remove the tan plastic piece under your steering wheel. Just drop it out of the way. Next remove the black trim bezel for the gauges. Afterwards there is the clear plastic lense that will need to be removed. Afterwards there are I believe 4 bolts holding the instrument cluster in. Once it is out you will need to remove the needles and the faceplate. the housing will need to be unscrewed. (very simple) next you will need plcc-2 led's of your choosing. I chose white. next desolder the old leds from the spots that you want white. (for the sr5 and sport the needles will need to be colored the blue/ other color as there is no different led for them) After you have soldered the new leds in test it out and it should be good to go! make sure you have the needles aligned properly. For the other led's for the buttons I used a resistor and diode style leds. I hope that helps! sorry I didnt take any pics during the process. I'll link another thread for the instrument cluster though.

http://www.toyota-4runner.org/4th-g...ter-hvac-switches-window-*steering-wheel.html
 
Thanks! and the first thing you will need to do is remove the tan plastic piece under your steering wheel. Just drop it out of the way. Next remove the black trim bezel for the gauges. Afterwards there is the clear plastic lense that will need to be removed. Afterwards there are I believe 4 bolts holding the instrument cluster in. Once it is out you will need to remove the needles and the faceplate. the housing will need to be unscrewed. (very simple) next you will need plcc-2 led's of your choosing. I chose white. next desolder the old leds from the spots that you want white. (for the sr5 and sport the needles will need to be colored the blue/ other color as there is no different led for them) After you have soldered the new leds in test it out and it should be good to go! make sure you have the needles aligned properly. For the other led's for the buttons I used a resistor and diode style leds. I hope that helps! sorry I didnt take any pics during the process. I'll link another thread for the instrument cluster though.

http://www.toyota-4runner.org/4th-g...ter-hvac-switches-window-*steering-wheel.html

Thank you man! I'm gonna give this a try next weekend. Hope it turns out good. How long did the whole process take you?
 
suspension rebuilt

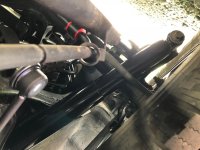
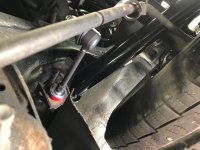
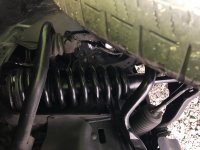
Just finished the full suspension kit today and Couldn't be happier! The car handles almost flat now and there is much less body roll in general. The rear shocks were relatively easy. Ended up sawzalling the top of the shocks off because the bolt was seized. I also installed the new sway bar end links and poly bushings. The front was just as difficult as I remember the last time haha. I got the front struts and sway bar end links in but was not able to do the front sway bar bushings. The rear bolt on the driver side snapped off and am not sure how to replace it as the rest of the bolt is still in there. I am having to get my passenger side cv axle replaced next week. Should I get the shop to do the sway bar bushings and fix the bolt?
 

Attachments

  • IMG_2953.jpg
    IMG_2953.jpg
    126.2 KB · Views: 487
  • IMG_2954.jpg
    IMG_2954.jpg
    125.6 KB · Views: 495
  • IMG_2955.jpg
    IMG_2955.jpg
    125.7 KB · Views: 505
  • IMG_2956.jpg
    IMG_2956.jpg
    127.7 KB · Views: 493
Update

Dropped my 4runner off for the cv axle replacement today. I ordered a few parts which are as follows:


----Dorman 459-225 M6-1.0 x 25mm class 10.9 bolts to replace my rusted coil bolts

----replacement oil cap (accidentally tore the rubber seal

----PCV valve (never been replaced)

-----a usb port to put my apple carplay cable in another spot

-----and I also bought a pedal commander second hand online so we will see how well it performs
 

Forum statistics

Threads
278,307
Messages
3,554,053
Members
248,016
Latest member
Advally Service

Trending content

Back
Top