Mud guard ?

Do you need to do any drilling w/ the Toyota OEM guards?

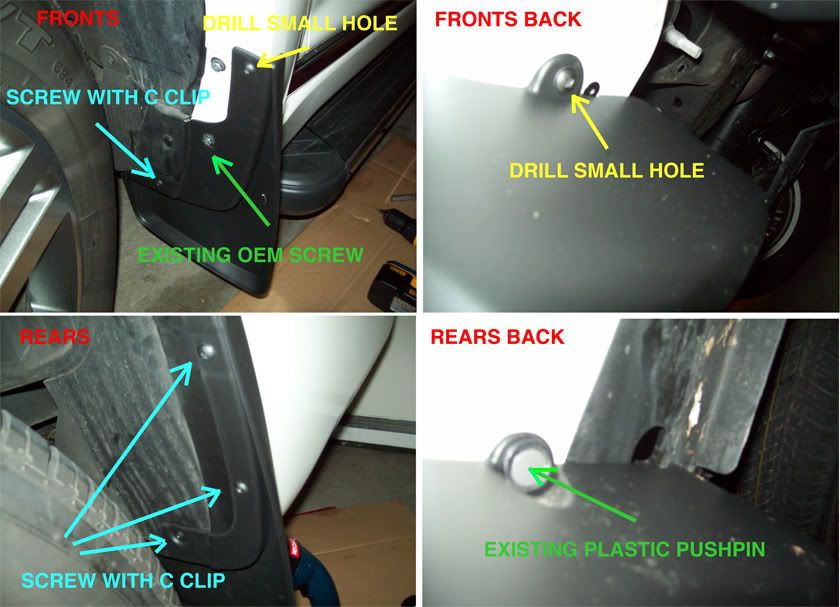
I just installed the oem mudguards yesterday. The rears use all stock holes (4 on each side) which makes them very secure. Took about 10 min to figure out with no instructions.

The fronts also have 4 mounting holes each, however the fronts require 2 holes drilled into the body (2 each side). One is into the body located inside the wheel well and the others on the bottom of the side skirt.

I don't know if anyones said it before, but the oem mudguards are made in Canada. Reminds me of the posts about the mudguard smuggling. lol
 
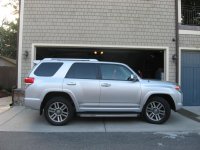
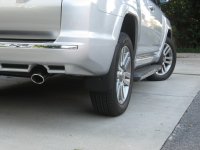
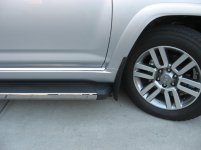
Canadian OEM 2011 4Runner mudguards... on a US Limited with US OEM sidesteps (no cutting or modification)..

TYTAMUDFLAPS.jpg~original

About to install my OEM if the weather ever gets above freezing.

Quick questions:

How do the Screw with Clips work? Obviously the screw goes into the clip but is it Screw >>> Mud Guard >>>> Truck >>>> Clip

And, for the holes that were drilled did you use the screws that came with the guards?
 
About to install my OEM if the weather ever gets above freezing.

Quick questions:

How do the Screw with Clips work? Obviously the screw goes into the clip but is it Screw >>> Mud Guard >>>> Truck >>>> Clip

And, for the holes that were drilled did you use the screws that came with the guards?

To the first question, thats how I did it. Just make sure the smaller hole in the clip is the last thing the screw goes into.

The fronts I think come with 3 screws each, so you use the existing screw thats in the oem hole.
 
2011 4runner oem mud guards

I have just installed oem mud guards on my 2011 limited 4runner. the dealer I bought them from emailed the install sheets from toyota. they were pretty straight forward. the front require two 3/32 holes drilled but the rear do not require any additional holes.Just loosen the running boards and slide them back to install the front mud guards and then slide them back toward the front after they are installed. The running boards protrude about an inch past the front of the rear wheel well. I will probably cut an inch of the running boards but it is probably not necessary unless they collect a lot of dirt from the rear tires

Just cut an 1 1/4 inch off the rear end off each running board. One screw holds the end cap on. Just removed the end cap and cut the boards with an electric jig saw with a metal cutting blade.The 1 1/4 inch allows the board to line up with the rear wheel well and gives about 3/8s to a 1/2 inch of clearance behind the front mud guards
 

Attachments

  • IMG_9505.jpg
    IMG_9505.jpg
    133.7 KB · Views: 3,842
  • IMG_9508.jpg
    IMG_9508.jpg
    131.5 KB · Views: 2,284
  • IMG_9507.jpg
    IMG_9507.jpg
    129.8 KB · Views: 2,225
Last edited:
My OEM mud guards just arrived. How do you remove the existing plastic pushpings?


Flat head screw driver. Just pop it out evenly and then pull it out. Most of the time the force of the screw driver pulled it out.

The rear mud flaps require you to remove the push pin from underneath (if you look under the instructions you will see what I'm talking about). Those are a PAINto remove. Just go slowly with those, but even if they do break you don't need them as they are discarded anyways.


For the front mud guards.... when drilling it might be helpful to have another set of hands to push the guard against the vehicle body, so when you tighten it up the guards will fit flush with the body panel.
 
Last edited:
I thought that I read the mud guards to not work with the OEM running boards, they clearly do in you picture. Did you have to slide the running boards back?
 
I thought that I read the mud guards to not work with the OEM running boards, they clearly do in you picture. Did you have to slide the running boards back?
Yes for some unknown reason Toyota engineers have determined that OEM boards do not work with OEM mudguards and have so noted at parts departments. They are wrong.
Just loosen the six underside bolts and slide back a little.
 
Terminator, I to have a USA 2010 4rnr with no mudflaps. I was wondering if in the end you went with the drilling of holes or tried the 2 sided 3M tape for the front flaps? Thanks for any input you may have, and a big thanks for all the running around and you did for the USA members.
 
Terminator, I to have a USA 2010 4rnr with no mudflaps. I was wondering if in the end you went with the drilling of holes or tried the 2 sided 3M tape for the front flaps? Thanks for any input you may have, and a big thanks for all the running around and you did for the USA members.

I decided just to drill the small pilot holes since the Canadian 2011s are done that way, I figured that it is no different, really.

The rears need no drilling. The fronts need 2 each, one underneath and behind and one on the other side in the inner lip. Bolted on prior to drilling I checked for strength and they felt sturdy, so I am sure you could just add the bodytape in those two (drill) spots and be fine.

I looked at it and just thought and thought, well if the 2011s are drilled then what the hey... drill.. it is in plastic anyway.

These mudguards really make a huge difference keeping the rocks and crud off.


Do you have any sidesteps?

Oh, is your SOS Safety Connect system working?? Mine is still working after about 14 months from in service date...
 
Terminator, thanks for the reply. To tell you the truth I have never tested the SOS system. I did notice that the light is still green when the vehicle is running. Not sure if I should press it, heheheh. I have no side steps, but have noticed the odd pit and chip on the plastic. Was thinking of going and ordering a pair of mudflaps first to see if that stops it. My wife leaves a week friday for a drive back east, eventually to the coast, so I had better get out and get at it. Thanks again for all the info very helpful. The one thing I was thinking about is renewing the XM radio for her, but have been having trouble identifying the vehicle's radio with the XM canada people.
 
2011 4 Runner Mud Guards

I just installed the original OEM mud guard to a 4runner with running boards. If you have to instal the Mud guard you just need to slide 3 inches to the back the running board. Just losse 6 nuts that hold the running board to the base. That it, I will post photos in the futures. The board and the running board all OEM does not look bad.

Now my 2011 4Runner have the guard and the running board installed.

Regards

Jose
 
Instructions?

I just got a set of splash guards (PT769-89110) for my 2011 4Runner Limited from trdparts4u. The box that they came in says "installation instructions for this accessory are on the Toyota Information System (TIS). Please see your dealer for a copy".

Well, my dealer is being difficult since I didn't buy the accessory from them. Does anyone have a scanned or electronic copy they can send me? I'd greatly appreciate it. Thanks!

Mike
 
Canadian OEM 2011 4Runner mudguards... on a US Limited with US OEM sidesteps (no cutting or modification).. I think the US SR5 is the same.....so check that. They list at $130


OK, I ordered 5 sets with the 20% off, took a risk, so they will be in Tues AM. (part # PU06089100P)

So, anyone who is interested in getting a set PM me with your email...

First of all, that is a SICK drive way :) ... Second, I have the same truck with same color, It's dreamy :)...

Lastly, how do these mud guards hold up to the factory toyota mud guards.? What's the price difference?
 
First of all, that is a SICK drive way :) ... Second, I have the same truck with same color, It's dreamy :)...

Lastly, how do these mud guards hold up to the factory toyota mud guards.? What's the price difference?

Those mudguards are the same Toyota OEM ones available in the US now. Canada had them a while before the US got them..

Now, cheaper for Americans to buy in US... back then, not available..
 
We like to think of them as contraband flaps smuggled across the dangerous boarder in the dead of night. . :lookout:
 

Members online

Forum statistics

Threads
278,307
Messages
3,554,056
Members
248,016
Latest member
Advally Service

Trending content

Back
Top