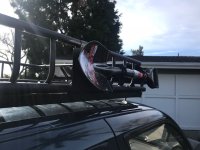
My 97 Resto Mod/ Overland Build

Castle_runner

New member
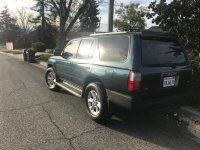
Well after looking for what seems like forever, I found this. A '97 4wd, 5sp with the 3.4l. It has a 145k on the clock. It was fairly well maintained (Oil changes every 3000k) but is in need in of some attention. Overall I am very happy with my find. I plan on addressing some needed maintenance issues before moving into mods. My ultimate plan is to build a solid and capable overland rig that will take me anywhere I need/want to go with the piece of mind that it will also be able to get be back home.

Things Needing to be addressed
- Rear passenger side axle seal leaking - Done
- Timing belt is at 90k (needs replacement)
- Replace LBJs (peace of mind) - Done
- Suspension Bushings - restore ride to better than new (going poly)
- Air filter - Done
- Spark plug and wires - Done
- Fuel filter
- New Fluids all around (this will happen as I go through many of the above named projects)
- fix the faded and peeling Plasti Dip on the bumpers

Future Mods Planned
- Suspension - leaning towards Bilstein 6112s in the front with a Sonoran Steel rear setup
- Sliders, Skids, and Bumpers - will try to build as much of this as possible
- Lockers and gears
- Rear drawers
- Roof rack - Done

I will keep this thread updated as I progress through my project. Hope you enjoy the work

First Day I picked it up. Trailer hooked up to tow my motorcycle home the 150 miles I rode to pick up the runner
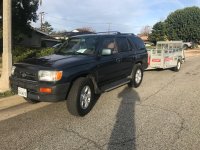
First Day 2.jpg

First Day.jpg

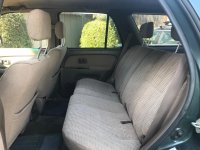
Some interior shots. The interior is pretty clean aside from the center consul lid (pretty low on the to-do list but it is on the list ha). Also want to get some new floor mats as I'm not a fan of what is in there.
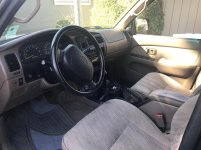
Dash and Front seats.jpg

Rear seats.jpg

First off road outing in my new truck. Nothing crazy but I wanted to take it easy as I'm still developing my trust in it. I also really want to get the LBJs replaced before I push it on difficult trails. You may also notice I removed those low hanging running boards.
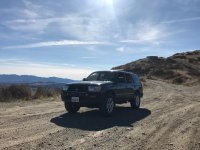
First Outing 2.jpg
 

Attachments

  • First Day 2.jpg
    First Day 2.jpg
    135.1 KB · Views: 2,041
  • First Day.jpg
    First Day.jpg
    136.3 KB · Views: 1,654
  • Dash and Front seats.jpg
    Dash and Front seats.jpg
    134.6 KB · Views: 1,523
  • Rear seats.jpg
    Rear seats.jpg
    135.9 KB · Views: 1,513
  • First Outing 2.jpg
    First Outing 2.jpg
    137.8 KB · Views: 1,520
Last edited:
Register to hide this ad
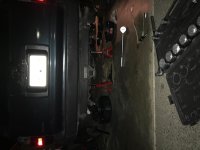
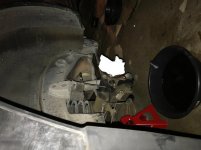
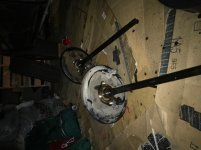
First thing to address was the leaking rear axle seal. It was only the passenger side but I ended up doing both sides. New bearings, new seals.

I pulled the axle shafts myself but lacking a press, I had to outsource pressing the old bearings off and the new ones one.

Bearings and seals 2.jpg

Bearings and seals.jpg

Bearings and seals 3.jpg

I called around several shops to inquire about the press work I needed done. Nobody was inspiring any confidence in me about their ability to accomplish the job properly. One shop asked if my '97 4runner had independent rear suspension . . . After that call, I decided to make the 90 mile round trip down to Yotamasters in corona.

Yotamasters1.jpg

Yotamasters is a great shop. Extremely knowledgeable and very fair. Though it was not the most convenient for me, it was well worth the drive to know the job was done correctly

Got the the axle reassembled and 300 miles later, no leaking.

Sorry about the sideways pics - I wont let that happen again :sorry:
 

Attachments

  • Bearings and seals 2.jpg
    Bearings and seals 2.jpg
    125.8 KB · Views: 1,376
  • Bearings and seals.jpg
    Bearings and seals.jpg
    126.2 KB · Views: 1,361
  • Bearings and seals 3.jpg
    Bearings and seals 3.jpg
    126.2 KB · Views: 1,343
  • Yotamasters1.jpg
    Yotamasters1.jpg
    111.5 KB · Views: 1,378
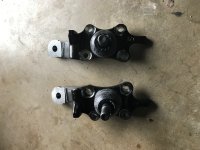
With almost 150k miles, the first thing I wanted to address was replacing the LBJs. I did not want to end up stranded on the side of the road or on a mountain pass in the middle of nowhere with a front wheel laying on the ground.

I went OEM genuine Toyota - definitely not a part I was willing to save a few $$$ on -

Lower Ball Joints.jpg


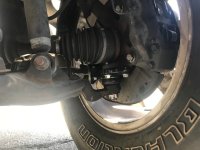
Here they are installed -

LBJ installed.jpg

The original ones still looked and felt good and I'm sure I could have gotten more miles out of them but now I don't wince every time I hit a bump - Money well spent for peace of mind

I also want to thank Tim for his awesome youtube videos - His LBJ video made this project painless and easy
 

Attachments

  • Lower Ball Joints.jpg
    Lower Ball Joints.jpg
    101.9 KB · Views: 1,297
  • LBJ installed.jpg
    LBJ installed.jpg
    81.8 KB · Views: 1,304
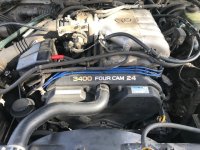
Next on the list was spark plugs and wires.

Spark Plugs and Wires.jpg

I also replaced the air filter at the same time but didn't get any pictures of that. Just went OEM replacement so there was nothing exciting to see anyways.

Not sure which had the more significant impact but I was pleasantly surprised with about a 10% increase in MPGs after completing these jobs.

The red tape on the vacuum hose is to remind to replace it as it had developed some cracks on the end. Though with the tape holding nicely and seemingly fixing the problem, this replacement is low on the list.
 

Attachments

  • Spark Plugs and Wires.jpg
    Spark Plugs and Wires.jpg
    119 KB · Views: 1,331
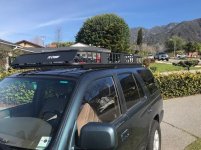
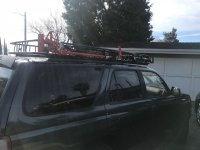
With all of the "boring" maintenance jobs, I felt I needed to do something a little more fun. Why not a rook rack?? While the prospect of a Gobi or other high priced option was enticing, this thread - http://www.toyota-4runner.org/3rd-gen-t4rs/224557-inexpensive-full-length-roof-rack-curt-rack.html - inspired me to go with a cheaper option.

Roof Rack Back.jpg

Roof Rack Front.jpg

I will save money where I can and I believe I can get the same utility from this as I could with one of the more expensive options. When all was completed, I am into it for about $275. I have been up there and walked all around it - including the front overhang - and it feels very solid. It will see its first loaded outing in two weeks. I will report back on how it does.

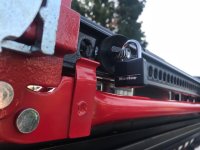
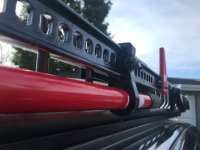
I also mounted my High Lift jack and a little shovel up there.

Tools Mounted.jpg

I used this guy's idea for a DIY High Lift mount - Homemade Hi-Lift Jack Mount for Yakima roof rack - JeepForum.com

High Lift Rear.jpg

With the addition of an Energy Suspension High Lift mount "bushing"

High Lift Front.jpg

the shovel was mounted with Quick Fists

Shovel.jpg
 

Attachments

  • Roof Rack Back.jpg
    Roof Rack Back.jpg
    107.2 KB · Views: 1,655
  • Roof Rack Front.jpg
    Roof Rack Front.jpg
    88 KB · Views: 1,495
  • Tools Mounted.jpg
    Tools Mounted.jpg
    71 KB · Views: 1,366
  • High Lift Rear.jpg
    High Lift Rear.jpg
    69.9 KB · Views: 1,297
  • High Lift Front.jpg
    High Lift Front.jpg
    68.1 KB · Views: 1,267
  • Shovel.jpg
    Shovel.jpg
    79.8 KB · Views: 1,292

Members online

Forum statistics

Threads
278,312
Messages
3,554,084
Members
248,016
Latest member
Advally Service

Trending content

Back
Top