My Build Thread for "Imogene"

bumper update

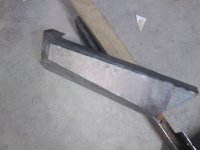
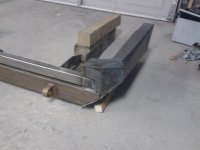
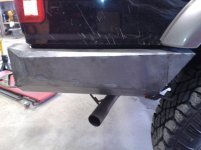
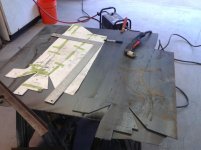
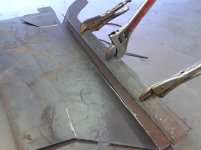
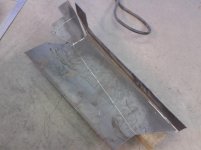
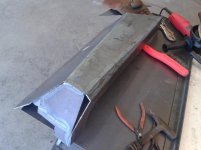
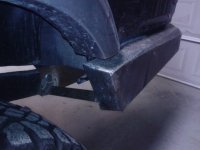
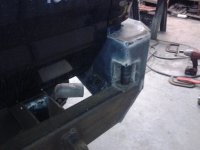
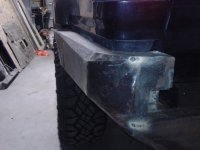
I haven't had much time to work on the bumper. I took the pattern and transferred it over to a sheet of 11 gauge steel.
I bent it and tweeked it and right now it is fairly close to the form it needs to be.
I also started the process of making the swing out carrier. I want the hinge and the latch finished before I finish the sides
so as to avoid any "surprises".

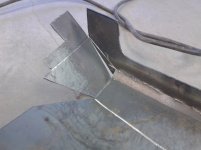
While I was welding on the "wing" I forgot to turn down the setting on the welder and burned through along one seam :frusty::doh::ybrick:
so I will have to do quite a bit of "massaging" of weld seams.

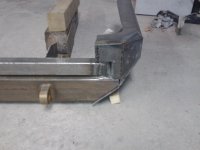
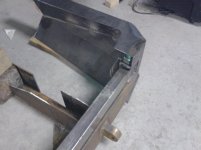
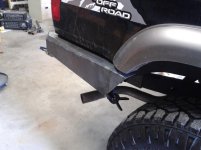
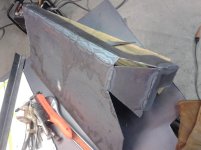
Anyway, you can see how it is starting to take shape. Next I will work on the latch side so I can begin on the drivers side wing.

In the pics, the wing is just sitting there, so the gaps are "big", but when I go to weld it together, it fits much better:hippie:
 

Attachments

  • IMG_20130329_194203 (Medium).jpg
    IMG_20130329_194203 (Medium).jpg
    62.2 KB · Views: 1,835
  • IMG_20130329_205004 (Medium).jpg
    IMG_20130329_205004 (Medium).jpg
    89.2 KB · Views: 1,838
  • IMG_20130329_205426 (Medium).jpg
    IMG_20130329_205426 (Medium).jpg
    130.4 KB · Views: 1,832
  • IMG_20130329_205418 (Medium).jpg
    IMG_20130329_205418 (Medium).jpg
    125.6 KB · Views: 1,829
  • IMG_20130329_205458 (Medium).jpg
    IMG_20130329_205458 (Medium).jpg
    135.6 KB · Views: 1,852
  • IMG_20130329_205716 (Medium).jpg
    IMG_20130329_205716 (Medium).jpg
    126.5 KB · Views: 1,863
  • IMG_20130329_205721 (Medium).jpg
    IMG_20130329_205721 (Medium).jpg
    128.2 KB · Views: 1,833
  • IMG_20130329_205823 (Medium).jpg
    IMG_20130329_205823 (Medium).jpg
    65.3 KB · Views: 1,831
Test Fitting

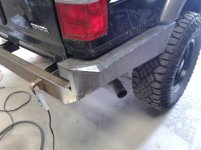
Some more random pics from my test-fitting.
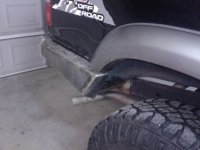
I am either going to have to remove the exhaust OR make a removable brace
for the passenger side....I fear that the exhaust will be in the way when it comes time
to install the bumper otherwise.

Soon I will finish welding up the seams, then the REAL work begins :whip:
I will need to grind down the exposed, welded seams to a nice crease to match
the other bends....should be interesting to see how good of a job I can do with
a grinding disk and "flapper" disks :bounce:
 

Attachments

  • IMG_20130330_141108.jpg
    IMG_20130330_141108.jpg
    75.3 KB · Views: 1,792
  • IMG_20130330_141040.jpg
    IMG_20130330_141040.jpg
    79.1 KB · Views: 1,799
  • IMG_20130330_144534.jpg
    IMG_20130330_144534.jpg
    86.7 KB · Views: 1,794
more progress

I finally had some time to work on the bumper some today.

I took some pics while I was bending up the drivers side of the rear bumper.
I used the same pattern I had made for the passanger side, and just bent it
"backwards" and voila, instant bumper.:eyebrows:

Hopefully I will be able to spend some time this week and maybe get to
"grinding and flapping" on it :frisky:

It is turning out pretty good, not perfect, but pretty good. I am enjoying
doing this, and I see the fruits of my labor beginning to pay off.
 

Attachments

  • IMG_20130408_182541 (Medium).jpg
    IMG_20130408_182541 (Medium).jpg
    84.7 KB · Views: 1,753
  • IMG_20130408_184621 (Medium).jpg
    IMG_20130408_184621 (Medium).jpg
    83.6 KB · Views: 1,740
  • IMG_20130408_191230 (Medium).jpg
    IMG_20130408_191230 (Medium).jpg
    68.2 KB · Views: 1,740
  • IMG_20130408_191235 (Medium).jpg
    IMG_20130408_191235 (Medium).jpg
    63.4 KB · Views: 1,787
  • IMG_20130408_194229 (Medium).jpg
    IMG_20130408_194229 (Medium).jpg
    82 KB · Views: 1,741
  • IMG_20130413_110223 (Medium).jpg
    IMG_20130413_110223 (Medium).jpg
    77.8 KB · Views: 1,748
  • IMG_20130413_125317 (Medium).jpg
    IMG_20130413_125317 (Medium).jpg
    90.3 KB · Views: 1,732
  • IMG_20130413_125558 (Medium).jpg
    IMG_20130413_125558 (Medium).jpg
    123.2 KB · Views: 1,754
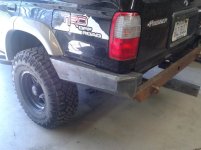
Well, I am getting closer to finishing up the rear bumper build. I just need to find the time to finish grinding down the welds, and then prep, prime, and paint.

I have been doing some research and I thought I would ask for some input. I have been considering using POR-15 but I have had some concern with the amount of work involved with it, versus a product called Mastercoat silver. I am leaning towards the mastercoat product mainly because it seems to be a more user friendly product. I searched the interwebs and found this thread over on IH8mud....what do you guys think? :decision:
 
I have used a lot of POR15 on my FJ60 and it is pretty labor intensive. It can be sprayed, but generally its brushed on, and whatever brush you use (and whatever else might come in contact with the POR15) will need to be thrown away. It is literally impossible to clean up. Also, since you're brushing it on, it's hard to get a quality finish without any dimples, streaks or brush marks. Not that that matters too much since you will still have to prime and paint over the POR (it breaks down in the sunlight).

I think POR15 is really designed for areas that are prone to rust or already rusted. If you've got a clean, rust-free surface, I would just use a quality primer and paint.
 
well, i am getting closer to finishing up the rear bumper build. I just need to find the time to finish grinding down the welds, and then prep, prime, and paint.

I have been doing some research and i thought i would ask for some input. I have been considering using por-15 but i have had some concern with the amount of work involved with it, versus a product called mastercoat silver. I am leaning towards the mastercoat product mainly because it seems to be a more user friendly product. I searched the interwebs and found this thread over on ih8mud....what do you guys think? :decision:

pics!
 

I must be stupid...10:30 at night, I'm in my robe, barefoot in the garage taking pictures for a forum post! :der:

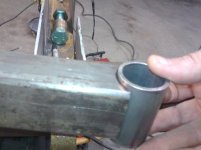
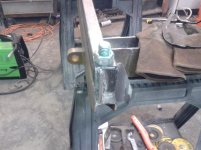
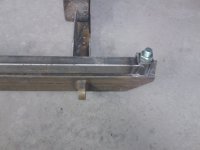
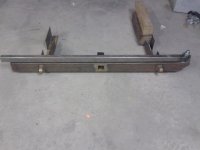
These are poor quality, and keep in mind that this is a work in progress.
I still need to do a LOT of finishing work.

I have been leaving it on the truck as I work; to lazy to take it off :wacko:

The big-ass bolt on the rear is what holds on the swing-out tire carrier
(not pictured and still in the design phase)
 

Attachments

  • IMG_20130424_223407.jpg
    IMG_20130424_223407.jpg
    115.8 KB · Views: 1,759
  • IMG_20130424_223450.jpg
    IMG_20130424_223450.jpg
    109.9 KB · Views: 1,757
  • IMG_20130424_223432.jpg
    IMG_20130424_223432.jpg
    116.2 KB · Views: 1,759
  • IMG_20130424_223348.jpg
    IMG_20130424_223348.jpg
    116.7 KB · Views: 1,756
Very nice. I just got a welder. Practicing on scrap for a while, till I am comfortable tackling something like this.
 
Very nice. I just got a welder. Practicing on scrap for a while, till I am comfortable tackling something like this.

You will never be comfortable, or at least I am not. The good news is that a grinding wheel and "flapper" disks fix lots-o-stuff :madgrin:
 
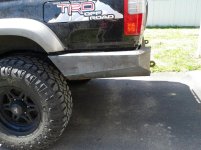
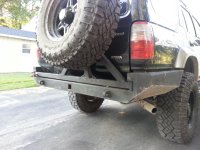
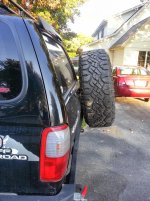
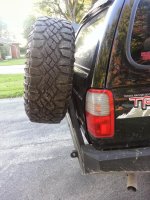
update:

I have been so very busy with work that I just haven't had much time to work on the runner or to post up here.

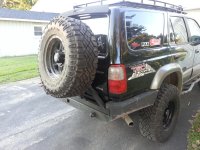
Having said that, here are some updated pics.

For now I have just rattle-canned some flat black. I plan on some good poly-type primer and a satin black finish.
 

Attachments

  • rearbumper1.jpg
    rearbumper1.jpg
    137.2 KB · Views: 1,512
  • rearbumper2.jpg
    rearbumper2.jpg
    133.7 KB · Views: 1,501
  • rearbumper3.jpg
    rearbumper3.jpg
    138.6 KB · Views: 1,500
  • rearbumper4.jpg
    rearbumper4.jpg
    138.3 KB · Views: 1,503

Members online

No members online now.

Forum statistics

Threads
278,309
Messages
3,554,071
Members
248,016
Latest member
Advally Service

Trending content

Back
Top